Top Five Tips for Better Live Sound
How to ensure a good show … for the performers as well as the audience.
This month I set out to write an article about the top five ways to achieve better live sound, but quickly realized there are lots more than five. That said, here are the tips I would rate as being the most important:
1. Focus On On-Stage Monitoring
The louder the stage volume, the more the main “front of house” (FOH) sound is colored because audio from various onstage sources — especially drums and amplifiers — “bleed” into microphones (particularly vocal mics) that are supposed to be picking up something else. This makes getting a clean, clear mix out front nearly impossible.
This actually affects the music too: If everyone on the stage is subjected to sound levels that are too high to safely listen to for long periods of time, the drummer will have to play harder and will tire faster, and the singers and instrumentalists won’t hear subtle timing and harmony clues that they rely on to give the best performance.

Correct placement of floor (“wedge”) monitors like the ones shown above is an important key to solving this problem. Get out from behind the console and up on stage to learn what the performers are encountering. Often moving things around (even small amounts) can help improve the situation, giving you a better performance to mix out front. The best monitor engineers in the business all agree: Quieter on stage means better sound out front!
2. Choose The Right Microphones For The Job
Each different make and model of microphone comes with two important graphs that help predict how they will perform in your system. You can find these on the manufacturer’s websites.
First is the frequency response graph. This shows how the microphone responds to different audio frequencies. For example, here’s the response curve for the popular Shure™ SM58 vocal microphone:

Since the main (“fundamental”) frequencies of the human voice are in the 80Hz – 1100Hz range, you can see that this mic will do a great job on vocals. Of course, there are also harmonics and overtones, and so the fact that the response increases at higher frequencies is another reason why this microphone is so widely used on stages around the world.
The other graph you’ll want to look at is the polar pattern, often shown at various frequencies. These graphs allow you to see how well sounds that aren’t directly in front of the microphone are rejected:

As you can see, this mic does a good job of rejecting all off-axis frequencies, though some are rejected better than others (which is normal). Now you can really appreciate why, in live sound, we want to use microphones with this kind of “cardioid” (heart-shaped) pickup pattern. This will pick up the singer or instrument directly in front of the microphone while rejecting sounds coming from behind (at around the 180° mark) or off to the sides (at around the 90° mark). Note that, in the particular graph shown above, at lower frequencies, the pattern is more round (omnidirectional), meaning that these low frequency sounds are picked up more equally all around.
Once you know the frequency response and polar pattern of the microphones you are using, you can better place floor monitors to reduce feedback and help the performers hear themselves better. As an example, for a cardioid microphone, the best spot for a floor monitor is going to be directly in front of the performer.
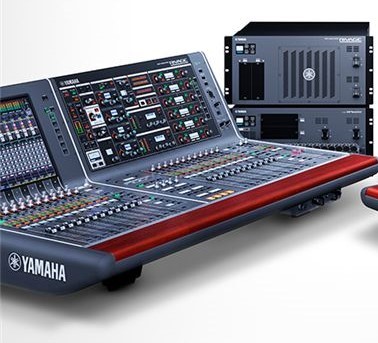
3. Turn Off Channels On The Mixing Console When You Don’t Need Them
Just about every mixing console — be it analog or digital — offers individual channel on/off switches. When a microphone is not needed, turning its channel off (i.e., muting it) will give you two very important advantages: One, the signal going out to your PA will be cleaner, since only the sources you need are going through the system, and two, each time you mute a mic, you add to the gain your system can produce before feedback occurs. (For more information, see our blog article on how to fight feedback.)
A word of caution, though: Be sure to turn the channel back on before the talent steps up to perform!
4. Make The Effort To Train Your Ears
Since lots of us live sound engineers started as musicians, you might already be familiar with the notes on a piano or guitar. If you are in this crowd, you’re way ahead of the game when it comes to ear training. If not, it behooves you to at least learn the fundamentals of musical pitches.
We all could use help in identifying audio by frequency though, and there are apps (such as Quiztones, available for both Apple® and Android™ devices) that can help you get more accurate results when adjusting EQ to gain more musicality in your mix and/or fight feedback. (For more information, see our blog article about equalization.) As with most anything musical, practice makes perfect!
5. Follow The Golden Rule
While not always exactly technical, sometimes we all need to remind ourselves of what we can do to improve the experience of both our onstage talent and the audience.
In no particular order, here are a few:
– Come with a “can-do” attitude. This is the golden rule for a sound person. Performers want to trust you. It’s about learning to anticipate the performer’s concerns before they become a problem.
– Keep an open mind. There’s always another way to do everything. You never know what you’ll learn, or what laughs you can have later!
– You’re going to have less than perfect shows. It’s inevitable. Learn from them and try not to make the same mistakes again. The best live sound engineers on the planet never stop trying to attain perfection. There’s always room to improve!
– Murphy will always be nearby. The more complex your system(s) are, the more chances he will visit you. Keep him at bay by using the right gear, replacing intermittent cabling, and using fresh batteries. Oh, and put the wireless receivers up on stage, near the performers, not out at the Front of House mixer.
– Make your performers comfortable onstage. It’s the little things that count. Grab a bottle of water and put it on the drum riser or over near the lead vocalist’s area. If possible, print out or write the set list in a large font and put it on the floor by the microphone stands. Make sure the microphones are the right height for the performers. (Have you ever had to adjust a mic stand with a guitar on your shoulder? Not easy.) If you know that a particular performer likes chocolate, make sure there’s always a candy bar waiting when they hit the stage. Small gestures go a long way to show your talent you care and want a great show too.
As I said, there are lots more tips out there but I hope these at least get you started down the right road to better live sound.
Keep reading