Tone and Sound on Your Guitar, Part 2
To find their tone, students must be familiar with everything their gear — pickups, controls, cables, amps, effects and more — can do.
In Part 1, we focused on shaping your tone at the guitar, from picking and fretting to pickup choice. Now we’ll follow the signal beyond the instrument, exploring amps, EQ, effects and presets. When students understand these elements, they will be able to create tones that feel good and sound great with the rest of the band.
Cables and Signal Flow
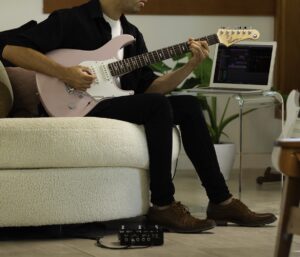
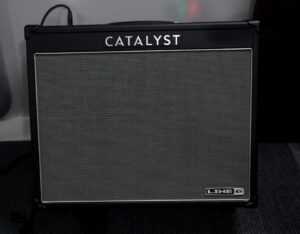
I tell students that the signal coming out of a guitar is like water — it flows out (OUTPUT) of a source, and it flows in (INPUT) to something else. The TS (tip-sleeve) cable is used to bring the instrument level OUT of a guitar and IN to an amp. Both ends are the same, so it doesn’t matter which end goes in the input or output. If pedals are being used, they go between the guitar and the amp. I use a modeling amp, like the Line 6 Catalyst CX 100, but do not use pedals for beginners. This removes the clutter on the ground and the potential for cable chaos.
Your body and pieces of metal pass electricity, so if you touch an instrument cable when it is plugged into an amp that’s turned on, you will hear it. If you take a cable out of a guitar when the amp is on, you will REALLY hear it. Remind students to turn off their amps when plugging in their instruments — this will eventually become routine, and students will police each other.
I have students route their instrument cable through their strap. This acts as a strain relief for if/when they step on the cable while playing, and it will keep them from having an embarrassing moment on stage.
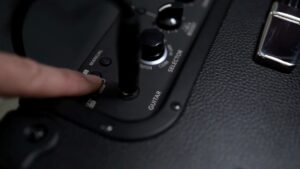
There are different jacks on an amp. Some are inputs and some are outputs. The input that the instrument cable plugs into is usually closest to the preamp volume knob. Students will plug the cable into different jacks in the amp — they are kids after all — but you can get ahead of that eventuality by doing a lesson on the anatomy of an amp when they start out. After students know where things go, have them take turns sabotaging each other’s rig, and then, figure out how to get them working again.
The Pre-Amp and Power Amp
There are three gain stages in a guitar amp – two in the pre-amp and one in the power amp. The power amp volume, or master volume, control is usually closest to the right side of the amp and controls the level speaker. This is the first control that I show students because it adjusts the overall loudness of the amp.
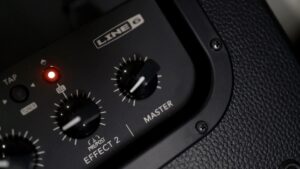
The job of the pre-amp is to bring the instrument level from the pickups to the line level, which is the amount of signal that most pro-audio gear runs at and is best for EQ and effects. Most preamps have controls for the gain (or drive) and the channel volume. The gain knob controls the amp’s input sensitivity. The channel volume adjusts the amount the instrument signal is raised to get to line level. Both these stages can be set to green, yellow or red depending on the desired sound.
Each amplifier has a different type of pre-amp, and there are some popular amps that have been used to produce different sounds.
- Fender Twin: Crystal clean sounds with scooped mids; clean rhythm parts, funk, jazz
- Vox AC30: Clean to crunch with more mids and sparkle; clean rhythm parts with some edge, crunchy rhythm parts, bluesy leads
- Marshall Plexi: Classic crunch; crunchy rhythm parts and some single note riffs
- Mesa Dual Rectifier: High gain; single note distorted metal parts, searing leads
- Diezel VH4: Modern high gain; low tuned djent, modern metal leads
Each amp or amp model will sound different when the pre-amp is pushed because each has its own characteristics. For example, some will get distorted earlier than others.
It’s good practice to be able to craft a clean, crunch and lead sound to be used in different parts of a song. Here are some general rules of thumb to get these different sounds.
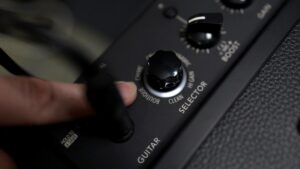
- CLEAN: Find a clean amp model (labeled Clean or Boutique on the Catalyst CX). Have students turn the master volume higher with the channel volume turned to about half. Adjust the gain knob from 0 until there is still clarity, but there is body to the sound.
- CRUNCH: Find a crunch amp model (labeled Chime or Crunch on the Catalyst CX). Turn the master volume lower than for clean, and the channel volume higher than half. Adjust the gain, so there is distortion when the guitar is picked hard.
- LEAD: Find a lead amp model (labeled Dynamic or High Gain on the Catalyst CX)Same level of master and channel volume as crunch. Adjust the gain so that there is distortion even when picked quietly.
It’s important to note that clarity is lost when there is too much gain. A beginner’s mistake is to turn up the gain too much, which makes it harder to hear the beginnings of the note and hides picking mistakes. This sounds great when the player is playing by themselves, but the attack of their notes gets lost when the ensemble is playing. Most of the power in a distorted guitar sound comes from the pick, NOT the gain knob. You would be surprised to hear how clean Eddie Van Halen’s guitar sound is on Van Halen’s isolated tracks. Most of his power came from his picking style.
EQ
There is usually a three-channel equalizer in the pre-amp section of each amp. This allows you to boost or cut certain frequency bands. What’s tricky is that you hear frequencies differently when you are playing by yourself as opposed to when you’re playing with the rest of the band. Have a tone workshop day where you experiment with different settings for everyone in the band, so they can start to develop and understand their sound’s role in the group.
When playing in an ensemble, have students turn the bass knob down to 2 or 3. The low frequencies in a band are carried by the bass guitarist, so cutting the low frequencies on the guitar amp makes for a cleaner mix on stage. Most band rooms have issues with low frequency build-up, and multiple amps taking up this low range can result in a volume war between players — no one needs or wants that!
I like to think of the mids as the voice of the guitar. The notes you play live primarily in the mid-frequency band. Boosting the mids makes the notes sound thicker, which creates more of a jazz tone when played clean. Cutting the mids produces a scooped sound.
I usually have my students keep the mid knob around the middle. If their tone is overly full, I’ll suggest cutting it slightly. Many instruments in a band occupy the mid-frequency range, so it’s important not to muddy up the mix with your guitar tone.
If a cheap guitar has a particularly thin-sounding pickup, I might have a student boost the mids. Conversely, if a guitar has pickups where the mids are overpowering, I’ll recommend cutting them—but just a little. With mids, a little adjustment goes a long way!
The highs alter the amount of clarity in the sound. Some budget guitars will sound too dark and can be fixed with a boost of the treble control. Some parts — like a funky, single-note Chic-style rhythm line — could benefit from a little boost, as well. Maybe students are using the bridge pickup for a country twang line and the tone is like an icepick to the ears. In that case, turn the treble down a little. Again, a little goes a long way.
Speaker
Where you point the speaker is very important. If the signal flow is like water, then the speaker is the hose’s nozzle, and it sprays the sound in a cone shape. Students must point the cone where it counts.
Students should always stand in front of their amps, and if possible, they should be tilted up slightly. Higher frequencies are more directional than lower ones, and students won’t be able to hear the attack of the sound and might overcompensate with their EQ or volume on stage. This could result in blasting the front 15 rows with the dreaded ice-pick sound (especially if they are on their bridge pickup).
Effects
Effect pedals are placed between the guitar and the amp to “affect” the sound. There are hundreds of different effect pedals, so I’m not going to get too specific in this section. Most sounds that students need can come from the different amp models — a modeling amp like the Catalyst CX will have virtual versions of the pedals. These effects can be put into the following categories.
Boost, Overdrive, Distortion: These pedals add more gain or boost the level of the guitar before hitting the pre-amp. They can be used in a song to push the volume in a solo or change the character of a clean sound. Some overdrives like an Ibanez Tube Screamer have different EQ characteristics that can cut through the band during a solo or important riff. Cycle through different pedals like this on clean and crunch sounds to create different layered patches. The Catalyst has a different boost pedal for each amp model that works well with that specific sound. My students use this boost all the time for solos, especially since it can be easily triggered with a footswitch.
Fuzz: This is one of the earliest guitar effects and replaces the sound of distortion. It works well for very specific parts, and I only have students use it for certain songs. If you are doing “Foxy Lady” by Jimi Hendrix or “Cherub Rock” by Smashing Pumpkins, try a fuzz sound instead of distortion. Fuzz adds authenticity to a part, but it can be omitted if you want to keep it simple for students.
Modulation (chorus, flanger, phaser, ring modulator, etc): These are special sounds that are specific to different songs. I only have students use these sounds if the sound is characteristic of the song. Some examples include Kurt Cobain’s (Nirvana) watery chorus sound in “Smells Like Teen Spirit,” or Chris Cornell’s (Soundgarden) swirly rotary sound in “Black Hole Sun.”
Delay: Delay or echo adds repeats to the sound. You can usually control the amount of delay you hear (wet mix or level), the number of repeats (feedback) and how long between each repeat (time). Some delay pedals have a tap tempo function that allows you to tap a footswitch to match the tempo of the song. Delay adds space to the sound, and I have students use it on cleans in some sections, on songs like, “Shut Up and Dance” by Walk the Moon or “Where the Streets Have No Name” by U2. A short delay time with little feedback makes for a great slap-back sound for a country part.
Delay is great for leads. It adds a thickness that can help cut through the band. Use a longer delay time and moderate feedback for a lead delay. Dial in the amount of wet mix until it is present but not overpowering. Try it with your band and have students use TOO much of it on purpose and then dial it back.
Reverb: Most amps have a reverb setting and most students LOVE to turn it up too high. I like a little bit of reverb on a clean sound. For a crunch sound for power chords and single note riffs, it helps to keep things tight, so go without reverb. For a lead sound, add a little bit of reverb.
Channel Saving and Switching
A modeling amp, like the Catalyst CX, allows you to save settings into easily recallable presets. The preset includes the amp model, gain, channel volume, EQ and effects. The master volume is not included in the channel. Have students build a clean, crunch, lead and boosted lead presets.
Saving presets is different on each amp, but it usually is as simple as holding down the button for the preset on the amp for a few seconds until it flashes. When building out presets, make sure the overall volume is similar between each sound by using the channel volume. Make sure the crunch and clean are close in volume with the lead being slightly louder.

How to Get Students to Own their Tone
Students must be stewards of their own tone and be trained to listen to themselves as a soloist and in relation to the band. Ask your players what the songs need and have them adjust their rig and listen critically.
If possible, allow students to observe professional guitarists, so they can ask them questions about their rig. If there is one thing musicians love to talk about, it’s their gear!
Students should listen to recordings of their favorite players, which should prompt them to use their guitar and amp to recreate sounds on different recordings. Turn it into a game with multiple players. It’s impossible to get it exactly right, but practice and persistence makes perfect.
Keep reading