Eight Great Tips for Learning Steel-String Acoustic Guitar
Here’s how to get started — and move in the right direction.
With the recent release of the URBAN Guitar by Yamaha and its companion lesson app (featuring instruction from Keith Urban himself), lots of folks are getting excited about learning to play steel-string acoustic guitar … to which I say, great! In my opinion, it’s one of the most enjoyable things you can do in your life. (Okay, I’ll admit I may be a little biased.)
The URBAN Guitar lesson app (available for both iOS and Android™) covers all the basics you need to get started, but here are eight tips of my own that beginning acoustic guitar players might find helpful.
1. Find the Right Body Position
By the “right” body position, I mean what’s right for you. If you already feel comfortable with how you’re holding the guitar, that’s a great start.
One piece of advice: Even though the URBAN Guitar comes with a strap that allows you to play standing up right away, I recommend that, at least in the beginning, you practice while sitting, not standing. That’s because it’s easier to focus on what your hands are doing when you’re seated. (Feel free to attach the strap to the guitar as soon as you want, of course, and don’t worry — you’ll be standing soon enough!)
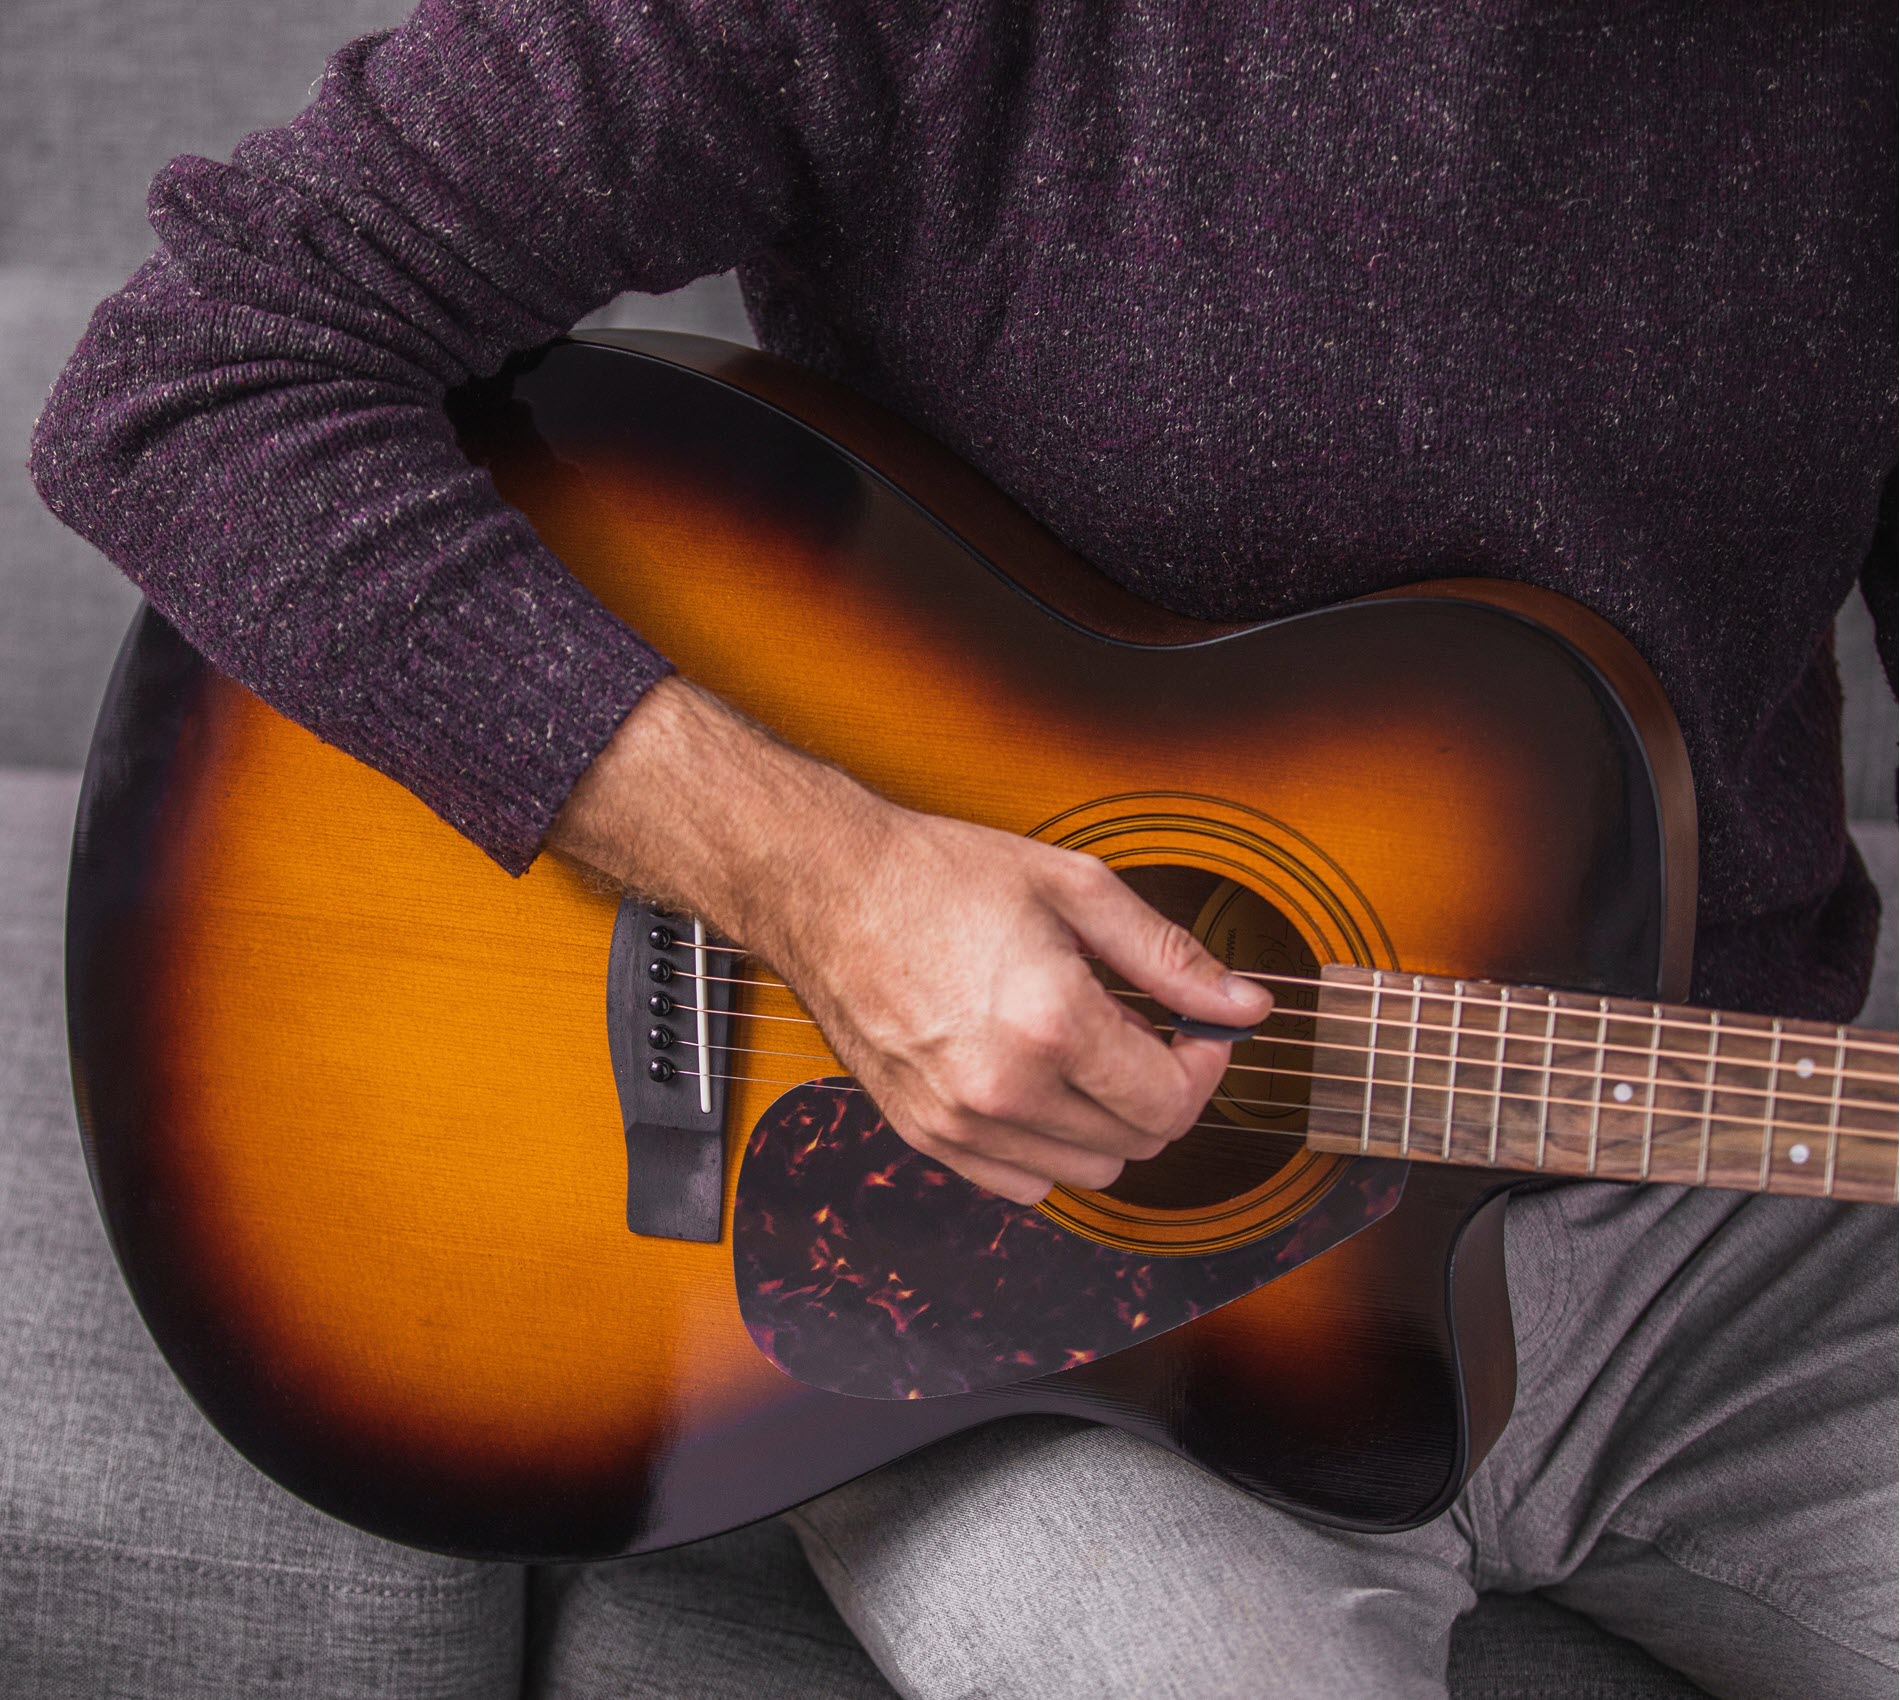
Once you’re seated comfortably, hold the guitar so that the narrowest point of the inside curve on its bottom half is balanced around the middle of your thigh, as shown in the photo below. Be careful not to place the guitar too close to your knee or it might slip off while you’re playing.

Then cradle the guitar with the arm of your picking hand, and bend that arm so that the crook of your elbow is right against the top edge of the body and your forearm makes a diagonal angle across the instrument:
2. Establish Good Hand Placement
Again, keep in mind that “good” hand placement for you may not necessarily be the same as it is for other people. That said, your picking hand should more or less follow the line of your forearm, making a diagonal angle to the guitar strings when laid across them, like this:

Your fretting hand should wrap around the guitar’s neck so your fingers naturally form an arch over the fretboard, like this:

By the way, the neck on the URBAN Guitar by Yamaha is thinner than the average acoustic, so wrapping your fingers around it is a lot easier than on many other guitars.
The thumb of your fretting hand is there to provide support for the rest of your hand as you play, so make sure it’s actually touching the back of the guitar neck. Where it touches the neck really doesn’t matter too much. Some guitarists like to keep their thumb anchored at the back all the time; others like to move it around, depending on what their other fingers are doing. I suggest you try both approaches and see which one feels best to you.
3. Get Your Fingers Going
One of the hardest parts of learning guitar is building finger dexterity and strength. Take it easy at first; your fingers (and especially your fingertips) are probably going to be a little sore after practice sessions of half an hour or more. But don’t get discouraged: Your fingertips will quickly adjust with regular practice and the muscles in your fingers will get stronger. In fact, you’ll be shocked at how quickly you progress simply by setting aside fifteen minutes to a half hour every day just to play. It’s also worth noting that the string tension on the URBAN Guitar by Yamaha is lower than on many other beginner instruments, so your hands have a lot less to fight against right from the start.
In the URBAN Guitar lesson app, Keith and his co-pilot JUNO take you through several of the basics and guide you through 14 fantastic songs that are easy to learn. However, if you’d like to go a little bit further with your lessons, try scales. Scales are a great way to build finger strength, and they’re the first steps towards guitar solos!
An E major scale starting on the low open E (6th) string, ending on the high E (1st) string at the 4th fret (G-sharp), and then going back down will get you used to alternating open and fretted strings. (Fretting a string means that you’ve placed your finger behind a fret, as indicated in the illustration below by the numbered circles on the fretboard; the small, blank Os at the far left end of the grid stand for open strings — that is, those that aren’t fretted. The numbers inside the circles indicate the finger you should be fretting with: index = 1, second finger = 2, and so forth.)

Or try a G major scale starting on the 3rd fret of the 6th string, as shown below. Playing this up and down repeatedly will get you comfortable with playing in one hand position (sometimes called a “box”): Your 1st (index) finger stays on the 2nd fret, your 2nd (middle) finger on the 3rd fret, your 3rd (ring) finger on the 4th fret, and your 4th finger (pinky) on the 5th fret.

A G minor pentatonic scale starting in the same place will get your pinky accustomed to a little stretching, since it has to go all the way up to the 6th fret of the 1st string:

4. To Pick or Not to Pick? Try Both
Playing steel-string guitar with a pick is definitely something you’ll want to learn how to do, but you should also try playing without one because it feels and sounds different … and because it means you won’t become dependent on a pick (which, believe me, is reassuring if you can’t find one when you need it!).
The standard way to hold a pick is firmly between the thumb and index fingers of your picking hand, so that the bottom (thinnest) edge of the pick is parallel to the strings, as shown here:

There are also many non-standard ways of holding a pick, including the way Keith Urban himself holds one … but you’ll need to check out the URBAN Guitar lesson app to learn more about that. The most important thing to remember here is: If it feels good and it sounds good, it is good!
Be sure to try out different sizes and thicknesses of picks to find your favorite. When you’re not using a pick, lead with the edges of your pick-hand fingernails; you can even use your thumb as a “shadow pick” placed under one or more fingers to support your strumming and single-note playing.

In both cases, get used to strumming all the strings down and then up alternately, then see how it feels to strum down and/or up repeatedly without alternating.
5. Start with Open Chords
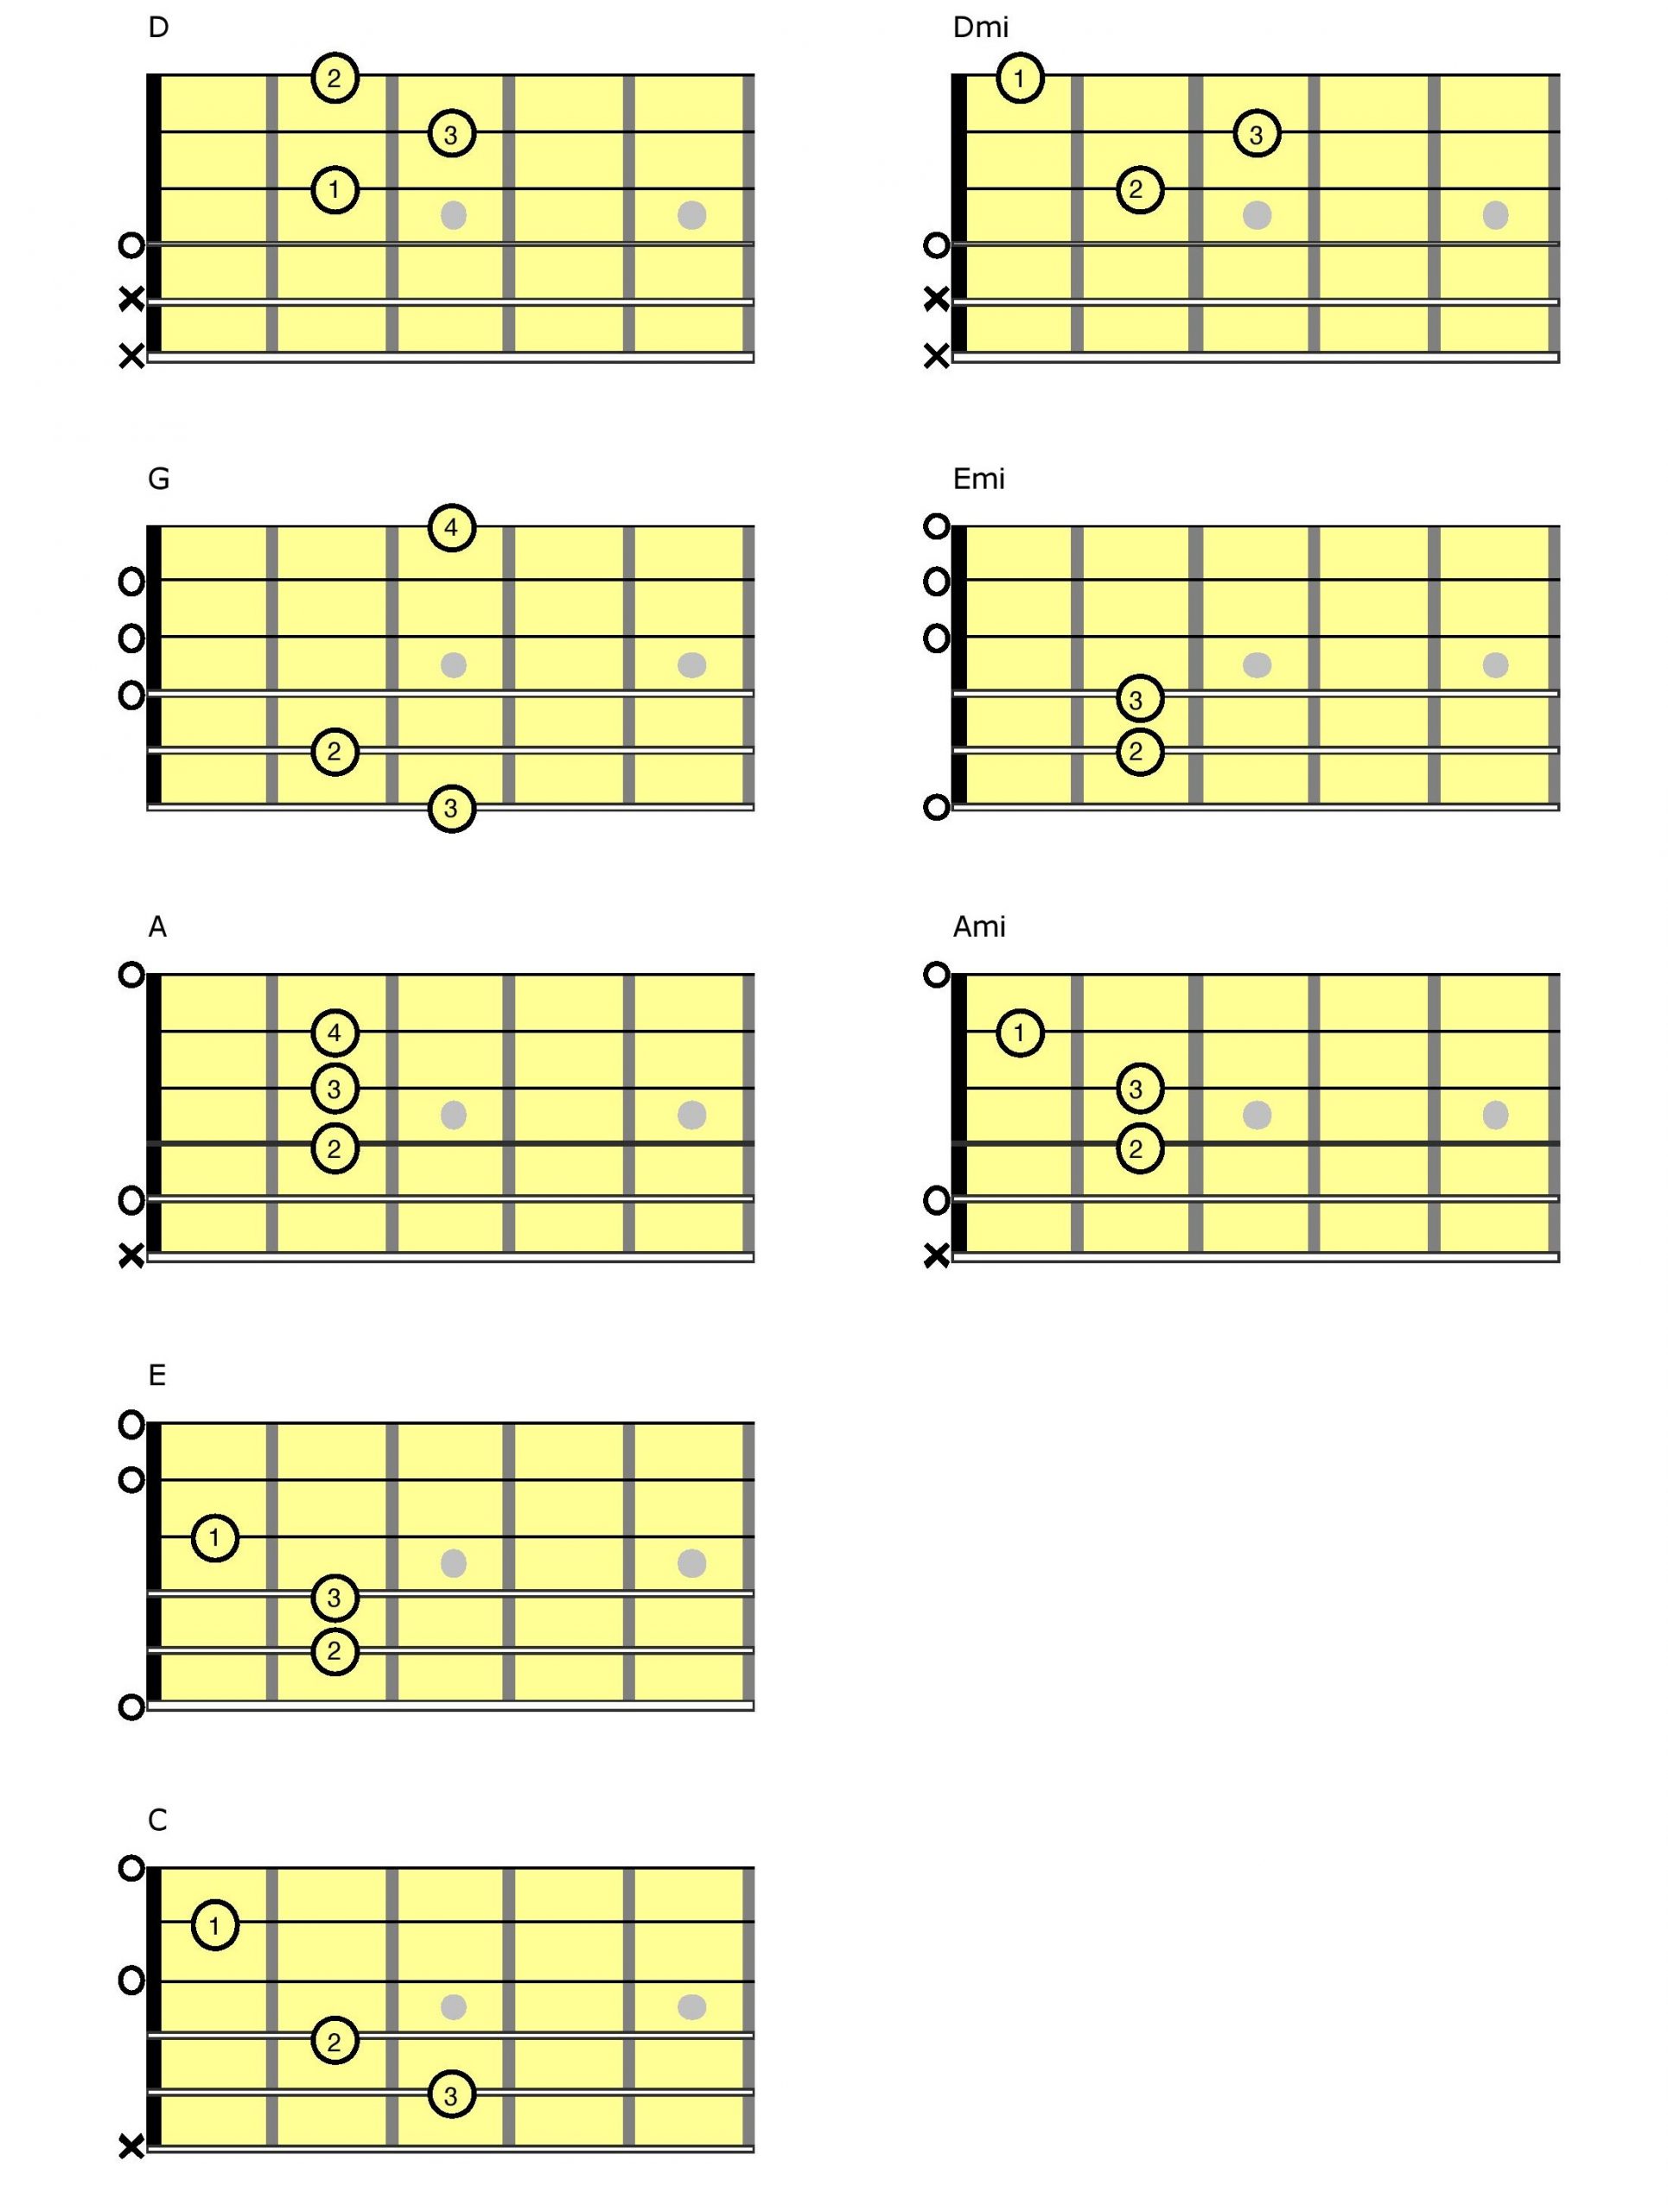
The basics of guitar are built around open chords (so called because they incorporate open strings). Of these, the easiest to play are D, G, A, E and C, along with D minor, E minor and A minor. (The lesson app included with the URBAN Guitar by Yamaha shows you all these chords.) Again, the small Os on the left side of these illustrations stand for open strings. The small Xs stand for strings that you don’t play: just skip over them when you strum.
A few other open chords are a little tougher to master because they require you to either skip a bunch of strings while strumming (such as B minor) or fret multiple strings with one finger (such as F):

But even with just these ten chords, you can play a lot of songs. Pick a few favorites of yours that use these chords and start strumming. Work on making the changes between chords as clean as possible so that each string keeps ringing out while you strum.
6. Work Your Way Up to Bar Chords
Once you’re familiar with the shapes of open chords, you can easily move many of them — like E, A, and D — up the neck to form “bar” chords. These chords have the same notes, but because they’re played on different strings (and in some cases, in different octaves), they have a different sonic quality — a little brighter, a little ringier.
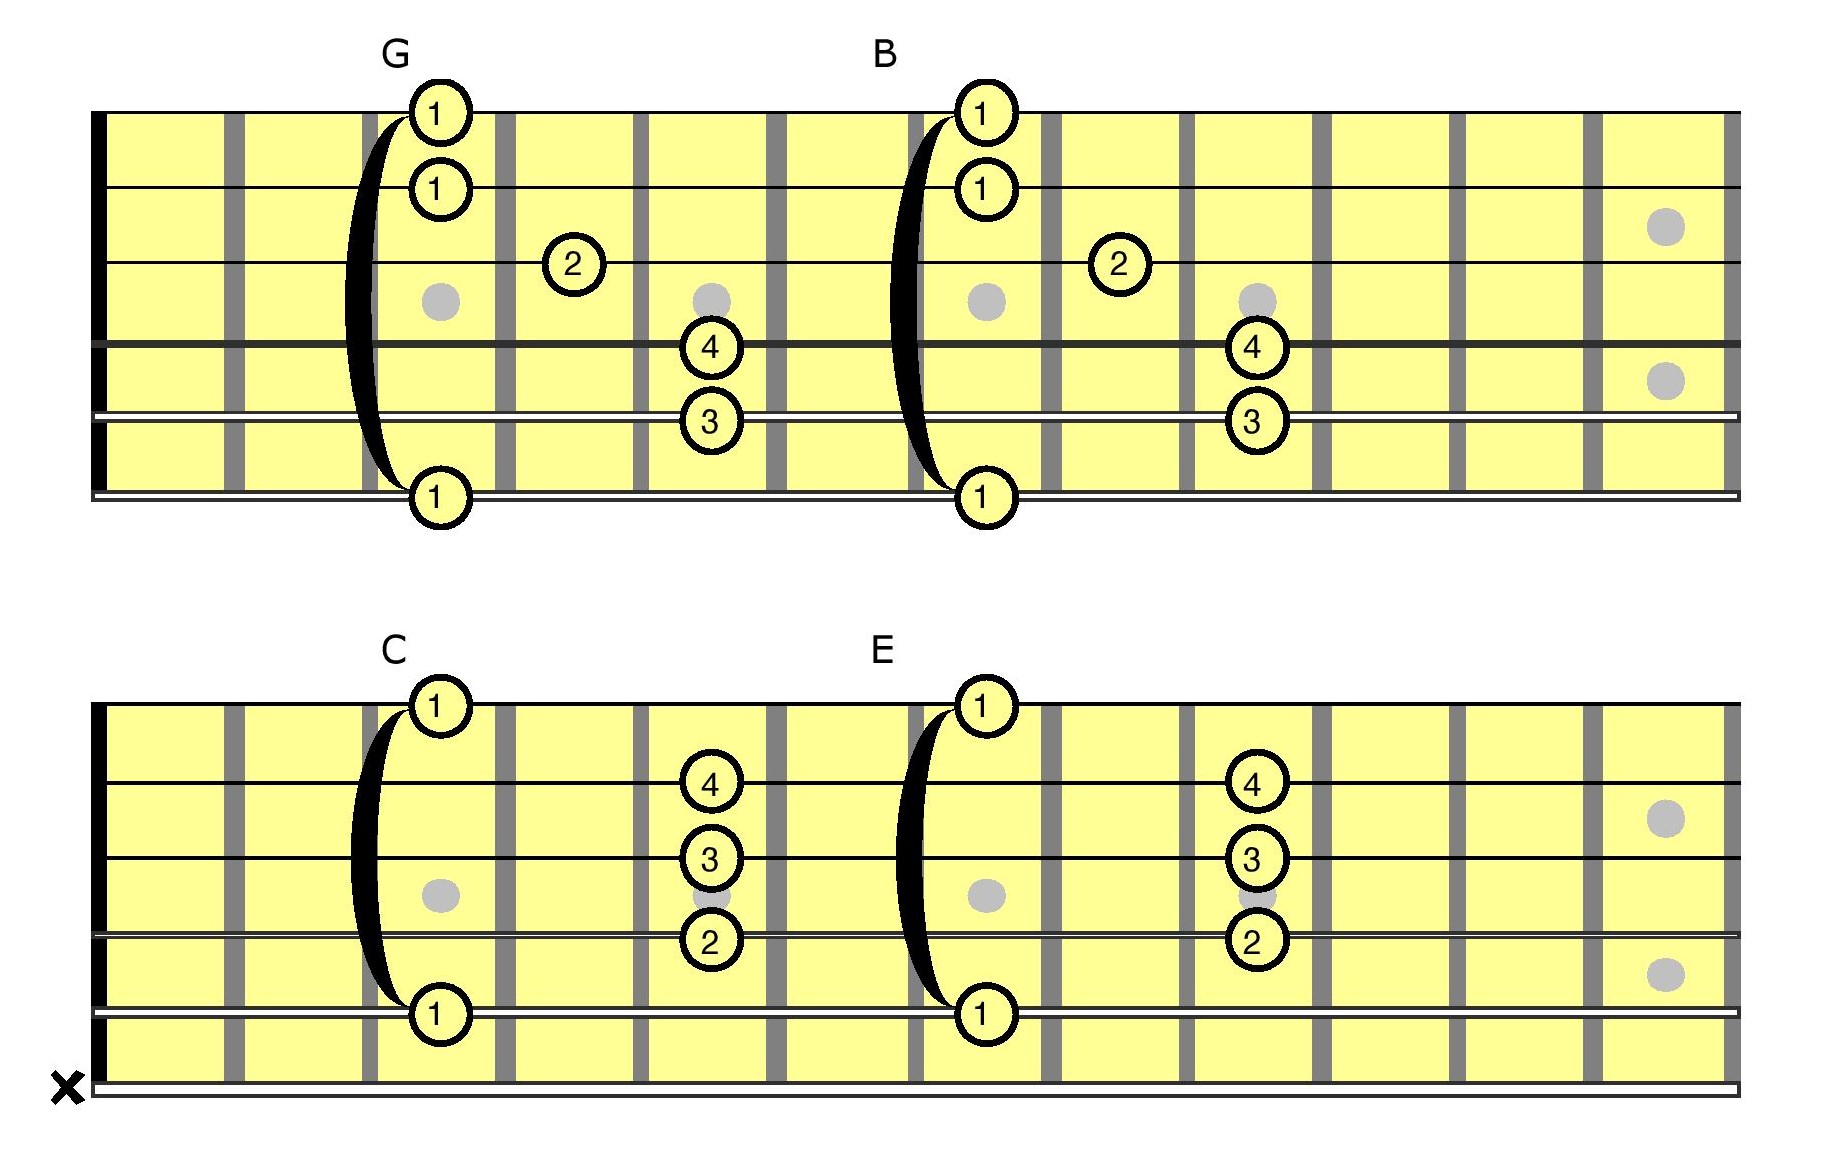
Here’s how to do it: Lay your fretting-hand index (1st) finger across all six strings on one fret; that’s the bar. Then form those familiar chord shapes with your other fingers on the frets above the bar, as illustrated below. As you can see, an E chord with a bar on the 3rd fret becomes a G chord, while an A chord with a bar on the same fret is a C chord; the same two fingerings on the 7th fret yield B and E chords, respectively.
Play the same simple songs you played before, but now try them with bar chords. Yes, they’re the same songs, but they sound quite different, don’t they?
7. Mix In Some Fingerpicking
Just as you should challenge your fretting hand with bar chords, I suggest you also give your picking hand a test by learning to play fingerstyle — which, besides sounding cool, can also help you hear and improve how you’re doing on those bars. (If you can hear all the strings ringing, great; if you can’t, press that fret-hand index finger down harder.)
Here’s how: Assign the top three strings (the thickest strings closest to you) to your picking-hand thumb and the bottom three (the thinnest ones) to your index, middle and ring fingers, respectively, as shown here:
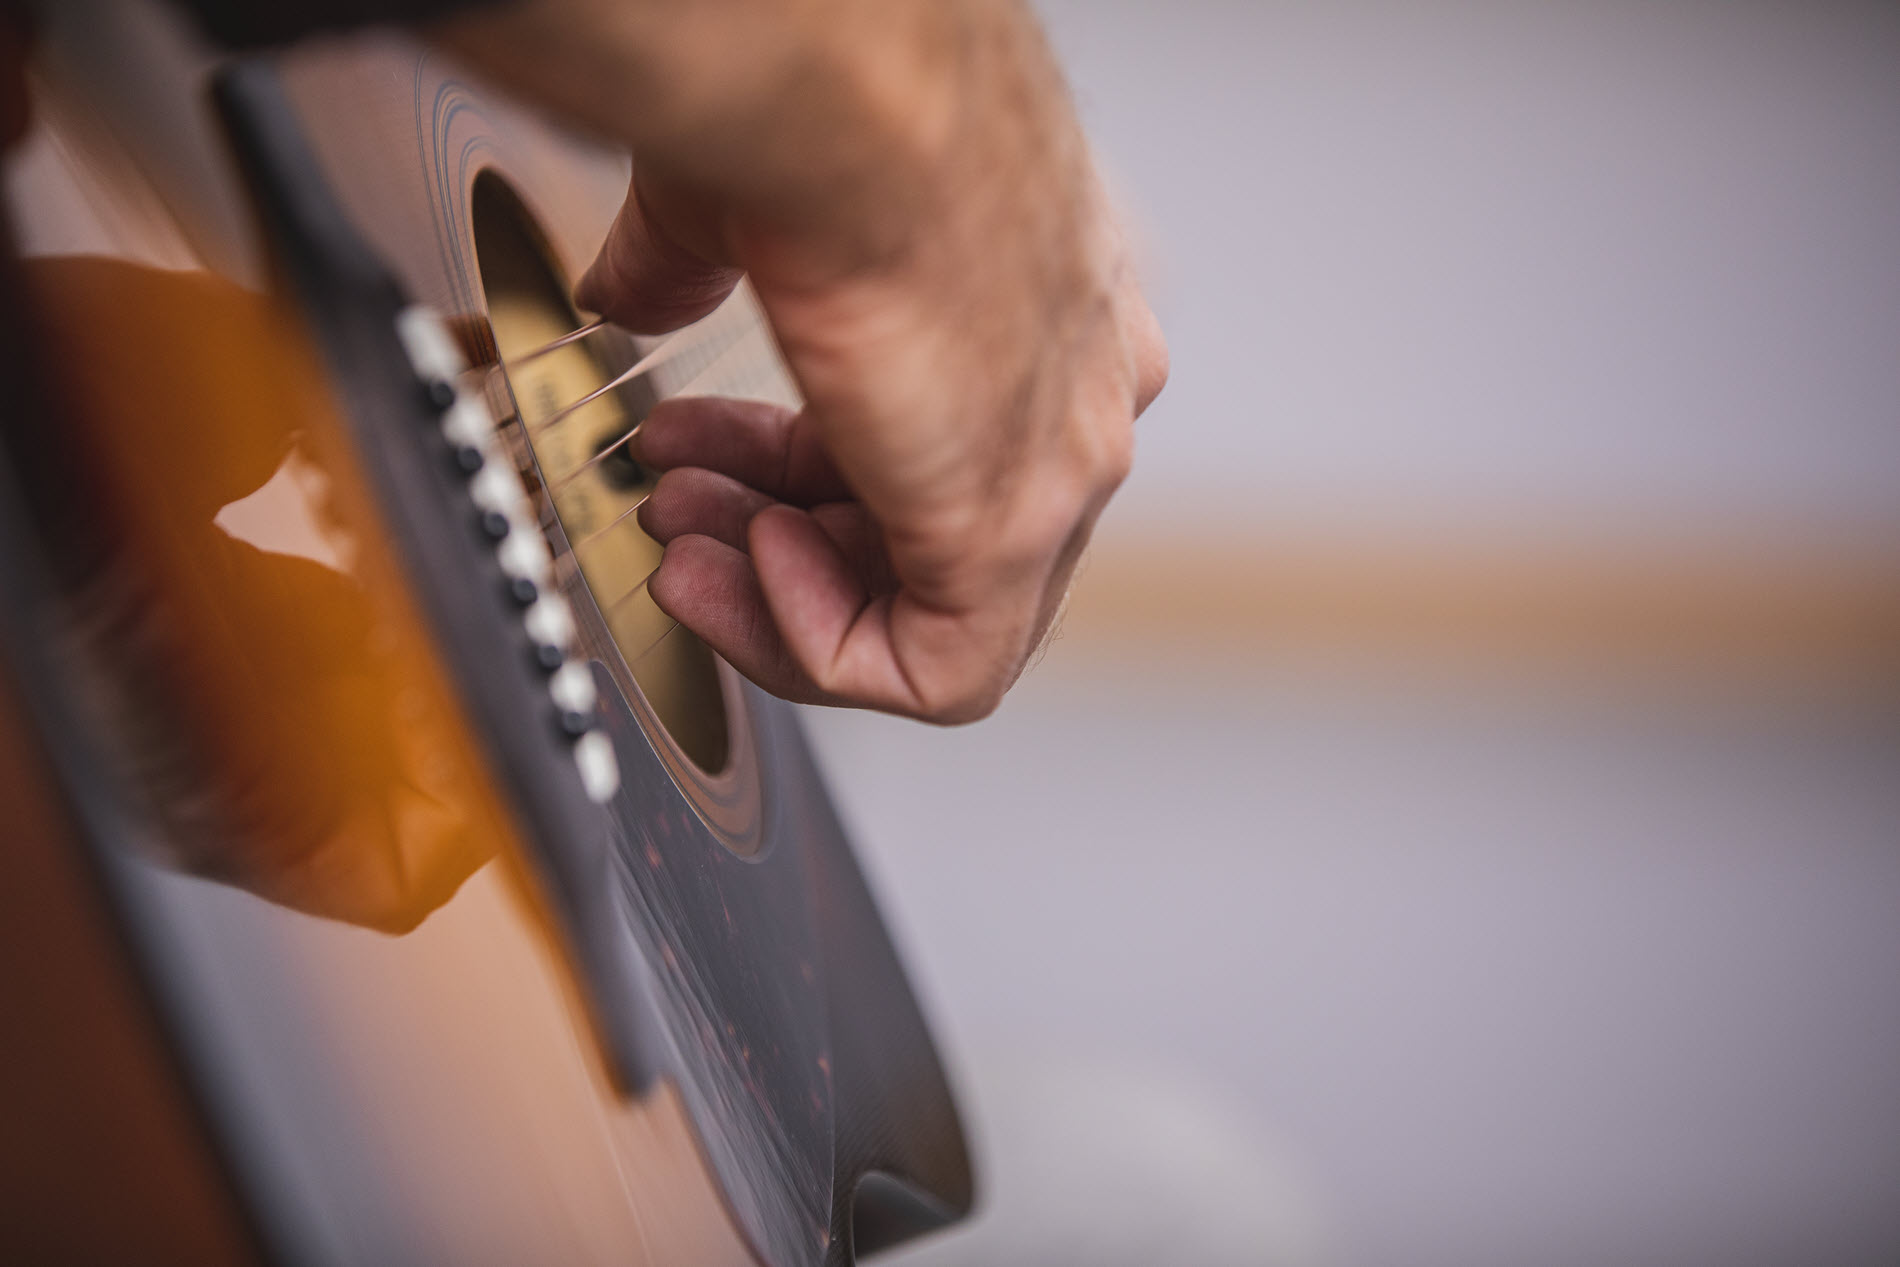
Try plucking the strings simultaneously, then alternating between fingers. If you want to incorporate your pinky, you can assign it to the 1st string (the thinnest string, furthest from you) and place the others in-between, as shown here:

Alternatively, you can just let the pinky hang or place its tip on the body of the guitar below the strings to help anchor your hand while you pick:
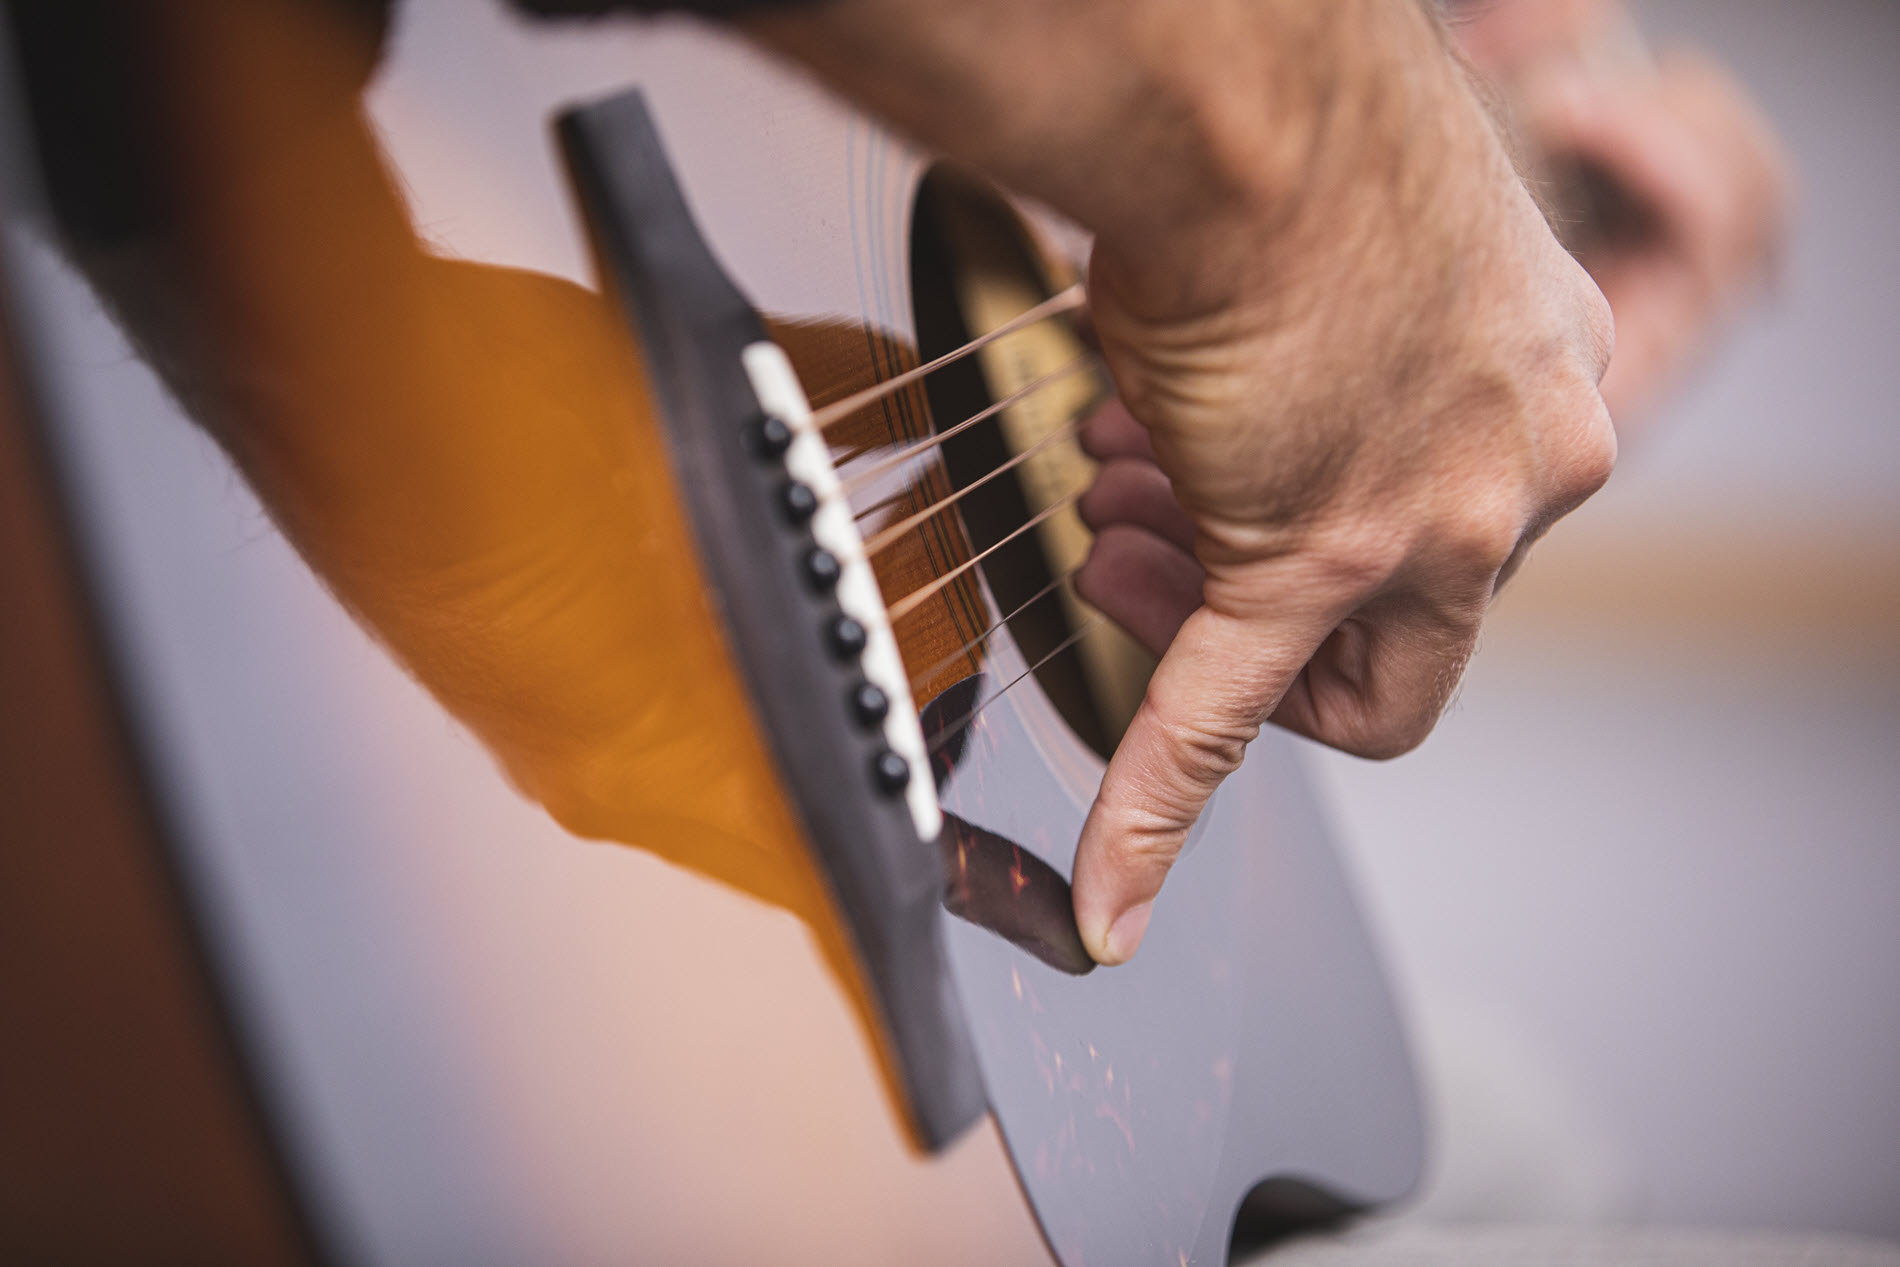
8. Be Patient
In the beginning stages, much of guitar practice is about building muscle memory. The effort needed to change cleanly from an A chord to a D chord, or to pluck the low E string with your thumb right after you’ve plucked the B string with your middle finger, will feel new and awkward for your hands. You’re asking them to do things they’re not used to doing, so don’t be surprised — or get mad at yourself — if it takes them a while to figure it all out. Just keep on practicing, knowing that you’ll gain speed and accuracy as you go. Best of all, you’ll end up learning to play guitar … and how cool is that?
Want to find out more about the URBAN Guitar by Yamaha? Click here.


