Teach Guitar Chords
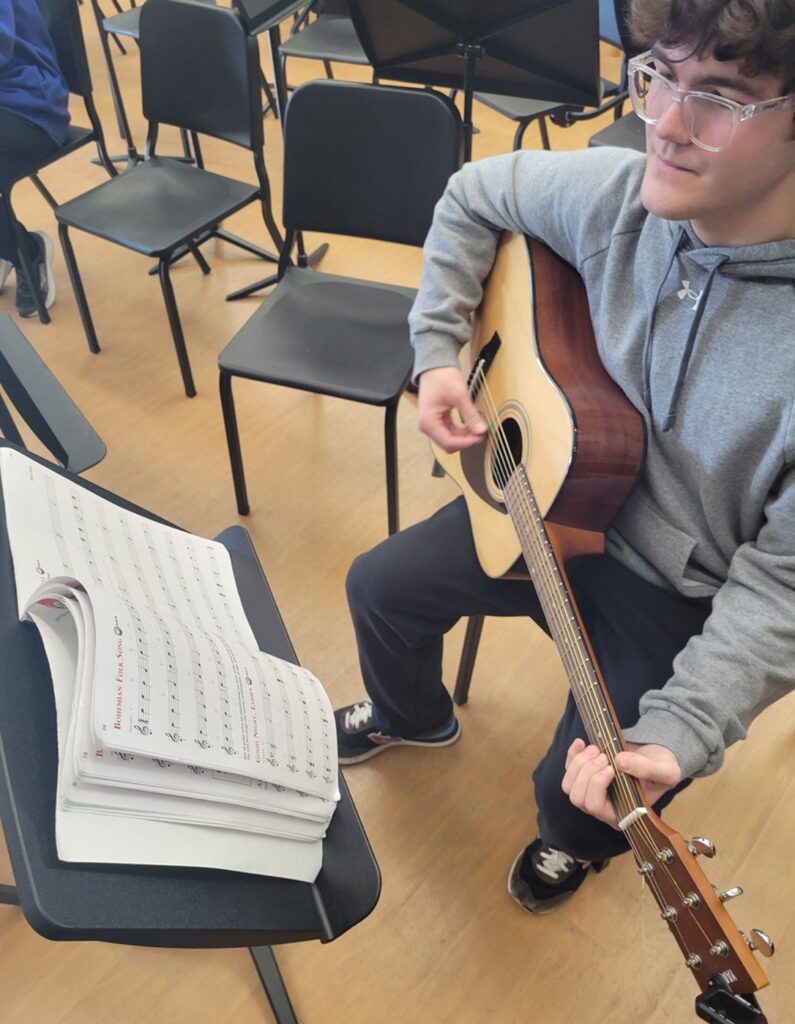
Open position, or cowboy chords as I call them, are one of the most important things that a guitar player should know. They are used in everything from classical guitar literature to Green Day songs, and they work when playing in a group or when playing by yourself. In this article, we will discuss how to teach your students to be to masters of open chords.
Chord Chart
An open position chord shape is a predetermined voicing that uses open strings to express the root and quality of a chord. A chord chart shows the finger locations on the guitar neck to create the corresponding shape for a chord. On a chord chart, the vertical lines represent the strings and the horizontal lines represent the frets. Strings that are not playing in a chord have an X over them and strings that are played open have an O. The number inside of a finger position marker shows which finger in the fretting hand should be used to play the notes of a chord. You can use this guitar worksheet to test students’ understanding of chord charts,
I usually start with having students play chords that use only the top three strings because this allows students to be successful while they are getting their fretting hand dexterity together. Download this PDF of three-string chords. (The ukulele has a similar interval construction, so these shapes work on that instrument as well.) After students have had experience playing basic three-string chords, I move them to chord voicings that use all the strings. Here is a PDF of those chord voicings.
THE YAMAHA EDUCATOR NEWSLETTER: Join to receive a round-up of our latest articles and programs!
Getting a Good Sound
I would guess that most guitars end up in closets because someone got frustrated with their sound while playing chords. That’s why scaffolding successful is so important for students when working with chords; you never want to have them feel frustrated and leave the instrument. I have found what works best is to address left-hand technique as soon as students start playing chords. Here are my technique rules:
- Thumb on the back of the neck.
- Curl fingers.
- Use fingertips.
- Keep fingers hovering over the frets when they are not being used.
Highlighting these rules and praising students who are demonstrating these techniques will set them up for success when playing chords. It takes mindfulness to build good technique and if you can help the class be mindful and recognize when they do things correctly, they will not develop poor habits. As everyone knows, breaking a bad habit is extremely difficult.
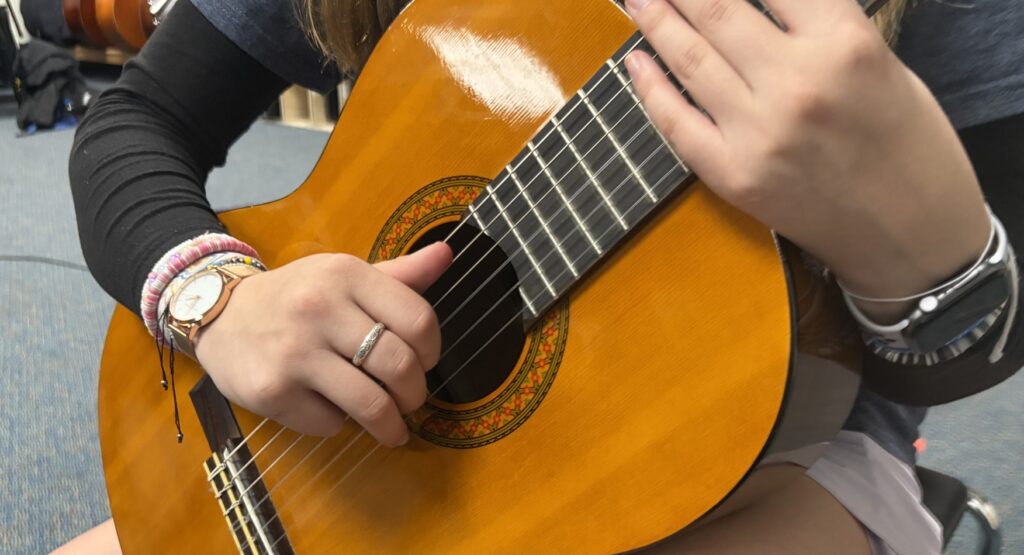
By giving students a pathway to build and check their chords, you allow them to troubleshoot their own problems. Instruct students to build chords one finger at a time starting with the top three strings. Use positive playing pressure by squeezing the string between the thumb on the back of the neck and the fretting finger. Add additional counter force by using the guitar body and neck as a fulcrum against your torso. If all the rules of the technique are followed, the notes should ring out clearly.
Check a chord by playing each note separately, which will point out notes that are unintentionally muted by poorly placed fretting fingers. If you or your students are having trouble getting some notes in a chord to play, try moving the fretting finger closer to the bridge side of the fret, which will allow an easier connection.
Some things to note: Putting too much pressure on the string will cause a note to go sharp, and placing the finger on the fret will result in a dead sound.

Picking
Right-hand technique is often overlooked and overshadowed by the difficulties in the fretting hand, so I introduce picking as early as possible. Holding a pick is a subjective and personal process, so I keep my instructions fairly simple for students. I tell them to grasp the pick between their thumb and index finger with the tip of the pick perpendicular to the thumb. Keep an eye out for students who use too much pick pressure and/or place the pick too far into the strings. This will cause the chords to sound splatty and distorted. As far as sourcing picks, I’ve been getting 600 packs of them from Amazon for less than $30. I also use a pick punch so students can make picks out of old IDs and expired gift cards.
Getting Students to Read a Lead Sheet
The great part about open chords is that everyone uses them and most of the songs that students listen to have been recorded using the same shapes that they will learn. After students have success playing a few chords, they can start playing songs that they know.
There are two main forms of notation that show when chords are played: 1) chord and lyric sheets and 2) lead sheets.
Chord and lyric sheets show when chords change related to words. The issue is that students must know the song in order to play it. If the song needs to be slowed down to assist with playing, it is almost impossible.
In a lead sheet, the harmonic rhythm (when chords change) is shown related to music time either above slashes in a rhythm section chart or above a melody written in standard notation. Work on reading lead sheets with your students away from the guitar by having them identify the beat in which chords change and having them say the letter of the chord change in musical time while listening to the original recording. Try it with this lead sheet library.
Chord Progression
The hardest part about playing chords in a song is changing shapes to follow the progression. I like to have students watch live performances of acoustic guitar players who use open chords in their songs on mute and have them pay attention to what their fretting hand looks like when moving from chord to chord. Often students will sacrifice quality technique to move from chord to chord and their tone will suffer.
Put a progression on the board and give students time to isolate their fretting hand only, making sure that the movements between shapes are efficient and meaningful. Have students identify notes that start the same between chords and for them to make “flight paths” for the other notes to ensure the smallest amount of movement. Another tip is to have students move all their fingers at the same time and place them on their new shape locations together. The goal when practicing should be to make their fretting hand look like that of a pro but played back at a slow speed.
Differentiation
If your beginning guitar class is like mine, you will have some students who have been playing guitar for a long time, others who struggle with basic concepts and everyone in between. It’s important to differentiate to provide enrichment and remediation when teaching chords to keep everyone engaged and challenged at the same time.
One of the ways that I differentiate is to adjust the rhythm in which students play the chords. For students who are struggling, I might have them only play the chord on the change.
G / / / | Em / / / | C / / / | D / / / |
In this example, I might have them only play on beat one of every measure. The chord voicing can also be simplified to use only the top three strings if they are still having trouble. Finally, have students choose one or two chords in the progression as the ones that they are going to play. When the class plays the progression, have them only play those chords.
The rhythm can also be used to address students who have more experience. Instead of playing on the change, students can play on every other beat, on every beat, or they can strum the subdivision. Finally, students can pick or strum the chords using different arpeggiation or strumming patterns.
This level of differentiation allows students to work on the same song at multiple different levels, which makes it easier to have students play together and address issues as an entire class.
Dynamic Charts
Chords are part of a lifelong study as each new shape is added to their “vocabulary” to use for different styles. The traditional way of learning new chord shapes is to learn them from individual chord charts. There are a couple of downsides to this method: 1) it is difficult to recall these shapes and 2) a new chart is needed for each new chord quality.
When I introduce six-string chords, I use what I call dynamic charts, which shows the chord tones located within the shape and highlights the location of the major chord. There are five main shapes, and If you teach students how to apply the formulas to a chord chart, they are able to generate up to seven different chords from each. I use dynamic charts in my Fretboard Fundamentals course.
This style of chord chart takes more prep time for students, but they end up with a much richer vocabulary of chord voicings and a basic understanding of chord theory that can be used for more advanced study. Note: I sequence these types of chords in the middle of my beginning guitar course, when students have already played three-note chords by reading traditional chord charts, learned the notes on the E and A string by playing bass, and applied those notes to learn power chords.
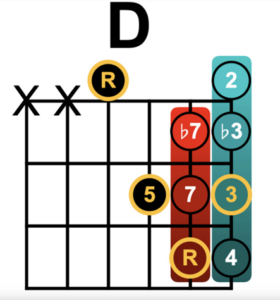
Above is a dynamic chart for a D chord, it can be used to create the shape for a D, Dm, D7, DM7, Dsus2, Dsus4 and Dm7 chords.
Download a PDF of all of the dynamic chord shapes and formulas.
Keep reading