How (and Where) To Mount a TV and Sound Bar
The television is the centerpiece of any home theater system. As a custom installer, it always amazes me how often a television or sound bar is mounted in the wrong place … sometimes even with the wrong bracket! But proper TV and sound bar placement will greatly enhance your home theater experience, so it behooves you to do it safely and correctly.
Here are some best practices that will allow you to get it right the first time.
TV Positioning
Obviously you want the TV to be placed directly across from your primary seating position, and not off to the left or the right … so get it right in the middle! If you mount the TV off to one side, it will be uncomfortable to view and can even result in neck strain if you do a lot of binge-watching.
Even when properly centered, TVs are often mounted too high. For aesthetic reasons, you may want that TV over your fireplace, but trust me, it is the absolute wrong place to mount it. For a comfortable viewing experience, you want your eyes (at a seated position) to be at the center of the TV.
This can be easily calculated, as follows:
- When seated, an average person’s eyes are 42.5″ off the floor
- The formula is: 42.5 – (TV height / 2) = Ideal height of the bottom of the TV
A typical 65″ flat panel TV is 33″ tall, so the bottom of this TV should ideally be 26″ (42.5 – 16.5) off the ground. However, in many installations this may be impractical due to the fact that there may be a piece of furniture underneath the TV. So what is your fudge factor? The sweet spot is the center, but you can go as low as the bottom 1/3rd line of the TV. In the case of a 65″ flat panel, this would mean that the bottom of the TV could start at 31.5″ off the floor. Since most furniture is 30″ high, you will have just enough room to squeeze that credenza under the TV.
Sound Upgrade
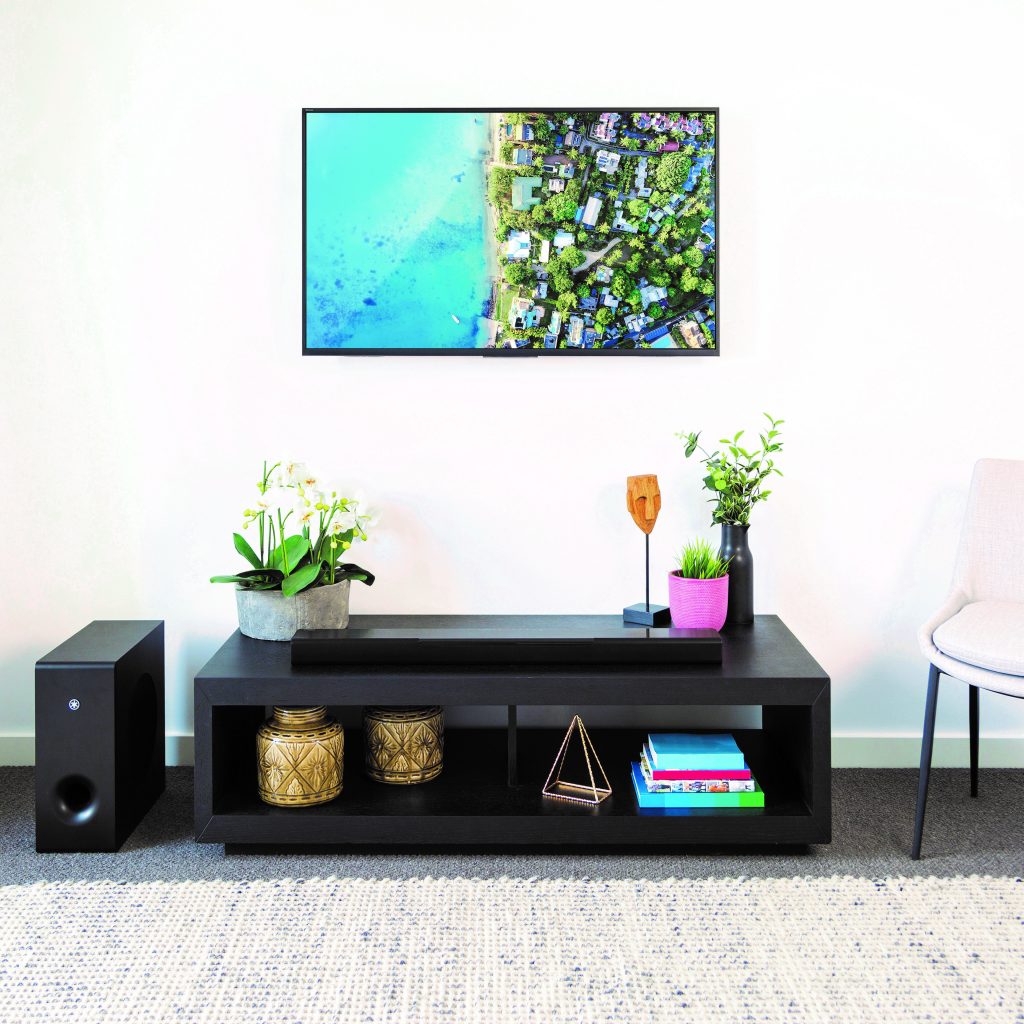
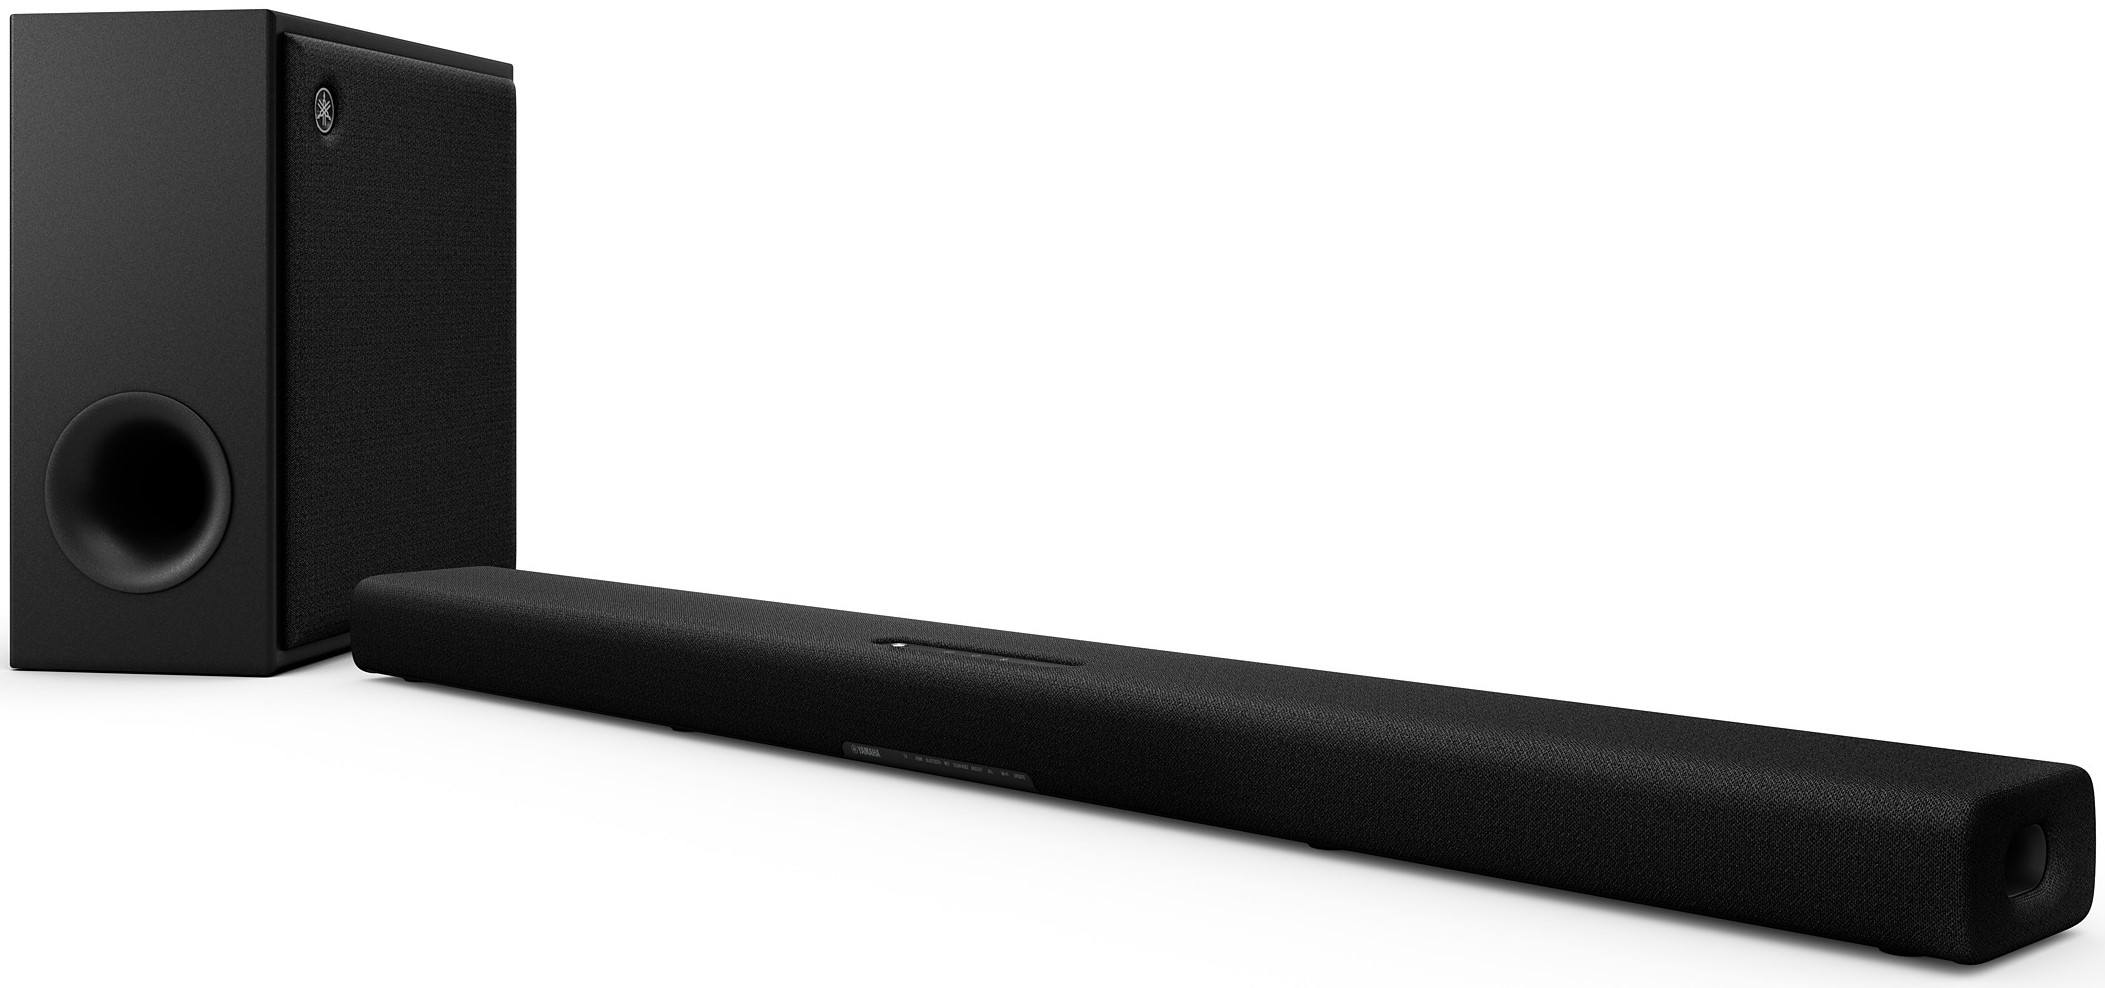
As TV bezels keep shrinking and shrinking, this leaves virtually no room for speakers. This means that any built-in speakers need to be small and/or project off the side or back of the TV, making for a tinny, poor-quality listening experience. So, to round out your viewing experience, an upgraded sound system is a must. But if the idea of setting up and using a full multi-channel receiver with discrete speakers feels daunting, a sound bar — especially one with Dolby Atmos technology and a wireless subwoofer (such as the Yamaha True X Bar 50A) — provides a simpler surround sound solution.
Wall-Mount or Tabletop?
These are the two most common options when it comes to placing a TV and sound bar. Which is better?
This is largely an aesthetic decision, but I have a couple of arguments for wall mounting. For one thing, it tends to be a safer installation. Large flat-screen TVs can be top-heavy and therefore fairly easy to knock off a stand. Wall mounting also gives you more flexibility in terms of mounting the TV exactly where it needs to be versus being stuck with the height of the furniture you sit it on.
This same debate can be extended to the sound bar. Here, though, it’s typically best to follow whatever you are doing with the TV, but consider the TV mounting method as well. (See “Wall Mount Options” below.) If you are using a flat or tilt bracket, you’ll be fine with mounting the sound bar on the wall directly below the TV. However, if you are using an articulating arm, you’ll instead want to attach the sound bar to the arm itself, so that the sound follows the angle in which you position the TV.
This also brings up the question of whether a sound bar works better above or below the TV. I suggest mounting it at the location that is closest to 42.5″ off the ground (again, where your ear falls at a seated position). This is typically below the TV in 95% of real-world installations.
Wall Mount Options
- Flat mount. This is the right choice if you are able to mount the TV at the correct height and you don’t need to angle the TV to watch it from different positions, or a different room. There are ultra-thin models available, but bear in mind that if you need to mount anything behind the TV (such as a Firestick, Apple TV® or HDMI® balun), you’ll have zero room for these devices.
- Tilt Mount. If you are forced to position the TV too high (i.e., above the center of your eyes when seated), this is probably your only mount option, since it allows you to tilt the TV downward.
- Articulating Mount. This is a mount that allows you to pull the TV out from the wall and swivel it towards a secondary viewing area. Keep in mind that these mounts add significant depth and make the TV project off the wall quite a bit (sometimes up to 6″). The upside to an articulating mount is that it makes it very easy to service the TV and plug/unplug devices.
- Recessed Mount. Some companies make a recessed articulating arm that allows you to completely recess the bracket into a flush mount enclosure in the wall. Installation of this kind of mount is not for novices since you need to perfectly place the recessed box within the wall and center to the room. This may require framing and drywall repair to get it just right, but the look is fabulous and it allows you to push the TV right into the wall with no gap.
Step-by-Step
Once you’ve worked out positioning and mount options, it’s time to roll up your sleeves and get to work. Here are step-by-step directions for mounting a TV and sound bar to a wall.
1. Mount the Plate. A TV bracket typically has two components: a plate that mounts to the wall and the brackets that attach to the back of the TV. Begin by mounting the brackets to your TV, then temporarily connect the wall mount to the brackets.
2. Measure. Next, measure the height of the lower bracket-to-plate points to the bottom of the TV. This will tell you exactly where the wall bracket needs to be mounted in order to get the bottom of the TV in the correct place. (See “TV Positioning” above.)
3. Find the Studs. Get out your handy-dandy stud finder and find the studs that line up with your wall plate mounting holes. Make marks on the wall where you are going to connect the plate with the supplied lag bolts. Never mount a TV to drywall only; for a safe installation, always find the studs (and use them!).
4. Check the Cables. Before drilling any holes, make sure that your electrical and audio/video cabling is in the right place in relation to the plate. If you are mounting a sound bar on the wall under the TV, make sure that you have appropriate connecting cables in the wall from behind the TV to behind the sound bar so that you don’t see a cable between the two. Bear in mind that you will also need a power outlet behind that sound bar, or a power extender that allows you to plug the sound bar into the outlet behind the TV
5. Drill. Once you are certain that your cabling and power wires are aligned with your mounting plate, go ahead and drill some pilot holes into the wall to make the supplied lag bolts easier to install. Before actually installing the wall bracket, however, make sure it is level, as most wall brackets do not have those kinds of adjustments.
6. Lift. Get a couple of helpers to assist in lifting the TV so as to mount it on the wall bracket. Three is the ideal number, since two people can hold the TV up while the third can get behind it and make all of the video, audio and power connections before the TV is placed on the bracket.
7. Level. Make sure your sound bar wall mount is level to the TV, then mount it below the TV on the wall where your optical or HDMI cable is poking out. Most sound bars do not weigh very much, so using drywall anchors is usually safe. If you are using an articulating mount (see “Wall Mount Options” above), you’ll need to connect the sound bar to the articulating arm, below the TV. There are many products out there designed specifically for this purpose.
Keep reading