That’s a simple fact. So if you don’t clean your headphones and earbuds regularly, here are two good reasons to rethink things. First, especially when it comes to earbuds, it’s a matter of health. You don’t want to continually put something in your ear that might have bacteria on it. Cleaning earbuds also helps them function better because you’ll be removing ear wax, dirt, dust and other foreign substances from the drivers that can impede the sound waves.
Headphones get dirty too. Although they don’t contact your ear like earbuds do, they have a lot more surface area that can pick up dust and dirt.
In this article, we’ll show you a simple, effective method for cleaning earbuds and headphones without doing any damage.
Cleaning Earbuds
Experts recommend cleaning earbuds (whether wired or wireless) once a month, though it depends on how heavy your usage is; if you wear them a lot every day, you might want to clean them more often. If you’re not sure if they’re ready for cleaning, just take a close look at them. You’ll know right away.
You can purchase kits made for cleaning earbuds (they’re the same as the ones for cleaning hearing aids) that come with all the necessary supplies, but you really don’t need to go to that expense, because you can do a fine job with some common household items. Here’s what you’ll need:
A clean, dry soft toothbrush
Cotton swabs
Some rubbing alcohol or a couple of rubbing alcohol pads
A toothpick
A couple of small microfiber cloths — the kind you use for cleaning glasses
(Optional) A small amount of a moldable putty such as Blu-Tack® or Loctite® Fun-Tak®
Important: If you’re cleaning wireless earbuds, make sure to turn them off before you get started. If you leave them on and accidentally get liquid into the drivers, you could damage or ruin them.
Here are step-by-step directions for cleaning earbuds:
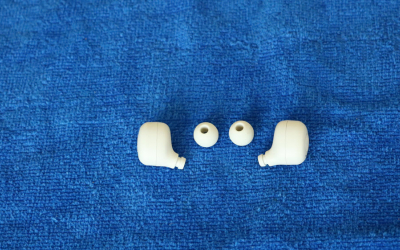
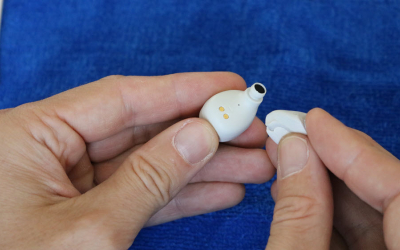
1. If your earbuds have ear tips, gently pull them off and put them on a flat surface nearby.
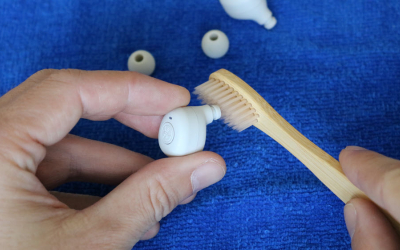
2. Do the first cleaning pass with the toothbrush. Gently brush the driver (speaker) area of each earbud. Brush gently, and don’t put a lot of downward pressure on the driver, or you can cause damage. As you brush, use gravity to your advantage: try to keep the earbuds pointed down, or at least angled down more than 45 degrees. If you have them right-side-up, some particles might stay on the grille of the driver, particularly around the edges. You want the gunk that you dislodge to fall off.
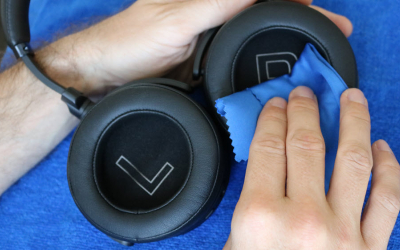
3. Brushing should get rid of a lot of the foreign matter, but probably not all of it. If you still see dirt and gunk on some parts of the earbuds, dampen one side of a cotton swab with a small amount of alcohol or water (check the manual for your earbuds to see which is recommended; rubbing alcohol is recommended for cleaning Yamaha headphones and earbuds). Make sure it’s just damp, not dripping wet. Now use the swab to clean the earbud anywhere you see dirt, keeping the pressure light.
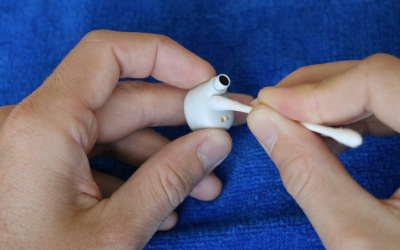
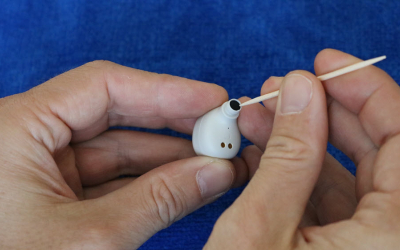
4. Use the toothpick to gently scrape away any gunk around the edges of the driver. Go slowly and carefully!
5. If you still can’t get your earbuds completely clean, take a small amount of moldable putty and press it gently against the dirty area, then remove it. The stickiness of the putty should be able to pull the dirt off.
6. Now that the earbuds themselves are clean, let’s go back to those ear tips that you put aside. Assuming they’re the silicone type (which most are), you can wipe them down with an alcohol-dipped swab or an alcohol pad. Make sure to turn them inside out and clean the inner surface — that’s where most of the dirt, dust and gunk accumulates. Unless contraindicated in your earbud’s owners manual, alcohol is a better choice than water here because it not only cleans, it disinfects too, plus it evaporates quickly. Alternatively, you could just dip the ear tips in warm, soapy water. Either way, give your ear tips and ear buds time to dry completely before you use them.
Cleaning Headphones
Headphones typically don’t get as filthy as earbuds because they only go on your ears, not in them. Still, they can get dusty and dirty.
The illustration below shows the names of the parts of a pair of headphones: The earcups (sometimes known as earpieces) are the left and right-side housings connected by the headband. The earcups have ear cushions on top of them. Those cushions are the only part of the headphones that touch your ears directly.
Headphone part names.
Here are step-by-step directions for cleaning headphones, using the same materials listed above:
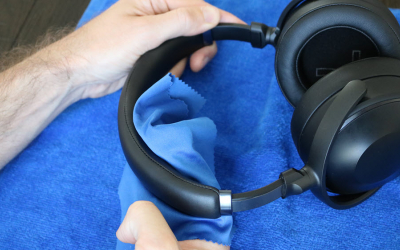
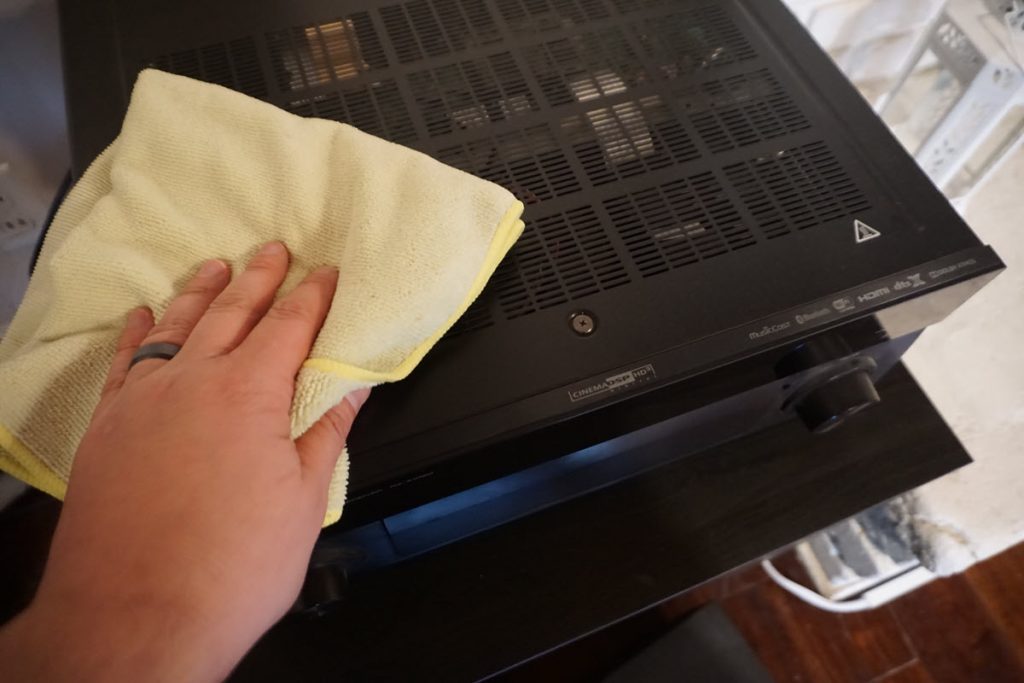
1. Extend the headband to its maximum length so that all the surface area is showing. Lightly dampen a microfiber cloth with water and wipe down the band and any outer plastic or metal parts, including the outer sides of the ear cups if your headphones are of the closed-back variety. If they’re open-back (which you can tell because the ear cups have vents on the outside), use only a dry cloth on the outer ear cups since you don’t want to get any moisture in the electronics.
2. How you clean the ear cushions depends on the material they’re made of. If they’re some sort of rubber or leather (faux or real), wipe them down with a microfiber cloth that’s been lightly dampened with warm, soapy water, then dry them with another microfiber cloth. If the cushions are made of foam, don’t use any water at all — just wipe them with a dry microfiber cloth to remove any loose dirt.
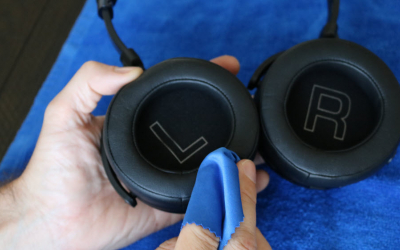
3. Replaceable ear cushions can be removed before cleaning the driver-side surface of the ear cups, but it can sometimes be difficult to get them back on as tightly as they were when new, so this isn’t recommended. Instead, simply clean around their inside edges. Take a dry cotton swab and, without putting any downward pressure on the driver, rub it around the inner circumference of the ear cups, going under the ear cushions.
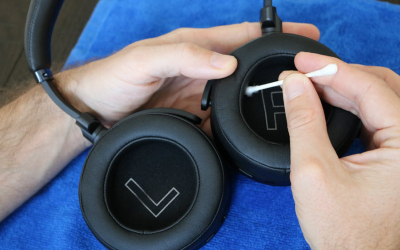
4. Finally, use a soft, dry microfiber cloth to lightly dust the mesh of the drivers. Again, avoid putting downward pressure onto the driver.
Cleaning Connectors
If you’re using wired earbuds or headphones, you can keep the connector clean by wiping it with an alcohol-dampened cloth or alcohol pad; then, wipe it again with a dry cloth to get all the alcohol off (it can leave a residue). You can wipe the cable down in a similar fashion. You can also clean connectors with a can of compressed air, but compressed air should not be used to clean drivers or cushions, as it can damage them.
One last note: It’s always a good idea to check the cleaning section in the manual for your particular earbuds or headphones first, in case the manufacturer has specific instructions or caveats when it comes to cleaning.
Click here for more information about Yamaha wireless earbuds and headphones.
Keep reading
Spring Cleaning Special: How to Dust and Clean Your Audio Gear
How (and Where) To Mount a TV and Sound Bar
Residential, Commercial and Resimercial Audio Installations
Five Tips to Get the Best Audio on Outdoor Movie Night
How to Mount Outdoor Speakers
Top Five DIY Home Audio Projects to Consider This Year