How to Connect a Subwoofer to a Sound Bar
Expand your sonic range and get ready to rumble!
Sure, a sound bar can fill your room with an amazing amount of pristine audio. But when you combine it with a subwoofer, its true potential is unleashed.
This sonic synergy happens because, while your sound bar can cover most of the spectrum of the audio being generated by your TV or video game console, it can only reproduce a certain amount of low bass. This is due in part to the size of the speakers in the sound bar, and in part to the size of its physical enclosure. A subwoofer, on the other hand, is a much bigger speaker capable of reproducing even the lowest lows — those rumbling sounds that we actually feel more than we hear — making it the perfect complement to a sound bar. With both, you get to hear the full range of sounds, as well as some added punch.
In this posting, we’ll explain how to make this essential connection, but first let’s take a closer look at the magic behind sound bars and subwoofers.
What’s Inside
Sound bars provide an immediate, convenient way to enjoy high-quality audio. Simply connect one to your television with a single HDMI cable, and you’re good to go.
Designed to be mounted on a wall or sit on a table beneath a TV, sound bars may appear unobtrusive, but they actually contain a number of small speakers (sometimes called drivers) in a compact enclosure that’s been acoustically optimized to deliver detailed audio. To enhance their bass output, most sound bars utilize what is called a passive radiator design. This helps the drivers better recreate lower frequencies, as if they were coming from bigger speakers in a larger enclosure. Small can be powerful!
That said, even a passive radiator design cannot match the in-your-chest thunder of a dedicated subwoofer (sometimes just called a “sub” for short). These large — or at least large-ish — speakers have one job, and one job only: to reproduce the very bottom of the audio spectrum. But they usually require sizable enclosures, and many environments don’t provide sufficient physical space to accommodate them, which is why some sound bars include built-in subwoofers. The Yamaha SR-B20A actually has two subs, powered by 60 watts of built-in amplification for plenty of punch. The end result is a rich, full sound consisting of a good blend of not only highs, mids and lows, but sub-bass too.

By the way, if you think that sound bars are only for stereo audio, you should think again. Some sound bars, like the aforementioned SR-B20A, can take multichannel content from movies, TV shows and video games and deliver immersive 3D surround sound, complete with a sense of height. The SR-B20A can decode Dolby Audio, DTS Digital Surround and DTS Virtual:X formats, and also features HDMI ARC, which, when connected to a compatible TV, allows you to control the sound bar with your TV remote.
Making the Connection
Fortunately, it’s easy to gain the benefit of all the additional bass information that a subwoofer provides, as long as your sound bar offers a subwoofer output. (It’s always a good idea to check for this important feature before purchasing any sound bar, since it gives you the option of expanding your system.)
If you have limited space, consider adding a subwoofer like the compact Yamaha NS-SW050. It offers an 8-inch speaker, a Twisted Flare port and advanced YST II (Yamaha Active Servo Technology) design for clear and tight bass, plus 100 watts of dynamic power.
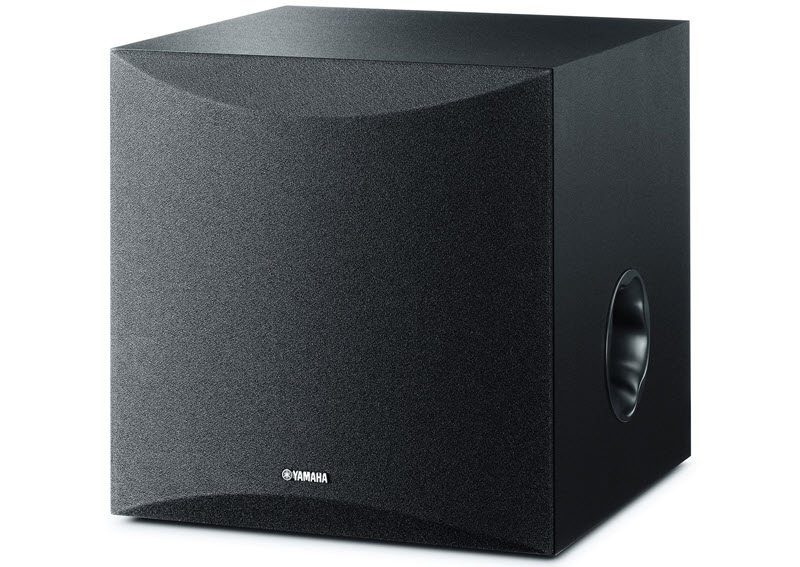
The process of connecting a sound bar to a subwoofer is simple. All you need is a monaural (mono) audio cable with the appropriate connectors on either end — an inexpensive item that’s readily available from both online and brick-and-mortar vendors. Once you have that in hand, just follow these three easy steps:
1. Locate the Subwoofer Out jack on your sound bar. As shown in the photograph of the SR-B20A below (circled in red), it’s usually located on the rear of the unit.

2. Locate the input on your subwoofer. Again, as shown in the photograph of the NS-SW050 below (circled in red), it’s usually located in the rear of the unit.
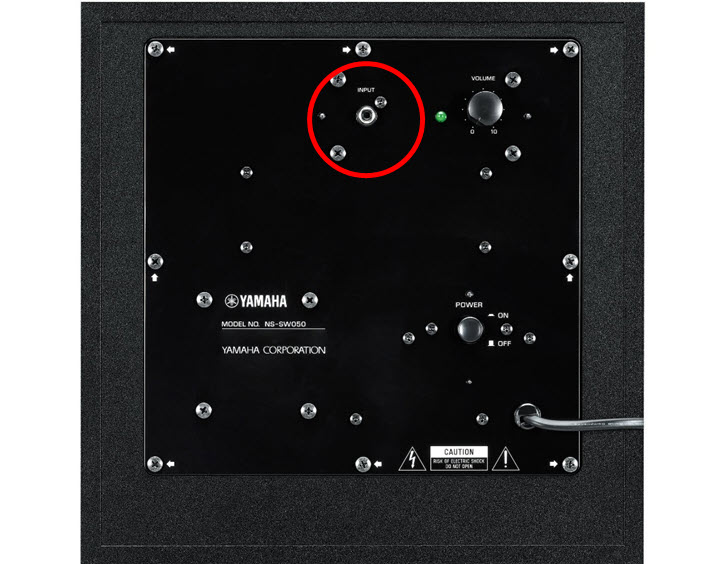
3. Plug one end of the cable into the sound bar’s Subwoofer Out jack and the other end into the subwoofer’s Input jack.
That’s all there is to it! Once connected, your sound bar and subwoofer will work seamlessly with each other: the sound bar will reproduce most of the audio frequencies, while the subwoofer will handle the lowest bass and “rumble” frequencies.
As to where to place the subwoofer for best results, there are no hard and fast rules. Unlike full-range speakers, subwoofers can be placed pretty much anywhere in a room. That’s because the human ear isn’t able to discern low frequency sounds as coming from any particular place — in technical terms, their sound isn’t localized. So, with just a little trial and error to determine what sounds best in your room, you’ll be up and running … and you’ll discover that it’s with a sound bar and a subwoofer that the real sonic fun begins!
Need some more convincing? Check out this blog:
Three Reasons to Add a Subwoofer to Your Sound Bar
You might also want to read these postings:
Click here for more information about the Yamaha SR-B20A sound bar.
Click here for more information about the Yamaha NS-SW050 subwoofer.


