A Bassist’s Guide to Compression
It can be an essential tool in developing your signature bass sound.
Using compression on your bass is the musical equivalent of putting salt in food. If you’ve never tried it, you probably think your sound is fine without it. But once you succumb to the intrigue and finally figure out how to add just the right amount, you’ll probably feel as though you can’t live without it.
Just a pinch of compression helps emphasize unique characteristics of your bass and tone that may not have been obvious beforehand. Even a small taste may make your bland bass sound bolder. But as with salt, too much of it can be overwhelming, leaving you with a sound that’s unappealing.
Don’t Get Lost in the Shuffle
Let audio snobs argue over whether compression is an effect or not. All I know is, it’s an essential tool that has helped me craft my signature bass sound. I started using compression many years ago when I was playing in an instrumental trio and found my bass lines getting lost all too often behind the wall of guitar and drums. In particular, when things went from loud to soft, then back to loud again, I could tell from the stage that my bass sound wasn’t keeping up. I was getting stepped on, and so I needed to take back the space that was rightfully mine to occupy.
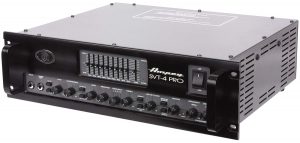
I knew that compression could help me even out my level, add some punchiness, and would enable me to lighten my attack without my volume dropping so that my bass would be clearly audible in the mix no matter else what was going on. However, my bass rig at the time was inadequate, so I went out and bought an Ampeg SVT-4 PRO. On top of having gobs of tone and power to play with, this bass amp comes equipped with a high quality built-in compression circuit that helped put me back on level ground with my bandmates. Ever since then, I’ve always used some sort of compression in my signal chain.

Why Compress?
Some bassists use compression to control their overall volume. Others use it to contain the dynamics of their attack. Sometimes it’s employed to add punchiness or sustain; other times, to help meld the bass’ fundamental note to the concussive impact of the kick drum — a very important part of rock music. Some players use compression as a form of EQ, to warm up their sound or give it a retro feel, with that super-beefy, flatwound thumping groove … sometimes accompanied by an obvious pumping effect.
You might even have compression on your bass without even knowing it! Many live sound and recording engineers don’t hesitate to apply whatever type and amount of compression they think is appropriate … and they may or may not bother to tell you about it. They use it for the same reasons you would: to keep your bass level steady and hot, yet free from clipping and distortion.
The Shape of Things to Come
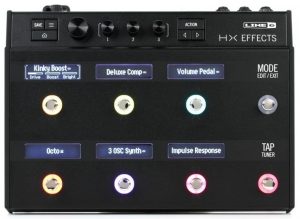
Compressors used to be big, bulky analog devices, but today they come in many shapes and sizes. Some stompboxes are dedicated to that one task, but many times you’ll find you need the flexibility, capability and control baked into a user-tweakable patch in a multi-effects processor like the Line 6 HX Effects.

Some bass amps (like the previously mentioned Ampeg SVT-4 PRO) come with compression as a built-in feature, but other times you may want a dedicated compressor with more bells and whistles, such as a standalone rack unit or a software plug-in.
Basic Settings
Here are brief explanations of basic compression parameters and some suggestions for how they can be tweaked to help you get the most out of your bass sound:
– Threshold. This determines the level at which compression kicks in. Any time your signal is louder than the threshold you set, the volume will be reduced (i.e., compressed). In a sense, less is more here — the lower the threshold, the greater the degree of compression. Setting the threshold high results in only compressing the loudest notes that you play, meaning that your dynamics will stay natural-sounding. The higher the threshold, the more your dynamics will be squashed.
– Ratio. The higher the ratio setting, the greater the amount of compression that’s applied to the signal (over the threshold you set). Think of it as somewhat of a magnifier, in the sense that the ratio determines how much your signal is reduced. A ratio of 2:1 cuts the volume above the threshold by half, while a 10:1 ratio will squash it tenfold (in other words, a +10dB signal will be reduced down to just +1dB). In essence, the higher the ratio, the more consistent your volume will be, allowing your sound to be turned up in the mix. If you want to absolutely limit the volume of your signal (to protect your speaker, for example), you can set the ratio to ∞:1 (infinity to 1), but most bass players choose a ratio somewhere between 2:1 and 4:1 to get the benefit of some peak reduction without losing all of their dynamics.
– Attack. This is measured in milliseconds, and determines how quickly the peak is reduced. Short attack times rein in your initial transients (i.e., when you dig in with a pick over a neck-position pickup or do a slap or pop) to smooth your sound by keeping things tamped down and under control. However, if the attack is too fast, all peaks will be affected, and your bass will sound unnatural. Slow/long attack times will allow you to coax more sustain out of your bass, but at the expense of allowing most or all transients to pass through unscathed.
– Release. Sometimes referred to as decay, this setting dictates how quickly the compression lets up. Since the optimum release time depends largely upon tempo and genre, the key here is experimentation. Properly set release times can effectively add sustain to your notes, but if you set the release time incorrectly you’ll end up drawing attention to string noise as you move between frets.
– Hard knee / Soft knee. A hard knee setting causes compression to kick as soon as your signal has crossed the threshold, immediately reducing the signal at the ratio you set. A soft knee setting gradually increases compression as your signal reaches the threshold, resulting in a smoother, more natural sound that helps maintain your dynamics.
Last but not least, keep in mind that there are many different types of compressors, including VCA, FET, optical and Vari-Mu — and the best one for your bass sound is a subjective decision. (Click here for our “Why Compress” blog article, which provides a description of each.)
If you know your bass sounds great when you’re playing on your own but can’t be heard clearly in band situations, that’s a red flag telling you that you should strongly consider adding compression to your sound. And even if that’s not the case, compression is well worth checking out, as it’s capable of improving almost any bass sound when used correctly. What are you waiting for?
Check out our companion article “A Guitarist’s Guide to Compression.”
Click here for more information about Yamaha basses.


