How to Set Up Your Bass
Keep your bass in top playing condition with these three simple steps.
Your bass may be a workhorse, but even workhorses need some TLC from time to time. Seasonal temperature and humidity changes, getting jostled around in the back of a van on the way to a gig, or simply being played regularly are all enough to throw even a great bass out of whack. Tell-tale signs of mild distress may include buzzing strings, or notes that sound sharp or flat even though you just tuned up.
When this happens, some manual adjustments may be needed to get your bass back into optimal playing shape. These tweaks — adjusting the curvature of the neck, raising or lowering the string height and setting the intonation — are what’s known as a “set-up,” and you can actually do it all yourself if you know what you’re trying to accomplish, understand how to execute each step, and have the right tools to get the job done. Plus — and this is an important plus — you have to be willing to take things slowly.
That’s because set-ups aren’t something to take lightly. All the adjustments are interrelated, which means you can’t usually get away with doing one without doing them all. More importantly, if you don’t do them properly (and slowly), you can exacerbate issues or even damage your bass.
If this worries you, know that you can always bring your bass to a qualified guitar technician (“guitar tech” for short) or a luthier. Your local music retailer should be able to refer you to these kinds of specialists — in fact, larger stores may even have one on the premises — or ask a guitarist; they usually know a good set-up person. There’s no shame in turning to a professional, but even if you know that’s the route you’d prefer to take, I’d still encourage you to read this article. It’s important to know how the different parts and components of your bass work together even if you don’t want to make these adjustments yourself.
If you’re comfortable taking the DIY route, you’ll save significant money each and every time your bass needs a set-up. What’s more, doing it yourself puts you on much more intimate terms with your bass. Wine, chocolate and flowers won’t be needed, but what you give is what you’ll get back.
Here’s what you need to get started:
Must-haves:
- Screwdrivers – Flat-head and Phillips types of various sizes, ideally steel-tipped so you don’t strip any screws
- A full set of Allen wrenches and socket wrenches (in both metric and standard sizes)
- A tuner
Nice-to-haves:
- A new set of strings
- A ruler with 1/64″ increments
- A capo
- A workbench or a large table with a soft cover (towels or blankets work well), or a couch, bed or other large, non-abrasive space on which to lay your bass down
1. ADJUST THE BOW
How much concave bend — commonly referred to as “bow” or “relief” — the neck of your bass requires is up to you. Players who want their string height (i.e., the “action” of the bass) high might add some bow because they have an aggressive style and like to dig in. Bassists with a lighter touch often prefer a straighter neck to get the action as low as possible without generating fret buzz.
To add or reduce the bow, you adjust the truss rod. This is a steel bar that runs underneath the fretboard roughly from the nut at the top of the neck to the place where the neck meets the body. It’s there to counteract the relentless string tension that would otherwise pull the bass’s headstock toward the bridge and render the instrument virtually unplayable. The truss rod can be adjusted by either a socket wrench, an Allen wrench or a screwdriver, depending on the manufacturer and the age of the bass. To access it, you have to use a screwdriver to remove the truss rod cover (usually located either just behind the nut or underneath the pickguard), as shown in the photos below.
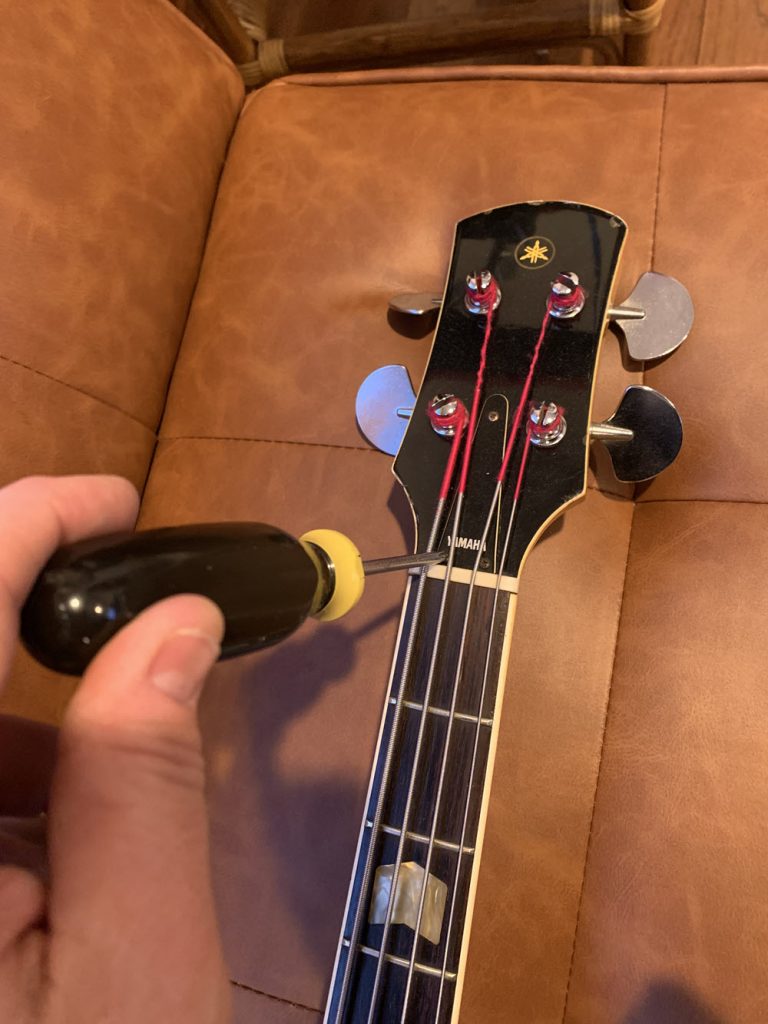
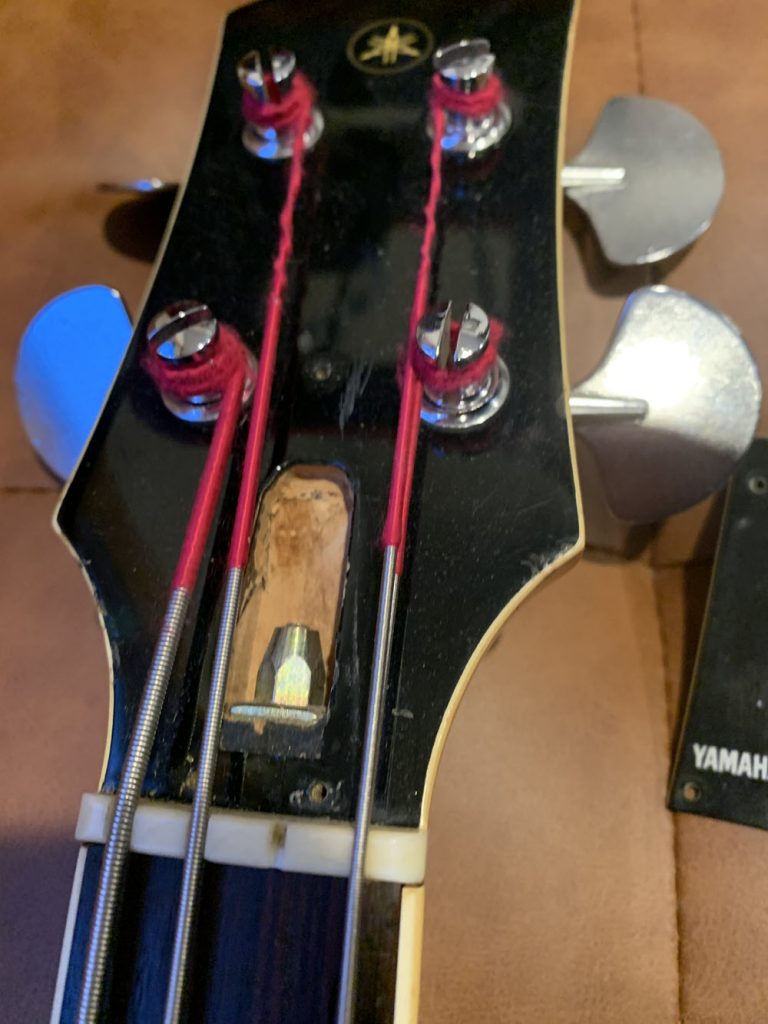
Start by detuning your bass (this relieves string tension and makes the job easier), then remove the truss rod cover and identify the correct wrench or screwdriver needed, making sure it snugly fits the head of the truss rod. Slowly (yes, there’s that word again!) give the truss rod a quarter-turn counter-clockwise (to loosen and add bow) or clockwise (to tighten and straighten the neck).
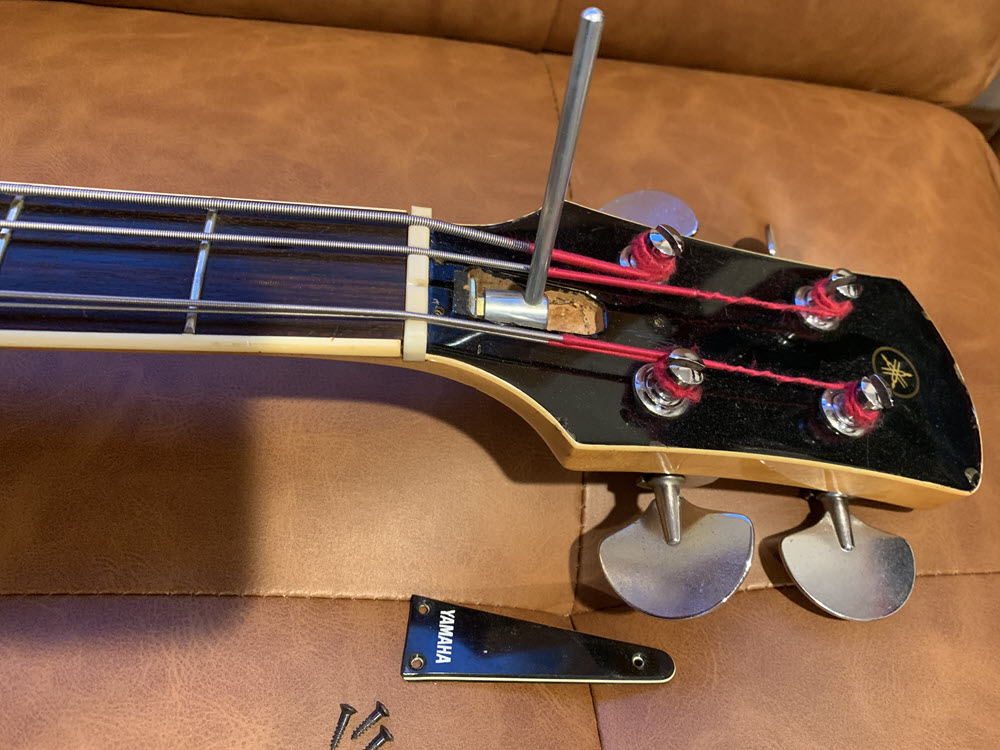
Now retune the bass, then use a capo (or your finger) to fret the lowest string at the first fret with one hand. With your other hand, fret the same string where the neck meets the body, as shown in the photo below.
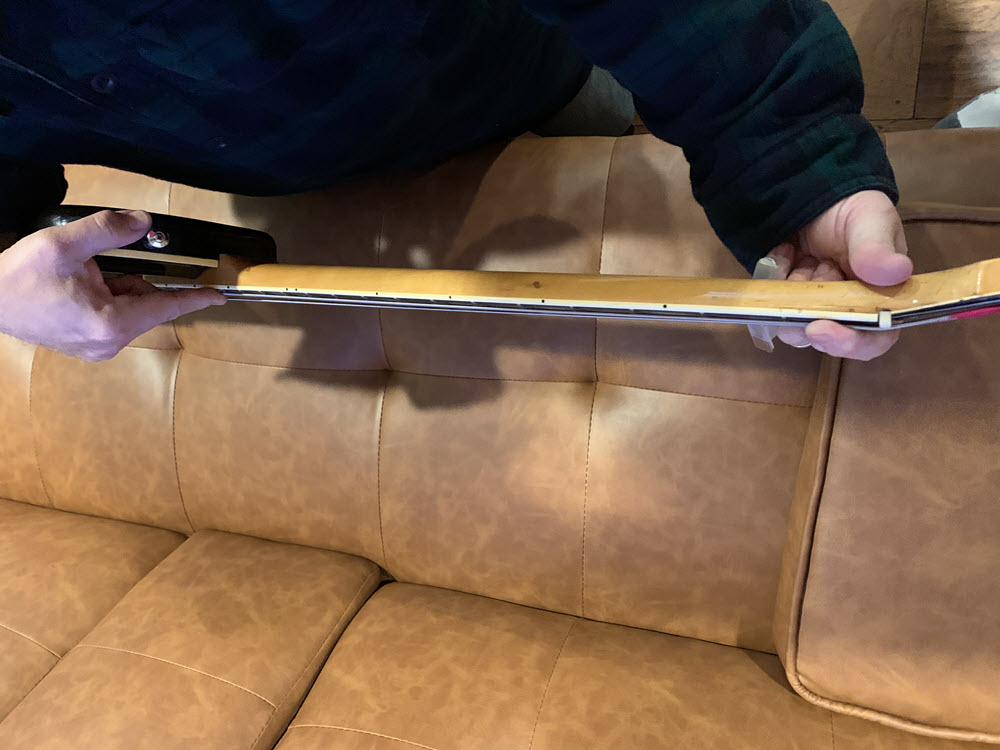
Look at the space between the top of the seventh fret and the bottom of that lower string. If there’s roughly .015 inches (1/64-inch) of space or less there, you’ve nailed it. If the string is touching the seventh fret, you need to add more bow by giving the truss rod another quarter-turn (or less) counter-clockwise. If your initial adjustment doesn’t give you the desired result, repeat the process, but do so carefully and slowly. (I know I’m repeating myself, but it bears repeating.)
CAUTION: If you feel heavy resistance while turning the truss rod clockwise, stop tightening it and turn it counterclockwise a quarter-turn, then take your bass to a qualified tech. An overtightened truss rod can cause stress cracks in the neck, or the truss rod itself can even snap, which is a serious and expensive problem to repair.
2. ADJUST THE STRING HEIGHT
This is accomplished by adjusting the height of the bridge saddles located on top of the bridge; there are two per string (one on either side of the string), as shown below.
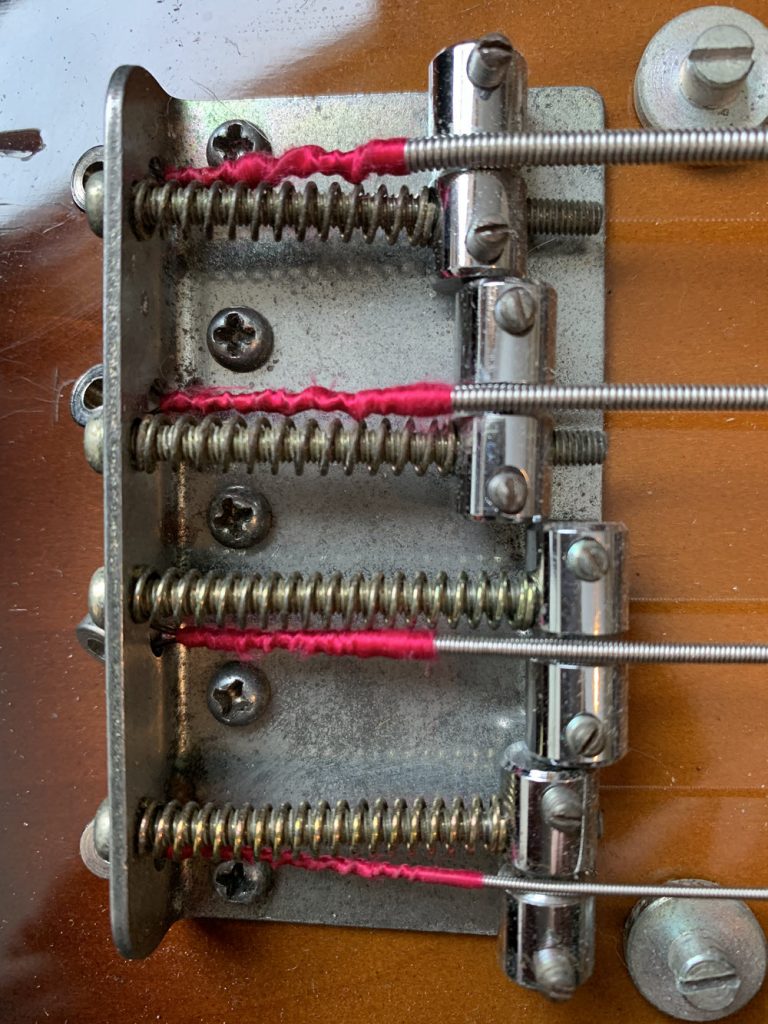
Adjusting one saddle is relatively simple, but getting all of them to the right height can be a challenge. That’s because the string height off the fingerboard should create a consistent arc across the fingerboard’s radius, measured width-wise.
Start by determining the appropriate screwdriver or Allen wrench needed. Make sure you’ve got the correct size because the wrong tool can strip those small screws. Clockwise turns raise each saddle’s height; counter-clockwise turns lower it.
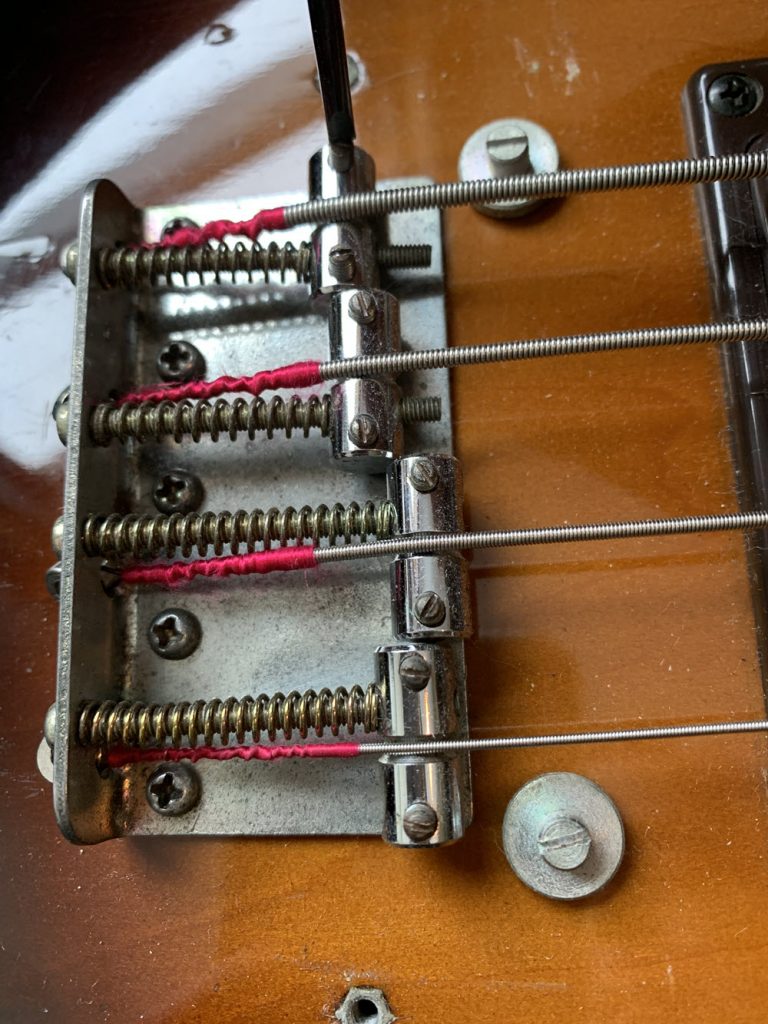
You can eyeball this as you’re making the adjustment, or for more precision, use a ruler to measure each saddle’s height. After each slight tweak, play a note at every fret to ensure there’s no buzzing. If there is any, or if you’re not completely happy with the overall “feel” of the fingerboard at this point (if the height of the saddles is uneven, you’ll probably notice it when playing), keep tweaking. It’s a precise adjustment, so be patient. When you’re satisfied with the results, it’s time to move on to adjusting intonation — the final step in the set-up process.
3. ADJUST THE INTONATION
Intonation is probably the most tedious and frustrating step to perform, but it’s absolutely necessary unless you enjoy being out of tune (which will likely result in your having to play solo for the rest of your life). Proper intonation requires that you set the saddle the correct distance from the nut so that a note played anywhere on the fretboard is identical to the mathematical pitch it’s supposed to match. How far off your intonation is becomes more obvious and pronounced the higher up the fretboard you play.
When a string’s saddle is closer to the nut than it’s supposed to be, notes will be increasingly flat as you go up the fretboard. Conversely, when the saddle is farther away from the nut than it’s supposed to be, notes will be sharp. You can fix this with slight turns of the saddle screws located on the bottom of the bridge, as shown below. This adjustment will serve to move the saddles forward or backward to their rightful position.
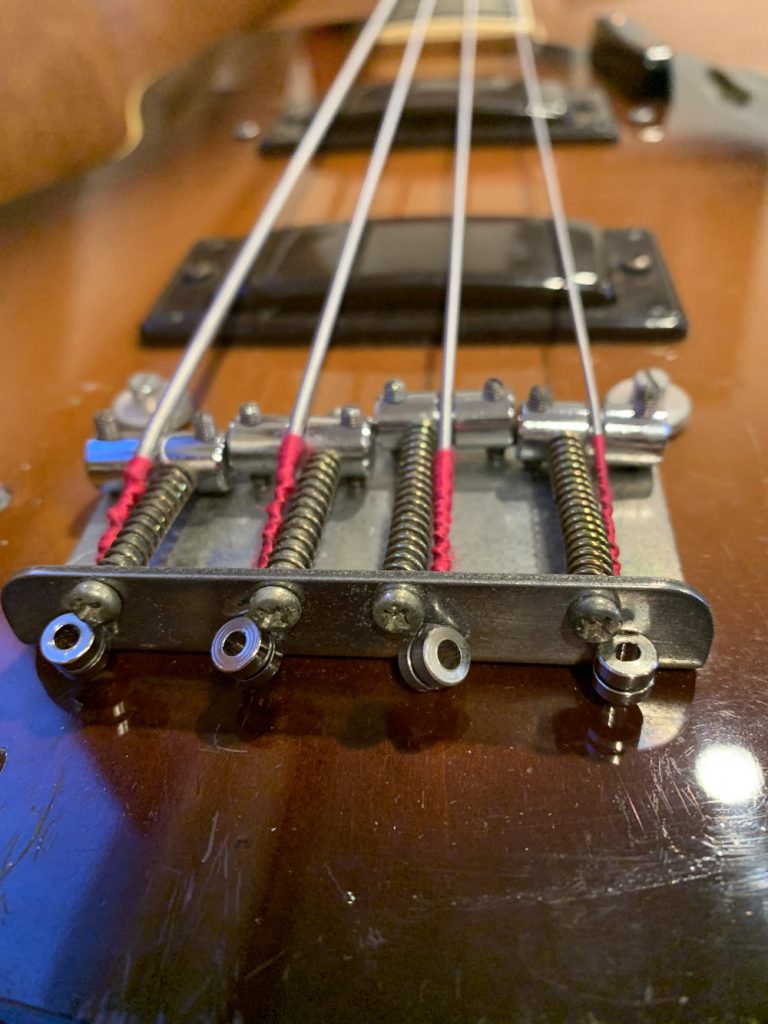
To start the process, plug into a tuner, then tune the bass. Now play the harmonic of the string you’re starting with at the twelfth fret and closely watch the tuner to ensure that the tuning is accurate. Then fret that same note at the twelfth fret and look at the tuner again. If the tuning is the same, that’s great, and you can move to the next string; if it’s not, you’ll need to move the saddle.
Before you make any adjustments, detune the string a bit so that the saddle screws glide easily across the bridge rather than scratch it under tension. Now locate the saddle screw for that string. If the note was sharp, turn the screw clockwise a half-turn, retune the string, and, using the tuner, check both the harmonic and the fretted note at the twelfth fret. If the note was flat, perform the same steps but turn the screw counterclockwise. You’ll know you’ve got it right when the harmonic and fretted note are exactly the same.
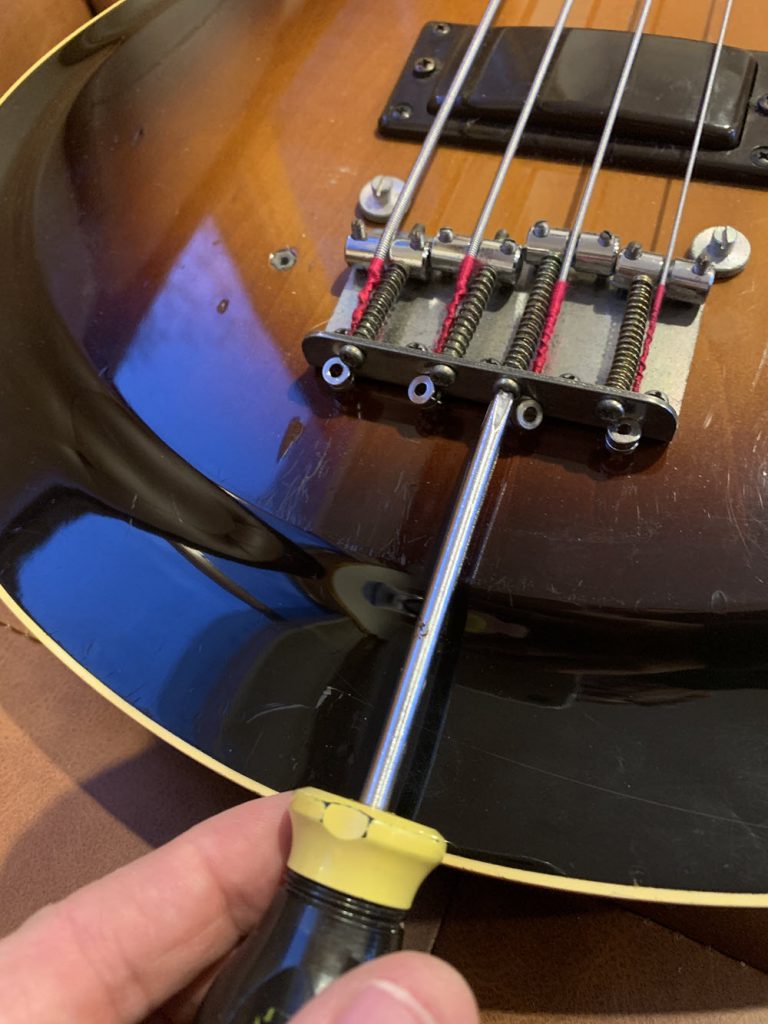
Repeat this for each string and retune the bass when you’re done to confirm that all the strings are intonated properly. This is necessary because, just as the tuning of one string affects all the others, the same is true of intonation. It’s common to have to fine-tune your intonation a number of times before you get it right, and it may take you a little while to get a feel for how much of an adjustment to make. As long as your eyes stay peeled on your tuner, you’ll eventually get it. (I promise you this process gets easier every time you do it.)
Before deciding that your set-up is complete, plug your bass into your amp and play it for awhile. You want to be sure the action is the way you like it, there’s no fret buzz, and the intonation is spot-on. Get all three right and playing your bass will become even more pleasurable than it is already!
All photos courtesy of the author.
NOTE: Yamaha cannot be held responsible for any damages that may occur to your instrument as a result of doing your own setup.
Click here for more information about Yamaha basses.


