The Advantages of Bi-Amping
On its own, an electric bass guitar makes very little sound at all. That’s why amplifying it to the point where it can not only be heard, but felt, is no small feat. There’s a lot of science — and art — that goes into designing and building a high-performance amp and a sweet-sounding speaker cabinet. But all you need to determine whether a bass rig sounds great or just meh is a little objectivity and a working set of ears.
Not satisfied with what your rig is delivering? Dig into the specs and maybe you’ll find that your amp doesn’t have enough power to deliver the current needed to accurately reproduce deep lows. In situations like that, when you play a low B on a five-string bass — or even a low E on a four-string — your sound will sag instead of making your chest pound.
Or maybe one day you’ll realize that your 2 x 15″ cabinet sounds noticeably shrill when you’re playing up the fretboard, due to the laws of physics that make it difficult for large speakers to accurately play high-frequency sounds. (This happens to varying degrees based on the relationship between the diameter of the speaker cone and the wavelength of the frequencies they’re trying to reproduce.)
And then, of course, there’s the age-old issue of speaker placement: Everything sounds fine when you play by yourself during sound check, but throw the entire band onto the same stage at full volume and suddenly you can’t hear yourself.
The good news is that all these issues can be dramatically improved, if not completely solved, by a technique called bi-amping. Ready to learn more? Read on …
How It Works

Bi-amping is accomplished by splitting the signal from your electric bass into two signals — one for the high frequencies and one for the low frequencies — and sending them to separate amps. In a typical bi-amp setup, the two signals are routed from the amps to different speaker cabinets — one to handle just the lows, the other to handle everything else. However, there are single cabinets that are bi-amp-capable too.
Some basses, like the Yamaha Attitude Limited 3, come equipped with separate outputs for the different pickups. This particular bass was designed in partnership with famed bassist and bi-amping pioneer Billy Sheehan. With the Attitude Limited 3, you can separately route the signals from the neck and middle pickups to individual amps, letting you take advantage of the inherent sonic characteristics of each pickup position. (Generally speaking, neck- and mid-position pickups are full of warmth and thickness, whereas bridge-position pickups are bright and ideal for an aggressive attack.)
Crossing Over
But what if you want to bi-amp and your bass only has a single output? No worries: You have a few different options. However, whichever option you choose, your bass signal has to meet up with a component called a crossover, which has the job of splitting the incoming signal into two signals, based on their frequency range. Crossovers can be standalone devices, but more commonly, they are either built in to your amp (as hardware) or effects unit (as software).
If you’re simply looking to split your signal for more efficient reproduction of your sound, having an amp with a built-in crossover (or using a standalone crossover) might be the best approach. But if you’re like me and are looking to use lots of different effects, using a multi-effects processor with a built-in virtual crossover (such as the Line 6 Helix®) is an interesting option to consider; this gives you the same sophisticated signal splitting at your fingertips, plus all of your effects can be consolidated into a single unit rather than sprawled out on the floor in front of you. You can use the Helix to apply chorus or fuzz, for example, to the higher frequencies while compressing the lows, keeping the fundamental bottom of your sound tight and controlled while adding as much or as little frill as you like to everything else.
Whether real or virtual, every crossover enables you to specify the frequency where your signal gets divided, thus serving as a kind of traffic cop at a fork in the road. The frequencies below the adjustable crossover point (i.e., the specific frequency denoting that fork in the road) will be sent to one amp, and the signal above the crossover will be routed to another amp, giving you distinct control over the tone and the volume of each.
Real-World Applications
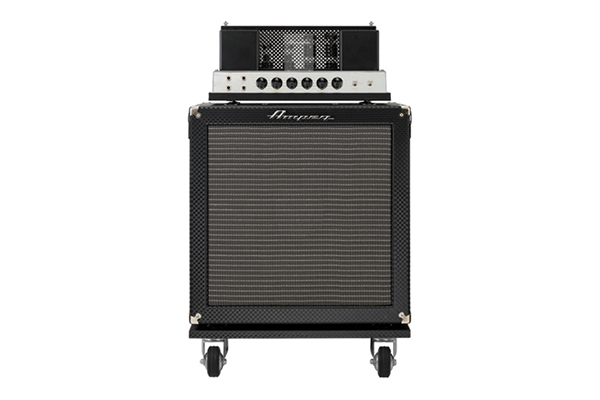
I typically play my bass through an Ampeg™ SVT-4PRO amplifier running in bridged mono mode, but into two individual cabinets, each with a single 15″ speaker. It’s a perfect rig for most situations, but if effect pedals are going to be involved I’ll sometimes opt to bi-amp, in which case I swap out one of the 15-inch cabinets for a 2 x 10″ that gets stacked on top. The SVT-4PRO has a built-in variable crossover that I set to around 200 Hz so that the lows are isolated in the 1 x 15″ cabinet, leaving the 2 x 10″ to handle the mids, highs and all the gristle coming from the effects. (This is part of what makes the SVT-4PRO a true workhorse — it’s easily switchable for a variety of desired performance scenarios, including bridged mono, true stereo and full or shared bi-amping responsibilities with another amp. And that’s to say nothing about how great it sounds in each instance.)
With this setup, gobs of power are dedicated to reproducing the fundamental lows, while the mids and highs sound glorious whether I’ve got the slurp-and-burp pedal factory engaged or off. If played through my regular setup, things would still sound good, but when bi-amped, the sound is tighter and more articulate.
Keep in mind that this setup is not plug-and-play — it does require some tweaking to get it right. Every individual speaker and cabinet is designed differently, and different speaker configurations have different power-handling capabilities and sensitivity ratings. These variations can be even more pronounced if you mix and match speakers or cabinets from different manufacturers.
That said, getting it right isn’t that hard to do. Once you make the respective volume adjustments to blend the separate sounds correctly, you’ll be able to throw the entire kitchen sink at your bass rig with incredibly satisfying results — powerful and unencumbered lows mixed with punchy mids, crystalline highs and rich harmonic content. That’s about as good a starting point as there is, isn’t it?
Check out Michael’s other postings.
Click here to learn more about the Yamaha Attitude Limited 3.
Click here to learn more about the Line 6 Helix.
Click here to learn more about the Ampeg SVT-4PRO.
Keep reading