How to Play the High Notes on Your Guitar
Guitar fretboard navigation made easy.
I’ve always loved how logical the piano keyboard is. Seven octaves (plus a minor third) of chromatic tones, color-coordinated in ebony and ivory to indicate the sharps, flats and naturals. Better still, the distance between each note is always the same, regardless of the octave.
If only things were that simple for guitarists! We need to navigate the fretboard in a very different way. For one thing, the distance between frets gets smaller as you go higher and higher up the neck (for reasons detailed in the blog posting “Why Do the Spaces Between Frets Grow Narrower Down the Neck?”), limiting the space we have to articulate melodic and chordal passages. In addition, we have to deal with the fact that the interval between the G and B strings is a major third, but is a perfect fourth between the other string pairs. We also must account for open strings within our chords and memorize which notes fall within each fret location.
Perhaps we should all get bonus points for even attempting the intrepid journey from our guitar’s lowest notes to its highest ones!
In this article, I’ll offer some tips on how to get positive results no matter what notes you’re playing, along with some specific advice about what to do when you are running out of oxygen in the upper stratosphere. Note that, like electric guitars, some acoustic guitars have cutaway designs that make life easier for those who like to venture all the way up the fretboard. The techniques discussed in this article apply to both, and will allow you to go as far as you possibly can on any given instrument, electric or acoustic.
The Lowdown
Guitar players that primarily stay in the open position (close to the nut and headstock) will appreciate the open space between the frets in this area. If you also have large hands, guitars with wider fretboards (i.e., a wider nut width) are available to accommodate you.
When I’m working with a new student, I often suggest they use a capo to place chord voicings higher up on the fretboard in order to reduce the size of the chord or scale shape. The student can then move the capo down the neck, one fret at a time, until the shapes are manageable in every location.
The Fingertips
Unless a barre is required, I’m a huge advocate of playing chords and scales with the fingertips — in other words, with the tips of your fingers facing the strings at a 90-degree angle to the fretboard. This will keep chords nicely articulated and free from choking or buzzing on adjacent strings. This technique will also produce clean results when you climb further up the neck.
The Wrist
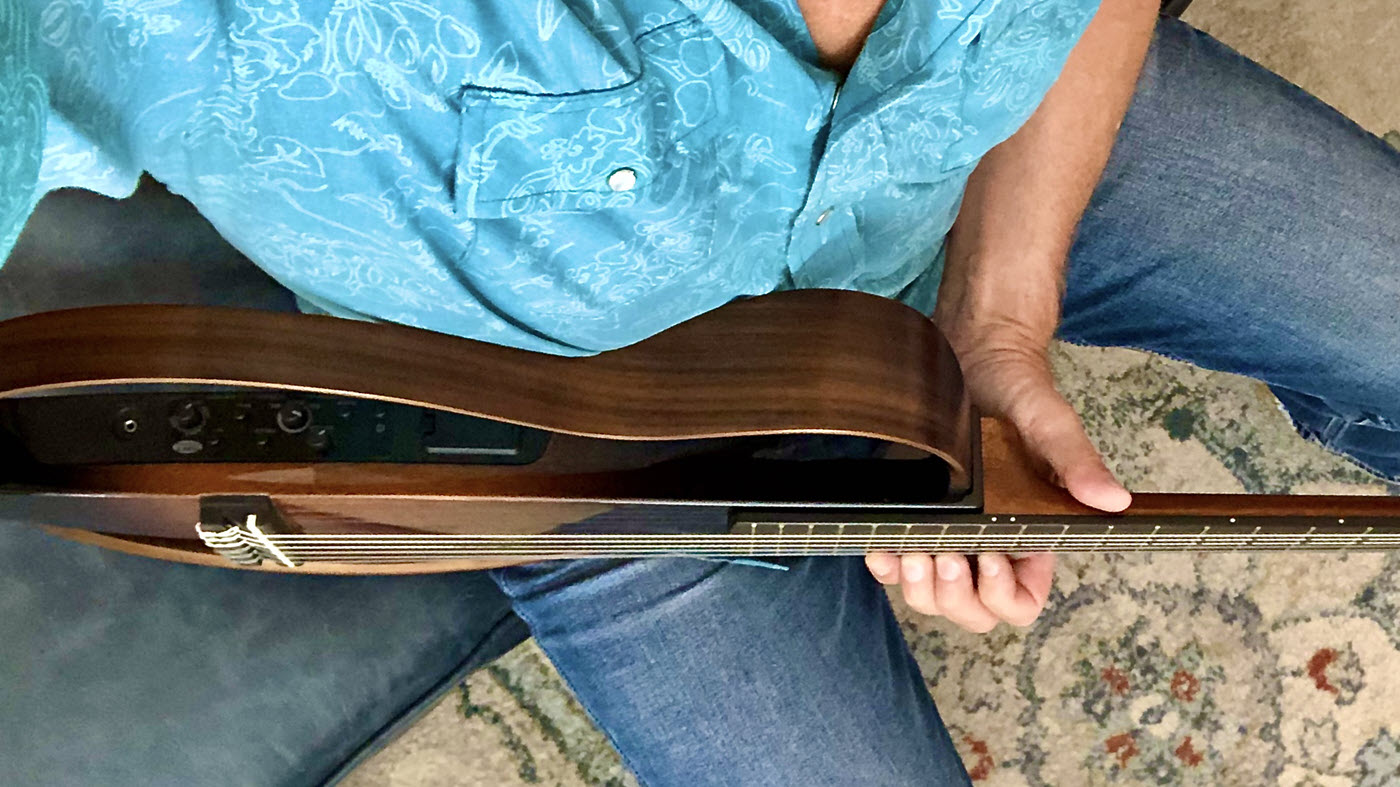
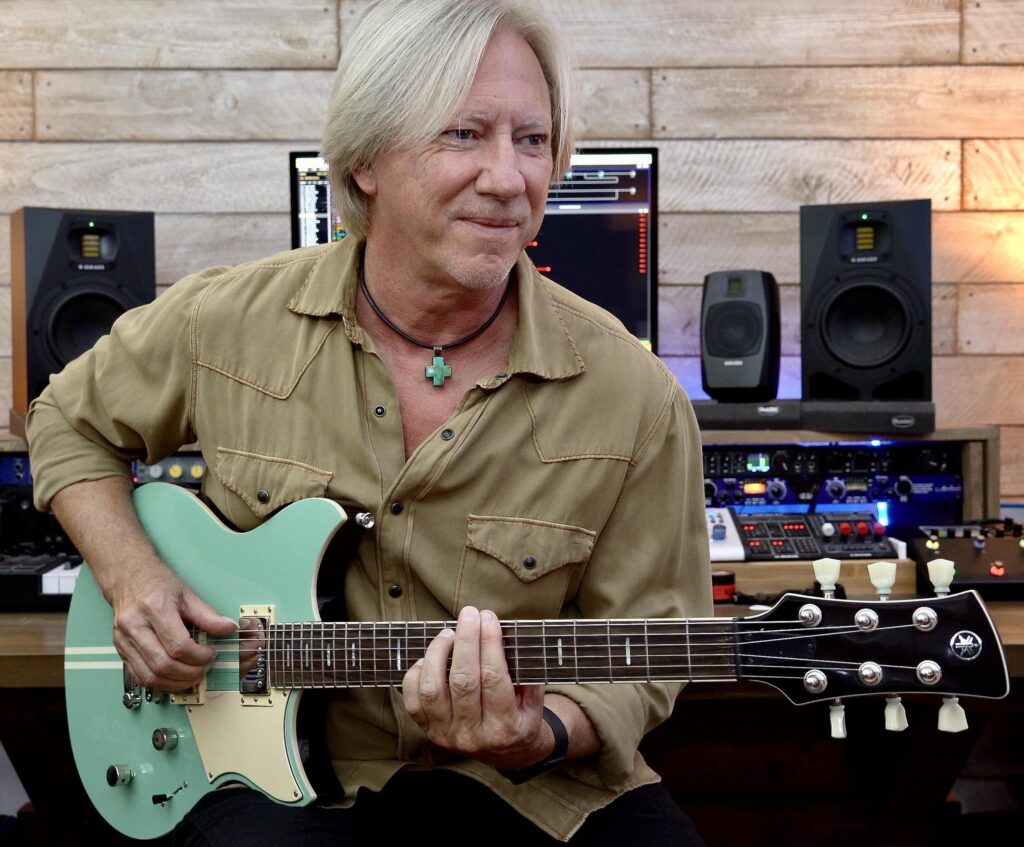
Reducing the amount of bend in your wrist will allow the tendons and fingers to move with fewer restrictions. The best way to achieve this is to place the guitar on your right leg (if you are right-handed) and rotate the guitar at a 45-degree angle to your body. As shown in the photographs below, moving the guitar headstock away from you at this angle will straighten the wrist and make articulations along the full length of the string much easier.


Classical Posture
Right-handed classical guitar players do something very similar: They rest their instrument on their left leg, raise their left foot on a low footstool and angle the headstock upwards at approximately 45 degrees. (Left-handed players do the opposite.) Again, this approach allows for a smooth transition of fretboard locations and keeps the wrist relatively straight. Here’s a short video that shows how it works:
Standing Up
Of course, we want to look as cool as possible when we perform, and we’ve all seen the guys that have their axe slung super low when they rock out. It may look the “business,” but the unmistakable fact is that it’s really hard to play when the wrist is bent to such a degree. Instead, raise the guitar strap to support the instrument as if you’re at a sitting position, then position the guitar away from you at 45-degree angle. It still looks pretty cool, and trust me, you’ll be able to play much better.
Mind you, I’m not advocating having the guitar under your chin at gigs … unless you’re in a Merseybeat tribute band!
Action/String Tension
Unless you’re playing slide guitar, you’ll almost always want to make sure that your guitar has been set up with the lowest possible action — that is, with the strings as close to the fretboard as possible, without any buzzing. This is especially important as you play further up the neck, where the action will get higher and the string tension will increase.
This means that any articulations will need more finger strength, and that the time it takes for the string to reach the fret wire will take longer. That’s a good reason why you should practice scales at every possible fretboard location to get used to these variances. Play along to a metronome or groove track and record yourself playing in both the lower and upper regions. If there are timing discrepancies, you’ll want to make the appropriate adjustments. Keeping your fingers close to the strings at all times will help reduce timing errors due to the two distances (fingers to strings and strings to fret wire) changing.
Scale Length
Guitars come in various scale lengths, and different lengths change the fret spacing, so finding a guitar that works for your hand size and playing style is crucial. Scale length also impacts string tension — the longer the guitar, the greater the tension. For example, a scale length of 25-1/2 inches has a higher string tension than a guitar with a 24-3/4 inch scale length.
Neck Join
The place where the guitar neck joins the body will also have a big impact on the playing range of your guitar. Guitars that join at the 12th fret will have less range than those with a 14th fret neck join. If playing in the upper ranges is an important part of your repertoire and style, this should be a very important factor in deciding which guitar to buy.
String Gauge
It may be worth experimenting with string gauges too. If you’re struggling with medium- to heavy-gauge strings (i.e., 12s or 13s) in any area of the fretboard, you may want to try a lighter set, such as 11s. This will often affect the tone, but is well worth the trade-off.
Man in the Mirror
Practicing in front of a mirror is also a good idea. You’ll be able to see the transitions and fret spacings more easily, and it may also allow you to see any problem areas in your technique or posture.
Whether or not you expect to be playing in the high register of your guitar very much, I advise you to practice your scales, arpeggios and chord voicings in every fretboard location. As you do so, work your way upwards to the highest area in which you can play comfortably. Understand that this is actually the highest range of your guitar regardless of how many frets you see; if you can’t reach them, you can’t use them!
Lowering your thumb to the lower bout of the neck will also help you reach the upper strings in the higher ranges of the fretboard.
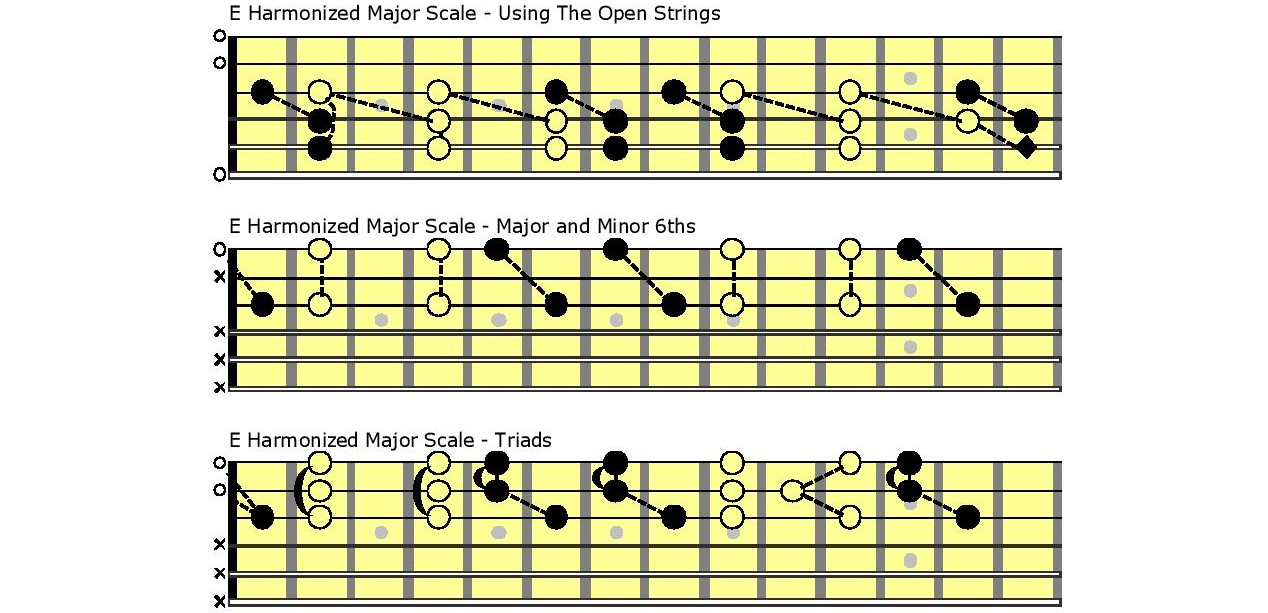
Try playing the following three musical exercises of the harmonized E major scale and focus on making all the fretboard transitions smooth, with open strings ringing out without a buzz. This will help you adjust to the fret spacing of your particular instrument.
The Video
In this video, I’m playing a Yamaha SLG200NW SILENT Guitar™ — a nylon-string with a classical neck width that is uniquely qualified for recording, live performance and, of course, silent practice sessions thanks to its headphone jack. It also offers an auxiliary input for jamming to tracks and some wonderful onboard effects. (The electronics on the SLG200N and SLG200S models are identical, but their necks are slightly narrower, making them a great choice for people accustomed to electric guitars or those players with smaller hands.)
Notice how the 12th fret neck join and the generous cutaway allows me to easily access those upper frets and navigate the full length of the fretboard, creating vertical and horizontal melodies using chords, double-stops, arpeggios and single-note solo lines.
The Wrap-Up
Before purchasing any new guitar, consider its body style, neck join and pitch range to be sure it fulfills your musical needs and style. Once you’ve made your decision, be prepared to make any and all necessary adjustments to your posture, fingering and timing. The full range and potential of the instrument will then be yours to explore with relative ease.
Photographs courtesy of the author.
Check out Robbie’s other postings.
Click here for more information about Yamaha SLG Series SILENT guitars.


