Pop Guitar as an Entry Point
Try these five steps to introduce guitar in a process-focused, structured way.
Pop guitar is incredibly enjoyable and can serve as an excellent entry point for instrumental music programs at the middle and high school levels. It provides opportunities for student choice in selecting music literature and can offer nearly immediate success, even for students with no prior musical experience.
While the advantages of pop guitar are apparent, it’s important to consider potential drawbacks as well. As a professional guitar player, private instructor and classroom guitar teacher, I have witnessed the consequences when students exclusively rely on tutorial videos on YouTube, tabs, lessons from music stores or learning from friends in a product-focused manner. While they may learn how to play songs, there’s often a disconnect from rhythm, chord theory, aural skills and understanding notes on the fretboard.

Download this Yamaha Guitar Care Checklist for Students now!
It is possible to introduce pop guitar playing as an introduction to guitar with a process-focused, structured curriculum that addresses these vital topics while enabling students to authentically play the songs they know. Here’s the sequence I use for my beginning guitar students. This curriculum, Fretboard Fundamentals, is available through ShedtheMusic.
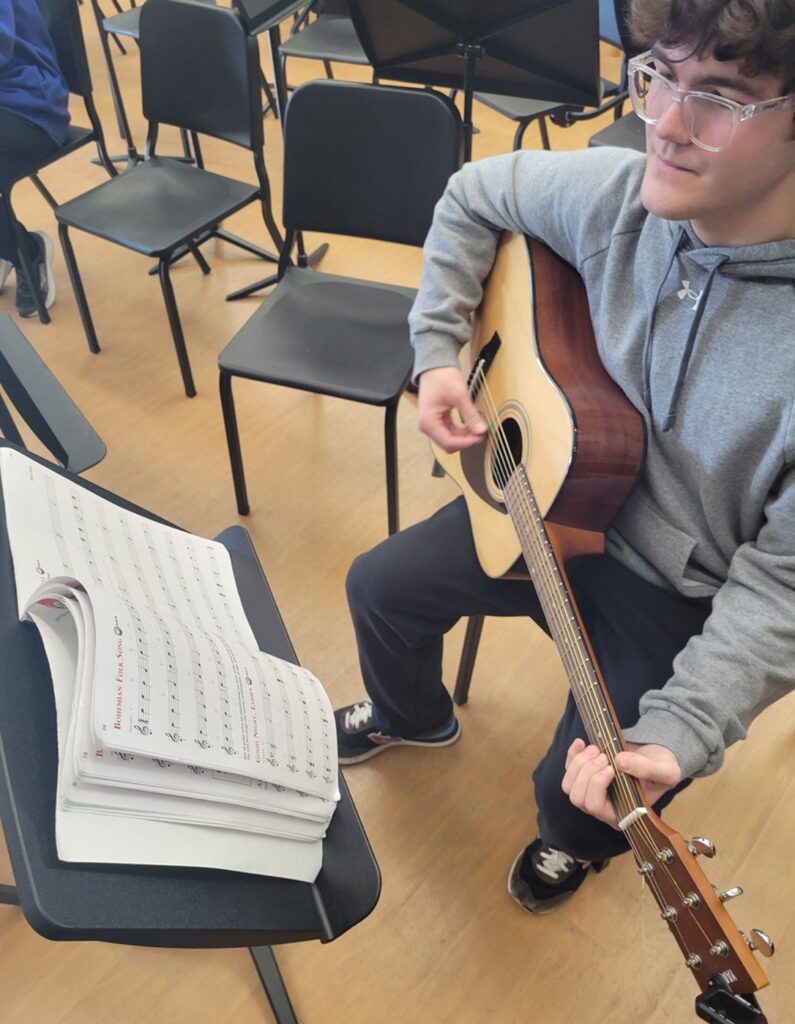
Step 1: Establishing Good Technique and Playing Simple Chords
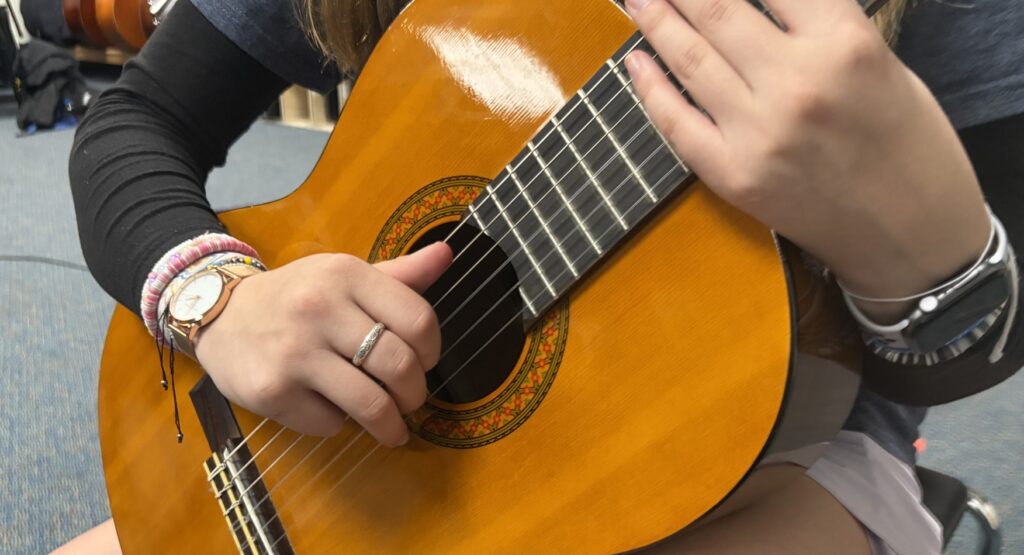
Bad habits are easy to form but hard to break. My first step with beginning guitar students is to ensure that they can successfully play something simple with proper technique. We begin by learning the notes of the open strings and how to play basic three-note chords.
I composed a song called “What You’re Going to Do” that focuses on the fundamentals of good left-hand technique and provides guidance on practicing and performing. The song encourages finger placement close to the fretboard and offers immediate success for beginners. Students learn and perform the song using a recording, a backing track or in pairs for assessment. Extra credit if they sing along while playing! It’s important to normalize singing from the beginning.
Step 2: Understanding the Guitar Fretboard and Notes
The next stage is teaching students how to locate notes on the guitar fretboard using the chromatic scale. Each fret represents a half step, so students can think of the fretboard as a chromatic number line.
I explain that moving up from a fret sharpens the note, and there’s no separate pitch for E sharp and B sharp. We start by identifying all the natural notes on the low E string and then proceed to identify flats. I also introduce landmark frets, such as the 12th fret, the 5th fret (matching the string above) and the 7th fret (matching the string below).

Once students can find these notes, we apply them to play the root notes of chords and simulate playing bass lines. I use audio-synced scores (made in a notation software) and lead sheets, allowing students to jam along with their favorite tracks while reinforcing their understanding of the fretboard’s notes. After covering the low E string, we repeat the same process with the A string, teaching students how to cross between the two lowest strings without shifting positions.
Once students have mastered the E and A strings, I proceed to teach them low E and A string riffs by ear. I have a collection of famous riffs recorded at different speeds to facilitate learning. Students can use these riffs to play for friends and begin developing a connection between their ear and the instrument. This unit culminates in a composition task where students create a metal riff using the low E and A strings and record it.
THE YAMAHA EDUCATOR NEWSLETTER: Join to receive a round-up of our latest articles and programs!
Step 3: Introducing Power Chords
A smooth transition from notes on the low E and A strings is to introduce power chords. The power chord shape offers students a chance to play chords while reinforcing their understanding of the notes on the low E and A strings. Because power chords have no chord qualities, students do not need to worry about shifting them when reading lead sheets. I incorporate power chords into songs selected for students, often working in small groups where they can play bass and chords together. Again, extra credit if they sing along.
To teach basic rhythms using power chords, I provide lead sheets with augmented rhythmic notation. Students can also challenge themselves by working through lead sheets of well-known songs written with rhythm section notation. Additionally, students can learn famous riffs using power chords with recordings available at different speeds.
This unit culminates in a pop-punk recording project where students create a chord progression, use power chords and bass, and incorporate a drum loop into their own pop-punk songs within small groups. Students enjoy the creative aspect, including writing lyrics and designing album covers and coming up with band names to enhance their experience.
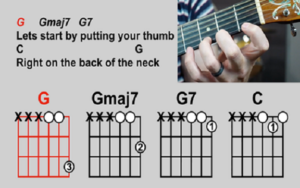
Step 4: Teaching Open Position Chords (Cowboy Chords)
The next phase of instruction involves teaching students open position chords, often referred to as cowboy chords. Traditionally, students learn these chords from chord charts, but I prefer to show them how to alter chord qualities by identifying specific chord tone locations within each chord shape. These dynamic chord charts enable students to find major, minor, major 7, minor 7, dominant 7 and other voicings using a single chart.
The class reads songs that feature cowboy chords together, and I introduce techniques for adding movement to chords through right-hand picking patterns. This unit culminates in a singer-songwriter composition task where students create a verse-chorus pop song using open position chords. Here is a PDF of dynamic chord charts with a chord quality chart to share with students.
Read my article on Teaching Guitar Chords.
Step 5: Introduction to Soloing with Emphasis on Blues Language
The final unit in my introductory class focuses on soloing. If you listen to most guitar solos recorded in the last 70 years, you’ll notice they are often based on the blues language. While the blues scale pattern is traditionally used to teach blues, I’ve found that students often lack intent and phrasing when learning this way. Instead, I guide them in playing blues through call and response activities and provide a lick library for students to learn in a manner similar to how we learn spoken language. Students are provided with listening lists of blues masters and instructional videos on playing bass and chords at various levels of difficulty. This unit culminates in a blues composition or performance where students work in groups of three, taking on the roles of bass player, chord player, and soloist. The 12-bar blues structure is repeated three times, allowing each student to play each role in their small group. I’ve found that teaching blues language in this manner significantly enhances students’ soloing abilities. Following this sequence, students are well-prepared to learn how to read notes in standard notation. They can apply their knowledge of the chromatic scale to each string, making it easier for them to excel in advanced guitar study.
Authentic Instruments
In order to implement this curriculum in an authentic way, you must have authentic instruments for your students to play. For the majority of playing, my students use classical guitars like the Yamaha CG122MSH or the Yamaha C40II because of their ease of use and ability to play without being amplified. We do, however play electrics and basses as much as possible. The Yamaha Pacifica 112V is the perfect classroom electric guitar. It is easy to play and it sounds great with all styles of much. A Yamaha BB434 bass helps round out the electrics by giving students an opportunity to feel what it’s like to play bass lines on a really high quality instrument. Throw in a Yamaha Stage Custom Bop drum set (great sizes for a small room) and you have a band!
It’s important to have a halo guitar in the room as well. The new Yamaha Pacifica Standard Plus is the perfect instrument for that. It’s the guitar that the teacher can play most of the time to demonstrate new concepts and ideas, but it can also be used by students for capstone projects, recording or just as a treat! This instrument is a pro level piece of gear that can be used in a modern band, jazz group or anything in between.
Keep reading