Tagged Under:
Engaging Wind Rehearsals
Try these tips on how to rehearse your winds section and maximize your time during rehearsals.
Differentiating instruction for a variety of instruments all in one group can be tricky because you must keep all students engaged. I use a number of rehearsal techniques that apply to all instruments, therefore engaging everyone.
Start with the Warmup
The warmup is when most of our instruction on fundamentals takes place. My warmups vary depending on things like how much time we have, where we are, who is missing, etc. Most of the time we work out of a warm-up book. I encourage you to look for two things in a warm up book: 1) it should have more exercises than just scales for everyone, and 2) it should have chorales in various keys. If your book does not have those, supplement to make sure your students are getting what they need.
For example, the book we use includes lip slurs for brass that are harmonized by the woodwinds and vice versa when the woodwinds are playing embouchure studies. Chorales provide a fundamental understanding of tone, balance, blend, tuning, etc. We make sure to do a chorale every day during warmup.

Use flexibility in your warmup. If you have an exercise that is a major scale in eighth notes that goes up to the ninth scale degree, but it doesn’t include articulations, make up your own! If it has articulations written in, play those. Then make up your own! Try slur two, tongue two. Slur three, tongue one. Tongue one, slur two, tongue one. Slur up, tongue down. The possibilities are endless. Now you have introduced articulation into your warmups and demonstrated your students’ ability to be versatile in their articulation abilities, which will come in handy when it comes to the repertoire.
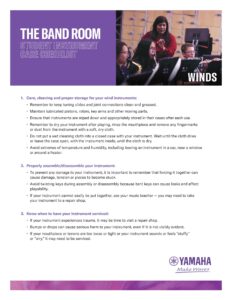
Download this Yamaha Winds Care Checklist for Students now!
Sometimes, I don’t even use a warm-up packet or book. When choirs warm up, I have never seen them use a prescribed book of warmups to find their sound. Some exercises I use I stole from my colleague’s vocal warm-ups! My hope in doing this is that students are thinking about what they are doing. Especially if you are doing the same warmups from the book every rehearsal (or even if you don’t, they are bound to repeat soon!) students can go on autopilot and ignore important aspects of the warmup. By describing the warmup to them (usually using solfege syllables), students now are thinking about what key they are playing in and how they are playing it. How is my balance? How is my blend? Am I matching articulation? Teaching a handful of warmups to students can come in handy when you are at a festival or an away performance and you need to warm up quickly as a group. You can very easily say “let’s play (insert warm up here) in (insert key here)” and everyone (well, let’s hope everyone) is on the same page.
Breathing
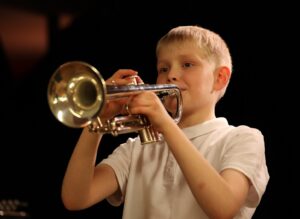
The breath is the most important component of playing a wind instrument. Breathing is something humans do so naturally that we think we know how to do it, but when it comes to playing an instrument, we somehow do it poorly. When something like breathing happens instinctually, it is very easy to ignore it when playing an instrument. The No. 1 issue I need to address in my wind students is breathing through their nose. When I see this happen, I stop and explain why we need to breathe through our mouths. When it continues, I simply remind them. It’s a very easy thing to see students doing wrong. It is also very easy to hear! The difference in sound when students breathe correctly is night and day!
THE YAMAHA EDUCATOR NEWSLETTER: Join to receive a round-up of our latest articles and programs!
Incorporate breathing into your warmup! I have found that this positively impacts students’ performance in two ways. First, they start thinking about their breath and are training their lungs and muscles related to breathing. This improves their breath support, and as a result improves their playing. After a break from breathing exercises in our warm-up, a student came to me and asked if we could add them back in because of how much he felt it helped his playing! Remember how important the breath is! Second, I have found that it improves focus during rehearsal. Breathing exercises are great for mindfulness and focus. Even if students aren’t aware of it, there are days their incorrect breathing could make or break me…err, I mean, the rehearsal. By having all students focus and regulating their breathing, we start rehearsal from a place of silence, not chaos.
Pitch Tendency Charts
One of the things I take time to do at the beginning of the year is to create pitch tendency charts. Each student will fill out a chart for every pitch on their instrument that indicates if a note is sharp or flat and how sharp or flat that note is. This becomes a resource for students for tuning their instrument. Now, when you tell the clarinets that the note they’re playing is sharp, they will (hopefully) know that the answer is not to pull out your barrel. Guess what, now that the note is in tune, the others are not! Students will need to work with a partner and a tuner. What is important is that the student playing cannot see the tuner. If they do — even though they may not think they are — they will adjust naturally to move the needle. That is what we want them to do when they hear, not see, that they’re out of tune!
I have done this lesson in a couple of ways. First, you can have students pair up. They don’t even need to be the same instrument! Hopefully, they won’t mess around. They take turns completing the task. Another option is to have one student (let’s call them the “tuner watcher”) work with all the members of their section. Then there are two students away from a section at a time and the other students can run a sectional or remain in your rehearsal. The “tuner watcher” will need someone else to become the tuner watcher for them to complete their chart. If you’re like me and hate wasting time with a study hall when you are absent, this is a great lesson plan. Now you can waste their time by helping them play in tune.
I’m sure you’re thinking, “Wait, what will my percussionists do? They play in tune.” You’ll have to wait until my next article.
Rehearse Like They Will Practice
This is one of the most important things I emphasize in rehearsals. Like all music educators, I find that my students need to practice more. Mind. Blown. If this isn’t an issue for you because you have the answer, please let me know.
I believe the biggest issue students have with practicing is that they don’t know how to practice, or how to do it efficiently. If they are anything like me when I was young, they just play their music over and over again, top to bottom, and call it a day. I have (and by that I mean I stole or maybe borrowed) a list of practice tips and techniques. These are strategies that I use in rehearsal, and I’m sure many of you do, too. These strategies will hopefully help students slowly understand how to practice. They can make the connection from “when I’m having trouble with this, I can do that to make it better.”
Here are some (but not all) of my favorites:
- Work backward: Start with a measure or half a measure or even a beat and slowly add to it until you have a full phrase. We sometimes focus too much at the beginning and somehow forget that the audience will also hear the end. Ignore the middle because if the beginning and end are good that’s all they’ll remember. I’m kidding — fix it all.
- Eliminate rhythm: This is a great way to ensure that you can hear harmonies for tuning. This is also very valuable for brass instruments that might be playing wrong partials.
- Eliminate pitch: This helps with rhythmic alignment and articulation. Isolating music is great, but far too often, we isolate a measure to fix it, when we can also isolate components like pitch and rhythm.
- Looping: I do this a lot in rehearsal. This is great for technical passages. Isolate the measure and keep doing it over and over, slowly increasing tempo.
- Hold a note: This is great for rhythmic alignment and, at times, intonation. Play a passage and choose a note to stop on. Hope you arrive together. Pick a trouble note in this passage, too. Hope it’s in tune.
It’s like the old saying “give a man a fish, he lies on his practice logs; teach a man to fish, he might actually practice.”

Use Analogy
This is a hot-topic debate. Depending on your students’ age and grade level, using analogy to explain what you are hearing or how you want them to play can be hit or miss. Perhaps they are too young to understand, or maybe they feel they’re too mature to buy into what you are saying. I hope the latter is not the case. Some players prefer being told directly how you want the music played. Louder, softer, shorter, longer. Being direct with my instruction like this is generally how I fix things in rehearsals. However, at times I like to use analogies to explain what I am hearing. This can be effective to get the students listening to how it sounds and thinking about why it sounds that way. “How is my playing making the music sound the way he described it?” From there I will explain how it should sound and include direct instruction that explains how to achieve that.
For example, we were working on a piece where the melody was very exposed in one or two instruments with a chordal accompaniment with long note values. Having played exposed parts like that, I know how important it is to feel supported by the sound of that foundation. They were playing sort of timidly and unsupported and as a result it sounded very thin. I asked them “if the way you just played was a blanket, would that blanket keep you warm? Is it a weighted blanket, or is it one of those blankets your grandmother knitted that has gaping holes in it?” Here I might say, “now play it like a weighted blanket” or “use more air and play 10% stronger to give the melody support.” Either way can work. Students will either make the decision on how to achieve that on their own or take the direct instruction and apply it. Regardless of how they achieved the sound, at that part of the music, they will have better connection to that moment. They will remember that that part should sound like a warm blanket. They are less likely to make that connection if I simply said, “That needs to be louder.”
I see using analogies as an important tool to connect students to the music on a more personal level. Especially in a school setting, it is part of our job to help students create a sonic image for the music they are playing. Giving them examples can help them develop their own image. Sometimes telling them every answer isn’t the answer. And sometimes just saying “do it better,” does the trick. I’m serious, it does.
Rely on Your Students
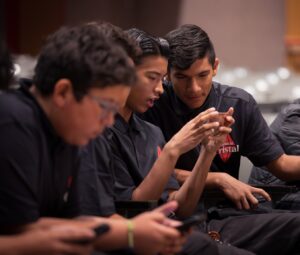
I will be the first to admit that I don’t know everything. Now, if I admitted that at the beginning of this article, you might not have made it this far. As a trumpet player who picked the trumpet because there were too many buttons on a saxophone, I still feel that way. When it comes to things like alternate fingerings, trill fingerings, etc., I get lost sometimes. Okay, most of the time.
This is one example of when I rely on my students to help each other. They are the ones playing the part, and on most instruments, they are doing it at a higher level than I can (you do not want to hear me play clarinet). I trust that they can make decisions on the best way to be successful playing their instrument. Additionally, giving students a chance to teach and learn from their peers is beneficial.
At times throughout rehearsal, we might get to a part where I tell students, “Take 30 seconds and work that out on your own.”
Students might play it a few times to get it under their fingers, but they can also use that time to help others in their section. This can work for a variety of issues, including fixing notes, finding best fingerings, picking places to breathe, etc. You can even ask students to do this quietly while you work with another section.
We have all dealt with students having side conversations. Again, if this isn’t an issue for you because you have the answer, please let me know. By asking students to work together quietly, I am giving them a chance to have a brief side conversation about the music. They all say they’re talking about the music, but now they actually have to!
______________________
This is far from a comprehensive list of how to work with your winds. I will keep adding to this list as time goes on. Hopefully this article gives you a place to start in your rehearsals that will help improve your students and their engagement. As always, feel free to take some or all my tips, or ignore everything I said. Disagreeing with me is just as valuable in developing your own rehearsal techniques as listening to me is! I’m always open to chatting about my always-evolving rehearsal process!


