Teach Your Students the Best Way to Oil Valves
It’s the night of the beginning band concert, and the curtain will go up soon. You’re back stage shepherding all of your students, who are bubbling with nervous excitement, to their chairs.
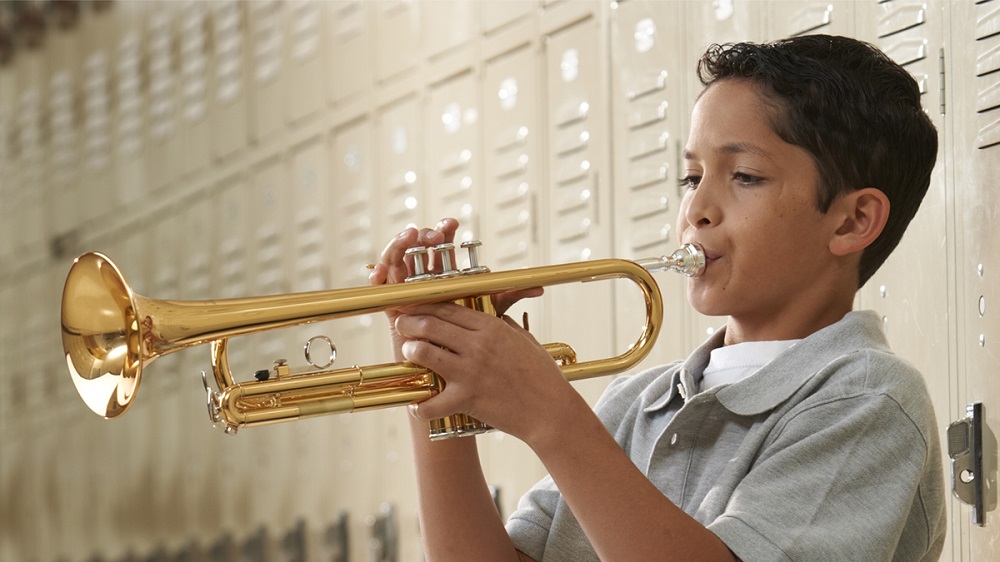
Then, from the rear of the ensemble one of your trumpets raises his hand and says, “My valves are sticky – can you help me oil them?”
This could never happen because all beginning band students have received extensive training on how to properly care for their instruments, right? All of your brass players know how to oil their own valves, right? Unfortunately, all too often, this is not the case. To help clear up some of the mystery, here is our official Yamaha-approved method to oiling brass instrument piston valves.
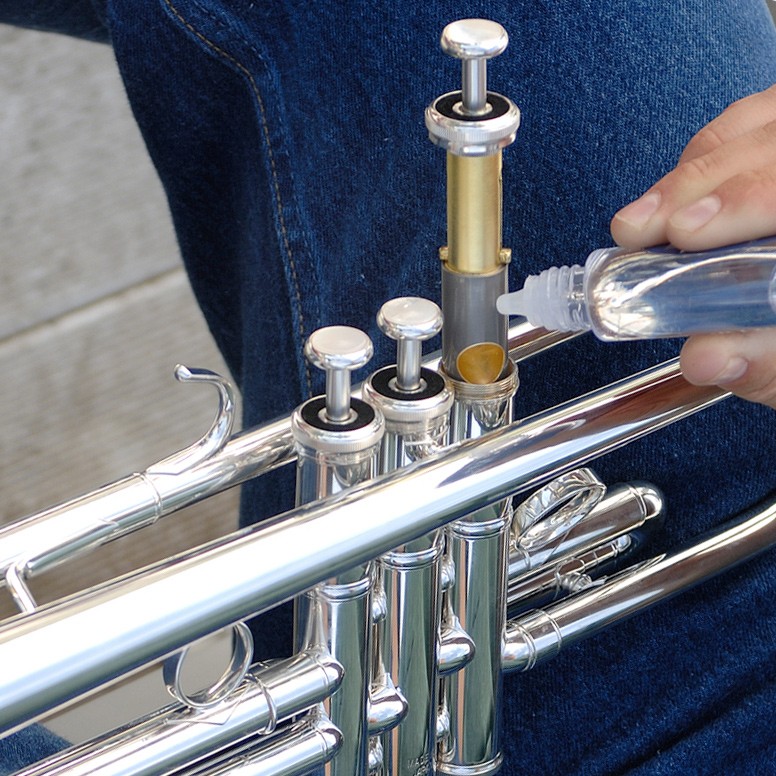
- Step 1: You’ll need both hands free, so place the instrument someplace that it can safely stay put with the valves easily accessible. Sitting in a chair with the instrument on your lap is a good choice – if you’re worried about oil dripping on your pants, put a towel or rag underneath the instrument to catch the drips.
- Step 2: Unscrew the top of the valve oil bottle and set the cap aside. It may seem silly, but it’s a lot easier to do this now rather than after the next step!
- Step 3: Starting with the first valve, fully unscrew the cap at the top of the valve until it comes loose. Then, with one hand gently slide the entire piston assembly up until you can see the wide silvery-gray portion of the valve body. The piston doesn’t need to come all the way out of the instrument – as long as you can see the top of that wide area, you’ve pulled it out far enough.
- CAUTION: the piston can be easily damaged if it’s dropped or banged against something, so be very careful while it’s unscrewed and exposed!

- Step 4: Place several drops of oil around the top of that silvery-gray area and allow it to run down the side of the piston and into the valve casing. Don’t be afraid to use more oil than you think is necessary – any excess will drain out the bottom of the valve and will help keep the instrument clean by washing out dirt, bits of food, saliva or any other debris that may have found its way onto the valves.
- Step 5: Carefully slide the piston back down
into the casing, making sure that everything is still lined up the way it
started. For Yamaha trumpets, you will see the valve number stamped into the
metal near the top of the piston – this number should be facing toward the
mouthpiece, so that if you were playing the instrument you would be able to
read it. Depending on the instrument, there may also be an audible “click” as
the piston guide locks into place, so listen for that click as a good sign that
everything is where it should be. Once the piston is lowered all the way, screw
the top cap back into place until it is tight. - Step 6: Repeat steps 3 to 5 for the rest of
the valves. - Step 7: Once all the valves are back in
place, work all of the pistons up and down a few times to help spread the oil
around. This is also a good time to blow some air through the instrument to
make sure everything was put back together correctly – do this once with all
the valves open, and then again with all the valves pressed down. If the air
feels blocked or restricted, go back to step 5 and re-check each valve to make
sure each piston is lined up correctly.
SEE: VALVE OIL COMPARISON
THE YAMAHA EDUCATOR NEWSLETTER: Sign up to receive real-word advice, tips and classroom guides!
Don’t Make These Mistakes

I’ll confess that when I first started playing a valved instrument, I developed a few bad oiling habits because no one had taught me the proper way to oil valves. The first was dripping oil down the top valve stem without unscrewing the caps. At the time, I didn’t know that there was felt underneath the stem that was absorbing all the oil, so the oil never got where it needed to go.
The second bad habit was squirting oil through the vent holes in the bottom valve caps. While some oil might have found its way to the proper place, I didn’t realize just how filthy the bottom caps can get since they’re like a lint trap collecting all the dirt and debris that drips down from the pistons. Any oil that did make it onto the piston would have picked up some of that debris and put it right back where you don’t want it.
Unscrewing the caps may seem like a complicated process, but even a beginning student can learn to do this with a minimum amount of instruction and practice. My own son started playing trumpet in 6th grade, and he had no problems learning to safely oil his valves by this method. It’s also the best way to guarantee that the oil is getting right onto the sides of the piston where it will do the most good.
Spend a few minutes with your brass players to teach them this process – they’ll be self-sufficient and you’ll have fewer stuck valves to worry about!
Keep reading