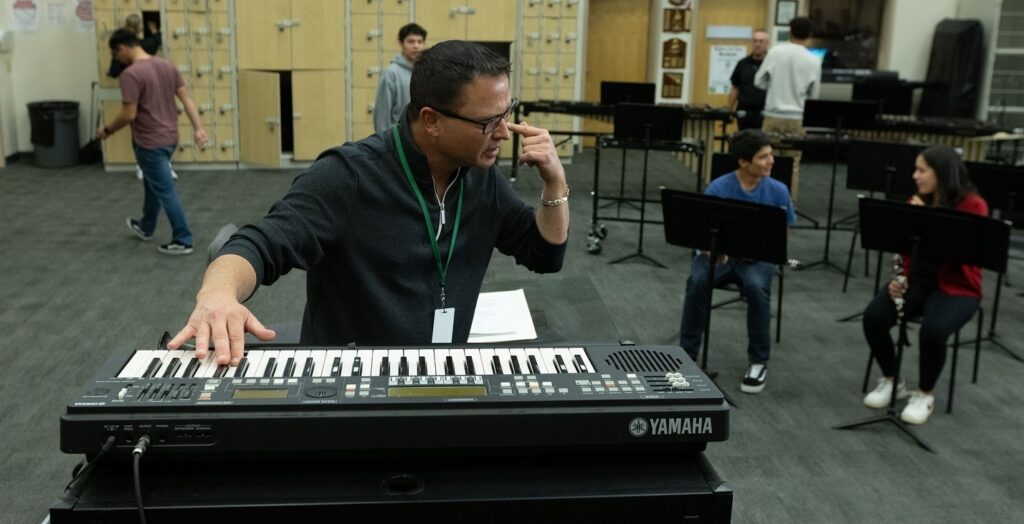
Music Tech Series, Part 2: Elementary Music Technology
Children have an innate desire to improvise and create. Without any expectations, they begin life moving, singing and playing music in imaginative and newfound ways. As students begin learning formal music in elementary school, the urgency for mastering literacy and vocabulary skills can sometimes take the place of learning improvisatory or creative music skills. As a way to counter this, the National Coalition for Arts Standards (NCAS) reorganized music learning goals into the universal domains of creating, performing, responding and connecting. The hope was that by re-emphasizing these domains, the focus could shift to foster students’ convergent and divergent thinking. Exercising these enabling skills helps prepare students for the multiple roles found in the music industry as well as promoting student autonomy. The national standards are very extensive, so for brevity, here are the four major disciplines with summarized anchor standards.
THE YAMAHA EDUCATOR NEWSLETTER: Sign up to receive real-world advice, tips and guides!
 Creating:
- Anchor Standard 1: Generate and conceptualize artistic ideas and work.
- Anchor Standard 2: Organize and develop artistic ideas and work.
- Anchor Standard 3: Refine and complete artistic work.
Performing/Presenting/Producing:
- Anchor Standard 4: Analyze, interpret, and select artistic work for presentation.
- Anchor Standard 5: Develop and refine artistic work for presentation.
- Anchor Standard 6: Convey meaning through the presentation of artistic work.
Responding:
- Anchor Standard 7: Percieve and analyze artistic work.
- Anchor Standard 8: Interpret intent and meaning in artistic work.
Connecting:
- Anchor Standard 10: Synthesize and relate knowledge and personal experiences to make art.
- Anchor Standard 11: Relate artistic ideas and works with societal, cultural and historical context to deepen understanding.
David Brian Williams, author of “Reaching the Other 80%,” defined 80% of students who do not currently participate in music education ensembles as “non-traditional musicians” (NTM). NTMs are determined to be between 6th and 12th grade and may have a music life independent of school. They may also not read music notation but aspire to a career in the music recording or the music industry. A later article written alongside Peter R. Webster titled “NTM Skills as a Future College Music Student” defines specific music technology skills as “essential for the undergraduate music major.” The following skills are outlined below:
 Edit in notation software (like Dorico).
- Understand and edit digital audio.
- Record and mix a performance.
- Understand copyright and fair use.
- Create music with production software.
- Create a streaming audio file.
- Understand MIDI and applications with instruments.
- Set up/problem solve a computer music workstation.
- Understand basics of acoustics.
- Create/edit a music video.
- Manage social media music-sharing tools.
It’s important that we refer to these competencies as overarching goals for our growing students and find ways to cleverly integrate them into our lessons. Giving students the opportunity to compose music, whether it be in notation software or in a digital audio workstation (DAW) is a great way to accomplish the national standards, while also allowing students time to practice these music technology competencies. Using web applications that bridge music with other interdisciplinary topics like science or math can be a fun and new way for students to make connections to music. MIDI instruments are very customizable and can be a great addition to the classroom for students with disabilities. As a music stand is to sheet music, technology is to music education. Let it be a tool for supporting students in their music learning experiences.

Elementary Music Curriculum with Technologies and Web Apps
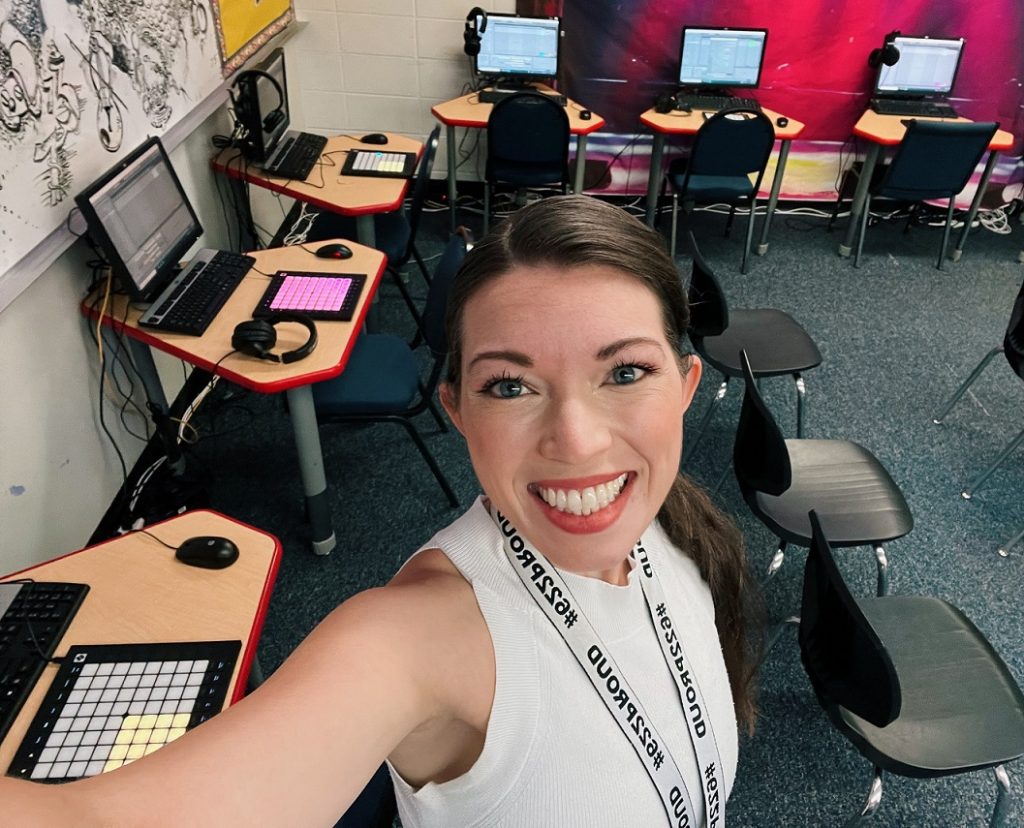
Assuming that Chromebooks, iPads or desktop computers are available to you in your classroom, the next step would be to invest in decent quality headphones like the Yamaha HPH-50B. A little more expensive than the average headphones, these have much better sound quality and will be more durable for classroom use. Headphone splitters are also a great investment for collaborative projects that require more than one student listening from the same device. These are relatively inexpensive and can include a range of two to five headphone ports for sharing audio.
Optionally, having a few MIDI controllers can be great for small group projects or classroom stations. MIDI keyboards are the most common choice for DAW composition and can come in a variety of sizes. For classroom use, 25-key MIDI keyboards are more suitable for portable independent use, whereas 49-key keyboards are great for two-player fixed stations. Other controllers like the ARTinoise re.corder (based on the recorder) or the Joué J-Play Keys (based on the xylophone) can be fantastic for students who struggle performing on their traditional counterparts due to a disability. STEAM-based kits are also great for connecting music to other disciplines. Useful for classroom activity stations, these kits are often self-guided and include apps that introduce skills like coding or instrument making. Lastly, microphones can be a worthwhile investment for older and more advanced music technology students. Microphones requiring a separate interface and XLR cable are more professional (like the Focusrite Scarlett Studio 3 bundle), though there are many USB microphones that require less set-up (like the FIFINE USB Microphone).
A few general music curriculums that specifically integrate music technology include “Teaching Music Through Composition” by Barbara Freedman, “Using Technology with Elementary Music Approaches” by Amy M. Burns, “Integrating STEM with Music” by Shawna Longo and Zachary Gates. These resources are great for introducing digital composition or for STEAM-based/interdisciplinary learning. Web applications (web apps) are also be a great way to engage students. Below are a few of my top recommendations, as well as a few others that are fun for kids to explore music with.
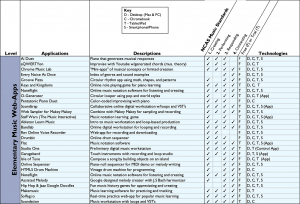
Download this elementary web-apps chart.
Creating lessons that give students time to explore is key. This semi-structured “play” time allows them to make stronger connections to each new concept by utilizing it within their own art. Here are some of my favorite elementary music lessons that apply students’ new musical knowledge in an engaging and creative way. Enjoy!
Lesson 1: Soundwaves and The Science of Sound (STEAM)
NCAS:
- Anchor Standard 1: Generate and conceptualize artistic ideas and work.
- Anchor Standard 6: Convey meaning through the presentation of artistic work.
- Anchor Standard 10: Synthesize and relate knowledge and personal experiences to make art.
- Anchor Standard 11: Relate artistic ideas and works with societal, cultural and historical context to deepen understanding.
Technology Competency Goals:
- 9. Understand basics of acoustics
- 5. Create music with production software (web-app version)
Objective: Students will understand sound waves and how humans hear sound. Using Chrome Music Lab, students will use the visualizer to experience how pitch affects soundwaves and the movement of air particles. Students will also learn a song and participate in a movement activity reinforcing these learned concepts on soundwaves.
Level: Grade 3 (can be modified for other grade levels)
Materials:
- Chrome-accessible devices (Chromebooks, laptops, tablets etc.)
- Headphones
- Slideshow Presentation (optional)
- Piano or high-pitched/low-pitched instrument (e.g., triangle and hand drum)
- Chrome Music Lab link
Procedure:
 1) Begin with the question, “what is sound?” As students guess, slowly navigate them toward the answer: “vibrations in the air.” Next ask, “What is actually vibrating when we hear sound?” The answer should be “air molecules.” Feel free to use the following explanations below alongside diagrams or photos in a slideshow presentation.
“All sound is made up of vibrations. Vibrations through the air.”
“What is actually vibrating? Air molecules! Molecules are tiny particles that make up everything around us. Even you are made of molecules! Molecules are also invisible, meaning we can’t see them. Air molecules help us to hear sounds.
“When a bell rings, the air particles around it start grouping together and spreading out. This movement looks like a wave. We call these sound waves!”
2) Demonstrate the movement of soundwaves using Chrome Music Lab. Navigate to the Soundwaves window and ask students, “What do the blue dots represent? What instrument is at the bottom of the screen?” Tell students to observe how air particles move differently based on each note’s pitch. Define pitch and clarify that “the higher the pitch, the faster the movement of the air particles; the lower the pitch, the slower the movement of the air particles.” Have student volunteers play a note from the demo computer. Use the magnify glass on-screen to zoom in on the horizontal waveform. (*This demo will prepare students for a follow-up lesson on soundwave shapes)
3) Give students 10-15 minutes to explore Chrome Music Lab’s Soundwaves window as well as the other music windows.
4) Transition students to begin learning the accompanying “Johnny Was a Molecule” song and movement activity. Have students listen and echo each line one line at a time. Introduce the Sally verse in a follow-up lesson or as an extension.
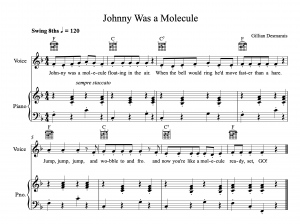
Download Johnny Was a Molecule sheet music.
Sally Verse:
Sally was a molecule, floating in the air
When the bass would play, she’d move slower than a bear
Crawl, crawl, crawl, and wobble to and fro
And now you’re like a molecule, ready, set go!
Movement Game:
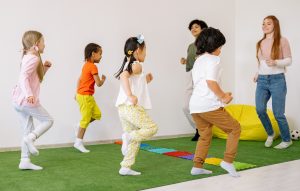
On the Johnny verse, have students jump to the beat.
On the Sally verse, have students crawl to the beat.
After the verse is sung, the teacher alternates playing a high-pitched and low-pitched sound. Students respond by either moving slowly (low pitch) or fast (high pitch). Specific locomotor movements may also be picked in advance (e.g., fast: running, skipping, jumping or slow: crawling, tip toeing, walking). Teacher may give individual students a turn to play instrument(s) as well.
Lesson 2: Four Basic Sound Waves (STEAM)
NCAS:
-
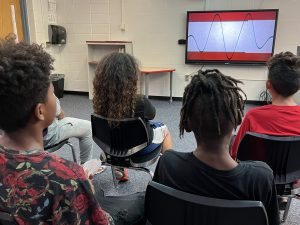
A group of 5th-grade students learn about sound waves. Anchor Standard 1: Generate and conceptualize artistic ideas and work.
- Anchor Standard 6: Convey meaning through the presentation of artistic work.
- Anchor Standard 10: Synthesize and relate knowledge and personal experiences to make art.
- Anchor Standard 11: Relate artistic ideas and works with societal, cultural, and historical context to deepen understanding.
Technology Competency Goals:
- 9. Understand basics of acoustics
- 5. Create music with production software (web-app version)
Objective: Students will learn about the four primary wave shapes and recreate them using manipulative (popsicle sticks). Using Soundbreaking, students will use the visualizer and sound generator to identify the differences in timbre between soundwaves and the movement of air particles. Students will play a competitive popsicle stick game by listening and identifying the different soundwaves.
Level: Grade 3 (can be modified for other grade levels)
Materials:
- Chrome-accessible devices (Chromebooks, laptops, tablets etc.)
- Headphones
- Slideshow Presentation (optional)
- Soundbreaking link
Procedure:
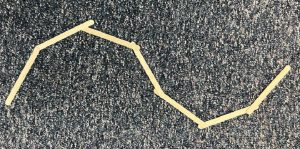
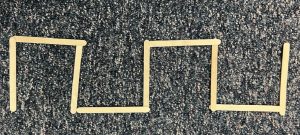
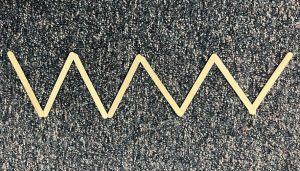
1) Start by reviewing what sound is (e.g., vibrations through the air). Show a visual of a transverse wave and explain that the reason it is horizontal is that it’s simpler to see. Ask students, “What shapes do these soundwaves look like?” Have them guess the triangle and square shapes. Introduce all four basic sound waves (sine, square, triangle and sawtooth) along with their visuals.
2) Use the Soundbreaking app to play back each soundwave’s unique timbre. Have two students volunteer to play a guessing game. One student plays a soundwave while the other guesses. See if they can listen for the differences in sound.
3) Allow students 5 to 10 minutes to explore the Soundbreaking app on their devices.
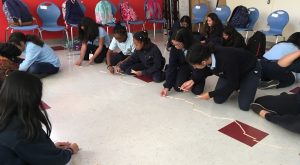
4) Transition students and provide a group demonstration of how to create each soundwave with popsicle sticks.
5) Distribute eight popsicle sticks to each student and have them re-create each soundwave shape.
To begin the competition, have students hold onto their own popsicle sticks and split the room into two groups. Next, play a tone, display the name and/or show the visual of either of the four sound waves (sine, square, triangle or sawtooth). Students must work together to make a giant soundwave from one side of the room to the other. The first team to use all their popsicle sticks wins!

Lesson 3: Introduction to Audio in Songwriting (STEAM)
NCAS:
- Anchor Standard 1: Generate and conceptualize artistic ideas and work.
- Anchor Standard 2: Organize and develop artistic ideas and work.
- Anchor Standard 5: Develop and refine artistic work for presentation.
- Anchor Standard 6: Convey meaning through the presentation of artistic work.
- Anchor Standard 10: Synthesize and relate knowledge and personal experiences to make art.
- Anchor Standard 11: Relate artistic ideas and works with societal, cultural, and historical context to deepen understanding.
Technology Competency Goals:
-
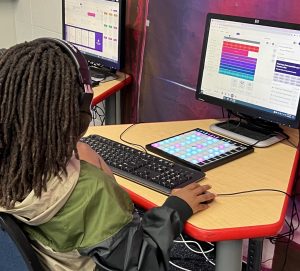
A 3rd-grade student uses an online DAW to create their first song. 2. Understand and edit digital audio
- 8. Set-up/problem-solve a computer music workstation
- 5. Create music with production software (web-app version)
Objective: Students will learn about digital audio and the transfer for sound from a microphone to a digital audio workstation (DAW). Students will also write their first song using an online DAW and apply their knowledge of audio in the creating process. Students will share their projects with peers and discuss aspects to refine for the next song.
Level: Grade 3 (can be modified for other grade levels)
Materials:
- Chrome-accessible devices (Chromebooks, laptops, tablets etc.)
- Headphones
- Slideshow Presentation (optional)
- Digital Audio Workstation (e.g., Cubase, Soundtrap, Garageband)
Procedure:
1) Begin by asking, “When you talk on the phone with someone, how are you able to hear them and how are they able to hear you?” Begin the conversation by guiding students toward the term “microphone.” Use the visuals to display a picture of a stage microphone, a studio microphone and a computer microphone. Next, explain the process of how sound is recorded onto a computer.
“When sound vibrations reach the microphone they are made into an electric signal. That signal then becomes a series of numbers known as binary code (the language of the computer). In the computer, this data represents a digital sound or “audio.”
 2) Have a project open in your DAW and encourage students to view the sample browser/loop browser. From here, differentiate audio loops by their “audio icon” (see below) and drag and drop one into the timeline. See some examples below for reference.
3) Have students begin a project in which they drag and drop four audio loops into their blank project. Give students 10 to 15 minutes to complete this task.
4) Once most students are done, have them transition to “Musical Museum,” an activity where students will simultaneously stand up, walk around the room and listen to two random student songs. Allot about 4 to 5 minutes for this activity. Afterward, have students return to their seats and begin a discussion on what they heard. Some appropriate questions to ask include:
- “What did you like about the songs you heard?”
- “What would you want to hear more of?”
- “What instrument sounds did you recognize/like in songs?”
- “What’s one thing you heard that you might add to your own song?”
In the next few articles, we’ll discover why beginning with these technology goals and interdisciplinary lessons provides a strong foundation for middle school and high school music learning. We’ll also look at showcase opportunities, trademark stages of learning with the DAW, audio engineering fundamentals, and project-based learning activities. In the meantime, enjoy and lookout for more coming soon!
Read the first article in this series, “Music Tech Series, Part 1: Getting Started Teaching the DAW.”
Keep reading