Tagged Under:
Pop/Rock Chord Voicings, Part 1
How to construct and play chords in pop and rock styles.
The application of harmonic concepts, as well as your choice of chord voicings (the way you arrange the notes across your two hands), can vary significantly depending upon the genre of music you’re playing. Pop and rock styles are a good place to start, as they tend to use simpler approaches.
The Basics
In this style of music, the root of the chord is generally played by the left hand — either as a single note or as an octave — accompanied by the right hand playing basic triads.
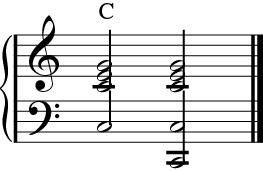
Using this approach, we can take a common chord progression and explore how to arrange the notes in the right hand. If we only played the chords in root position (i.e., with the root note always at the bottom), we would get this:

This works, but it sounds somewhat “disconnected” since the right hand chords are not close to one another. But one of the cool things about harmony is that chords can be rearranged so the order of the notes varies, yet they will still sound much the same. These different arrangements of the notes are called inversions, as shown below:

Using inversions, we can find the closest way to move each note of the current chord to get to the second one. This concept is called voice leading. Let’s go back to our chord progression again and see how all these variations can work to make the right hand chord voicings move more smoothly.

There is no strict rule that says you must only use the closest voicing. When playing a repeating chord progression, I like to add variety by sometimes moving to a different inversion and starting the progression again a bit higher or lower on the keyboard. (A jump is fine, as long as you settle back down into good voice leading for a little while.) Here are a few variations that show how you might make some different choices:
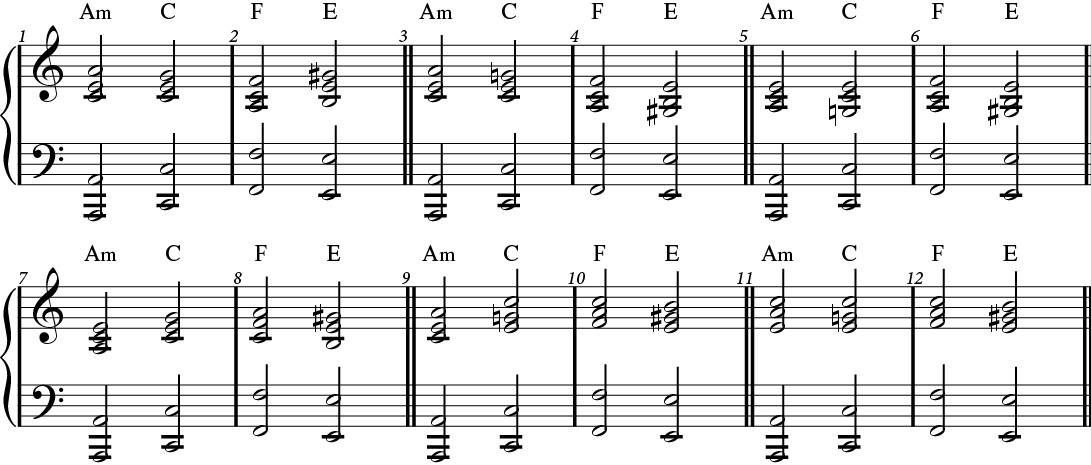
The second bar has a slight jump up from the F to the E to make for a smooth transition to the first voicing for the A minor chord. The next variation moves downward from the F to the E, which works well to lead into the root position A minor in the third variation (bars 5 – 6). The fourth variation (bars 7 – 8) jumps up to the C root position to help climb back up the keyboard a bit and lead into the fifth variation, which also jumps up to the C (as opposed to the first two examples), leading nicely into the last variation.
Knowing your chords and their inversions gives you lots of freedom in how you voice your right hand parts. You’ll make these decisions largely based on two factors: One, what register of the keyboard you want to play in to support a singer or instrumentalist; and two, what sounds good against the given melody line or solo being played.
Got Rhythm?
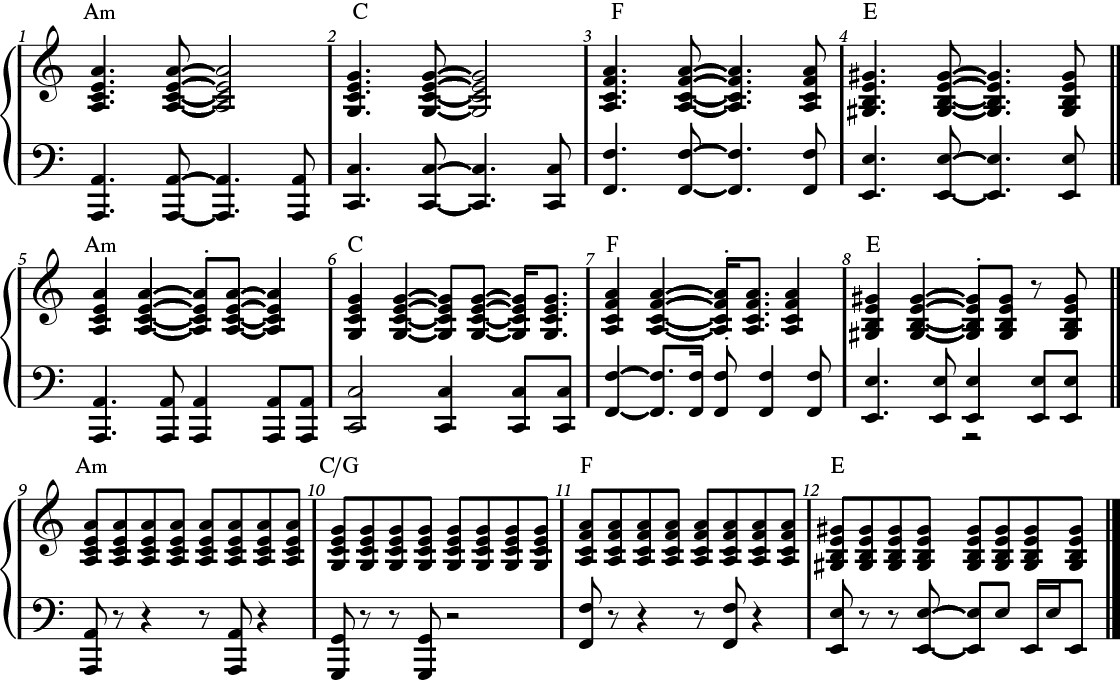
The notes are only part of the solution: you’ll also want to play with rhythm and develop a feel that matches the “groove,” or pulse of the song. (This is a deep subject that I’m only going to touch on lightly here.) Simple patterns are always a good way to go, and you can either play with both hands together to set the groove, or create some back-and-forth between the hands. If you’re playing in a band, it’s usually better to play simpler, and you also need to be careful that your left hand doesn’t get in the way of the bass player (maybe play single notes instead of octaves). If you’re accompanying a singer or playing solo, you have much more freedom.
This first pattern keeps the hands mostly together and uses a simple rhythm. The left hand adds a “push” (an upbeat) into the bar that follows. This push is supported by the right hand in bars 3 and 4.

This next pattern gets a little busier, and divides up the hands more. Bar 3 especially has some nice syncopation in it: imagine you are hearing the rhythm from a drummer as you practice it.

Another approach is to play steadily repeated notes. In this example, the right hand holds down the pulse while the left hand adds strong accents.

Creating Movement with Passing Chords
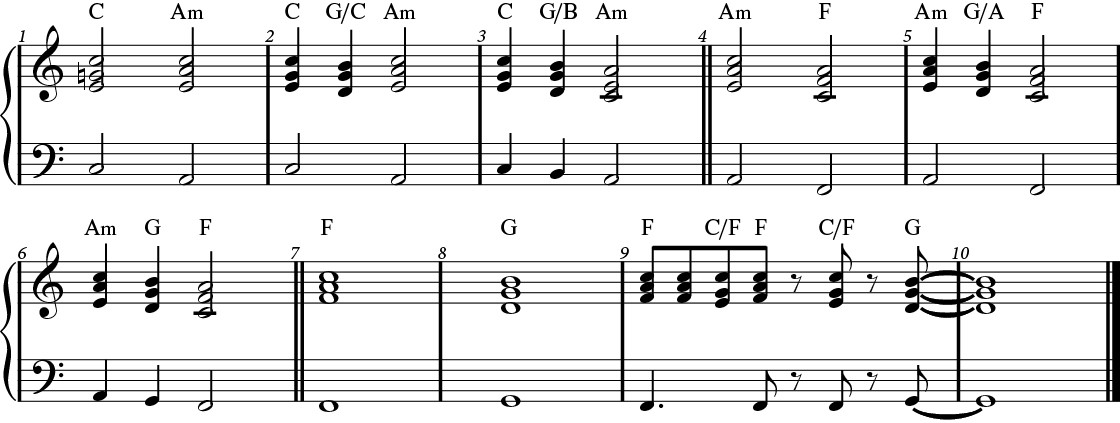
A cool way to move between chord voicings is to use a passing chord to go between two inversions of the same chord, or just to add a little more rhythmic action while on a single chord root tone. This concept is different from the one described in our two-part Functional Harmony series; since these chords all come from the scale tone chords, they can be used without affecting the bass player or other harmonic elements that might be going on.
Here are the scale tone triads for the key of C major, including their two inversion positions:

Drawing from these chords, we can create movement like this:

When played against an unchanging bass note, these examples help to move the sound around. As a bonus, they also create some melodic figures without actually reharmonizing the passage. Of course, more interesting rhythms need to be used!
You can also apply this concept when moving between two different chords when you want to stay in the key center — again, without sounding like you’re reharmonizing the song. As before, it’s not necessary to change your bass notes, although that can be done if desired.
A Bigger Sound
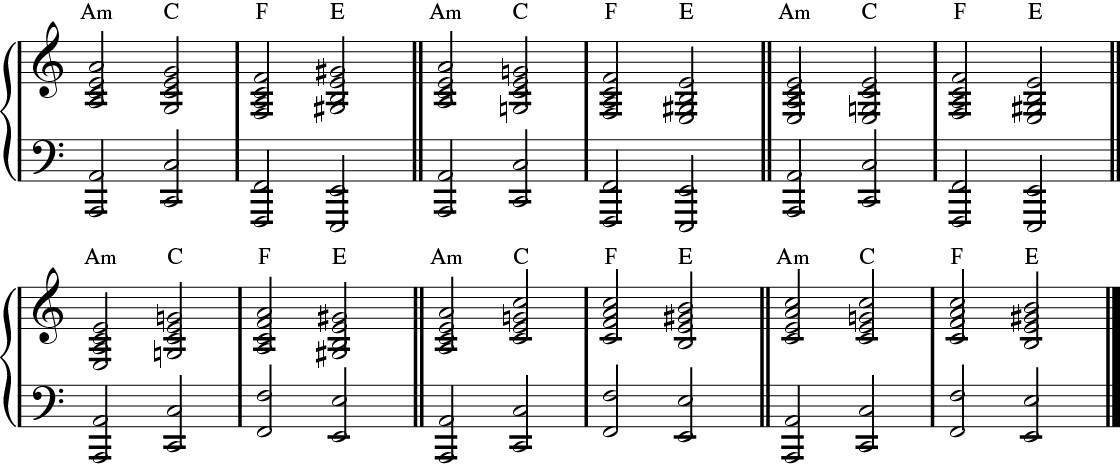
Rock pianists will often play bigger chord voicings to stand up to the sound of drums, bass and guitars. This is done simply by adding an octave tone either above the lowest note of the voicing, or an octave below the top note of the voicing.

Here are a few of the previous examples revisited, with the added octave to make the right hand chords sound bigger:
All audio played on a Yamaha P-515.
Check out our other Well-Rounded Keyboardist postings.
Click here for more information about Yamaha keyboard instruments.


