Recording a Favorite Song on Your Clavinova … Including Vocals!
Turn your CVP into a recording studio.
Your CVP Clavinova has many fun features that allow you to record and share your music with friends and family. The Clavinova has the ability to record in several formats, including standard MIDI files, MP3s (five different resolutions) and WAV files for CD-quality recording. Because these last two are audio formats, you can even add vocals to your recordings!
A standard MIDI file is always where I start, as these files can be easily edited, allowing you to perfect your composition before adding your vocals. Depending on your arrangement, you may choose to do a “quick record” of one of the many styles available on your CVP.
For quick recording, begin by setting up all the desired parts, style type, tempo, main voice, etc. Then press “Rec” in the song control area and select “New Midi” from the display. Once you start to play, the recording begins. When finished, save your creation to a flash drive or the internal User drive.
If you need to, you can always record your performance a little slower and then speed it back up before adding vocals. To make these changes to your MIDI file, do the following:
- Use the tempo buttons on the left of the Clavinova control panel to adjust the tempo of the song to your liking. (You can listen to the song while adjusting the tempo.)
- When the perfect tempo is found, press “Stop” in the song control area. This must be done prior to resaving the file, as we are changing the “Setup” message.
- Touch “Menu” from the home screen, go to page 2 of the icons, and touch “Song Creator”:
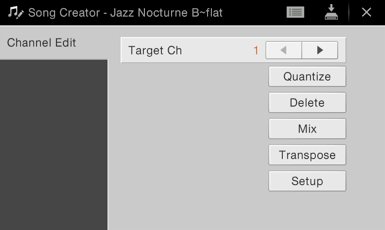
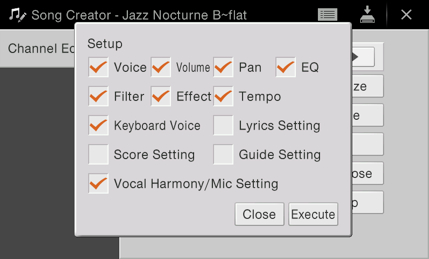
- Touch the display where you see the word “Setup” — notice all the choices that can be saved to the start of your MIDI file. Be sure Tempo is checked, then press “Execute”:
- After this is complete, touch “Close.”
- To save the song that now has the new tempo, touch the download icon at the top of the page, and select where you wish to save the file (User or USB) — touch “Save Here,” and name your file. (It’s advisable to name your new song file with a different title, as it’s always a good idea to leave the original MIDI file as it was, just in case you want to make other changes at a different time.
- If you have to make any changes to the microphone settings, these will also need to be saved (using this same procedure) prior to recording your vocal parts — make sure “Vocal Harmony/Mic setting” is checked on the Setup page of the Song Creator prior to executing the change.
If you plan to share this file on social media or email it to friends and family, you will probably want to save it in an MP3 format. To set the Clavinova output to the desired audio format:
- Touch the “Menu” icon in the Main display.
- Go to the second page of the icons.
- Touch the “Song Setting” icon.
- Touch “Rec.”
- Select page 2.
- Select your desired Audio Recording (Audio Rec) format. MP3 256kbps gives good results, and is usually small enough to email.
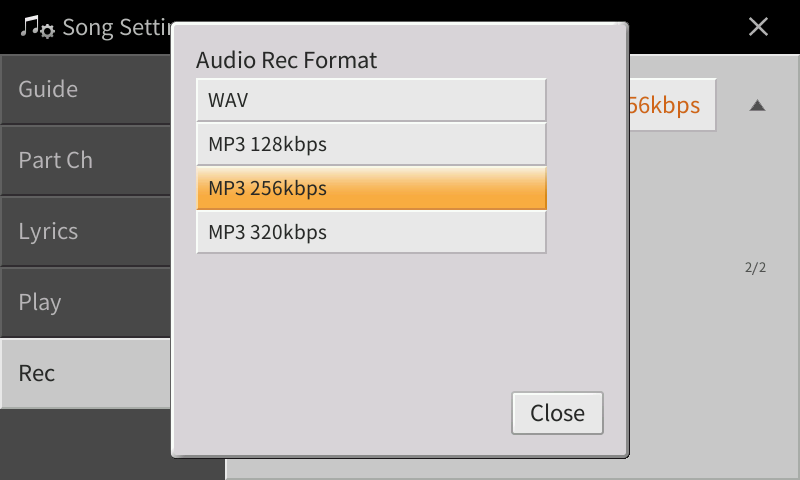
- Close the Audio Rec Format display and then press “Home” to return to the home screen.
Once you have your audio format selected, the fun can begin!
- From the Main display, touch the right side of the screen to display the song titles.
- Select the song you wish to add vocals to.
- Plug your microphone into your CVP.
- Press “Play” in the song control area and use your balance controls, as well as the microphone volume control, to adjust the balance between your voice and the music.
When you’re ready to record your vocals, I recommend you insert a USB flash drive. Use one no larger than 16GB, but make sure it has plenty of room available for your recording.
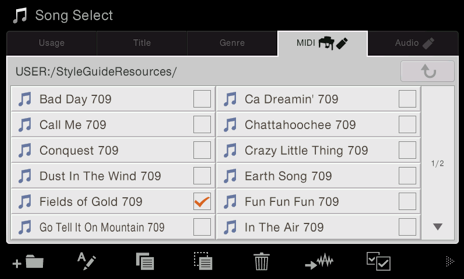
- From the main screen, touch the song area to bring up the Song Select menu.
- Make sure the song you’re going to add vocals to has been selected.
- In the lower left corner of the “Song” menu, touch the arrow next to “File.” (The song title you are working with should be checked — if it is not, it needs to be.)
- Touch the icon for audio — it looks like a squiggly line (a sound wave pattern):
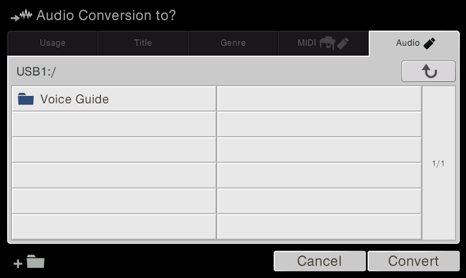
- Touch “Convert.”
- Your song will begin playing, and you may add your vocals at this point — anything you sing into the microphone will be added to your previously recorded song.
- When the song is done playing, it will automatically save to the USB or User drive in the Audio folder with the same song title as your MIDI file.
Now it’s time to hear your creation! Touch the song area in the display and select the tab labeled Audio. Select your song title and press “Play” in the Song Control area. If you need to re-record, just load your MIDI file again and repeat the process. That’s all there is to it!
Keep reading