How a Vinyl Record Is Made
Have you ever wondered how a vinyl record is made? The process is both an art and a science — and, though there have been improvements in the technology of some of the machinery used in manufacturing, it’s still very much the same as it was back in the 1960s and 1970s.
In this posting, we’ll take you through the entire process step-by-step, focusing on the dominant vinyl format being produced today: the 12-inch LP.
First Things First
After an album gets recorded and mixed to the artist and producer’s satisfaction, the final mixes go to a mastering engineer, who gives everything a final sonic polishing in terms of both frequency and dynamics, as well as making sure that both the levels and tonality are consistent from song to song. Mastering is crucial, regardless of whether the album will be pressed to vinyl or simply released digitally. (For more information, check out mastering engineer Pete Lyman’s blogs.)

Vinyl Realities
Typically, the mastering engineer will create separate files for digital release and vinyl. That’s because vinyl has several inherent qualities that affect the mastering process:
1. A vinyl record cannot reproduce as broad a frequency range as a digital recording. Too much high end, low end or volume can cause distortion and make the needle skip.
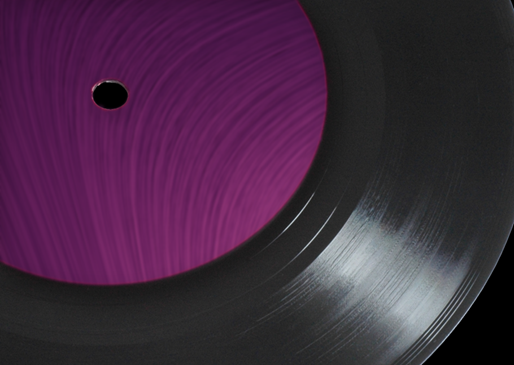
2. The closer the needle gets to the center, the smaller the circumference of the groove. This is due to a record’s circular shape. On the outside of a 12-inch LP, the needle moves at roughly 20 inches per second, but on the inside, it moves at roughly 8 1/2 inches per second. With less groove length per second of music, the resolution gets diminished. Sonically, this is equivalent to reducing the sampling rate of a digital recording from 96 kHz to 22.05 kHz — a huge difference in fidelity. That has ramifications for the artist and producer, who have to choose a song order carefully, knowing that the ones on the inner parts of the disc won’t sound quite as clear and crisp.

3. The amount of music a record can hold is finite. The needle on the turntable will eventually reach the end of a side. As a result, the artist and producer also need to consider the time factor when creating the song order and deciding which songs will go on which side of the record.
4. Vinyl records have considerably less dynamic range than digital recordings. If the mastering engineer tries to make the record too loud, it will just sound distorted. What’s more, large dynamic swings can cause the needle to jump when the record is played on a consumer’s turntable. In addition, the higher the amplitude, the wider the grooves need to be. Wider grooves mean less playing time per side, which also impacts the mastering engineer’s level decisions.
Making the Cut
Once the mastering engineer is satisfied that they’ve gotten all the songs sounding as good as possible, it’s time to create the master disc. This is also known as a lacquer master, since it’s an aluminum plate covered in a thick coat of lacquer. Some mastering engineers do this themselves; others hand the project off to a specialized “cutting” engineer.
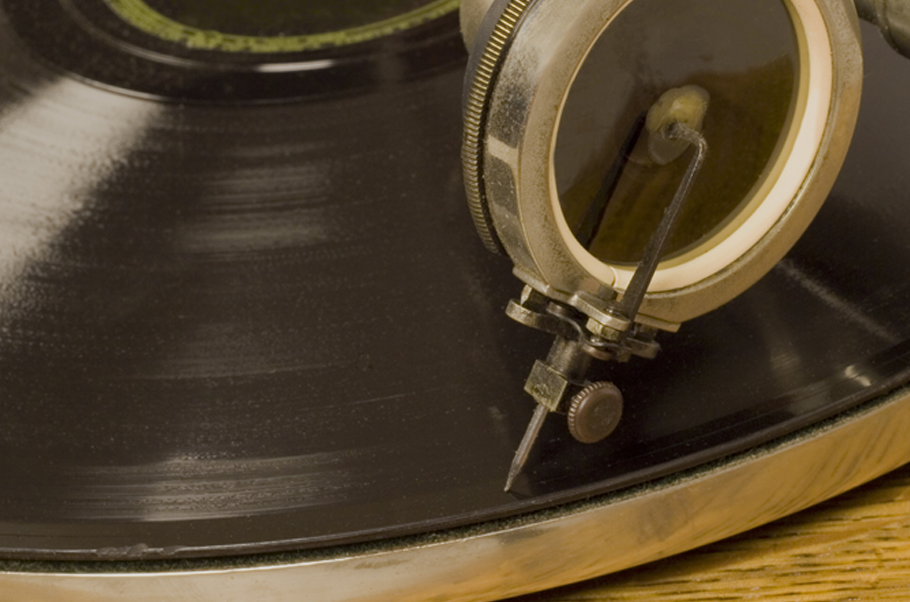
In this step, the audio is routed into a cutting lathe — a large, specialized machine fitted with a cutting head that contains a tiny stylus usually made of sapphire. Whereas a turntable converts grooves on a record into sound, the electronics in the cutting lathe do the reverse: They turn the sound waves in the music into vibrations that the lathe’s stylus cuts into grooves on the master disc. The stylus gets so hot during the cutting process that it has to be cooled with helium gas the entire time to avoid a fire!

Because the cutting is done in real time (that is, as the music is playing), one of the tasks of the cutting engineer is to manually create the spaces between songs. This is accomplished by scrolling the stylus very slightly toward the center of the record to create a gap.

Check out this video for a detailed look at the cutting process.
Hello Mother, Hello Father
The next step is the making of a “stamper” disc — something that takes place at the record manufacturing plant. First, the master disc is carefully washed — it’s critical to keep dust off it — and then sprayed with silver. Next, it gets submerged in a nickel bath and electroplated. The electroplating causes the nickel to fill the grooves on the disc.
The electroplated master then gets pulled apart, creating two discs that are mirror images of each other. One is the original lacquer master with grooves; the other is its opposite, with ridges instead of grooves. The latter is called the “father” disc and it’s what gets used as a stamper for pressing the record.
At that point in the process, the master gets checked to make sure it has no errors. The lacquer master isn’t usable for that purpose, however — nor is the father disc because it has ridges instead of grooves. Instead, the father gets electroplated once more and split apart, creating a grooved “mother” disc.
Biscuits and Blobs
Once the stamper is done, the pressing plant can begin making vinyl copies. One stamper is required for every thousand records. After that, the stamper starts to wear out, and the audio quality begins to degrade. Technicians can make additional copies of the stamper by electroplating and splitting the mother disc.
The vinyl used starts out as pellets of polyvinyl chloride. These pellets get loaded into a hopper on the record press and are melted and squeezed into what’s often referred to as a “biscuit” — a blob of vinyl shaped like a hockey puck.
The stampers get loaded above and below the biscuit in the pressing machine — one for side one and one for side two. The record labels that go in the center of each side also get loaded between the biscuit and the stamper on each side. Technicians have to bake the labels in advance to get all the moisture out of them, so they don’t bubble when pressed onto the vinyl by the machine.
When the pressing sequence starts, the two stampers come together, squeezing the biscuit and labels with heat and roughly 100 tons of pressure. The biscuit flattens out, and the ridges on the stampers create the grooves in the still soft vinyl. At the same time, the labels get squashed into their respective spots in the center.
The pressing machine then trims the excess off the edges and cools the newly created record with water, and out it pops onto a spindle. Each record takes about 30 seconds to make. The machine continuously reloads new biscuits and labels and repeats the pressing process until the designed number of copies are made.
The Finishing Touches
Before shipping the vinyl records out, the plant makes a few test pressings that they send to the artist and record label for approval. Once they get the thumbs up, all the copies ordered are produced.
At this point in the process, the artwork for the record jacket has normally been printed and approved. The newly minted records are manually placed into the inner paper sleeves and album covers. The final step is to send the albums in their jackets through a shrink-wrap machine. After that, they’re ready for distribution — and your listening enjoyment.
Check out these related blog posts:
How Does a Vinyl Record Make Sound?
Here’s What You Need to Know About Vinyl
Appreciating Vinyl Records … and the Best Way to Enjoy Them
Five Reasons Vinyl Is Making a Comeback
Top 10 Vinyl Albums for Audiophiles
10 Hip-Hop Albums That Sound Great on Vinyl
Spotlight on Vinyl Subscription Services
How to Connect a Turntable to an AV Receiver
Keep reading