DTX6 Deep Dive, Part 4: Customizing, Importing and Layering Sounds
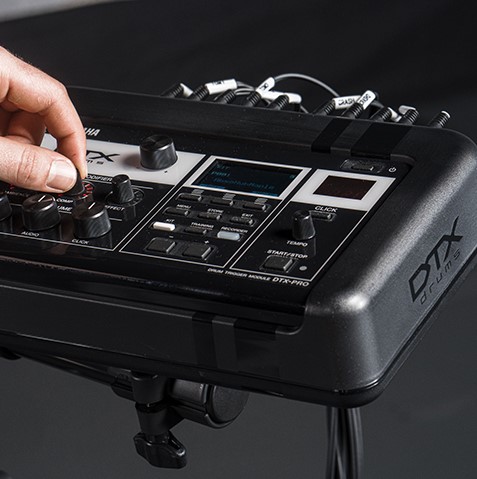
The DTX-PRO sound module furnished with all Yamaha DTX6 Series electronic drum kits comes loaded with 40 preset kits built from a library of over 700 amazing drum and percussion sounds. In addition, you can create up to 200 of your own customized user drum kits from the factory sounds and/or imported WAV files; you can also craft complex layerings of sounds and/or switch between sounds depending upon how hard you hit the drum pads. In this Deep Dive, we’ll show you how it all works.
Substituting Instruments
The drum kits in the DTX-PRO are collections of sounds called Instruments (“Inst” for short) such as kick, snare, toms, cymbals and hi-hat. Changing the Instruments in a preset kit is an easy way to build your own customized kit.
When the DTX-PRO is first powered on, it displays the Kit Screen:

Pressing (F1) opens the Inst Select Screen where you can view the category, number and name for any Instrument. Simply tap the drum pad for the one you want to edit, then use the scroll wheel or the +/- pads to audition different Instruments. The down arrow scrolls to the next page, where tuning, muffling or cymbal size can be changed. You can also press F3 to import your own custom WAV file and use it as an Instrument. (More about this shortly.)

Here’s an audio clip of me playing DTX-PRO preset kit P001 (“AbsoHybridMaple”):
Compare that with this next example, where the kick and snare Instruments have been changed to “18MpleAHM2” and “13×6 Brassy,” respectively:
This next clip is of the same “13×6 Brassy” snare Instrument, but with its tuning changed to -3.00 (that is, down three semitones). You can hear how even this slight change in tuning alters the attitude of the entire kit.
Similarly, changing Cymbal 2 to Perc 127 (“Tamtam”) gives the kit a very different flavor altogether:
Use Your Voice … and Get in the Zone
The Kit Edit menu gives you another way to access Inst Select, plus it provides access to an important parameter called voice.

A voice is the sound that makes up an Instrument. Voices can consist of either internal sounds or imported WAV files. Some Instruments (such as kick and toms) utilize one voice, but others use multiple voices. A snare Instrument, for example, is usually constructed from three different voices: one for the head, one for the open rim (rim shot), and another for the closed rim (cross stick). When you change a snare Instrument, all the voices are changed.
Different voices can be played from a multi-zone pad such as the Yamaha XP80, which is divided into three zones, one for each voice.

Any voice can be assigned to each of these zones. For example, you can assign an acoustic drum sound to the pad head, a tambourine to Rim A, and a cowbell to Rim B — enabling a unique performance on your custom kit. These settings are stored to each User kit you create.
Importing Sounds
One of the most exciting DTX-PRO features is its ability to import up to a thousand WAV files (mono or stereo) that can then be used to create custom Instruments. First, you’ll need to copy the files you want to import onto a USB flash drive (tip: copy the files directly onto the root directory of the flash drive; if you copy them into a folder they may not be recognized). A list of compatible USB devices can be found here.
Next, go to the Kit Screen, press F3, and tap the Instrument pad you want to edit. The scroll wheel or the +/- buttons will then take you through the list of WAVs that are on the connected flash drive:

Once you find the WAV you want to import, press F3 again. The DTX-PRO will display a confirmation screen; pressing F1 (Yes) will import the file to the Instrument, and the pad will now play the imported WAV file.
When an audio file is imported to an Instrument, a multi-zone pad will play that sound regardless of which zone is struck. However, you can also import an audio file for use as a voice, in which case a different WAV sound can be assigned to each zone of a pad. To do this, navigate to Menu -> Kit Edit -> Voice. Use the down arrow (F2) to highlight Import Voice, then press F3. Tap the zone of the pad you want to edit, select a WAV from the flash drive, then press Import (F3) to confirm your choice. You even have the option of importing different WAVs to different layers (see below).
Layering Sounds
Adding to the versatility of DTX6 kits is the fact that different sounds can be layered together. Every zone of every pad has four layers (A, B, C and D), and each layer can play a different voice. The Yamaha PCY135 multi-zone pad is capable of playing up to 12 voices!

Voices can be stacked so they play simultaneously, or they can be played sequentially. It is also possible to create velocity switching so that the voice changes, or a second voice is added, when the pad is struck with a certain strength.
To demonstrate, here’s me playing preset kit P002 (“Steel Ring”):
And here’s how that same groove sounds when a tom is stacked on the snare pad. Every time the snare pad is struck, you’ll hear the snare layered with a tom:
Layers are edited by navigating to Menu -> Kit Edit -> Voice and then pressing F3, which brings you to the Trigger Input Source screen:

Tap the pad (trigger) and layer you want to edit, then press the Exit button. This takes you to the Voice Select screen, where you can choose the voice to be played for that particular layer. (Tip: When working on layers, turn on the PAD LOCK [F2] to ensure that you don’t accidentally tap another pad and edit it instead.)

You can also use layers to change the sound of an Instrument through velocity switching, where striking a pad with a certain strength causes different layers to play different voices.

To demonstrate how this can be used, here’s a simple figure played on a snare drum:
Here’s the same rhythm, with Layer A playing the same snare as in the previous clip, but with the other layers modified as follows: Layer B plays a high tom on medium-soft strikes, Layer C plays a mid tom on medium strikes, and Layer D plays a low tom on the hardest strikes.
Insertion Effects
You can also noticeably change the sound of the Instruments in your custom kit by adding effects. In addition to the Kit Modifier effects we talked about in Part 1 of this series (EQ, Transient and Comp [compressor]), you can apply Insertion effects to each individual Instrument. These tend to be quite dramatic and can take your sounds in a new direction. To demonstrate, here’s preset kit P13 (“Modern Country”) without any Insertion effects:
Inserting the Dynamic Flanger on the snare drum produces this very cool sound:
And adding the Dynamic Ringmod effect to the toms results in a drum kit that sounds like it could be from outer space!
Ready to learn more about customizing sounds? Check out this video:
Check out the other installments of our five-part “DTX6 Deep Dive” series:
Part 5: A New Level of Playability
Click here for more information about Yamaha DTX6 Series electronic drum kits.
Keep reading