DTX6 Deep Dive, Part 2: Recording Options
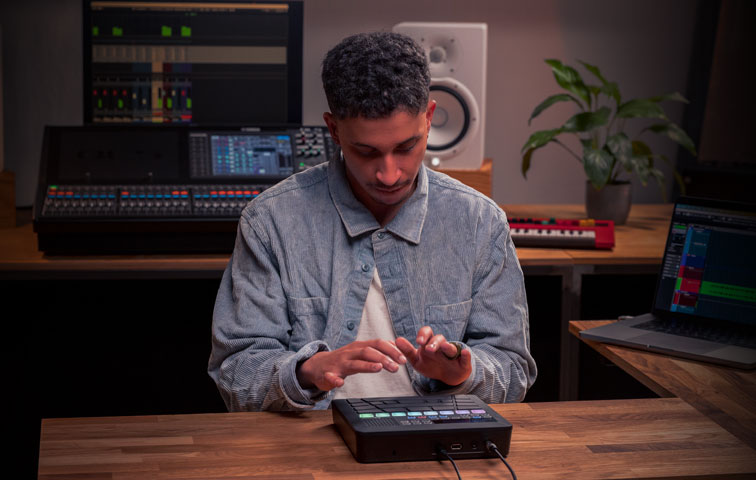
Recording acoustic drums can be a challenging process that not only requires a lot of expensive gear such as microphones, preamplifiers and processors, but also a physical space built for that purpose. Yamaha DTX6 Series electronic drums make it easy to create great recordings because the DTX-PRO module (furnished with all DTX6 kits) is already loaded with a library of expertly-recorded drum sounds. Using the DTX6, you’ll be able to record with professional results and concentrate on making music. Let’s look at the different ways that DTX6 drums can be recorded.
1. Internal Recording
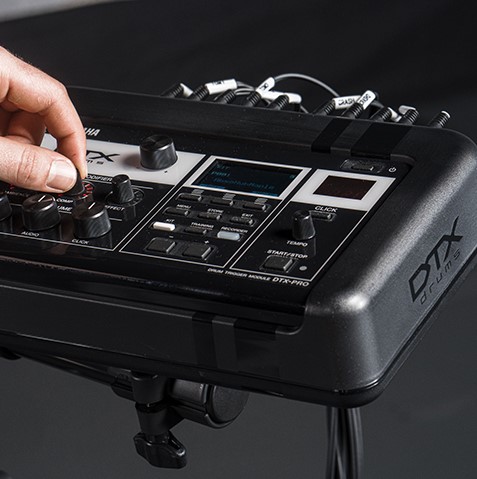
The DTX-PRO provides a built-in recorder, accessed by pressing the button of the same name on the front panel:

Once that button has been pressed, the DTX-PRO enters Recorder Mode; pressing the F1 function button directly below (the button marked “•”) initiates recording.

There are numerous options regarding what sound sources are recorded. The drums, of course, are always recorded but, in addition, you can also choose whether or not to record the internal click, audio fed into the DTX-PRO AUX IN jack (from a smartphone, for example) and/or audio coming from a computer via the rear-panel USB TO HOST jack:

Recording along with the click is a great way to work on your timing — when you play back the recording, you’ll easily be able to hear if you are in sync with the click. You can also change the playback speed over a range of +/- 50% — another great practice tool.
Up to 90 seconds of audio can be recorded into the DTX-PRO internal memory. However, this memory is volatile (meaning that the recording will be lost when the DTX-PRO is powered off), so you’ll want to be sure to save your recording to a USB flash drive connected to the rear-panel USB TO DEVICE port before turning off the unit. (A list of compatible USB devices can be found here.)
Plugging in a USB flash drive automatically increases recording time to 90 minutes, plus it allows you to name, store and recall your recordings. It also adds some interesting recording and practice options — for example, if you load your favorite songs or accompaniment files onto the flash drive as stereo WAV files, you can listen to them on connected speakers or headphones and play along with them. The DTX-PRO recorder even permits simultaneous recording and playback, so you can overdub your drums to the song while recording to a new audio file, and then play it back — a great way to monitor your progress when you’re learning a new song.
It’s worth noting that the level of the drums in the recorded file remains consistent regardless of the DTX-PRO Master Volume knob, while the level of the song being recorded can be set using the DTX-PRO Audio Volume knob.
2. Record to a Computer
The aforementioned rear-panel USB TO HOST port also allows you to connect the DTX-PRO to a computer using a standard USB Type B cable. Making this connection enables the DTX-PRO to stream audio and MIDI to and from any DAW (Digital Audio Workstation) software without the need for any additional hardware. The DTX-PRO even comes bundled with Steinberg Cubase AI music production software, so you’ll be able to quickly record, play and edit your drum performances and songs.

There are several ways to record in Cubase using the DTX-PRO: You can record MIDI data, audio files, or both at the same time. Recording MIDI data gives you powerful editing options such as quantization, which can align your performance to the click. Listen to this audio clip, and you’ll hear a MIDI recording of DTX-PRO drums as they were originally played. The performance is OK, but it’s not perfectly locked to the click track.
Compare that to the next audio clip, where the MIDI track has been quantized:
You can hear that the performance is now locked to the click. If you’re worried that quantizing might make the drums sound robotic or stiff, Cubase offers “soft quantize” and “groove quantize” features that correct the performance without making it sound mechanical.
Another powerful option that’s available when you record MIDI drum data is that you can easily go back and change the sound of your DTX-PRO kit to fit the production … and without having to redo your performance. For example, this audio clip was recorded using DTX-PRO preset kit P006 (“VintNashville”):
Since MIDI was recorded along with the audio, the MIDI track can be used to trigger a different kit. Here is the same exact performance, only this time the DTX-PRO is playing kit P008 (“Black Vinyl”):
In addition, the cut, copy and paste functions in Cubase make it possible to change the arrangement of a song at any time without needing to re-record the drums.
3. Use Rec’n’Share
One of the most exciting ways to record and practice with the DTX6 (or any Yamaha DTX Series drum kit, as well as the Yamaha EAD10 Electronic Acoustic Drum Module) is using the free Yamaha Rec’n’Share app, which records audio and video of your performance to any iOS or Android™ device.

Rec’n’Share can import a music file, analyze it for tempo and then generate a click track that you can play along with. Playback speed of the audio can be slowed down, and any section of audio can be looped — which is a tremendous help when you’re learning complicated music.
When you’re ready to record, Rec’n’Share lets you overdub your drums to the song while recording the audio and video to your smart device. You can then play back the recording and separately control the volume levels of the drum track and the music. Once you have a performance you’re happy with, you can edit the beginning and end of the file, then upload it to a file-sharing app, post your performance to social media or email it to your friends for instant feedback.
(Note that the DTX-PRO connects to your smart device via the USB TO HOST port, so you’ll need a cable that has a USB Type B connector at one end and an appropriate connector for your phone at the other end.)
4. Use the Analog Outputs
The rear panel of the DTX-PRO provides a pair of standard 1/4″ L/R audio outputs that can be connected to any recording device that has analog audio inputs. The downside to this “plain vanilla” approach is that it doesn’t take advantage of the many advanced capabilities described above. On the other hand, it does allow you to record your drumming to just about anything out there, from a vintage analog tape recorder to the most advanced digital system.
Ready to learn more about the recording features of the DTX-PRO? Check out this video:
Check out the other installments of our five-part “DTX6 Deep Dive” series:
Part 4: Customizing, Importing and Layering Sounds
Part 5: A New Level of Playability
Click here for more information about Yamaha DTX6 Series electronic drum kits.
Keep reading