The Magic of Wireless LAN and Chord Tracker
Imagine if there was an app that could take a song you love, analyze the audio and convert it to a chord chart! Now imagine taking that data and sending it wirelessly so that Genos could play the song back in a totally different style of music.
All of this is actually possible. And in today’s lesson we’re going to do just that.
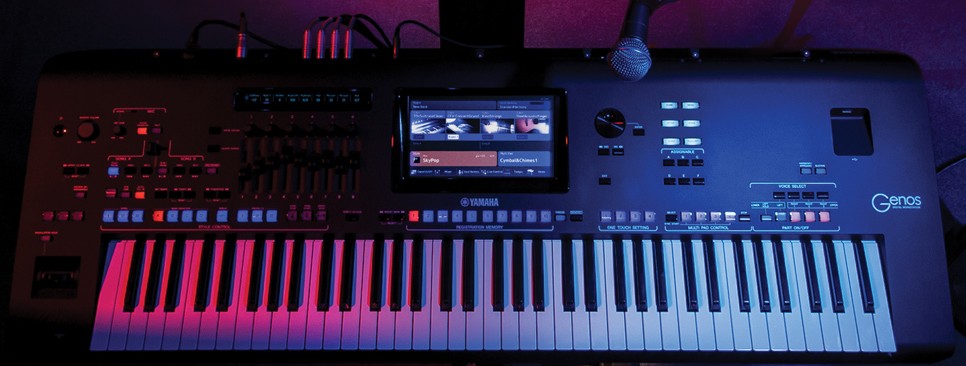
As you may or may not know, out of the box, Genos has LAN (Local Area Network) capabilities (though not available in some countries outside the U.S., so please check with your Yamaha retailer), which means it can transmit MIDI and audio data wirelessly. “Wow, that’s cool!” you may be saying, “but how does that help me make music?” Well, I’m glad you asked, because I’m going to provide the answer.

There are, however, a few things you’re going to have to do beforehand in order to follow along with this exercise. Begin by securing a flash drive with at least 500MB (half a GB) of space available. Then back up your Genos files to the flash drive. To do so, press the MENU button, select MENU2 and then touch Utility:Now go to page 2/2 in the Utility Menu and touch Backup. Once that’s done, you’ll need to update your Genos’s firmware to version 1.30 or later if it is running an earlier version. Simply click here and follow the download instructions.
Okay, now there are two more puzzle pieces you’ll need to make this work: an Android™ or iOS® (15.2 or higher) smartphone or tablet and the Yamaha Chord Tracker app, which you can download for free from the Google Play Store or App Store. This is the amazing software that converts the audio in your music library to chord charts. (For more information, check out our blog article “Chord Tracker and the Sonogenic keytar.”)
Once installed, make sure WiFi on your iOS device is turned on, then launch the Chord Tracker app:

Now let’s go back to Genos and get wireless connectivity going so the two can talk to each other. Press the MENU button, go to Menu2 and select Wireless LAN in the lower right-hand corner of the screen. You’ll see all the available networks pop up, as they would with your phone or tablet.


While you could connect Genos and your iOs device to your home WiFi network, I recommend instead using Access Point Mode. The benefit is that, in this mode, Genos and your device will be communicating peer to peer instead of sharing a network. Accordingly, go ahead and change the mode by touching Mode and selecting Yes when the “Changing to Access Point mode” dialog appears:Now go into the WiFi settings on your iOS device and you should see Genos pop up in the network list. Select the network ap-Genos-380672; the password is 00000000 (eight zeroes). You should see a check mark next to the Genos’s IP address. (It’s okay if it says “No Internet Connection” underneath.)

On the Chord Tracker Home screen, under the ”Instrument” menu, you should see Genos in the list. (If it’s not there at first, just give it a couple of seconds.)Once this connection appears, select “Music” to access your iTunes music library. (Only music you own can be analyzed by Chord Tracker; it does not support music streaming services.)
Next, select a song. For this exercise, I’m going to select one I wrote called “Ain’t Gonna Forget My Keys.” Once Chord Tracker finishes analyzing the audio — a process that takes just a second or two — a chord chart will appear. Pretty amazing stuff!

Now we’re going to send the chord data to Genos. In Chord Tracker, select the little box with the three dots in the upper left-hand corner of the screen, then select “Send to Instrument”:


You can now select a style within Genos to play back the MIDI chord data. For example, try choosing the SheriffReggae Style, under the Caribbean category. Once you’ve selected a style, touch “Send.” The Genos screen will show that it is connecting to your device:Now let’s find that chord chart in Genos. Select Song A on the Main screen (make sure you select MIDI instead of Audio), and then select the Chord Tracker folder. (This will contain the MIDI chord charts you transferred from Chord Tracker.)


All you have to do now is select the song you wish to play — in this case, “Ain’t Gonna Forget My Keys”: The song title will appear in the Song A area. Finally, press the SONG A PLAY/PAUSE button and enjoy hearing chords from a favorite song being played in a totally different style!
Have fun exploring the limitless possibilities that Chord Tracker, wireless data communication and Genos have to offer … and don’t forget to keep practicing!
All photographs courtesy of the author.
Keep reading