The Virtual Soundstage
Among the decisions you need to make when mixing is where to place the various instruments and vocals in a virtual “soundstage.” You can actually do more than just panning elements left and right in the stereo spectrum — you can also influence how far back or forward they seem. To some degree, you can even impact the apparent height of sounds in the mix.
In this article, we’ll tell you how to craft a mix that places the listener inside the music, even in a standard stereo setup.
Listen Up
Start by trying this simple exercise: Put on a pair of headphones and listen to the mix of a professionally produced popular song, paying particular attention to the placement of the various instruments and vocals.
First, focus on the stereo panning. You’ll hear the bass and kick drum — almost always the lowest instruments, frequency-wise — in the center. The lead vocal and snare drum will also usually be centered as well, although some mix engineers like to move one or both slightly off-center. Other elements, such as guitars, keyboards, background vocals, percussion and various parts of the drum kit will typically be spread out to the left or right or to both sides simultaneously. (To do the latter, simply create a copy of the track, then pan the original hard left and the copy hard right. Be careful, however, to slightly delay the copy or phase cancellations will result!)
Next, listen for the difference in depth between the various mix elements. Some sounds will be “in your face” — that is, right up front — whereas others feel like they’re coming from further back, as if they’re behind the “front line.” Finally, focus on differences in height; you’ll find that high-frequency sounds will appear to be higher or taller than the others.
While mixing, you can adjust where an instrument or vocal sits in all three of those dimensions. Note that all the techniques discussed here can be applied in Steinberg Cubase or any other DAW.
Front or Rear
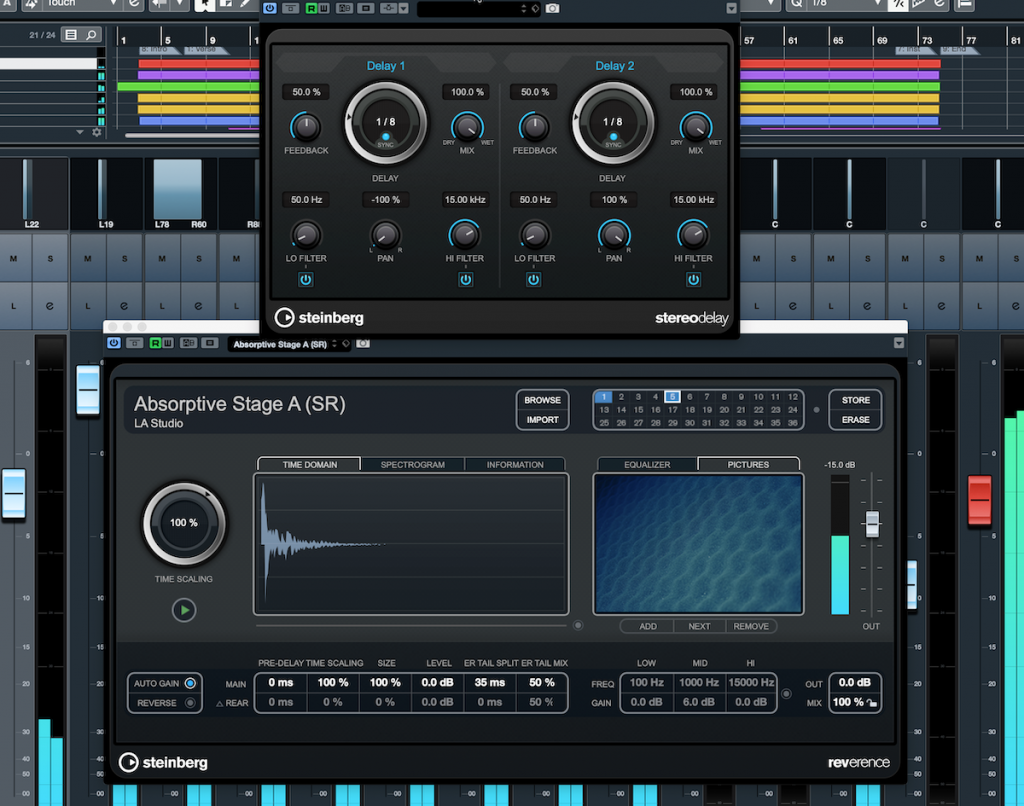
Whether a track sounds like it’s at the front edge of the mix or further back depends mainly on three factors: level, ambience and brightness. If you think about it, it’s similar to how you perceive sounds in real life. A closer sound will be louder than a distant sound. It will also be less ambient because you’re hearing more of it directly and less reflected sound — the softer, and slightly delayed reflections coming off the floor, walls or ceiling. In addition, a close sound will seem brighter, thanks again to hearing more of it directly, with fewer duller-sounding reflections.
To make bring a sound further forward, you have several tools at your disposal. These include raising its volume; reducing the amount of reverb or delay; and/or gently boosting its presence (that is, frequencies between 4 kHz and 6 kHz). Doing the opposite will cause a sound to appear more towards the back of the mix.
Up or Down
High-frequency sounds like cymbals and shakers — as well as, to a lesser degree, the upper ranges of pianos and guitars — often seem like they’re coming from the top of the mix. For that reason, you can raise the perceived height of a mix element by boosting its high frequencies (somewhere between 4 kHz to 20 kHz) and cutting low frequencies. You can’t be too heavy-handed about this, however, because too much boost will sound harsh, and if you cut necessary lower frequencies from an instrument or voice, it will sound thin and unnatural.
Note that the opposite does not hold true: You can’t move a sound whose energy mostly lives in the lower-midrange and low end to where it will appear to be floating on top of the mix. You can, however, roll some of the upper-mid frequencies off an instrument like bass guitar to place it more in the “bottom” of a mix.
To Each Its Own
Many times, you’ll find yourself having to mix multiple sounds that are occuping the same or similar frequency ranges. For example, note the overlaps in the four instruments shown here:
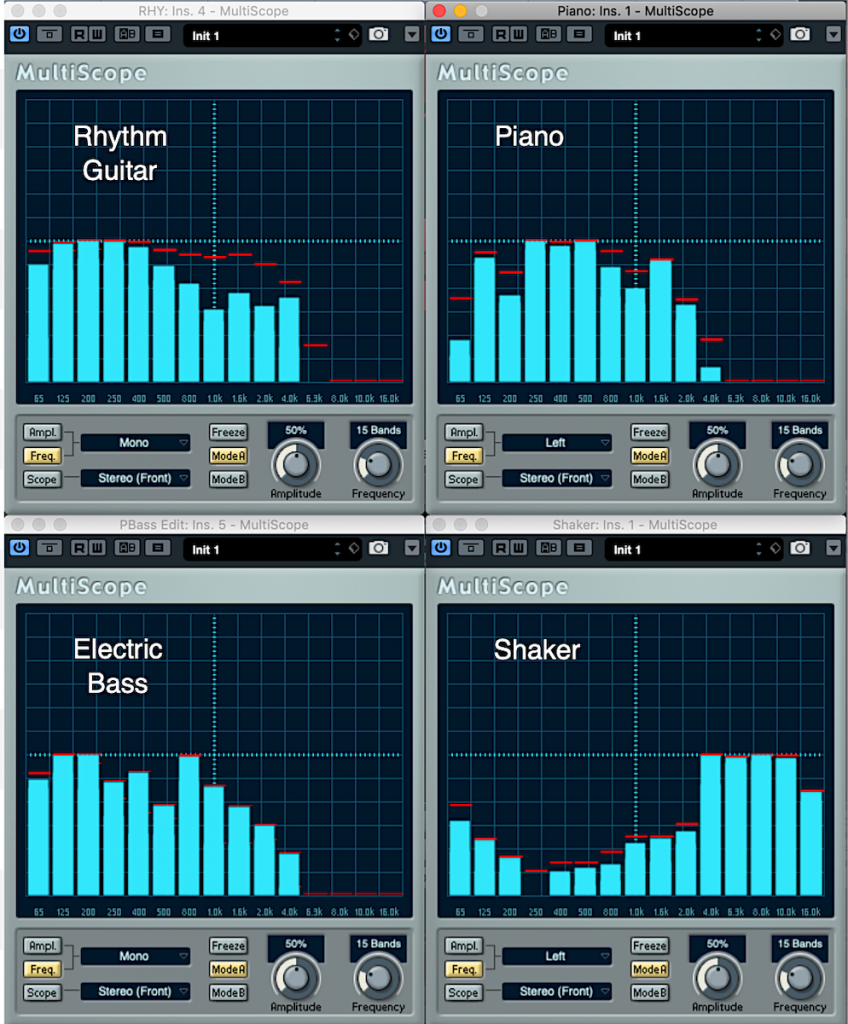
When tracks are competing for space in the same frequency area, you’ll have to deal with the phenomenon of “masking.” This not only makes one sound hard to distinguish from another, it also tends to clutter up the entire mix in the lower midrange (250 Hz to 500 Hz). Worse yet, the louder tracks in a particular range can render softer tracks in the same range inaudible.
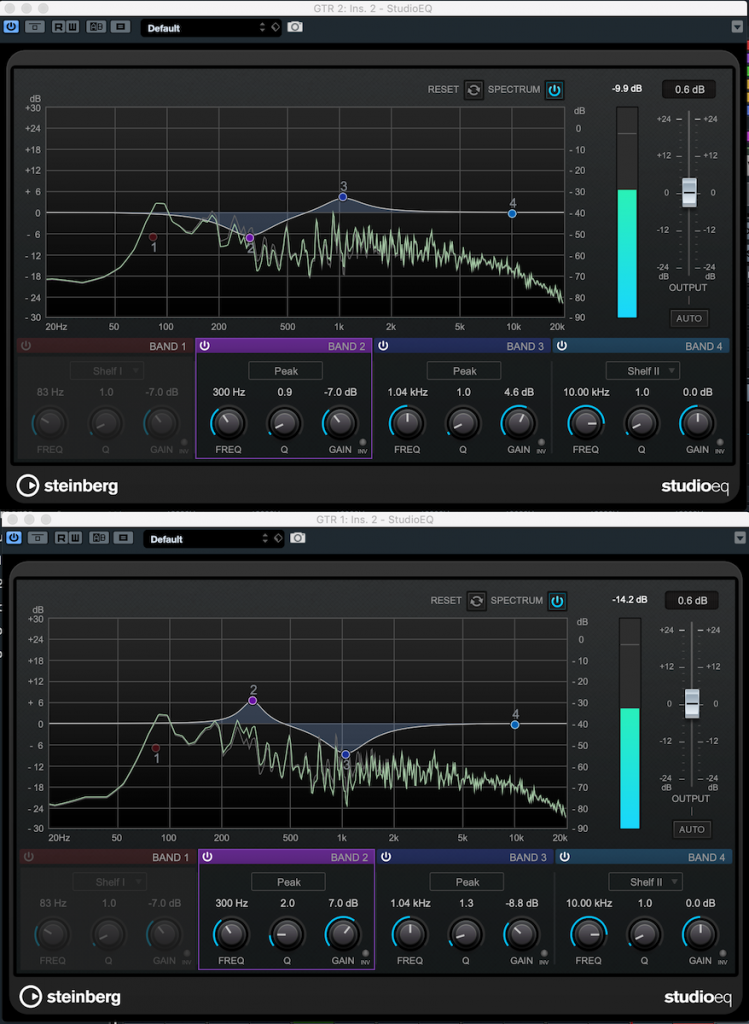
One good way of combatting this is to carve out a discrete frequency range — essentially a sonic “hole” — for each element (something we’ve discussed in a previous Recording Basics posting).
Another method is to pan various mix elements — particularly those that “live” in the same frequency range — away from one another so that each occupies a different space in the virtual soundstage you’re constructing. For example, you might want to place a rhythm guitar off to the left and a piano off to the right, or a shaker opposite to the hi-hat. Again, this rule of thumb applies mainly to multiple sounds in the same frequency range. Since a kick drum, snare drum and lead vocal all occupy distinctly different frequency areas, it’s generally fine to leave all three in the center of a mix.
Stereo Elements
These days, most synth and keyboard sounds originate in stereo and therefore take up space across the entire stereo field. They sound great on their own, but sometimes — particularly if you have other sounds in the same frequency range — they crowd out the rest of the elements due to their width. Too many stereo tracks can also reduce the punchiness of your mix.
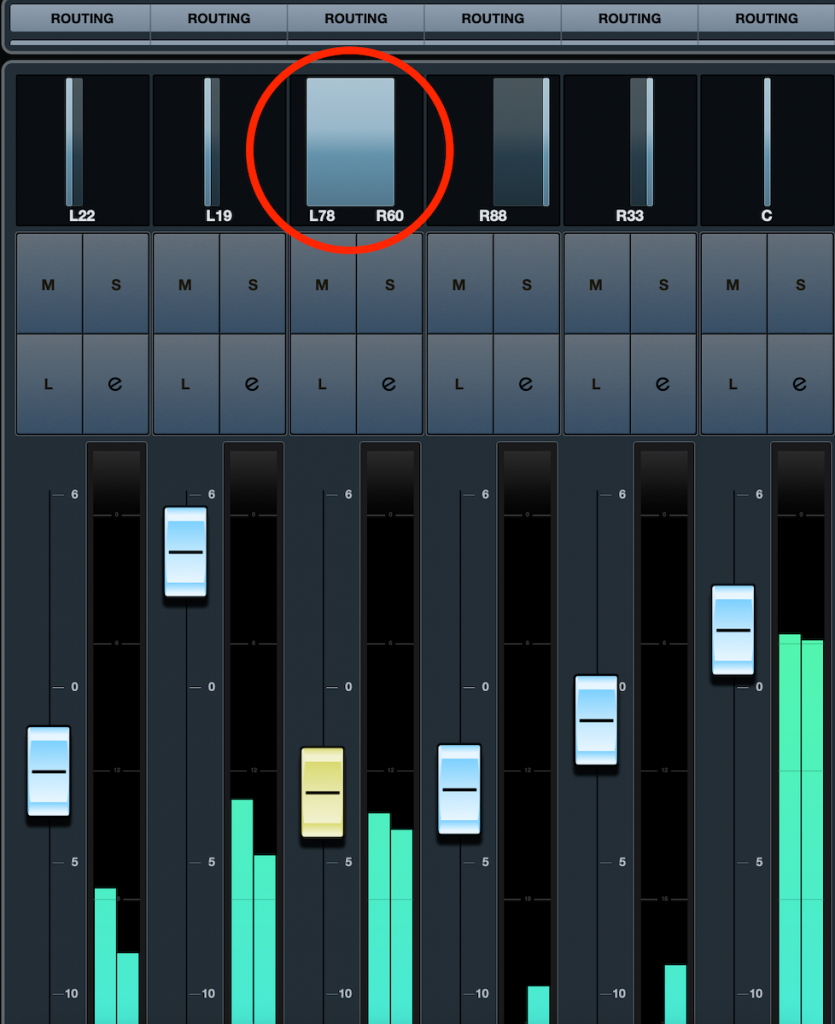
In a mix with few components — say, just guitar/vocal or piano/vocal underpinned with maybe some synth strings and background vocals — you might want the main instrument to stretch all the way across the soundstage, from far left to far right. But when mixing a full band or ensemble, you’re usually better off reducing the width of stereo instruments so that they take up less space by sending their signal to, say, half left and half right instead of hard left and hard right.
If you’re working in Steinberg Cubase Pro, this is easily accomplished: simply change the panning mode from the default Stereo Balance Panner to the Stereo Combined Panner. (Click on the arrow to the right of any stereo track to change the panner type.) This not only allows you to independently pan the left and right signals, it lets you take a stereo image and reduce the distance between left and right — even move the whole image towards one side or the other.
Start Panning
One effective workflow for starting your mix and creating your panning scheme is to begin with everything in the center. Get as good a rough balance as you can in terms of relative levels before you start placing the tracks across the soundstage.
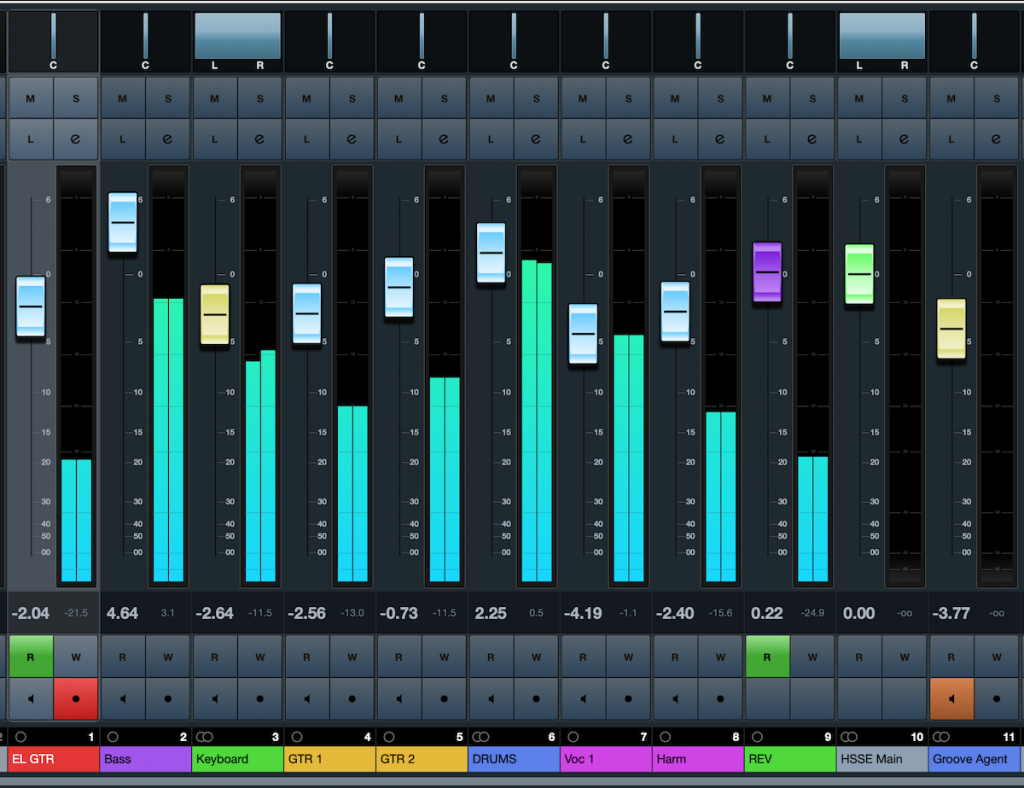
Instead of randomly placing elements, think first about where you want them to go and how they will relate positionally to the other elements in the mix. Although there are norms, there are no absolute rules when it comes to panning and placement, so feel free to experiment. And be sure to check your mix on a variety of speakers — and on headphones too — in order to get a good sense of the way the end listener will hear the virtual soundstage you are constructing.
Check out our other Recording Basics postings.
Click here for more information about Steinberg Cubase.


