Top 10 Tips for Livestreaming Your Music
More than ever before, musicians are livestreaming from their homes. To make yours stand out from the crowd, you need more than a good performance — you need to optimize your technology and maximize your production values.
Here are ten tips that will help you create a livestreaming event you’ll be proud of.
1. Choose the Right Platform
All the leading social media platforms (Instagram, Facebook®, YouTube™, Twitter/Periscope and Twitch) offer livestreaming options. Your choice will likely come down to where you have the most followers, or what’s fashionable within your genre of music.
But there are other factors to consider. For example, YouTube only allows you to stream from a mobile device if you have a channel with a thousand or more followers. (There’s no minimum follower requirement if you stream from a computer, however.) YouTube also requires a 24-hour waiting period after you verify your account (a relatively quick process involving inputting your phone number) before you can start to stream.

Instagram Live is easy to start streaming on, but your content only stays up for 24 hours. If you want your performance to be available in perpetuity, you need to record it and re-upload it to Instagram or YouTube.
Check out these links for more specifics on the streaming policies of the various main social media platforms: YouTube, Instagram Live, Facebook Live and Twitch.
2. Maximize Your Audio Quality
Livestreaming, at its most basic, entails standing in front of your smartphone and using its built-in camera and mic to capture your performance. It’s easy and quick, but doesn’t offer the best results, particularly on the audio side.
That’s because the built-in mics on phones are generally mono and don’t provide very good fidelity — not surprising, given that they were designed primarily for making phone calls. What’s more, you have to position yourself in such a way that your voice and instrument are correctly mixed. That usually requires you to get your mouth relatively close to the mic, which means moving your face close to the camera. That doesn’t often produce a flattering shot due to the optical distortion you get with extreme closeups.

Whether you’re streaming from your phone or from your computer, you can connect higher quality audio devices such as USB microphones or external mixers. The latter allows the usage of professional quality external microphones (positioned exactly where you want) and also enables you to bring in multiple sources. They also allow you to create a stereo mix before the audio is sent to the encoder software in your computer. (See Tip #8 below.)
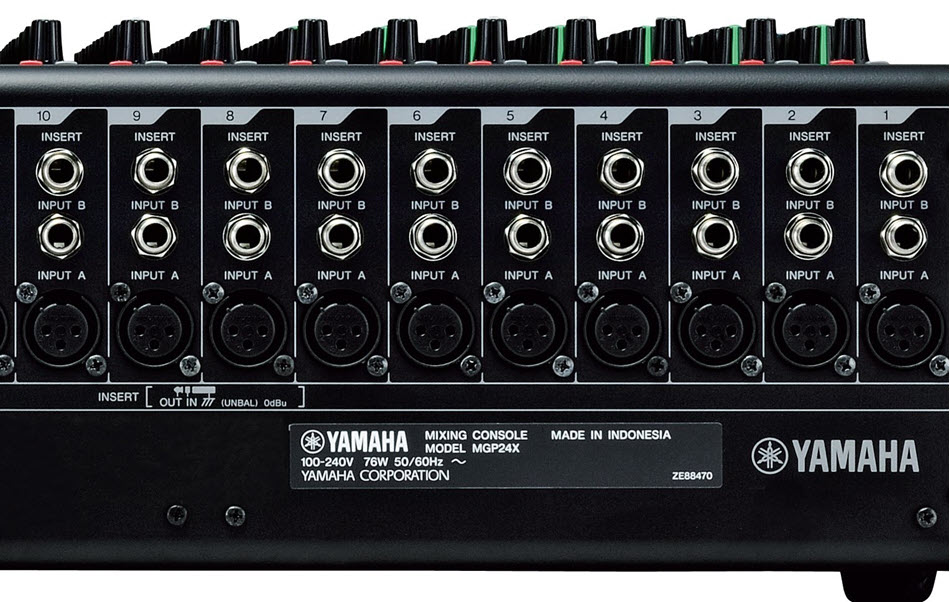
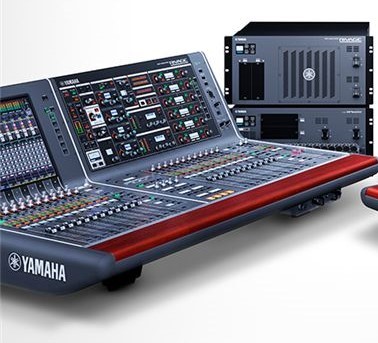
A good starting point would be one of the compact Yamaha AG Series mixers, which are optimized for basic livestreaming and podcasts, with features such as built-in effects and USB/iPad® connectivity. If you need more inputs and additional flexibility, check out the Yamaha MG Series or MGP Series line of mixers, which come in a variety of sizes and offer USB outputs that make them well-suited for livestreaming applications.

If you’re a solo act, you should consider using a vocal mic like the one you use onstage, plus a second mic (or a DI connection) for your instrument. If more than one person is performing, multiple input sources are imperative for getting a good blend of sound.
If you’re using your phone for a camera, you can connect USB mixers to it with the use of an inexpensive and readily available adapter cable. For iOS devices, you’ll need the Apple® Lightning-to-USB Camera Adapter; for Android™, an OTG cable.
3. Create an Appealing Visual Background
You want to make your visuals as appealing as possible, so finding the best spot in your house or apartment for your performance is critical. You’ll probably want the background to be as simple as possible — a cluttered room will be a distraction for your viewers.
Light-colored curtains make for a good background; if you don’t have any, you can always hang some fabric on the wall behind you. Or consider buying a “green screen” — a cloth backdrop in a particular shade of green compatible with the chroma key function in your broadcasting software. That’s a great way to go, since it allows you to use any kinds of images as backgrounds, giving you a lot of visual options.
4. Check Your Lighting
You’ll also need decent lighting. Unless you’re planning to stream your show during daylight hours (and assuming you have a space with good natural light), you’ll have to use artificial lighting of some type.
You may be able to get away with the existing lighting in your home, but you should think about purchasing a lighting setup designed for video since professional lighting will help eliminate facial shadows and other visual anomalies. Products and prices vary quite a bit, but you should be able to get something that does a credible job in the $200 – $300 range.

5. Use a Tripod or Stand
Whether you’re using your phone’s camera or a dedicated video camera, you’ll need a stand or tripod. Obviously, you can’t hold a camera and perform at the same time, and even if you have somebody in your house who can operate it for you, you want the visual image to be steady, not shaky, as would occur if the camera is handheld. A steady camera will provide a much more professional look and help you keep your viewers longer.
6. Consider Multiple Cameras
If you’re ambitious and have some money to spend, you might consider using more than one camera for your livestream. To do so, you’ll need to purchase either a hardware switcher or a software switcher and video capture card, which will require a minimum investment of $300 to $500. You’ll also need someone to operate the switcher during your performance. But the result is a much more captivating image, since the viewer won’t have to be subjected to the same camera angle from start to finish.
7. Maximize Your Internet Connection
Having a stable internet connection makes a huge difference when it comes to livestreaming. If your Wi-Fi is uneven in your house, it may dictate where you perform, which may not always be the best spot visually or acoustically. But if you perform where the signal is weak or unstable, your stream will be subject to dropouts and freezes, which could ruin things for your viewers.
Generally, you’ll get the best results if you set up in the same room as your router (or Wi-Fi extender, if you have one). If possible, connect your computer to the router/extender with an Ethernet cable (as opposed to wirelessly) for the most consistent — and likely fastest — service.
8. Pick the Right Encoding Software
To combine your audio and video sources for streaming, you’ll need to install broadcaster software on your computer. Fortunately, you don’t have to spend any money to do so. Two of the top freeware applications are OBS Studio (OBS stands for “Open Broadcaster Software”) and Streamlabs. Other software packages offering more extensive feature sets are also available.

These apps allow you to configure your video and audio inputs and will stream your content directly to YouTube, Facebook, Periscope (Twitter’s live streaming service) and Twitch, among others. (Only one at a time, however. If you want to stream to multiple sources you’ll have to pay for a subscription to a multi-streaming platform such as CASTR, Restream or Switchboard.)
9. Play Original Music
Legally, you don’t have the right to play a cover song online unless you’ve arranged for a license through a licensing agent such as The Harry Fox Agency®. If you play an unlicensed cover, your stream (or the recording of it that you post) could be taken down by Facebook, YouTube or whichever platform you’re streaming to. Don’t take that chance: Stick to original material.

10. Test Test Test!
Before you stream to the world, you want to test your setup extensively. Check how your background looks, how the lighting is working, whether your audio is coming through with sufficient fidelity, and how your internet connection is holding up.
Do several dry runs in advance of any public performance. If you’ve decided to use YouTube, you can do a test stream that’s recorded but that only you can access. For other platforms, you might consider setting up a separate account that you use exclusively for tests and don’t publicize.
In addition, most OBS software packages offer a handy recording option. Simply use the same settings as you’re planning on using for your livestream, then record a rehearsal onto your local drive to preview how it will look and sound.
Above all, remember Murphy’s Law: Whatever can go wrong, will go wrong. The only way to cope is to be copiously prepared. Happy streaming!
Click here for more information about Yamaha mixers.
Keep reading