Live Sound Troubleshooting Tips, Part 1
Troubleshooting any audio system can be tricky, but it’s not rocket science. In this two-part series, we’ll look at the common problems that plague PA systems, and ways to fix them.
Local Versus Global
One of the keys to troubleshooting your PA is recognizing whether a problem is “local” or “global.” A local problem affects only one or two channels, while a global problem affects the entire system. In this posting, we’ll look at global problems; in Part 2, we’ll look at local problems and those particular to digital consoles.
Important: Always turn off power amps or powered speakers any time you are making or removing connections. Failing to do so (i.e., “hot-plugging” them) can result in a nasty pop that could damage speakers and/or scare the daylights out of anyone nearby.
No Power
The first step in troubleshooting any audio system is ensuring that all the components are plugged in and turned on. If you are having power issues, check the following:
1. Confirm that the power switches for all gear are turned on.
2. Check that all AC plugs are firmly seated, including those that are plugged into power strips or surge suppressors.
3. Confirm that all power strips are turned on and plugged into working AC outlets. Most power strips have a light indicating that they are active.
4. Check the circuit breakers on your power strips (usually a pushbutton on the side). If a circuit breaker has tripped, it’s possible that the devices plugged into the strip are drawing too much power — in which case you may need to reconfigure the power distribution so that the power strips are operating within their safety limits. Power requirements for most audio gear can be found in the owner’s manual.
5. Removable IEC power cables can work loose during transport or due to vibration. Be sure they are firmly seated.

6. If a device still won’t power up, check the fuse on the rear panel and replace it if necessary. Use only the fuse recommended by the manufacturer.
No Sound
1. Verify that all components are receiving power.
2. Examine the connections between the mixer and the power amplifier or powered speakers. Sometimes cables for the mixer L/R outputs get swapped with the monitor outputs.
3. Turn up the volume controls on the powered speakers/amps.
4. Raise the mixer master fader to 0 (unity gain).
5. Make sure the mixer master mute switch is off.
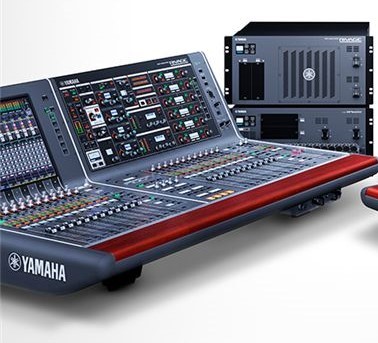
6. Send a signal from an input channel to the L/R bus of the mixer. You can play music from a laptop or smart device, speak into a microphone or use a test tone generator for this purpose. All current Yamaha digital mixers, including TF Series and RIVAGE PM Series models, provide an onboard oscillator for use as a test signal.
Audio Is Coming from Just One Side of the PA
If you’re getting audio only from one side of the PA, there are a couple of possibilities — but cables are always the first suspect. Here’s how to troubleshoot this type of problem:
1. Monitor a signal that is panned center and assigned to the L/R bus. Raise the channel fader to 0.
2. Slowly raise the master fader to 0, then back it down to -10 or -15 while you continue to troubleshoot.
3. Ensure that XLR connectors are latched, TRS or TS plugs are fully inserted, and Speakon connectors have been turned and locked. RCA connectors are particularly prone to failure under heavy use due to the outer ground connection wearing out and becoming loose, so if a piece of equipment provides the option of RCA, TRS or XLR connectors, always opt for TRS or XLR.

4. If you discover that the input connector to a power amp or powered speaker is partially plugged in (or not plugged in at all), temporarily power the piece of gear down while you reconnect the cable.
5. Swap the left and right output connectors on the mixer. If the problem changes sides, then the cable between the mixer and the amp is probably at fault. Change it.
6. If the problem remains on the same side, check the volume control on the amp or powered speaker.
7. Confirm that the amp is not in “protect” mode, whereby it may mute the outputs. This can be caused by shorted speaker cables.
8. For PAs using passive speakers with power amps, swap the speaker cables at the output of the power amp (make sure it’s powered off first!). If the problem changes sides, replace the speaker cable.
No Sound from a Monitor Mix
Monitor mixes can be tricky to troubleshoot because they can be affected by input channel settings. If you’re not getting sound from a monitor mix, here’s what to do:
1. Confirm that the aux send used for the monitor mix is pre-fader.
2. Using an input channel and source that you know is working, set the aux send to 12 o’clock.
3. Slowly raise the aux send master to unity gain.
4. Examine connections as previously described. If you are running multiple monitor mixes and some of them are working, swap cables at the aux output jacks on the mixer.

A cable tester is a handy device to have in your tool bag, and one that tests XLR, TS, TRS, RCA and Speakon cables can be purchased for under $50. Trust me: It will pay for itself on the first gig. If you’re experienced using a DMM (Digital Multi Meter), most can be set to indicate continuity with a “beep” — though using a DMM to test a cable will be a bit more time-consuming than using a dedicated cable tester.

Any cable that’s questionable should ether be immediately labeled for repair, or tossed in the trash. You don’t want that same cable showing up at the next gig, causing problems.
Hum or Buzz from Both Sides of the PA
Hum or buzz in a PA system is often related to a ground problem that can be traced to either an AC connection or an audio cable. Here’s how to chase down a ground issue:
1. Turn off the amp or powered speakers and disconnect the mixer from the main L/R and monitor amps.
2. Turn on the amp and with the volume up, listen to the speakers. You should hear a faint hiss, but no buzz or hum. If you do hear buzz or hum, examine the AC plug and make sure that the ground pin (the round one) is intact. (Never remove it!) Replace the power cable if necessary.

3. Look around for nearby fluorescent or neon lighting fixtures or lighting dimmers, all of which can induce noise in audio lines. Turn such fixtures off, or set such dimmers fully clockwise so that no dimming is occurring.
4. Connect the L/R outputs of the mixer to the amp(s) for the main speakers.
5. Turn on the mixer, then turn on the power amp. Raise the master fader to 0, lower all channel faders all the way down, and raise the volume controls on the amp. You should not hear any buzz.
If hum or buzz persists, or reappears when you connect cables between the mixer aux sends and the inputs to the monitor amps, you may have a ground loop.
Ground Loops
A ground loop is a condition where audio equipment is grounded in more than one location and there is a small voltage between the grounds. That small voltage can cause a big noise! Here’s how to find and cure a system ground loop:
1. Plug all AC cables — amps, mixer, powered speakers, etc. — into the same outlet using a power strip. This may not always be possible because a single outlet may not be capable of handling all of the power requirements. In that case, try plugging all gear into a nearby location — for example, using only AC outlets onstage and not at front-of-house.
2. Use an AC hum eliminator. These are placed between the AC plug of a device and the AC outlet. A well-designed AC hum eliminator maintains a ground connection for safety while eliminating the noise.
3. If this doesn’t work, try an audio hum eliminator. These are passive devices (usually in the form of a small box) that use transformers to safely break ground loops. Hum eliminators are typically connected between a mixer and a power amplifier, allowing audio to pass through unaffected while removing ground-related noise.

Check out Part 2, where we discuss how to troubleshoot distortion and input problems, as well as gremlins that sometimes lurk beneath the surface of digital consoles.
Photographs courtesy of the author.
Keep reading