Get More from Your EAD10 with v2.0 Firmware
The Yamaha EAD10 is an incredibly versatile device that can transform your acoustic drum set into a hybrid acoustic-electronic drum kit, making it a great tool for practice as well as performance.
It consists of two components: a sensor unit and a main module unit. The sensor is meant to be mounted on your bass drum hoop; its built-in stereo microphone is specially designed to pick up the sound of an entire acoustic drum set, allowing you to quickly record your acoustic drums (or send their sound to a P.A. system during live performance) and monitor them with full control over the volume in your headphones.

The main module provides hundreds of PCM sound sources and dozens of high-quality effects, along with a high-performance headphone amplifier that delivers the volume necessary when playing an acoustic drum set. It offers a series of large knobs that can easily be adjusted mid-performance, so that main control functions like volume and preset scene can be accessed easily, as well as LED indicators that enable quick and intuitive adjustment on even the darkest of stages.

When integrated with the Yamaha Rec’n’Share app (available for both Apple® iOS and Android™ devices), the functionality of the EAD10 is further enhanced. This powerhouse combination allows you to record audio and video while playing along with your favorite music, and to then upload the files to social media. Simply pick a song from your music library, and the app’s tempo detection lets you add a click, change the tempo and select sections to repeat for practice made perfect — you can even edit recorded audio.
Recently, Yamaha released free Version 2 firmware for the EAD10 that provides additional creative and educational tools that can help students with self-evaluation and when working with an instructor. In this article, we’ll show you how to upgrade to Version 2 and discuss the many new capabilities it adds.
Installation
Installing the V2 firmware into your EAD10 is simple and easy. Here’s a video that takes you through the process step by step:
Let’s take a closer look at each of the new features described in the video.
Talkback
The EAD10 main module provides a dedicated microphone button, located directly below the power on-off switch and to the right of the MENU button:

The new Talkback function added by the V2 upgrade enables easy communication between instructors and students without the need for extra microphones or speakers — even while wearing headphones.
Here’s how it works: During initial setup of the EAD10, the gain of the internal microphones in the sensor unit is set to capture loud sounds (i.e., the sound of the drums). For that reason, when you stop playing and start speaking, it may be difficult to hear yourself through the microphones because your voice is not nearly as loud as drums are. The new Talkback feature instantly changes the mic gain to a level that makes your voice easy to hear, and when recording using the Rec’n’Share app, it also enables you to hear your voice on video when you stop playing. Turning off Talkback returns the mic gain to its original setting.
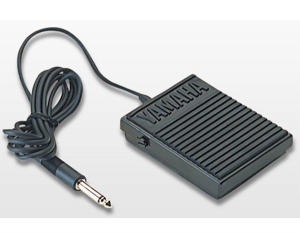
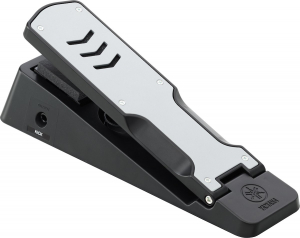
There are several ways to control Talkback. It can be turned on or off by double-tapping the Microphone button, or you can use a foot switch (such as the Yamaha FC5 or KU100 kick unit) connected to the rear panel of the main module. A third option is using the EAD10 Pad Function to control Talkback using a trigger input, in which case striking a specific drum pad turns Talkback on and off.
Click Output Assignment
Being able to work with a click track is an important skill for any drummer. EAD10 Version 2 firmware provides several options for routing the click, so you can hear it in live performance, as well as while recording. Assigning the click to PHONES sends the click to the headphone jack only. Assigning the click to L&R + PHONES routes the click to the headphone jack as well as the main left/right outputs. Setting the click output to ALL routes the click to the main left/right outputs, the headphone jack and the USB audio output that is sent to the Rec’n’Share app.
Since the click is the tempo guide, being able to hear it clearly creates a solid audio reference for your groove. The Click Output Assignment feature makes it easy for you to ascertain whether your performance is in sync with the click, or if you’re ahead of, or behind the beat — vital for improving your drumming skills.
Noise Gate
If you’re recording in a noisy environment, the Microphone Noise Gate feature added by the EAD10 V2 firmware can be used to filter out background noise. It’s accessed by pressing UTILITY > GENERAL, then scrolling down to MIC NOISE GATE. To set the gate, first adjust the threshold all the way down to -90 dB, then turn it on. You won’t hear any difference yet because the threshold is all the way down, and so the gate will open in response to even very soft sounds. Listen to the background noise while slowly raising the threshold. When you hear the background noise disappear, stop. This sets a threshold that ensures the background noise will be filtered out, but your drums will still come through loud and clear. The Release adjustment permits the gate to close smoothly so you don’t hear any choppiness, such as the decay of cymbals getting cut off.
This is a great way to prevent background stage noise or audience chatter from sneaking into your performance between songs. It’s also useful in situations where you need to filter out environmental sounds like the whoosh coming from an air conditioner. You may not hear those kinds of noises when the drums are being played, but you’ll certainly hear them when the drums stop!
Low-Volume Drum Sets
The Version 2 firmware also provides support for an optional data file that includes 42 new Scene presets designed for consistent, accurate triggering from mesh heads. They allow you to construct an incredibly realistic, low-volume practice or performance drum set, while preserving all the other functions of the EAD10. (Here’s a video that shows you how to load these presets into your EAD10.)

To use these scenes, you’ll need to connect a set of triggers, such as the Yamaha DT-50S (designed for use with snare drum, rack tom and floor tom) and/or DT-50K (designed for use with kick drum) to the mesh heads and to the EAD10’s rear panel trigger inputs.
To ensure reliable triggering, set the tension of each mesh head high — if it’s too loose, false triggers can occur. Don’t use a felt beater on a mesh bass drum head because felt will shorten the life of the head considerably. Instead, use a plastic beater or place a bass drum patch on the head.
Extended Recording Time
Last but not least, the Version 2 upgrade extends your recording time to 90 minutes when using a USB flash drive, allowing you to record an entire set, rehearsal or lesson for review and evaluation.
All in all, the V2 firmware upgrade adds a wealth of useful features to your EAD10, and at no cost whatsoever. That’s what I call a real bargain!
Click here for more information about the Yamaha EAD10.
Click here for more information about the Yamaha Rec’n’Share app.
Keep reading