Timpani Bowl Construction
There are many types of timpani, each with various types of pedals and different types of bowls and bowl materials. Options can be numerous, and needs will vary by the requirements of the ensemble. In this article, we’ll discuss the unique manufacturing process that Yamaha uses when making timpani bowls.
The Importance of the Timpani Bowl
When it comes to the construction of a timpano, the bowl has the greatest impact on sound. The type of material and the shape and thickness of the bowl all play a considerable role. An instrument that is musically consistent from one size to another allows the band director to focus on teaching, and when it is easy to discern pitch, students are better able to learn proper timpani tuning.
Choosing the Bowl Material
The first step in the bowl manufacturing process is choosing the right material. Yamaha makes five different models of timpani, utilizing two different bowl materials: copper and aluminum. Only high-grade copper (1.5 mm thick) and aluminum (3 mm thick) are used.
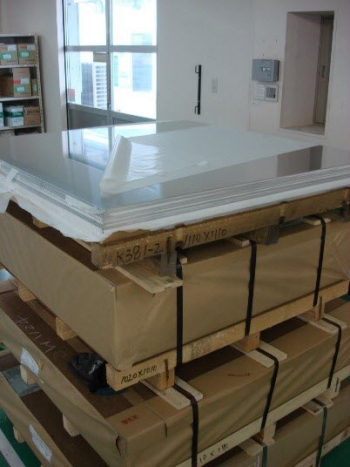
Aluminum has sonic properties that are very close to copper; it’s also recyclable and is a better alternative to fiberglass, another common bowl material. In addition, aluminum can be repaired if it is damaged, while fiberglass cannot.
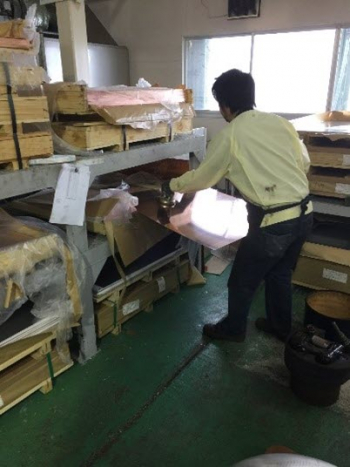
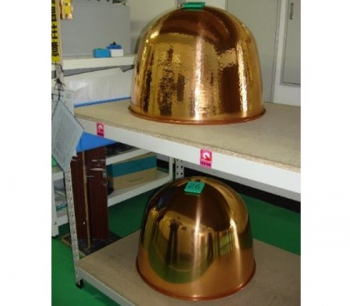
Cutting and Spinning
Next up is cutting and spinning the material. A special machine takes a large square sheet of copper or aluminum and spins it very slowly to a specific size, depending on the ultimate size of the bowl. It’s important to ensure that density and consistency is maintained as the material is spun into shape.
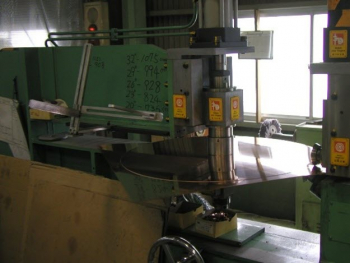
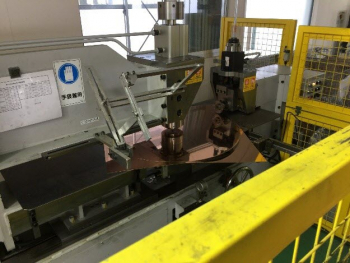
An arm connects to the flat sheet and slowly pushes it around a steel mold. These molds vary in size, depending upon the size of the timpano. The spinning process ensures that the metal consistency is even throughout the entire shape of the bowl, so the sound can resonate freely. In addition, the bowls have no seams, which can interrupt and interfere with the sound waves traveling inside.

Annealing
During the spinning process, the bowl must be annealed. This is a heat treatment that alters the physical properties of a material to increase its ductility and reduce its hardness, making it more pliable. This process involves heating a material above its recrystallization temperature, maintaining a suitable temperature for an appropriate amount of time, and then cooling it. Copper needs to be annealed many times in order to reshape it and maintain a constant thickness throughout the bowl. This level of detail leads to greater tuning accuracy and more consistent quality of sound.

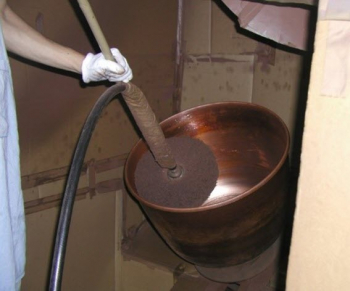
Sanding, Polishing and Hammering
After the bowls are spun, they get a sanding and a polish to clean them up inside and out.
On YTP-7300 and TP-8300 Series timpani, a hammering process follows. This makes the material denser and gives the timpano a darker tone, helping to hide the fundamental pitch and focusing the third overtone, so it sounds clearly — an important part of the sound of a timpani. Yamaha TP-8300R Series timpani have close to 30,000 hits on each bowl.

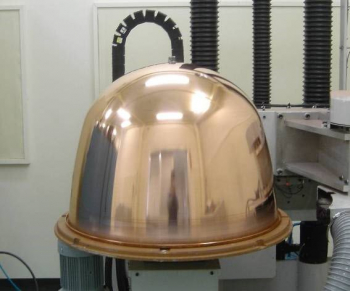
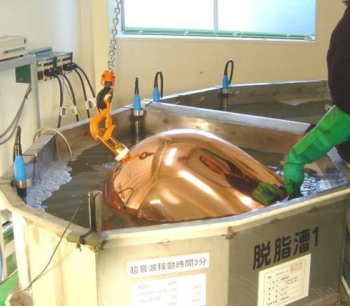
Degreasing, Lacquering and Baking
The bowl is then washed in a four-step degreasing process — a series of four baths to ensure it is clean before the lacquering process. This is important so the finish adheres correctly. The bowl is then set aside to dry for a short period of time.
Once completely dry, each bowl is given a light coat of clear lacquer. This imparts a shiny exterior finish that will pop visually on any stage.

A large oven is then used to bake each bowl up to 300 degrees. This ensures that the lacquer is completely dry and hardened before moving on to assembly with the frame and timpano head.

Final Assembly
During assembly, the bowl is placed into a frame where it is freely suspended by a suspension ring. This limitation on pressure allows the bowl to resonate to its fullest potential. Just as in brass instruments, a heavy frame promotes more resonance. Yamaha frames are comprised of heavy die-cast aluminum, which minimizes vibration transfer, allowing the timpano to project even more.

Lastly, each timpano is put through a final inspection. This is when the drum is tuned to the expected range. The head is adjusted a few times each day to ensure that it’s seated properly, and the pedal is engaged multiple times so that it works smoothly. Every Yamaha timpano is played and thoroughly tested prior to being shipped. This way, it’s ready to go, right out of the box.

The innovation you find in Yamaha timpani is a combination of skilled craftspeople, high-quality raw materials, and the latest in manufacturing techniques and technology, borne from years of research and development. From the symphony hall to the band room, the football field to the recording studio, there is a set of Yamaha timpani for every application.
Also check out these related blog articles:
A Brief History of Yamaha Timpani
Buying New Timpani? Here’s What You Need to Know
How to Change Timpani Drum Heads
Caution! Are You Moving Your Timpani Correctly?
Click here for more information about Yamaha timpani.
Keep reading