A Guide to Home Studio Monitors
When you set up a monitoring system for your home studio, your goal is not to make it sound as good as possible. Instead, you want it to provide a realistic sonic picture of the audio and MIDI tracks you’re working on. That way, the music you record and mix won’t sound significantly different when played on other speaker systems.
Conversely, if what you’re hearing doesn’t accurately reproduce the frequency content in your tracks, your music is less likely to “translate” to other systems and will sound amateurish.
In this posting, we’ll look at what you need to know to get the best monitoring in your home studio. We’ll focus on 2.0-channel (left-right) systems, which you can use for stereo or mono mixing, but will also touch on 2.1 systems, which include a subwoofer. (Multichannel audio formats such as Dolby Atmos or 5.1 surround require much more complex speaker systems and are beyond the scope of this blog.)
Near and Far
First and foremost, it’s important to understand the distinction between consumer speakers and studio monitors. Consumer speakers are meant for casual listening and so they tend to hype lows and highs in order to create a more pleasing sound. In contrast, studio monitors are designed specifically to provide accurate sound with a “flat” frequency response (that is, one with no frequency areas artificially boosted).
The Yamaha HS Series is a good example of monitors built for the studio. Every HS speaker cabinet incorporates two drivers: a woofer and a tweeter. Each driver gets amplified separately — in other words, they are bi-amplified. The incoming signal is split between low and high frequencies at a specific crossover point, with the lows and lower-midrange frequencies going to the woofer and the upper-midrange and high frequencies routed to the tweeter.

HS monitors come in five different sizes, categorized by the size of the woofers; the larger the woofer, the lower the bass frequencies the monitor can reproduce. The compact 3.5-inch HS3 produces bass down to 70 Hz; the slightly larger 4.5-inch HS4 down to 60 Hz; the 5-inch HS5 down to 54 Hz; the 6.5-inch HS7 down to 43 Hz; and the 8-inch HS8 all the way down to 38 Hz.
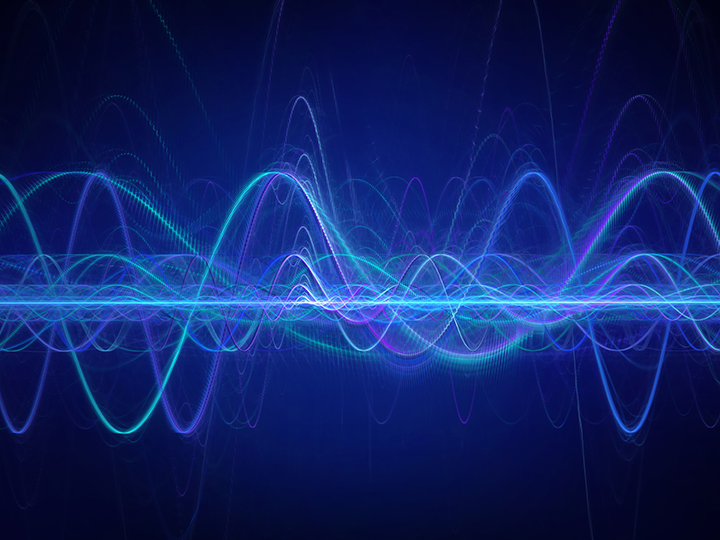
To give you some perspective, the fundamental (basic) frequency of the low E on a 4-string bass guitar (its lowest note) is 40 Hz. So if your monitor only reproduces down to 54 Hz, you’ll still hear that bass note because it’s got overtones that are much higher than 40 Hz (see the illustration below), but you won’t be able to judge how it sounds between 40 Hz and 53 Hz.

So why wouldn’t everyone get a monitor that can go as low as possible? One factor is cost. Larger monitors are typically more expensive. Another issue is space. Monitors with 8-inch woofers tend to be relatively large. If you don’t have a lot of space in your studio, you might find them too big to fit comfortably. Some monitors with 8- to 10-inch woofers are classified as “mid-field,” and are designed to be placed farther back from the listener. For most home studios, it’s best to stick to monitors designed for near-field use, such as the Yamaha HS Series models.
Unless you’re planning to produce a lot of EDM or hip hop — both genres where the bass is paramount and the music is often listened to on systems with subwoofers — you can probably get by without hearing below 50 Hz or so from your monitors.
Studio headphones (as opposed to consumer-grade headphones) sometimes let you hear lower frequencies than monitors; if so, you can use them to check the lowest parts of the audio. As an example, Yamaha HPH-MT7 and HPH-MT8 studio headphones go down to 15 Hz, which is theoretically below the lowest level of human hearing (approximately 20 Hz).

By the way, it’s generally a good idea to check your mixes on headphones, given that many people now consume music exclusively on headphones or earbuds instead of speakers. In addition, when listening to monitors, room reflections can cause you to hear some of the right channel signal in the left speaker and vice versa, whereas on headphones you hear the left and right channels entirely separately.
Another way to get more bass with smaller monitors is to supplement them with a subwoofer like the Yamaha HS8S, thus creating a 2.1 system. A correctly configured subwoofer will provide you with more than enough bass response, even if your main monitors are somewhat lacking. And because our ears don’t perceive much directionality in bass frequencies — that is, we can’t tell readily where they come from — you can put a subwoofer on the floor under your work surface (or pretty much anywhere in the room) and not use up precious table space.

In the Field
Professional studios are designed by acousticians and are often custom-built and outfitted with extensive (and often very expensive) acoustic treatments to ensure they’re neutral for mixing and suitable for recording.
Home studios, however, are generally situated in existing rooms in houses or apartments. Even if you have the budget for acoustic treatments, you may not want to attach absorbers and diffusers to your walls — especially if you’re renting. Luckily, there are strategies you can follow to help reduce the impact of unfavorable room acoustics that would otherwise make accurate monitoring problematic.
Most importantly, you want to place your monitors in a near-field configuration. This entails two monitors forming an equilateral triangle with your listening position. The distance of each of the three sides should be roughly the same and between about two and four feet. It helps to angle (“toe-in”) the monitors in by about 30 degrees, so the drivers are pointing directly at your ears. There are apps that can help you do this.

Even in a near-field setup, the room’s dimensions will still impact what you hear. One of the most common problems is low frequencies that build up in corners and close to walls, which can overly hype bass frequencies. When that happens, you’re likely to undermix elements like the kick drum and bass guitar, which will sound too soft when played back on more accurate systems.
Reducing Reflections
Another problem common to rooms without acoustic treatment is phase cancellation caused by room reflections. Because reflected sound reaches your ears later than direct sound, phase shifts can occur that cause particular frequencies to be attenuated (diminished), further skewing the accuracy of the reproduction.
Where you place your monitors in the room can help reduce problematic reflections. You want them as close to the center of the room and as far away from walls and corners as possible.

You can also mitigate some room issues if the monitor you’re using has adjustable built-in EQ. Yamaha HS Series monitors provide dual rear-panel EQ controls labeled ROOM CONTROL and HIGH TRIM. ROOM CONTROL adjusts the speaker’s low-frequency response (below 500 Hz) and is used to compensate for excessive reflections in some listening environments. The HIGH TRIM switch allows you to slightly cut or boost the speaker’s high-frequency response (above 2 kHz). In rooms that are overly bright, you would use it to cut the high-frequencies; in rooms that are too “dead,” you would boost it.

If your monitors won’t fit on the desk or table you’re using as your workspace, you may need to set them on stands. If those stands are adjustable, they’ll also help get your monitors high enough: The tweeters should be at about the same height as your ears when you’re sitting in your mix position. Regardless of whether you use stands or set the monitors on a tabletop, it’s best to decouple the vibrations coming from the cabinets so that they don’t get transferred into the supporting surface. Such vibrations can cause resonances that can further skew what you’re hearing. This is best accomplished by placing monitor isolation pads between the monitor and the surface they’re sitting on. These are generally an inch or two thick and are made of heavily absorbent material. You may be very pleasantly surprised at how much this simple addition aids in the accuracy of your monitoring system!
Additional Tips
No matter how carefully you configure your monitoring system, it’s always helpful to listen to your mixes on other speakers (those in your car, in your living room speakers, on a boombox, etc.) to make sure that your mixes are translating. Doing A/B comparisons with professionally mixed songs is another way to help ensure that.
It’s also good practice to check your mix at different levels as you’re working on it. Because the human ear perceives frequencies differently at various volumes, you don’t want to always listen at one level.
Be careful not to mix loud for too long, however. Louder volumes will hasten how quickly your ears get fatigued. When that happens, you’ll be less able to make accurate judgments. Instead, get in the habit of taking a break for at least 10 minutes — if not an hour or two — during every mix session to give your ears a chance to rest.
Monitoring at levels of 85 dB or more for extended periods of time can also damage your ears. A device (or app) called an SPL meter (short for Sound Pressure Level meter) will enable you to be aware of your monitoring levels and allow you to avoid unhealthy exposure. The app versions aren’t usually quite as accurate as hardware devices, but are often very inexpensive, or even free. Either way, it’s a great addition to your home studio.
Keep reading