Top 10 Mixing Tips
Mixing is like playing an instrument. It’s a skill you develop over time with lots of practice and repetition. Although there are no shortcuts to becoming a professional-level mix engineer, here are ten tips to help you improve your mixing chops.
1. Get Organized
Spend a few minutes organizing your tracks before you start mixing. Doing so will make your mixing workflow more efficient.
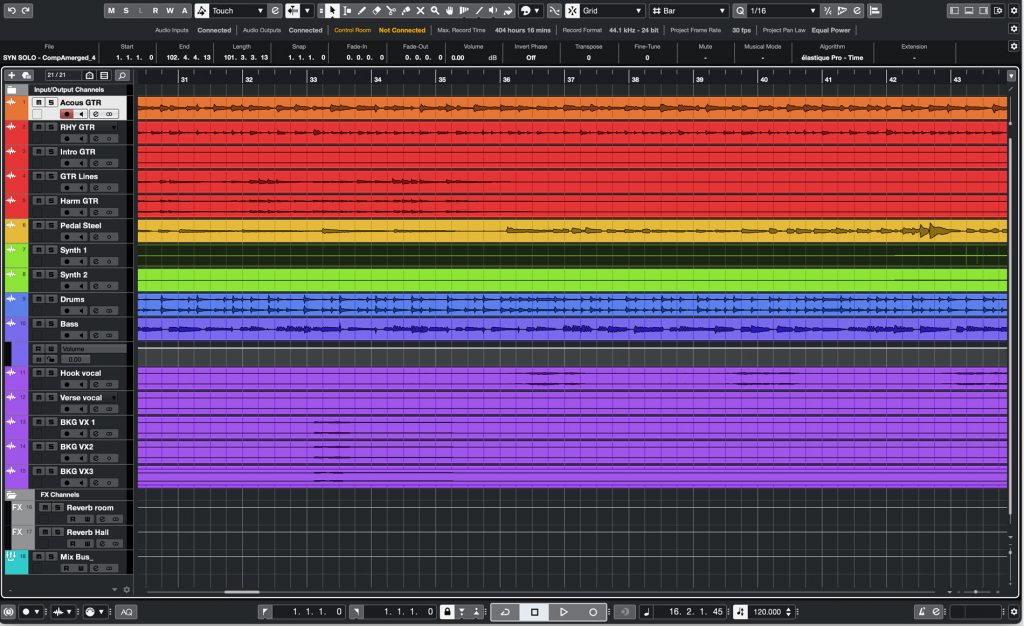
First, arrange the tracks in the mixer by type. For example, put the drum tracks next to each other, followed by the guitars, the keyboards, the vocals, etc.
Next, color code the tracks by category. Decide on specific colors to apply to various types of tracks and commit to using the same ones on future projects. The more you use them, the more your eye will become accustomed to seeing blue drums, red guitars, pink vocals, green keyboards and purple basses. After a while, the color coding will become second nature and save you time searching for tracks.
You’ll probably want to start with at least one reverb and one delay set up on auxiliary tracks (called FX Tracks in Steinberg Cubase); you may also use other types of effects frequently. As part of your setup, create the necessary tracks, insert the effects and confirm the routing. Consider creating a template file that saves your configuration so you don’t have to set it up for each song you’re working on.
2. Check Each Track for Glitches
Another essential task is to solo each track to listen for glitches and noises you might not have noticed with all the tracks playing — for example, a singer’s throat clearing or loud breath, a pick noise before a guitar line, or a forgotten crossfade after an edit that resulted a click.
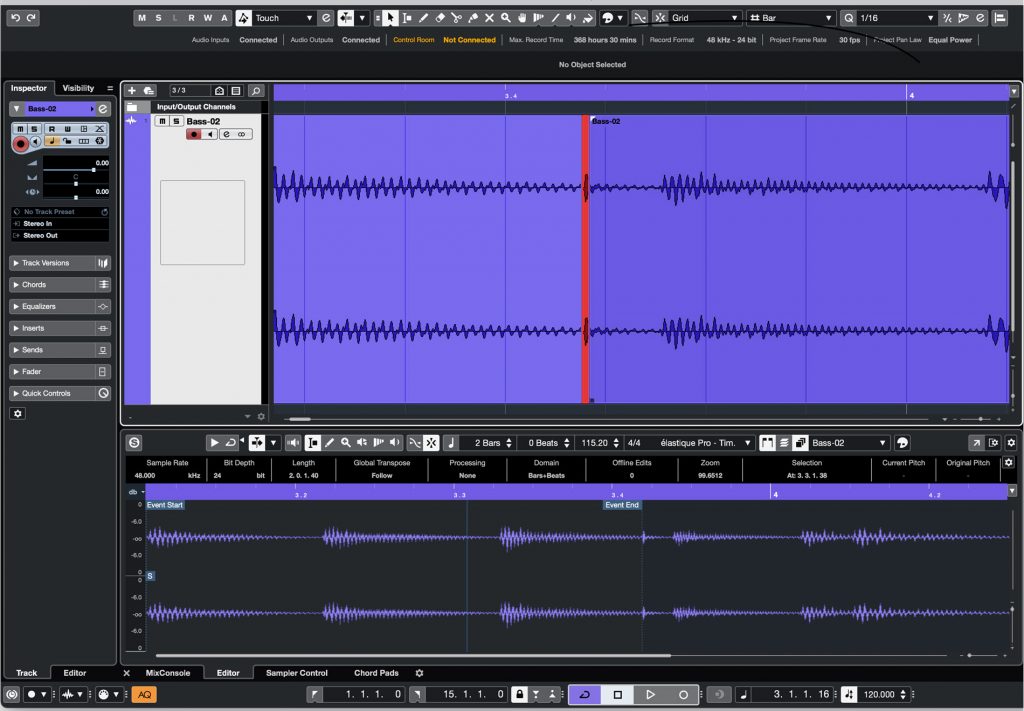
Yes, it can be a little tedious to go through the entire song track by track, but by using your DAW’s editing tools to fix any problems you discover, you’ll never have to worry about stray sounds ending up in the final mix.
3. Create a Preliminary Rough Mix
You’ll find many different opinions on how to start a mix, but here’s one that’s easy and effective: Pan all the tracks to the center, set all the volume faders at unity gain (0 dB) and turn off all EQ and effects, then adjust the track faders to create a rough balance.
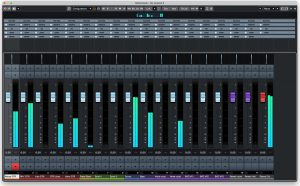
One way to create that rough mix is to start with the lead instruments and vocals muted, so all you’re hearing are the rhythm section instruments: drums, bass, rhythm guitars and chordal keyboard parts. Think of those tracks as the bedrock of your song. Get them balanced first, then add the vocals and any lead or melody instruments. Using the faders alone, make everything sound as good as you can before you start EQing or adding effects.
4. A Place for Everything
Once your rough mix is created, start thinking about the soundstage. In a stereo mix, selectively placing tracks from left to right is the easiest way to give each part its own space. Instruments like kick drum, snare drum and bass are almost always panned to the center, as are lead vocals. If you’re using a drum loop or drum machine, the kick and snare will already be in the center.
Where you pan the rest of the tracks is a creative decision, though symmetry is important: You want the left and right sides to be, on average, pretty close to equal in volume. For example, try to place stereo backing vocals at three and nine o’clock, or eight and four o’clock.
When you’ve got an instrument such as a dense synthesizer sound on a stereo track, it can occupy a lot of left-to-right real estate and mask other instruments. Many DAWs offer an optional panner (in Cubase, it’s called the Stereo Combined Panner) that you can deploy on a track-by-track basis to pan the left and right independently. This can be used to shrink the width of a stereo track while keeping it balanced between left and right, or to push it toward one side without collapsing it into mono.
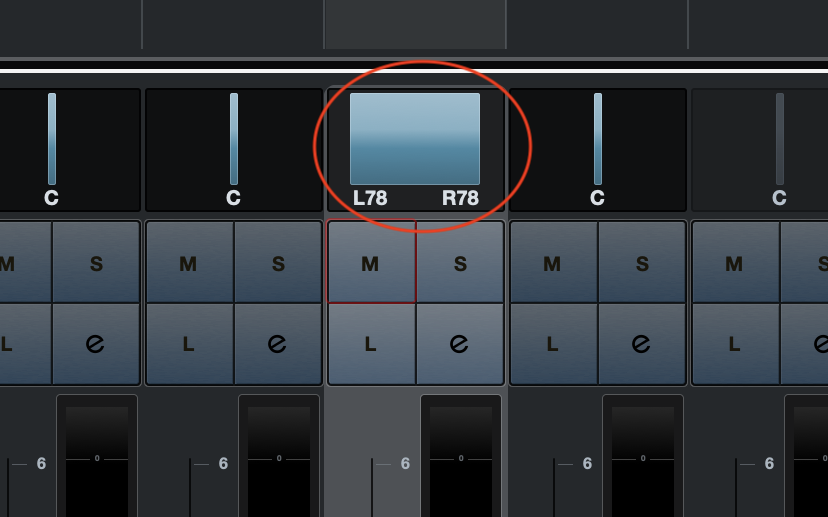
Panning is designed to give you control over the side-to-side aspect of the stereo soundstage, but unfortunately, there are no single controls for the front-to-back aspect. However, you can move a sound forward by making it louder, brighter or less reverb-y (or any combination of the three); conversely, you can move a sound back by making it softer, less bright or awash in more reverb.
5. Filter Out Mud
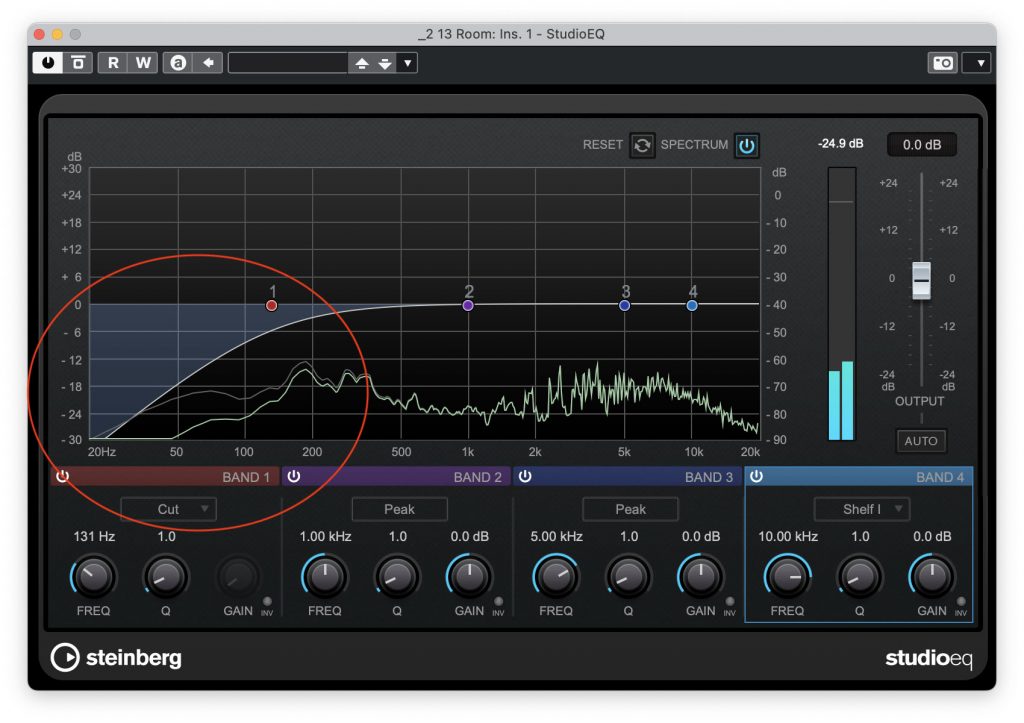
One of the most common mix problems is muddiness. Cutting unnecessary lows and low-midrange frequencies can help eliminate the mud. Vocals and guitars typically have lots of unneeded low-frequency information that you can reduce with a high-pass filter (also known as a “low-cut filter”).
You’ll typically find such filters in EQ plug-ins such as Cubase studioeq, shown below. The process is simple: Set the lowest band to act as a low-cut filter and slowly move the frequency for that band higher as the track is playing. When you hear the instrument or voice start to thin out, back off the frequency knob slightly until the thinning just starts to go away.
6. Go Easy with Reverb
A good-sounding reverb can work wonders as an effect, but too much can turn your mix into a muddy mess.
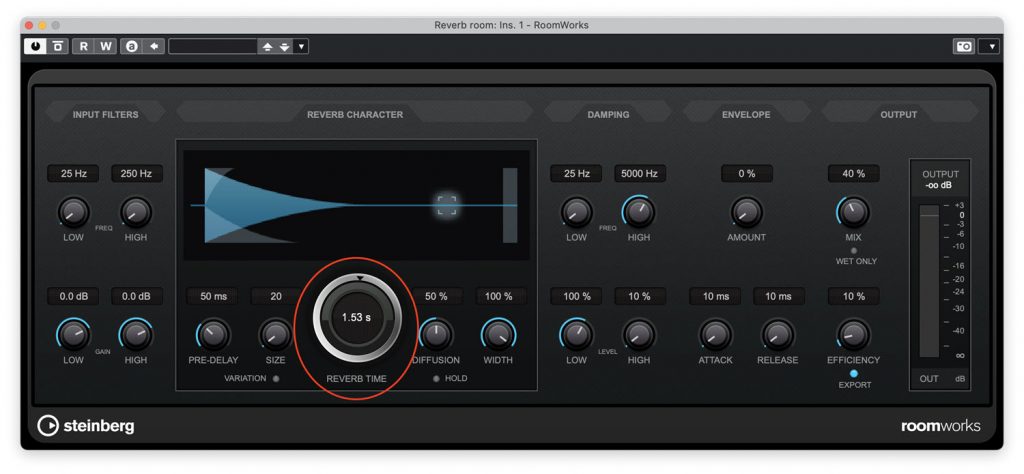
It’s not just how much reverb you apply, however. The reverb’s decay time (sometimes called “room size” or “reverb time”) also plays a major role. That’s because the longer a reverb decays, the more it will wash over itself from one beat, word or phrase to the next, adding clutter to the mix. The faster the tempo, the more acute this phenomenon becomes because the beats are coming faster.
If you hear reverb wash, tighten it up by backing off the amount of reverb or reducing the decay time. If that doesn’t give you the result you’re after, try rolling off some of the reverb’s bass by using its EQ to reduce everything below about 400Hz.
7. Save Often and Incrementally
Once you’re deep into a mix session, retaining your objectivity can be tricky. As a result, it’s often hard to know when to stop and, in the quest for perfection, take your mix into the weeds. Moreover, once you’ve pushed your mix into questionable territory and saved it, you may not be able to easily get it back to its most recent good-sounding point … if you can even remember where that was.
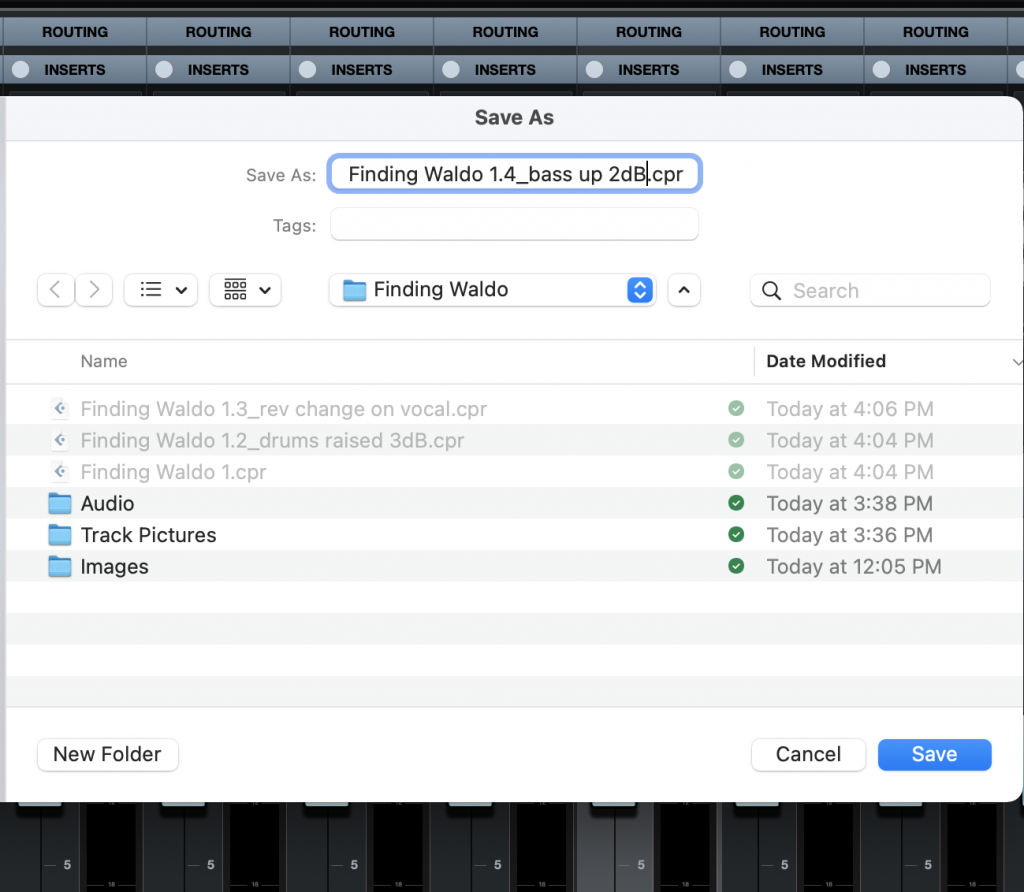
Fortunately, if you make a habit of using the “Save As…” command instead of “Save” (a technique known as incremental saving), you can mostly mitigate this problem. Here’s how it works: Any time you make a relatively significant change to your mix — say, putting a heavy compressor on the drums — employ Save As and give the file an incrementing number (or letter, it’s up to you) and add a brief description of the change to the file name. For example, “Song Name_1.7_bass up 2dB.” That way, if you go too far, you have a selection of previous versions with labeled changes that you can revert to.
8. Compare Your Mix
By comparing your mix to a professionally mixed song of a similar genre, tempo and instrumentation, you can get good clues to what yours lacks, if anything, and you can compensate. The process of comparing to a reference track is called “A/B-ing.”
The easiest way to set this up is with a dedicated A/B plug-in, but you can also A/B inside your DAW by creating a stereo channel, importing your reference track, and using that channel’s mute and solo buttons to switch between your reference and your mix. (See below.) It’s important to adjust the level of the reference track so that it’s the same as your mix. Otherwise, the comparison won’t be accurate.
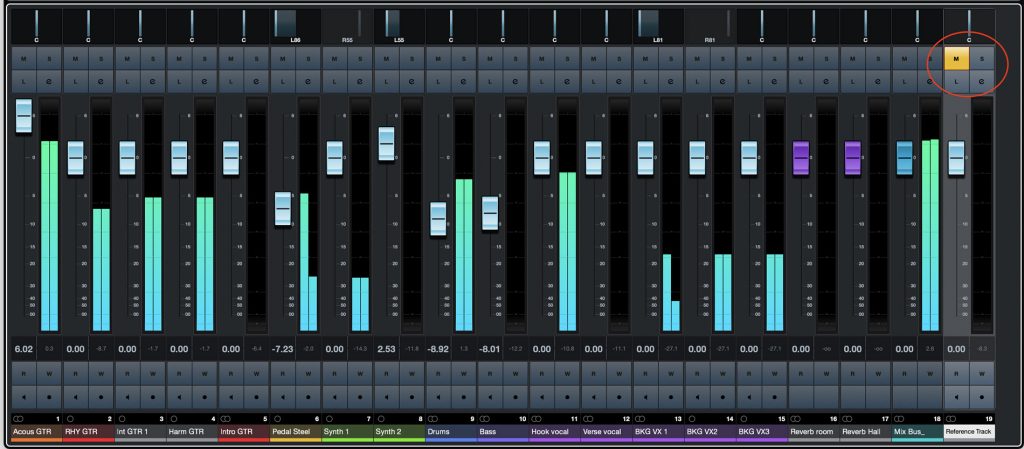
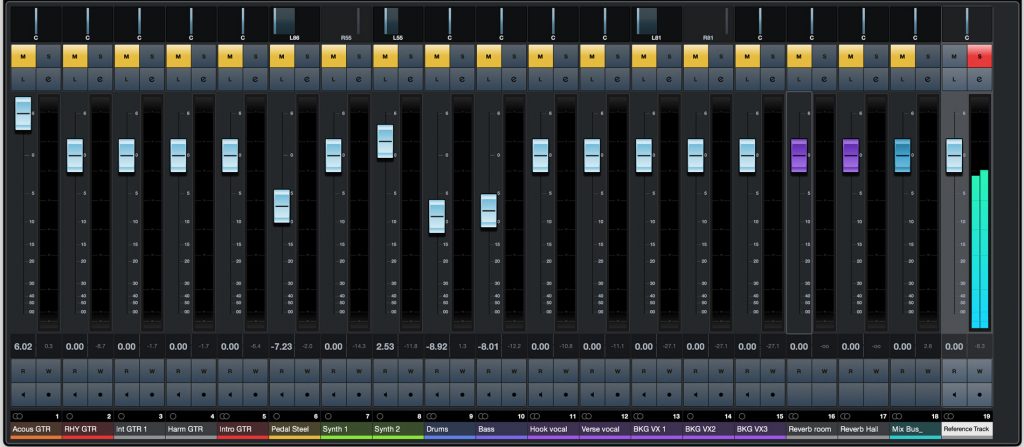
If you’re going to reference this way, it’s also better to create a dedicated mix bus track and route all of your tracks into it. (In Cubase, select all your tracks, including FX channels, then Control+Click on one of them in the MixConsole and use the “Add Group Channel to Selected Channels” command.) Route the mix bus’s output to the Main Out. When you export your mix, change the output source to the Mix Bus from the Main Out.
9. Let it Sit
I strongly suggest that you always let your mix sit overnight (or at least for a few hours) before calling it finished. As mentioned previously, it’s easy to lose objectivity over a long mix session, and you may be not-so-pleasantly surprised by some of what you hear when you listen the next day or after an extended break.
As you listen, make notes of the issues you hear, and correct them one by one. Then your mix should be in good shape.
10. Make Sure Your Mix Translates
As a final check, listen to your mix in as many places as possible outside your studio to ensure that it retains its balance on various speaker systems and in different acoustic spaces. Listen on your living room stereo, over a boombox, in your car, at a friend’s house, etc. Also be sure to check your mix on headphones and earbuds.
If it sounds good everywhere, you’re home free. But if you notice a consistent problem that you didn’t hear when you did the mix — such as too much or too little bass — your studio’s room acoustics or monitors (or both) are causing you to hear frequencies inaccurately. As a result, it will be impossible to balance levels correctly.
In the short term, the best way to mitigate that is to revise the mix and compensate for the discrepancies. For example, if it sounded too bright, make it a little less so and see how that sounds elsewhere. In the long term, consider adding acoustic treatment to your studio and/or upgrading to more accurate monitors — taking either or both of these steps should serve to improve the quality of your mixes substantially.


