Better Monitoring for Better Mixes, Part 2
Part 1 of this two-part series focused on choosing and positioning studio monitors for optimal results. Here in Part 2, we’ll offer some tips and techniques to help you monitor more effectively, even in a room with questionable acoustics.
Keep the Volume Down
It’s essential to keep your monitoring volume relatively low most of the time when mixing. You want to listen at a level that lets you hear everything comfortably, but isn’t consistently loud. This also reduces the reflections created within your listening room that can color what you hear.
If you’re not sure what the optimum level would be, you can purchase an SPL (Sound Pressure Level) meter or get a free (or very inexpensive) SPL app for your smartphone that will get you in the ballpark. You want to keep your settings below approximately 85dB (A-weighted) most of the time. That said, you should check your mix at louder volumes for short periods, especially if you think that’s how most people will listen to it.
Another problem with listening loud for too long is that it’s less efficient because it will more quickly bring on ear fatigue (sometimes referred to as “losing your ears”), and you’ll temporarily be less able to make accurate judgements. Not only that, listening at levels over 85dB SPL on a regular basis can damage your hearing over time.
Take Breaks
It’s also critical to take regular breaks during your mixing sessions to avoid ear fatigue and to regain the perspective that you can lose when concentrating on a single task for a long duration. Take a 10-minute break roughly every hour.
Get out of your studio if you can. Go for a walk or do something else to get your mind off the mix. If you feel like your ears still aren’t back to normal after the break, put off the rest of the session until the next day, if your schedule allows.
When you get back to the mix the following day, you’ll be surprised how much more you notice with fresh ears!
Save Incrementally
While this next tip isn’t strictly about monitoring, it’s directly related and very important. When a mix session runs too long, you not only get ear fatigue, but you lose perspective. When that happens, it’s all too easy to steer your mix off course inadvertently.
Because of those inevitable detours and the difficulty of knowing when you’ve passed the point of diminishing returns, it’s crucial to save your Project files incrementally. This refers to the practice of using “Save As…” instead of “Save,” then putting a successively higher version number in the file name every time you make a significant change to the mix (or even to just a single track within the mix). The idea is that if you do go off course and wreck your mix, you can backtrack to a point before the damage happened and start again by reopening that Project file.
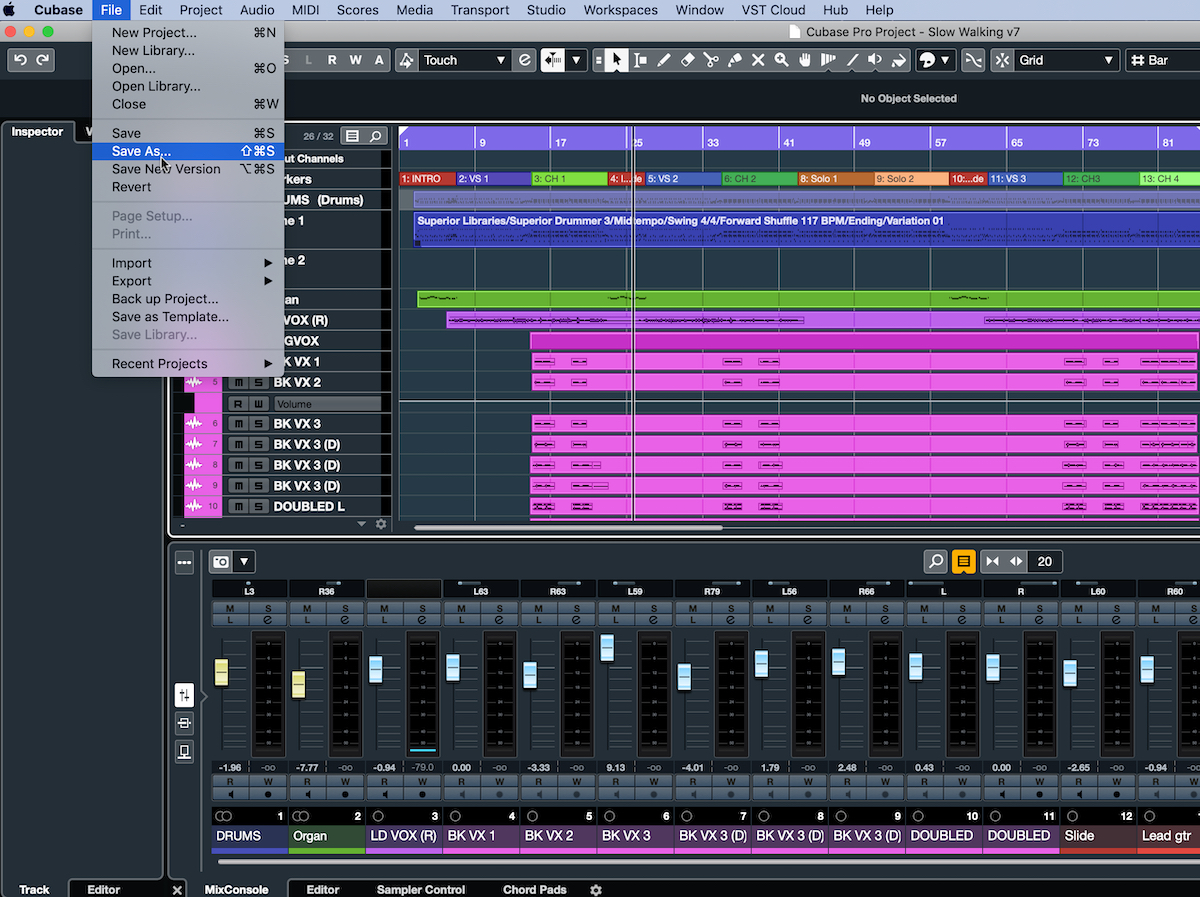
Besides the song title and the incremented numbers, you might want to add a descriptive word in the file name like “Bass up 2dB” or “New reverb on vocal” for a little extra context if you have to backtrack.
Take Notes
When you do reopen a mix after recovering your objectivity, jot down notes about everything you hear that you want to correct as the song is playing. (In my experience, this is more efficient when done the old-fashioned way, with pen and paper; typing in comments on a computer or smart device tends to be much more time-consuming and distracting.) If there are more than a few things that need adjusting, it will be hard to remember them after the fact.
With that list in hand, you’ll be able to go through the mix methodically and correct all the spots where you noticed problems or issues — something that should get you a lot closer to the finish line.
Listen Everywhere
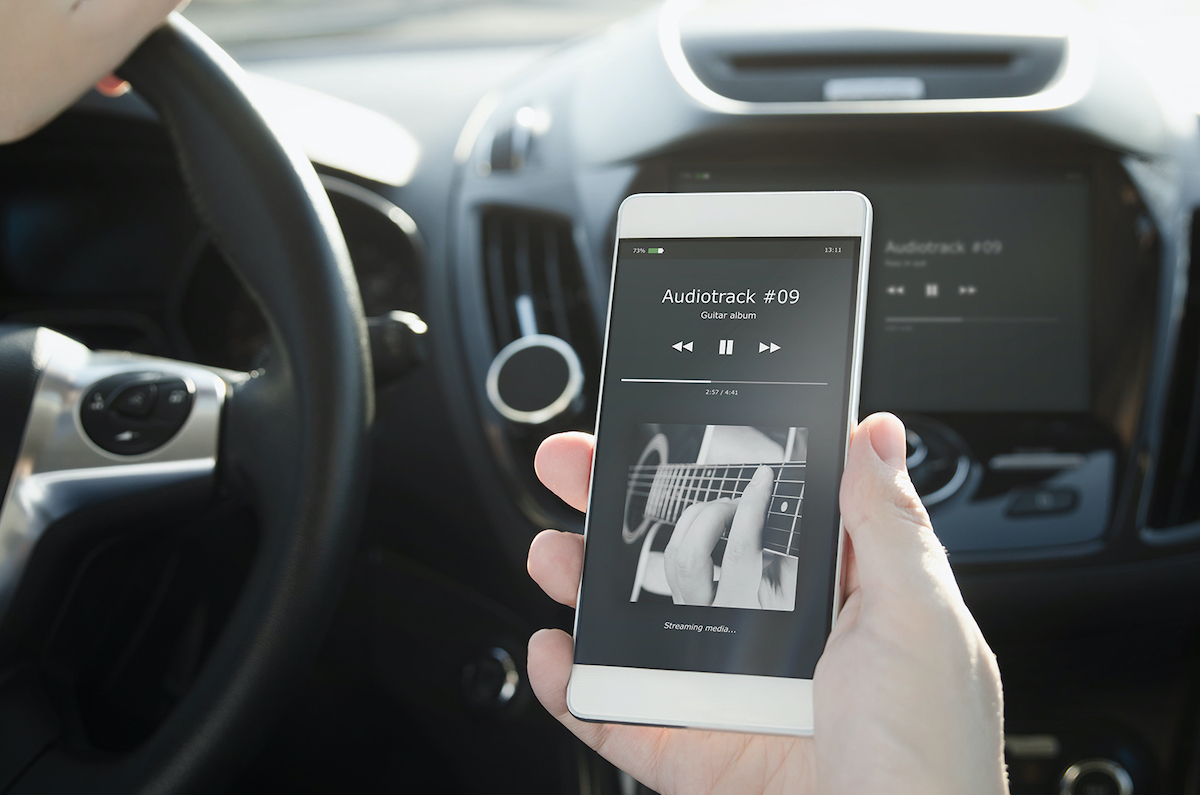
When you feel like you’ve finished your mix, bounce it down to a stereo MP3 and listen to it everywhere you can to see how it holds up. Listen on your home stereo system if you have one. Listen on earbuds. Listen on headphones. Listen at your friend’s house. If you have a car, listen on its sound system via your smartphone. (Like many people, I find my car to be the most revealing place to check a mix.) A well-balanced mix should sound good anywhere, so the more systems you check it on, the better.
If, after checking your mix on different systems, you notice that, though it sounded great in your studio, it sounds weird or out of balance everywhere else, the acoustics are likely contributing significantly to your problem — something we discussed in detail in Part 1. These acoustic anomalies are distorting your perception of frequency and thus causing you to over- or under-compensate. It’s often in the low frequencies where this is most problematic.
For example, if the bass sounds too quiet in your mixes when you listen outside of your studio, then your room is probably accentuating low frequencies too much. Because you’re hearing your mix with what sounds like sufficient bass, you’re not turning the bass or kick drum (or both) up enough.
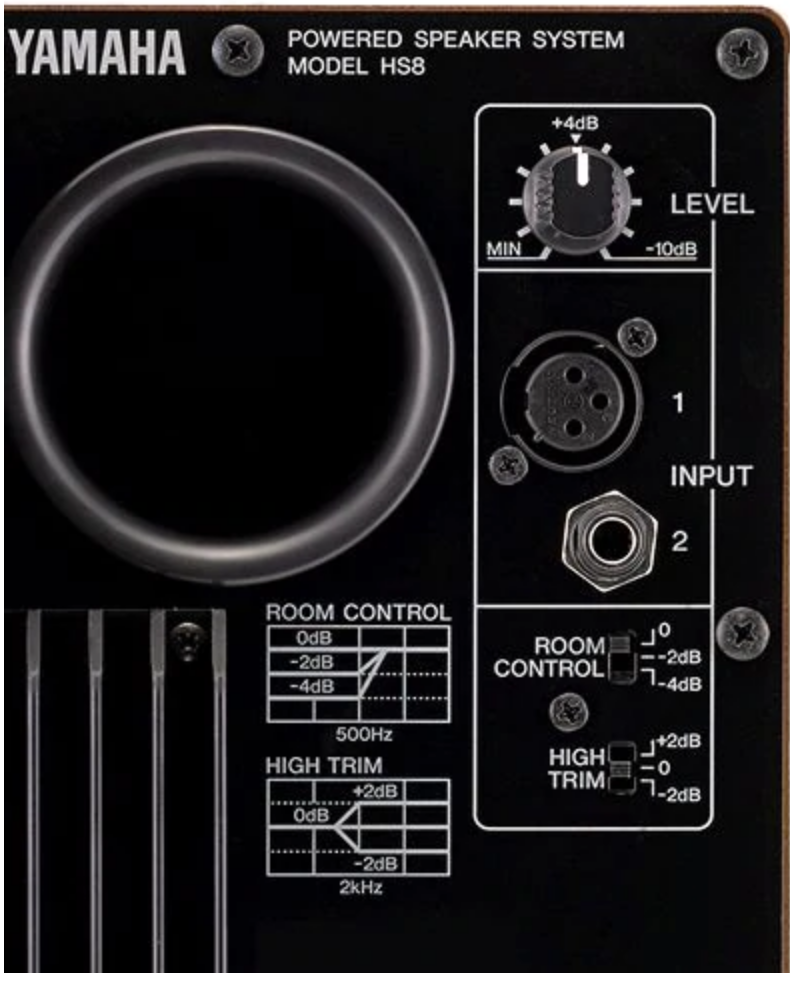
If you’ve already positioned your monitors in the most advantageous spot you can (see Part 1), try the room compensation EQ on your monitors, if they offer such a feature. For example, Yamaha HS Series monitors provide a rear-panel switch to cut the lower midrange (at 500 Hz) by either 2dB or 4dB and another switch that cuts or boosts by 2dB in the treble range (at 2 kHz).
A/B Your Mix
Even if your acoustics are problematic, a technique called A/B referencing can help you make your mixes more balanced and accurate.
It works like this: When you’re pretty far along in your mix, compare it with a professionally mixed song you like, preferably in a similar style. If you can match, say, the bass levels and the vocal-to-instrument blend of your mix with that of the reference, you should be able to get an accurate balance of levels and frequency.
As you switch between the two, it’s crucial that you make all comparisons at the same volume level. Otherwise, your frequency perception will be inconsistent between your song (the “A”) and the reference (the “B”). That’s because our ears perceive frequency differently depending on the volume, and louder always sounds better because it accentuates the lows and highs more.
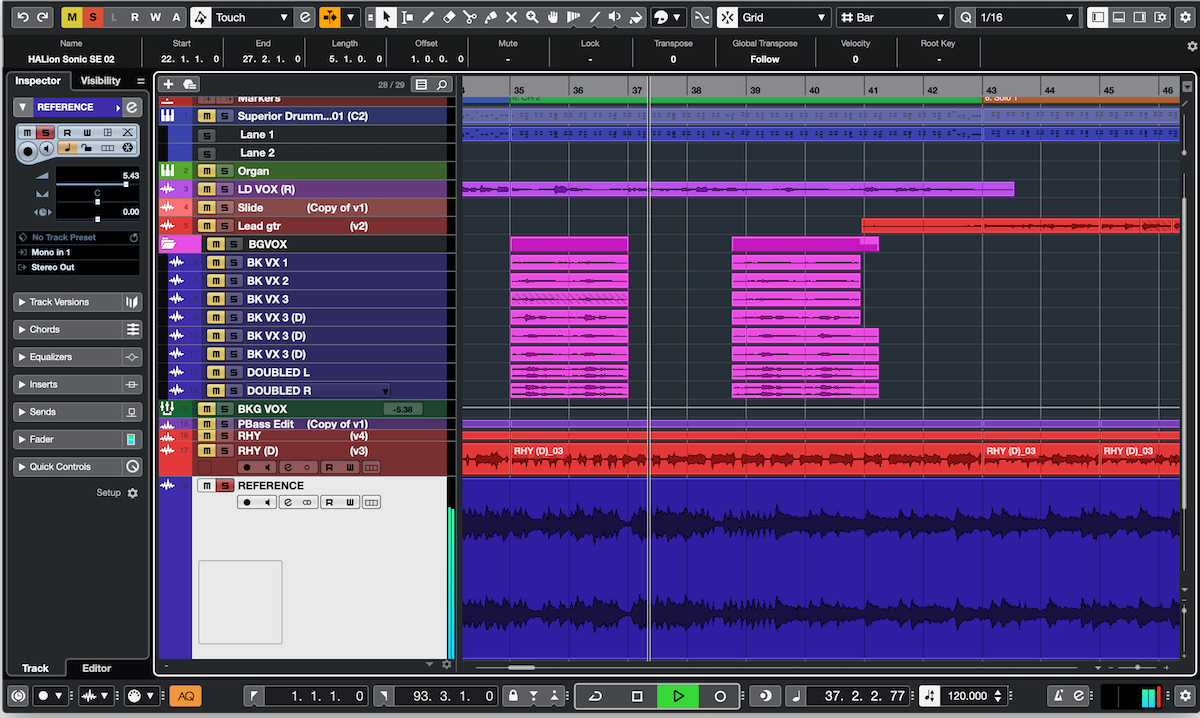
You can buy dedicated plug-ins for A/B referencing, but it’s not hard to do it yourself inside your DAW. The following method works in Steinberg Cubase and most other DAWs:
1. Import a reference file into your Project and mute its track.
2. Play your multitrack mix (A), and then press the solo button on the reference track (B). You should now hear B by itself.
3. To switch back to A, turn solo off (in some DAWs, you might have to press mute again).
4. Make sure that the volume is equal between A and B.
5. Use this technique to repeatedly switch back and forth between your mix and the reference as you compare the characteristics of the vocal level relative to the instruments, as well as the bass level, the drum level, the overall EQ, etc.
We’d all love to be able to mix in an acoustically treated, purpose-built studio. But for those of us who record at home, that’s rarely the reality. Yes, you have to work harder to mix in an imperfect space, but if you’re conscious of the issues you face, they are easily overcome.
Check out our other Recording Basics postings.
Click here for more information about Yamaha HS Series studio monitors.
Click here for more information about Steinberg Cubase.


