Tagged Under:
Creating Vocal Chops and Other Sampler Tricks, Part 1
Drop an audio file into your software sampler and let the fun begin.
Vocal chops are short vocal samples that you trigger via MIDI and use as melodic and rhythmic ornaments in song arrangements. They’re pretty easy to create, as we’ll demonstrate in this article.
Keeping It Simple
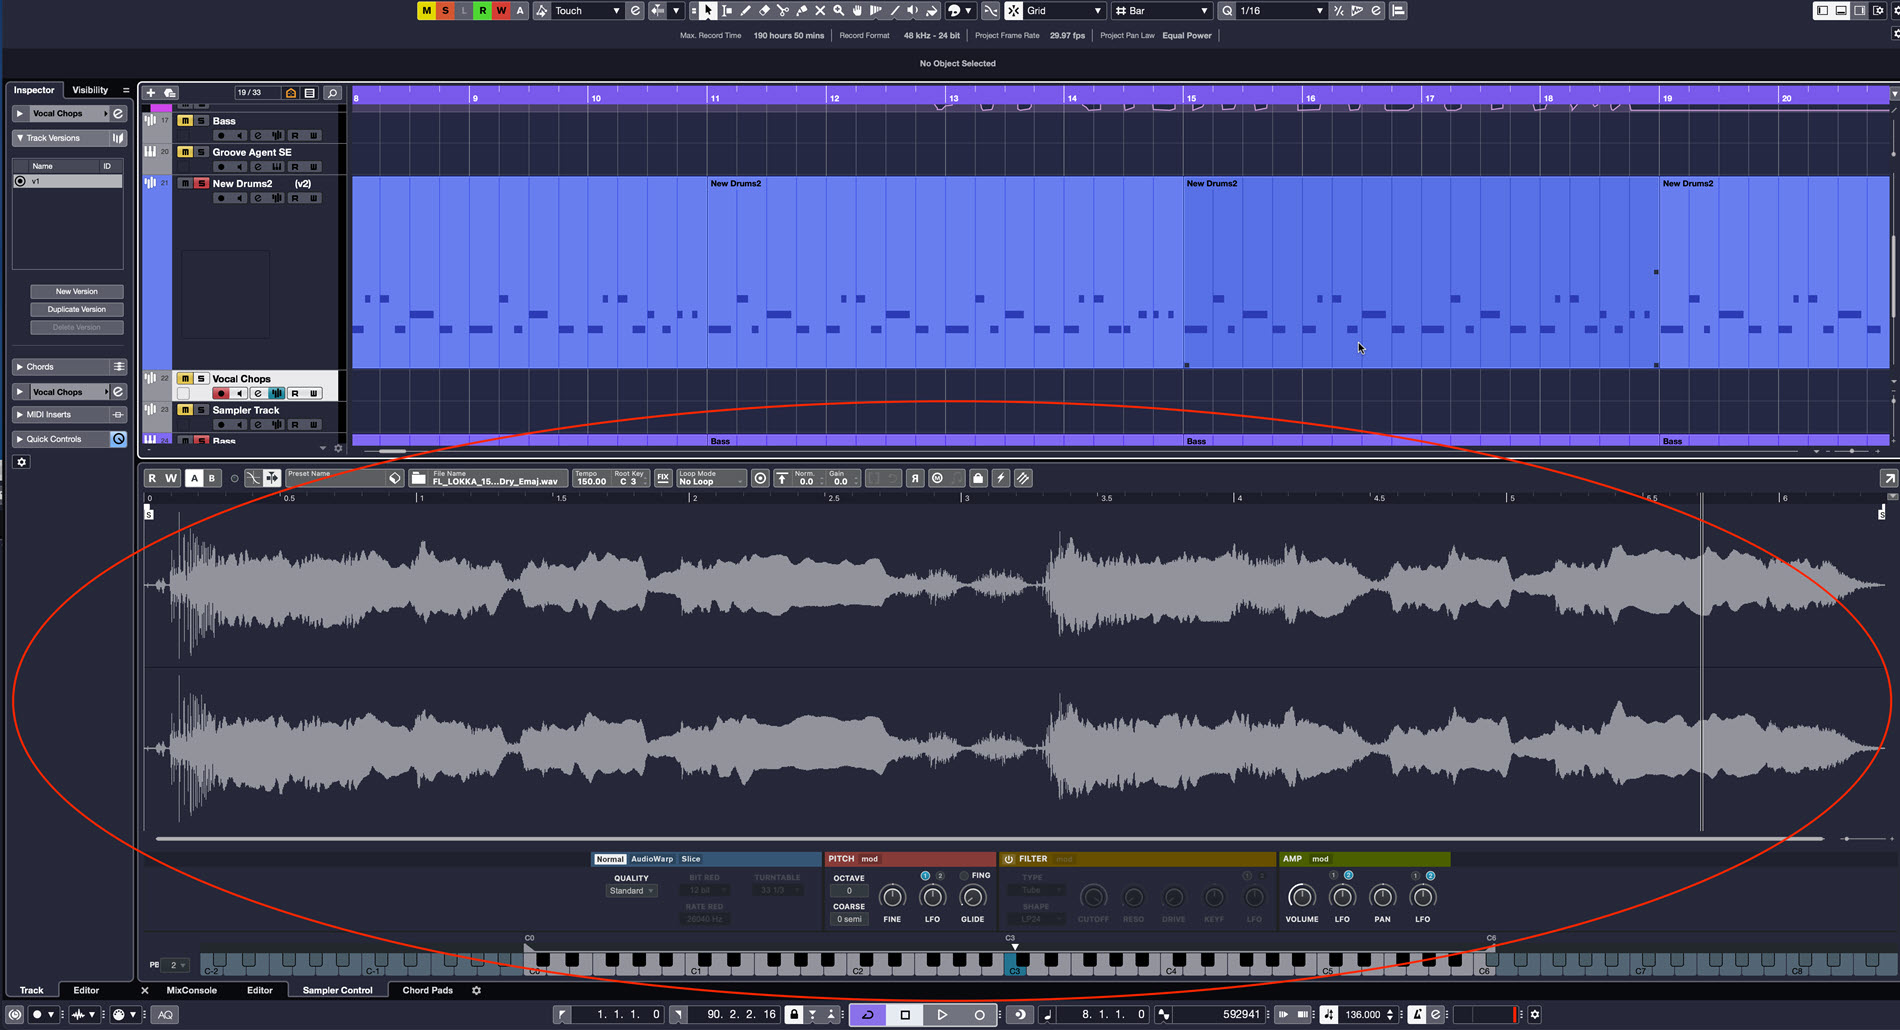
Most contemporary DAWs offer sampler plug-ins. In Steinberg Cubase, sampling functionality is available by creating a Sampler Track. There are multiple ways to do so, but probably the easiest method is to right-click (or option-click if you’re using a Mac with a one-button mouse) in the Track List to get the context menu, then choose Create Sampler Track:
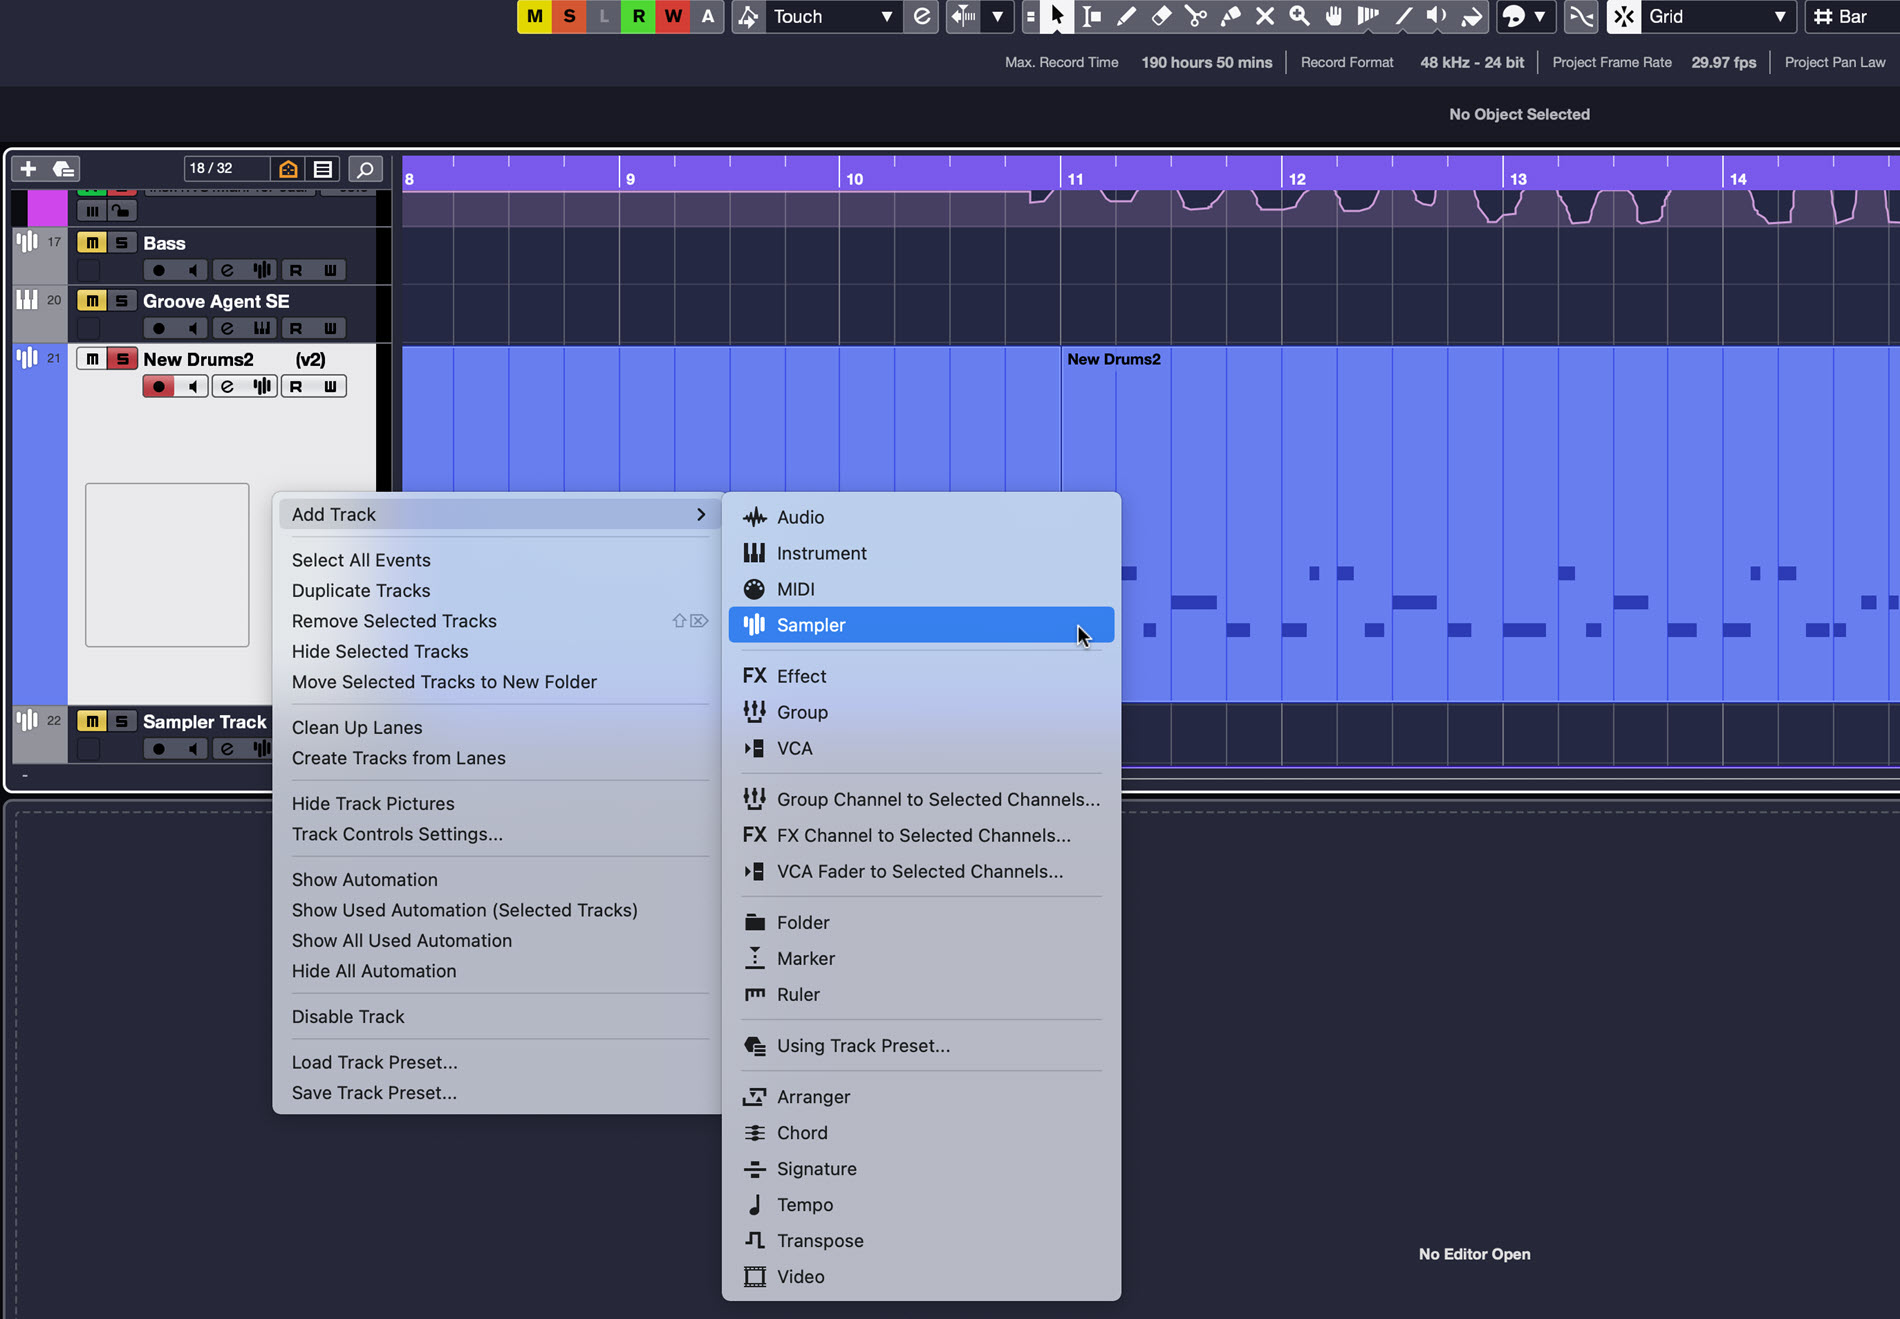
You’ll then get the Add Track dialog, where Cubase offers you the opportunity to name the track. After doing so and hitting Add Track, you’ll see the area in the Lower Zone. From there, you can drag and drop a sample from inside your session or from a directory on your computer. (like Cubase, most DAWs support dragging and dropping audio files into samplers.)
Choose Your Mode
There are a couple of different ways to create vocal chops. Let’s start with the most straightforward way: creating a vocal chop instrument. For that, you only need a one-note sample. If you drag in a longer sample, you can adjust the start and end points of a note of your choosing.
Cubase’s Sampler Track window features three different playback modes: Normal, Audiowarp and Slice (we’ll cover Slice mode in Part 2 of this article).
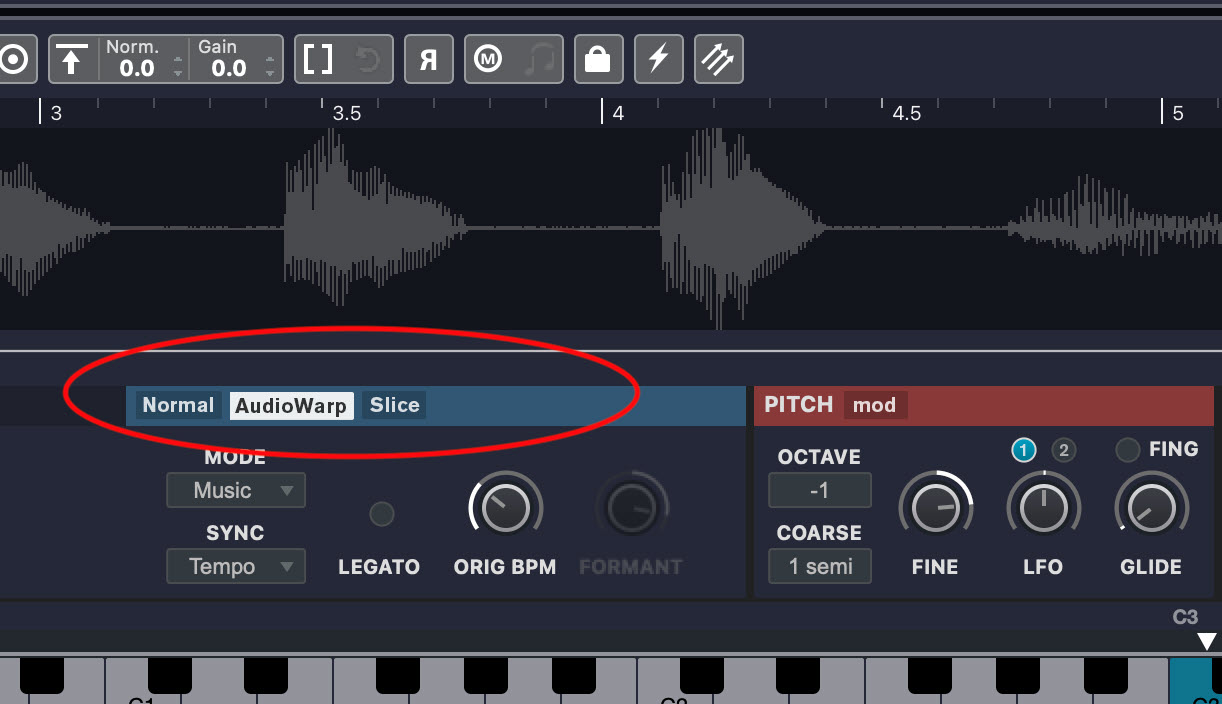
Let’s start with Normal mode, where the sample gets transposed up and down on the keyboard, playing back faster as you play higher notes, and slower as you play lower notes. As with all speeded-up or slowed-down recordings, it changes timbre too, so you get the “chipmunk effect” if you play a note more than a few semitones higher than the root pitch and the “monster effect” if you go a similar distance in the other direction.
In the following audio clip, you’ll hear a vocal line loaded into the Sampler Track in Normal playback mode, repeated five times. The first time it’s triggered by the root note (in this case, E3), followed by the notes F#3, G#3, B3 and E2 (an octave below the root). Notice how both the timbre and the speed change.
This next audio clip demonstrates AudioWarp mode, where Cubase time-stretches and formant-corrects the audio to keep all notes at the same speed and timbre as the root note. (Formants are resonances in your vocal tract that help shape the tone of your voice.) You’ll still notice timbral differences, but they are much less extreme:
Since a Vocal Chop instrument takes a single note you’ve defined from your source audio file and transposes it across the keyboard, it makes sense to use AudioWarp mode to keep it from getting too extreme sounding, unless that’s what you’re going for.
Chop That Vocal
Start by finding a vocal sample that you want to use. Often, it makes sense to use a section of the vocal track of the song you’re working on so that the sound of the chops will relate to the song. That’s an artistic decision, however; you can certainly opt to go with a completely different voice if you want to. If you can, use a dry sample rather than one with reverb and delay, because it’s better to have the flexibility of adding those effects yourself.
Make sure your Sampler Track is record-enabled so you can trigger it from your MIDI keyboard and listen for a note that’s steady pitch-wise. I’ve found that it also helps to select a word that starts in a hard consonant like P, B, T or G when creating vocal chops since it gives a more powerful attack than if the word starts with a vowel.
Start by clicking the blue root key on the keyboard at the bottom of the Sampler Track window, which is C3 by default in Cubase. Alternatively, you can use your MIDI keyboard to play that note. Then zoom in (you may have to zoom pretty far) and place the Start and End markers to outline the boundaries of the word you’ve selected.
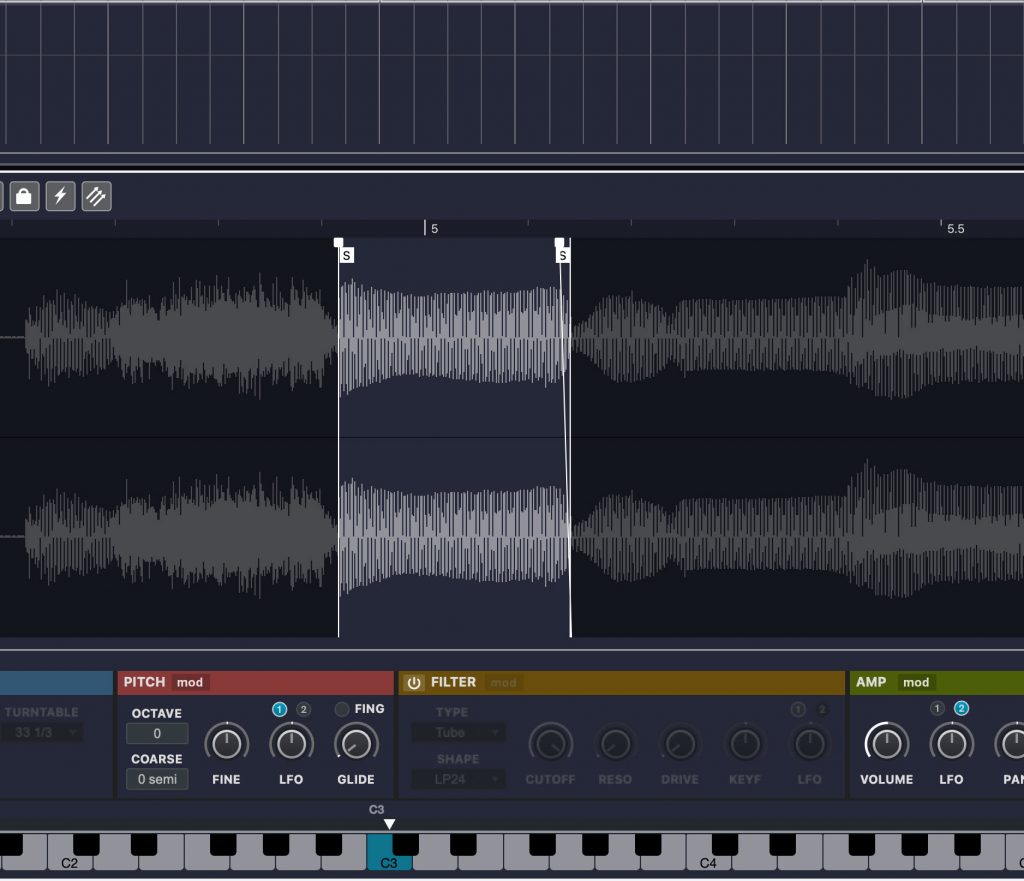
Use the built-in keyboard at the bottom of the Sampler Track window or your MIDI keyboard to check your placement of the markers. You don’t want any space before the note, or it won’t immediately sound when you press a key to trigger it. Also, just above each marker is a box you can drag to create a short crossfade; especially at the end of a chop, a short crossfade can make it sound cleaner if you hear any clicks.
Line ’Em Up
Next, check the pitch of the note you selected by finding its match on another virtual instrument or an actual guitar or piano in your studio. Once you figure out the pitch of the selected note, use the sampler’s transpose function to make the note match with concert pitch. (Important tip: You want your sample to correspond to concert pitch on your MIDI keyboard. That way, the C key triggers a C note, the D key a D note and so on.) In a Cubase Sampler Track, you can use the Coarse transpose field in the red Pitch section or the Root Key setting above the waveform display.
Ensure that you selected AudioWarp mode and then play your MIDI keyboard and check out how the chop sounds on various notes. Also make sure it sounds in tune. If not, use your sampler’s fine-tuning control to adjust it. If you can’t make it sound in tune within at least a one-octave range, you might try defining a different note to use as your vocal chop.
Assuming all is good, it’s time to make your chop more interesting with effects, especially if you’re starting with a sample of a dry voice. I often like to add a little reverb, delay, and maybe some compression and distortion as well.
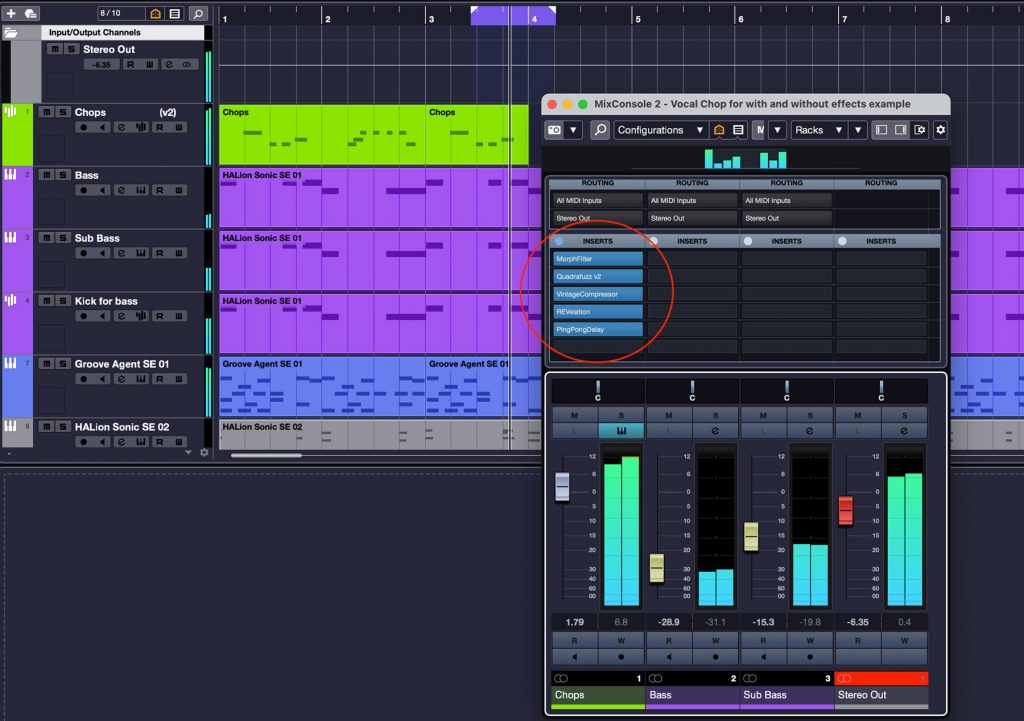
A trick I sometimes use is to insert an amp simulator with effects, such as Steinberg VST Amp Rack on the vocal chop track. That way, you have multiple effects within a single plug-in.
Here’s an example of a vocal chop instrument made in Cubase as just described. In this clip, it only has a little reverb on it, so it sounds pretty plain:
Compare that with this clip, where the chop has added reverb, delay, amp and cabinet simulation, as well as some modulation and compression:
Although vocal chops are mainly single-note parts, you can also create chords, giving you an unusual sound, like this:
In Part 2, we’ll demonstrate a couple of cool ways to use Slice mode. One enables you to create vocal chops that include multiple samples, and the other allows you to make drum kits from drum loops. We’ll also show you how you can open your samples in other instruments in Cubase for additional sonic possibilities.
Check out our other Recording Basics postings.
Click here for more information about Steinberg Cubase.


