Tagged Under:
Creating Vocal Chops and Other Sampler Tricks, Part 2
Slice up a sample and let the triggering begin.
In Part 1 of this two-part article, we used AudioWarp mode in a Sampler Track in Steinberg Cubase. The idea was to isolate one note and transpose it across the MIDI keyboard. Most samplers of this type — the kind that only let you load one sample at a time — offer a similar mode.
They also usually have a mode that cuts your sample into smaller pieces based on user-selectable criteria. In the Cubase Sampler Track, it’s called Slice mode. This offers many creative possibilities but can be a little trickier to use than other modes.
The advantage to making vocal chops with Slice mode is that, since you’re working with slices from a vocal recording, you end up with several that have different consonant sounds. These can be more interesting than the same sound transposed up and down the keyboard. Slice mode is also great for creating and manipulating drum loops.
Ready to learn how to use Slice mode? Read on …
Multi Chop
In Cubase Sampler Track and similar plug-ins for other DAWs, the default option is to slice samples by their transients. Transients are the peaks at the beginning of sound waves where the attack of the sound begins. The sampler turns each of the transients it finds into a separate note and maps it to the keyboard. A Threshold knob allows you to control the level at which transients are detected, which affects how many slices you get.
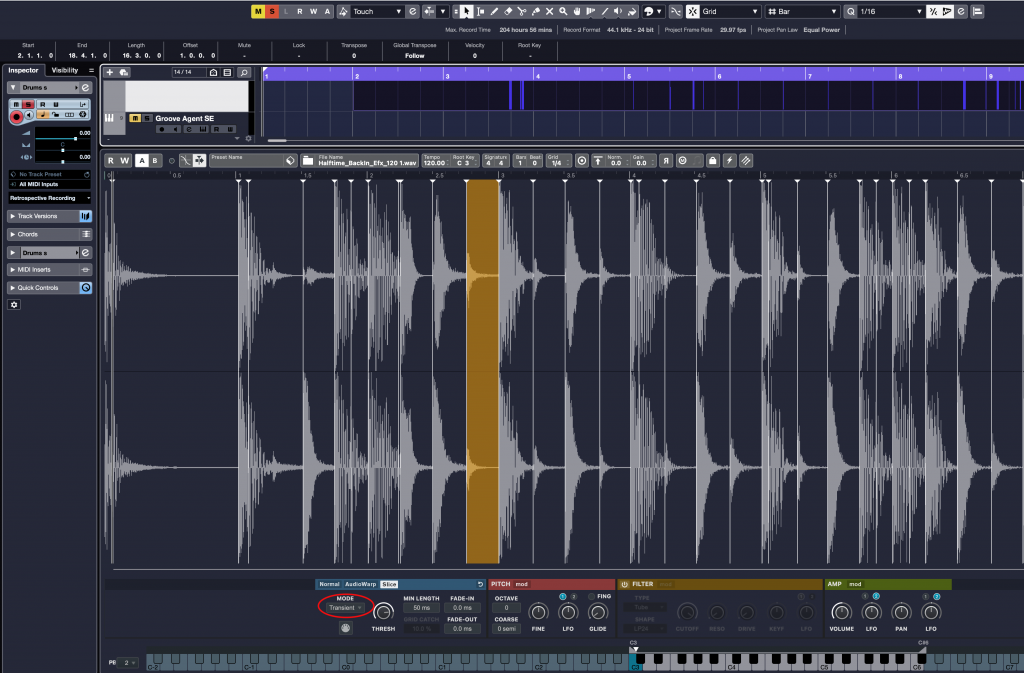
In Cubase, you can also choose Grid mode, which slices a sample based on the grid setting that you create for that track. Choosing sixteenth notes often works well, but it depends on the source material. You can also manipulate the slices manually in any mode by dragging their start or end points. If you select Manual mode, nothing gets automatically sliced — you have to click in the waveform to create slices.
By the Slice
Whichever method you choose, you end up with a finite group of slices, each triggered by its own MIDI note (these slices, by the way, don’t get transposed). In Cubase, the number of notes you have available after you slice a sample is equivalent to the number of slices created. These are mapped to your MIDI keyboard in a linear order.
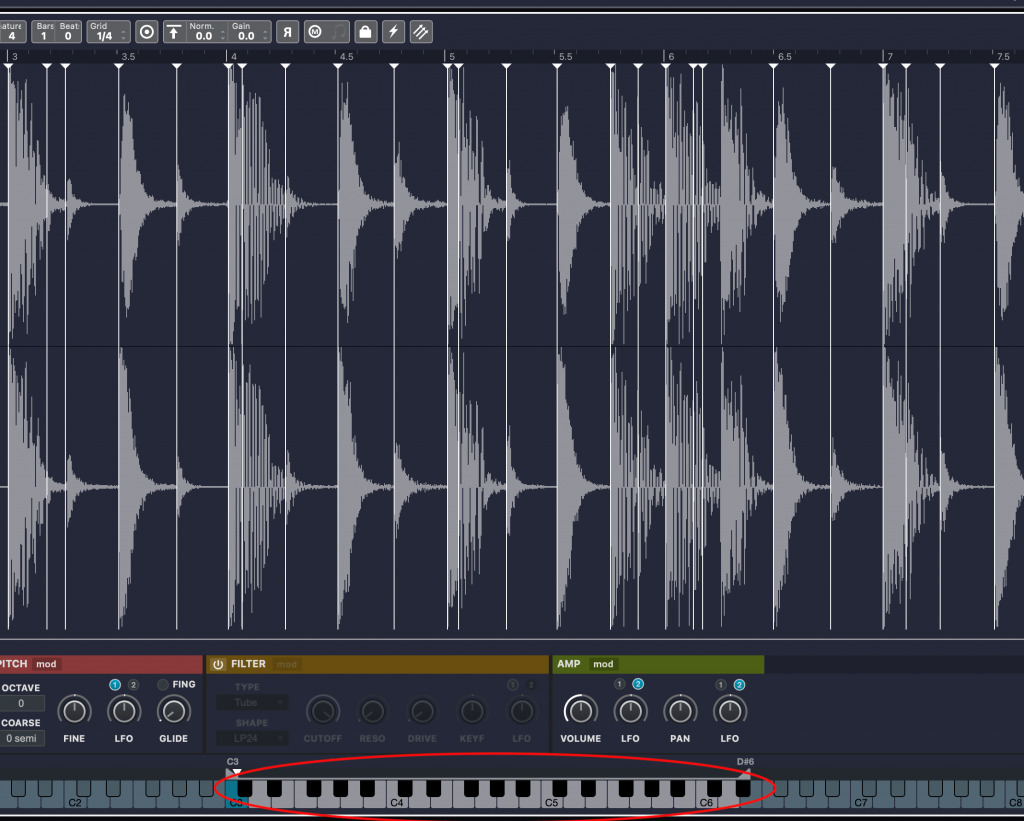
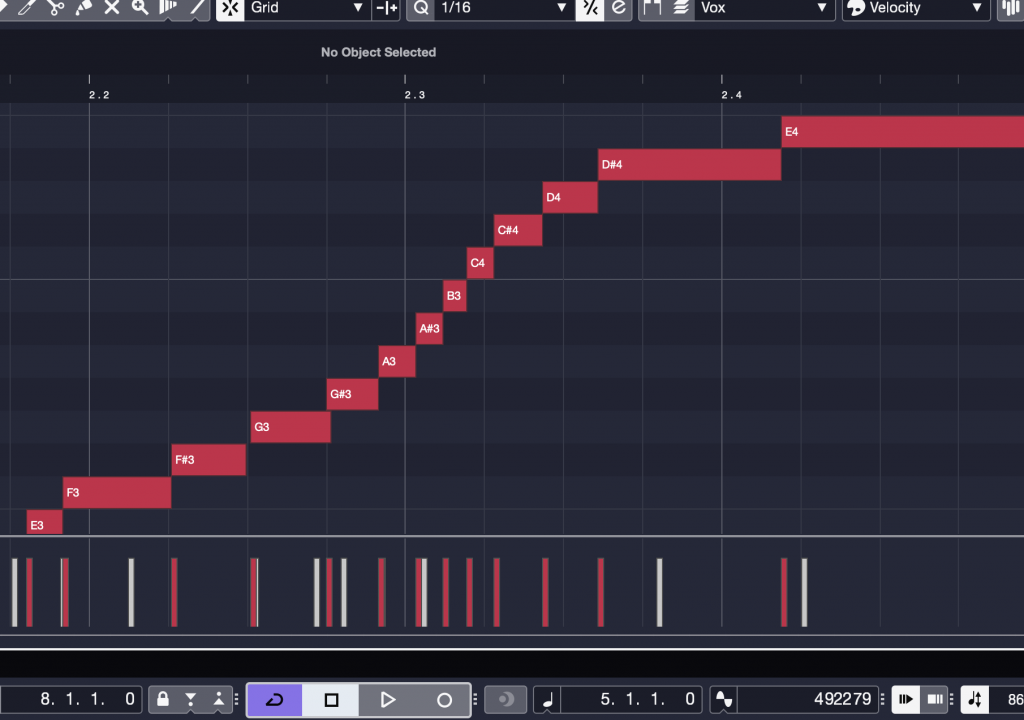
Cubase also creates a MIDI file of the notes corresponding to the slices — something that’s really helpful since you can drag and drop that file into the sampler’s MIDI track in the Project window.
From there, you can open the MIDI Key Editor to change the order and rhythm of the notes. It will then look something like the screenshot below:
You’ll have the most luck if you use a vocal sample from your song as the source material for your chops. It will feel more integrated, and the notes will be in the same key and scale as the song.
If you want to use a vocal sample from outside your song, you’ll likely need to transpose it to match the key. Samplers all have global transpose options, so you’ll just have to figure out how many steps up or down you need to go.
A Real Cut-Up
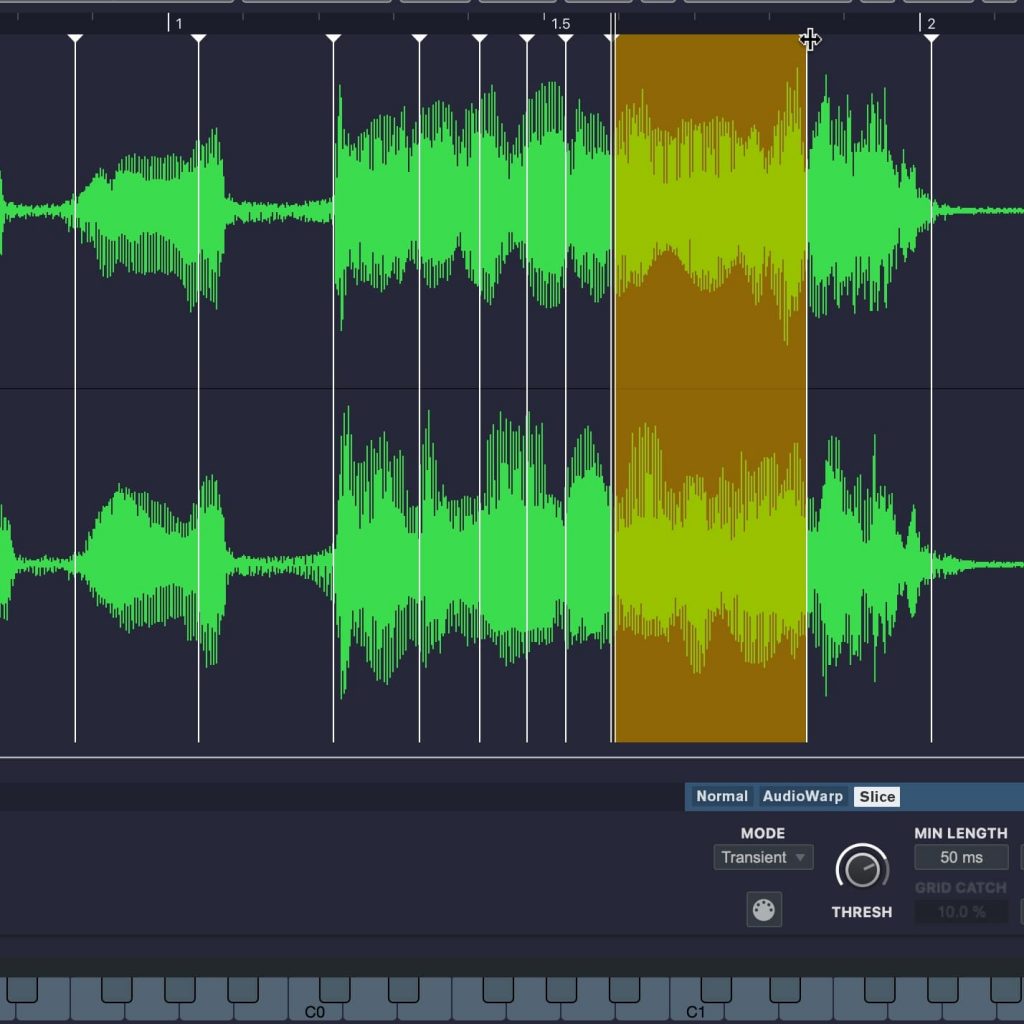
Let’s take a look at an example of Slice mode in action, applied to this vocal phrase:
I opened up a Sampler Track and dragged the phrase in, then sliced it in Transient mode to create vocal chops for use as a melody on top of a simple bass and MIDI drum part I’d recorded. I then triggered the chops I wanted from my MIDI keyboard, adding some delay and distortion in the Cubase mixer. When I was happy with my performance, I recorded it. Finally, I used Cubase’s Key Editor to quantize most of the notes.
Here’s what the final track sounded like:
On the Beat
As mentioned earlier, Slice mode is also useful for cutting up drum loops or a section from a mixed drum track. Let’s say you have a loop with really cool sounds, but the drum part is not right for your song. Even if it’s at a much different tempo or in a different time signature, you can slice it into samples that you can trigger via MIDI. This allows you “deconstruct” drum recordings and access their individual hits, which you can then “reconstruct” into new patterns.
To do this, simply drop the loop (or section) into your sampler and slice it by transients. Each resulting slice should represent a different drum hit. Try triggering from your MIDI keyboard or another controller, and you should be able to find kick, snare and hi-hat or ride slices that sound good. Now, with the click track going, record a new drum pattern or part and quantize it accordingly.
Note that the end points of slices may not always work for a particular drum or cymbal. If it sounds cut off, you’ll need to extend the end of the slice. Conversely, if you hear another drum or cymbal at the end of a slice, you may have to shorten it. In Cubase and many samplers, slices are delineated by vertical markers that you can drag horizontally to change the start or end time.
Here’s an example of deconstructing a drum loop, using this loop as source material:
After slicing it up, you can record a completely different pattern with it, like this:
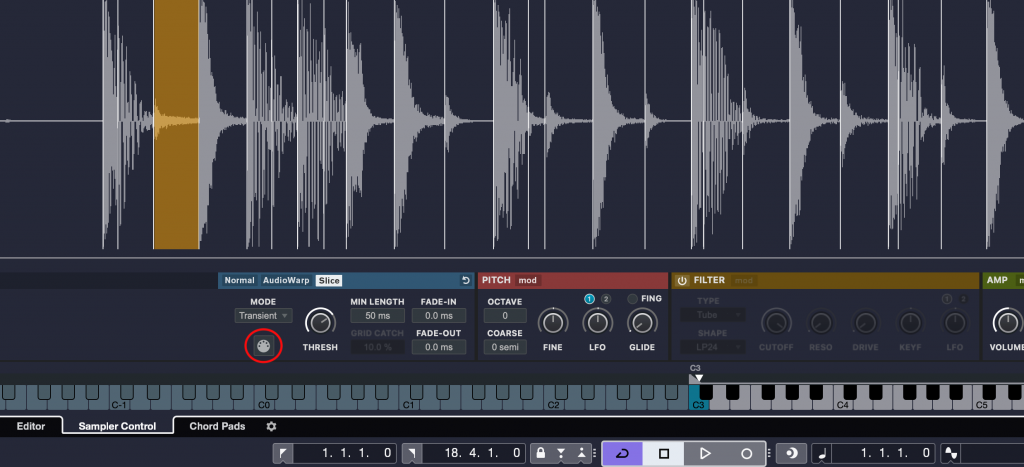
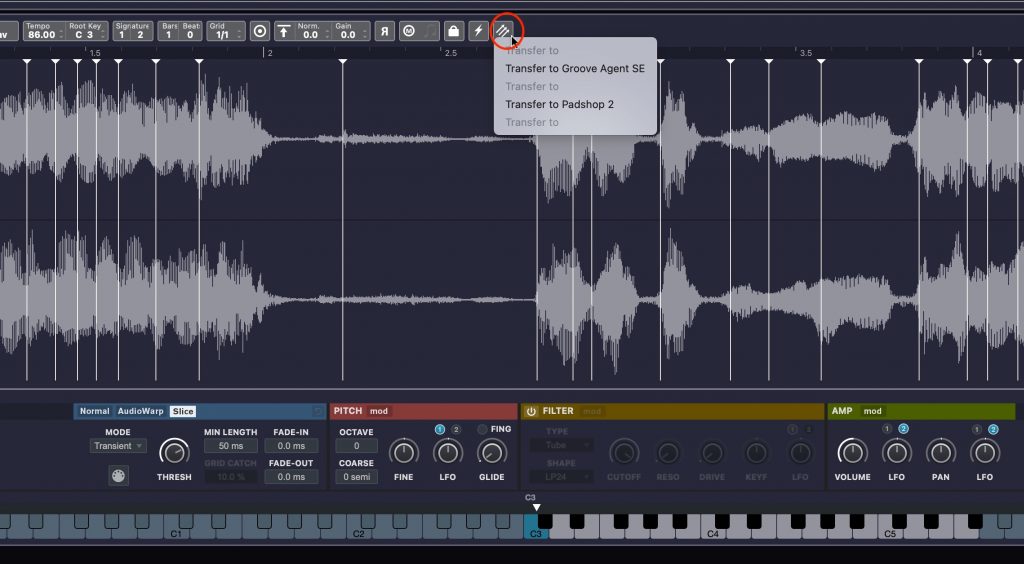
The Transfer to New Instrument Button (circled in red in the illustration below) in Cubase’s Sampler Control allows you to move the active sample (or sample slices) into a virtual instrument. From there, you can edit it using that instrument’s features.
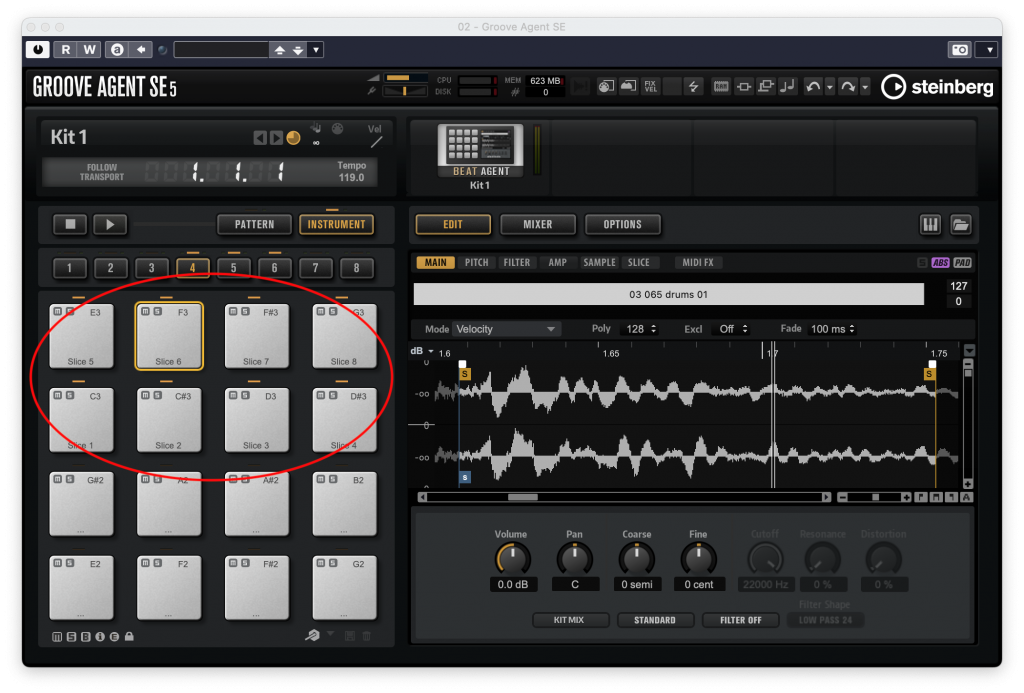
Slicing up a drum sample is an excellent way to create new drum tracks, but it does have some limitations. Dedicated drum sample instruments like Groove Agent SE (included with Cubase) use multisamples on each hit to make them sound more realistic. Different samples will be triggered depending on the velocity of the MIDI note (essentially, how hard you hit it), with each sample correspondingly louder or softer. For example, on a real drum kit, if you lightly tap a snare drum with a drumstick, it will sound quite a bit different than if you hit it hard. Using multisamples helps translate those dynamics into a realistic performance … even if you’re triggering virtual drum kit sounds instead of playing real drums.
Open the Envelope
One final point: Samplers generally allow you to apply and edit envelopes, and to modulate samples with things like LFOs (Low Frequency Oscillators) so that the volume, pitch and/or timbre of a note changes over time, same as on a synthesizer.
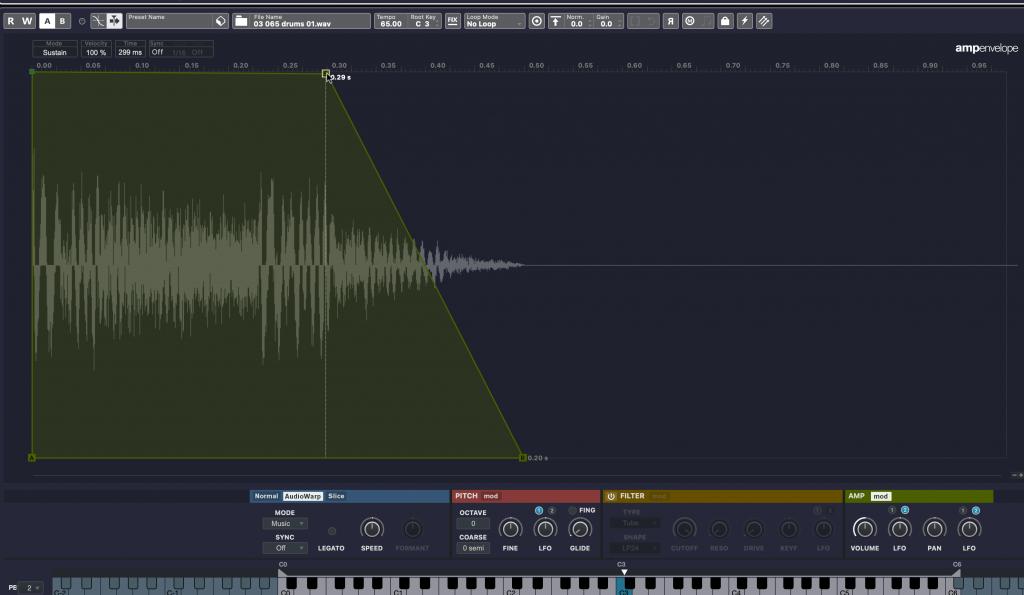
If you haven’t had experience with that type of editing, it’s helpful to experiment with it when you have some time on your hands. For example, check out what happens when you lengthen the attack or the release of an amplitude envelope. Or see how different filter types affect the notes sonically. Find out what happens when you turn up the resonance control in the filter section or use an LFO as a modulator. The more you understand those controls, the better your ability to manipulate vocal chops and other sampled parts.
Check out our other Recording Basics postings.
Click here for more information about Steinberg Cubase.


