Tagged Under:
Getting Great Vocal Tracks, Part 2: Comping
Combine the best of all your vocal takes into one track
In Part 1 of this two-part series, we looked at the gear requirements as well as mic placement and production techniques for recording vocal tracks. In this article, we’ll focus on something known as comping — that is, combining the best of multiple takes to create a composite “master” vocal track:
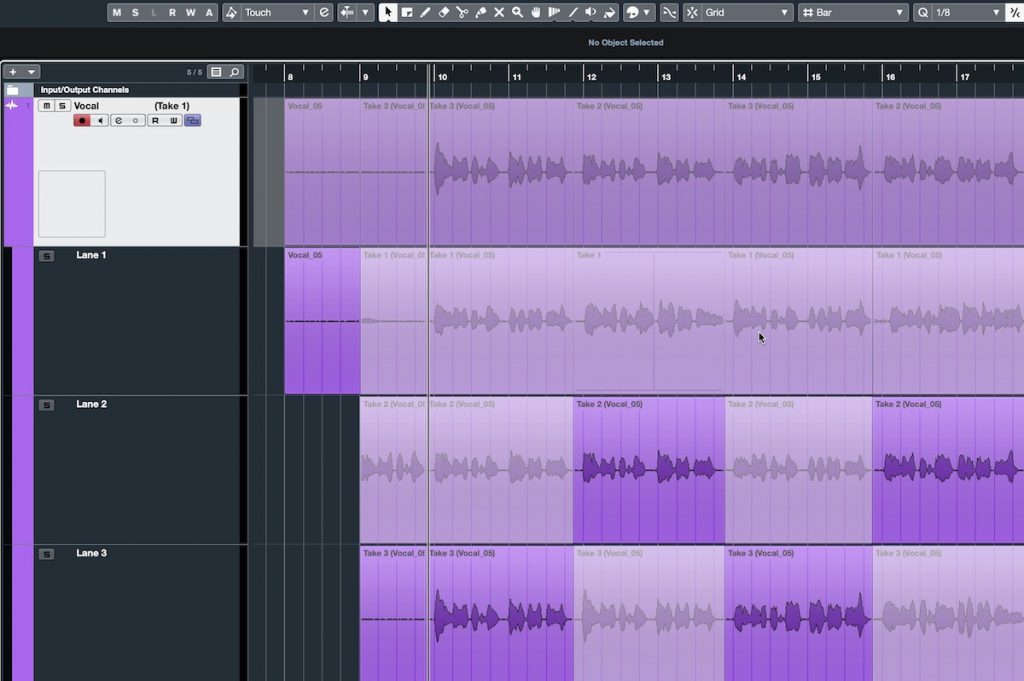
Every DAW has its specific comping features. We’ll be giving examples from Steinberg Cubase, but most are similar. They’re all designed to allow you to audition different takes and select the parts you want to use in your comped uber-take.
Get Recording
Before we get into the specifics of comping, it’s instructive to look at various ways you can record multiple takes of a singer. One way is to use your DAW’s loop recording feature, which, in Cubase, is called Cycle Recording.
It works like this: You set up a loop range, whether it’s one word, one phrase, one verse or one song — whatever length you want. Then, when you put the track into record, the DAW will continuously loop back to the beginning of the range and capture another take until you hit the stop button. The key here is that all the previous takes are saved as layers underneath. Cubase refers to each of these nested takes as “Lanes.”
If you don’t want to use loop recording but instead prefer to record your new takes at your own pace, your DAW may allow you to record multiple takes into one track. In Cubase, simply recording one track over another automatically saves the previous one as a layer underneath it, which can later be accessed for comping.
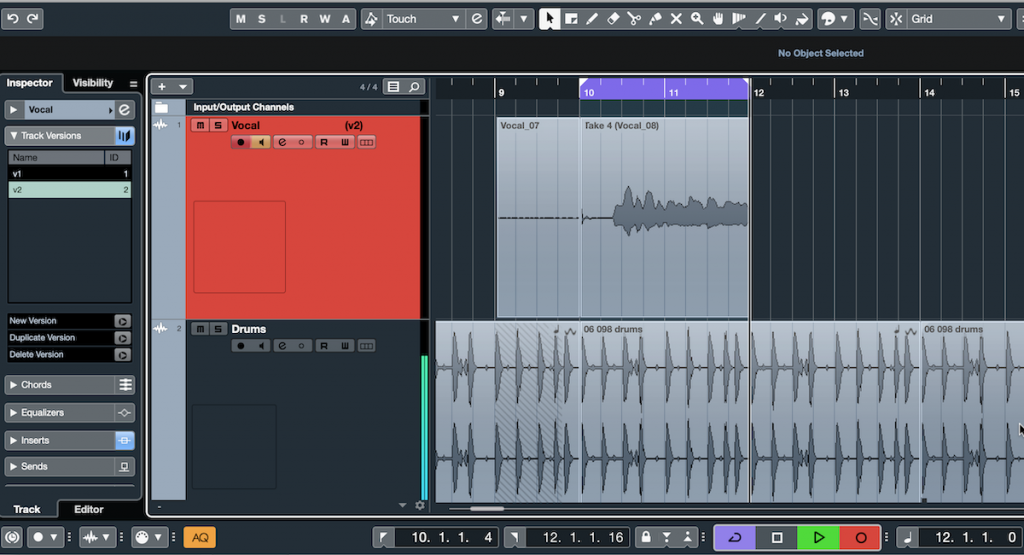
Another method for adding new takes in Cubase is to create a new Track Version, accomplished in the Inspector in the Left Zone of the Project window. As its name implies, a Track Version creates another track with all the same settings, and deactivates the one that was there. You don’t lose the previous track, though — you can easily switch between Track Versions.
Get Viewing
When you’re ready to do your comp, your DAW will offer you a way to see all the vocal takes so that you can combine them together any way you like. In Cubase, all you need to do is to click on the Show Lanes button, and any takes recorded on that track — either with Cycle Recording or simply by recording one track over another — will appear as Lanes.
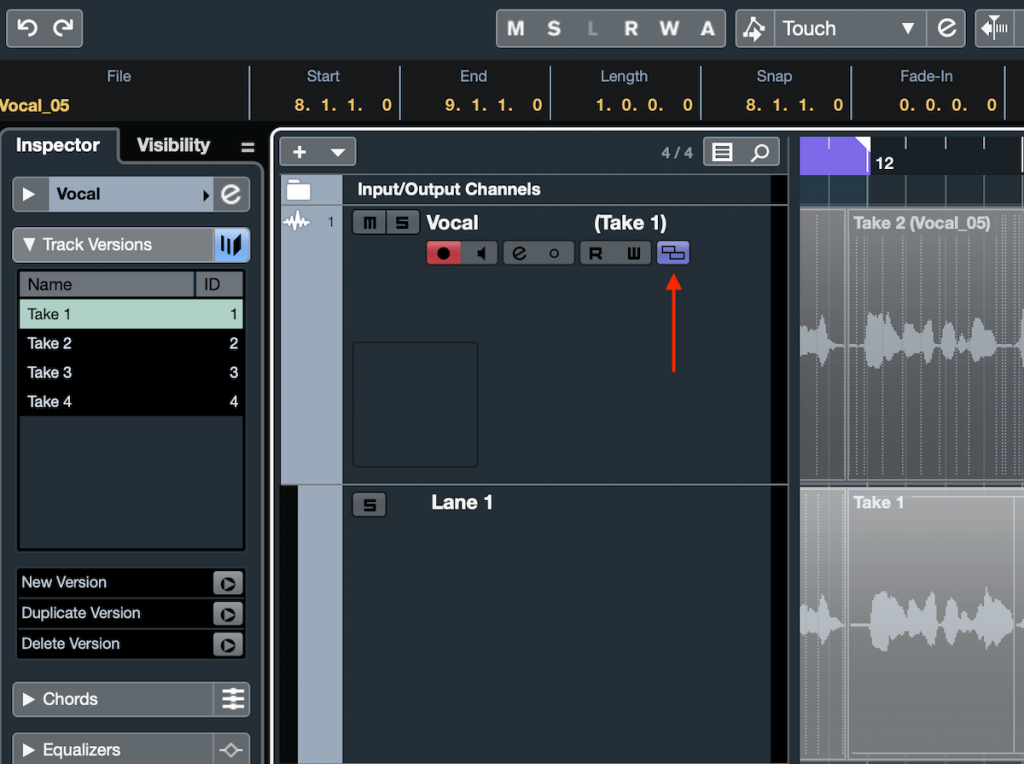
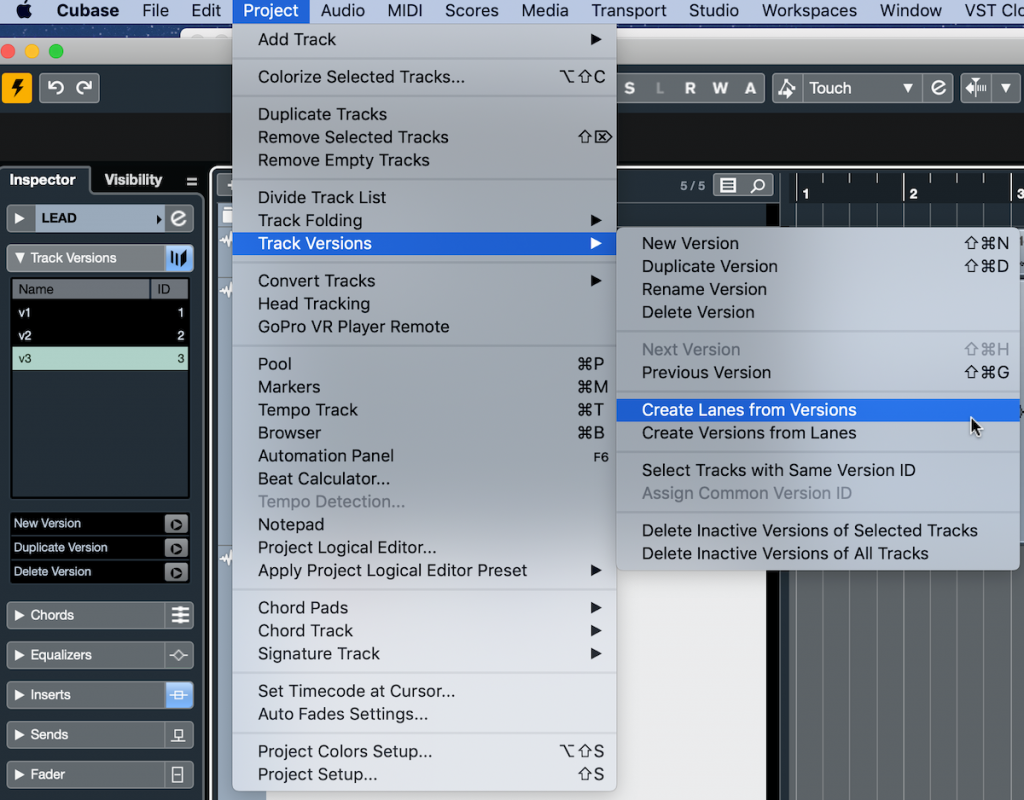
If you used Track Versions, you first must select the track and go to Project/Track Versions/Create Lanes. That will turn your various Track Versions into Lanes; the original track at the top becomes the composite track, and the lanes underneath are where the individual takes reside.
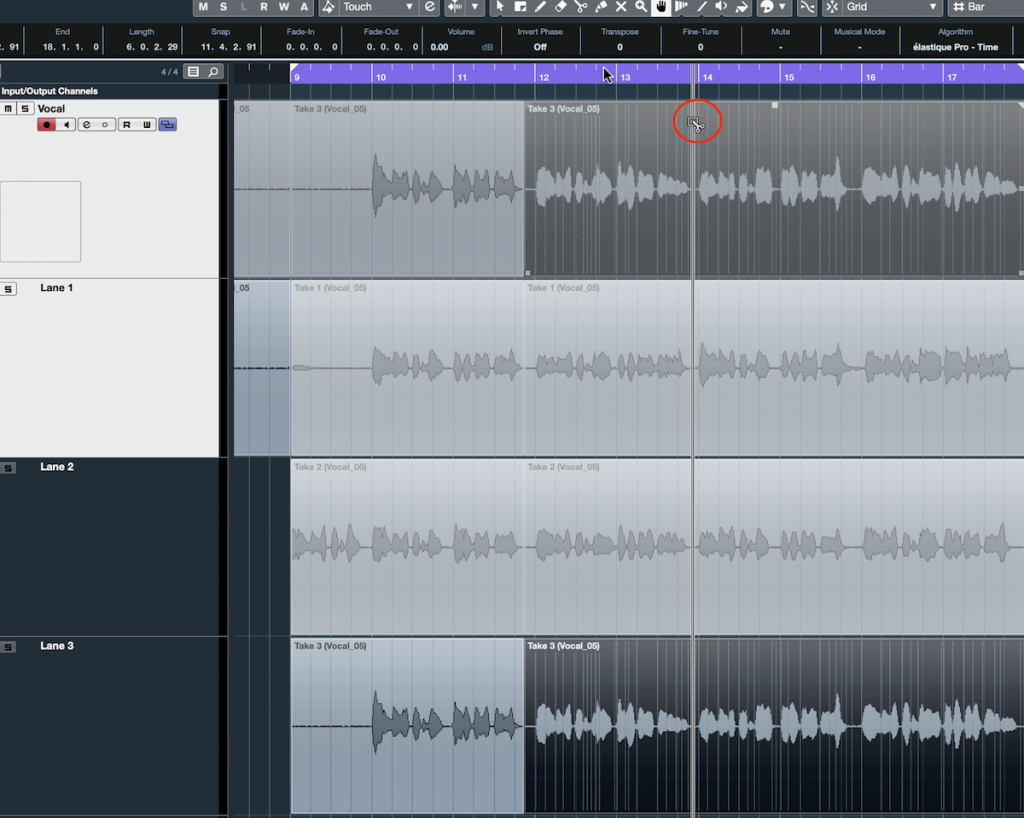
Your DAW’s comping feature will contain a tool or method for selecting the range from within a take that you want to use. When you do so, the selection appears in the main track, replacing whatever was in the time range corresponding to your selection. In Cubase, you do this by choosing the Comping Tool, which looks like a hand and is found in the Toolbox near the top of the Project window. Just click and drag it to select any length of audio from a take and that section will immediately appear in the composite track.
Get Organized
Before you start assembling your comp, you’ll want to audition the various takes to determine which parts of each you want to use. Comparing multiple takes of an entire vocal part for a song by memory is next to impossible. If your DAW has a comments or notes section (like, for example, the Notepad in Cubase), sure, you could write down the sections that you prefer in each take, or you could use a text program on your laptop — or go really “old-school” with a pencil and paper — but none of those methods are particularly efficient.
A much better approach is to compare just one phrase at a time from each of the takes. By listening to a short section as the transport loops over it, you can compare the various takes back to back and decide which is best.
It’s also useful, although not strictly necessary, to slice up the various takes into their component phrases before starting the comping process — it’s helpful visually to see the differences between them and makes assembling the comp fast and easy. Cubase simplifies the process of separating phrases because the Comping Tool turns into a Split Tool when you press the Option key, allowing you to cut all the vocal takes at the same spot:
Get Comping
Ready to get started? Begin by looping the first phrase and listen to each take. In some DAWs, you’ll have to use the solo button next to each take to determine which one is audible. In Cubase, all you need to do is click on a take with the Comping Tool and it will be the one you hear. This makes it easy to listen to the phrase in each take, back to back.
Some people like to color-code each phrase — say, red for the best, blue for second best and green for third best. That way, your top three are marked in case you want to try different combinations of them. In Cubase, switch to the Object Selection Tool, select the section you want to mark, and go to Project/Colorize Selected Tracks:
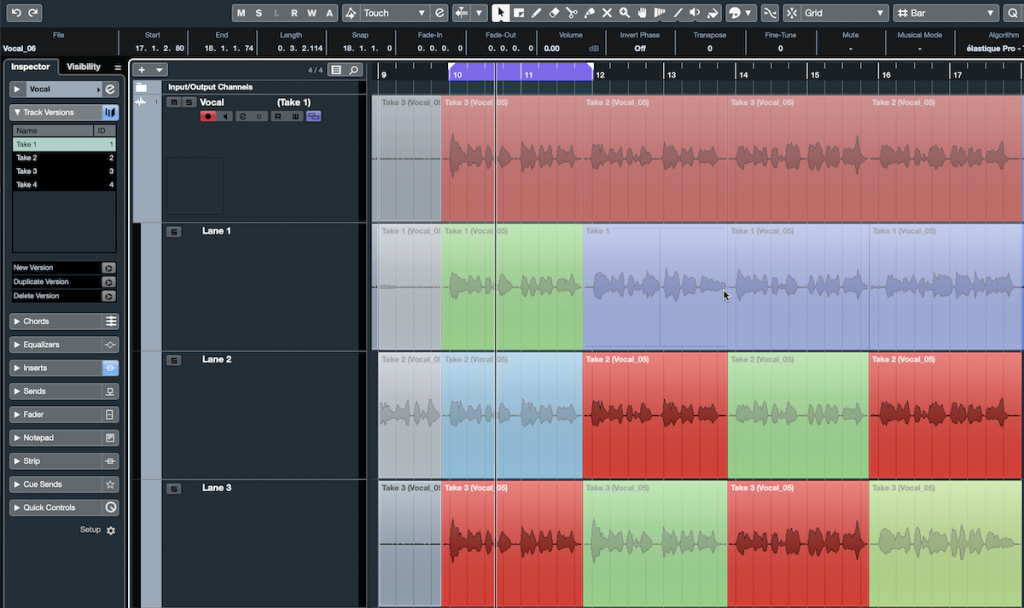
Once you’ve decided on the sections you want in the comp, selecting those parts (in most DAWs) should automatically copy them to the comp track. In Cubase, you do this by dragging over your preferred sections with the Comping Tool.
Get Listening
Sometimes when you’re listening to takes for comping, it’s obvious which parts are the best. If you’re in doubt, my advice is to choose the phrases or sections in which the singer has best captured the emotion or vibe of the song, even if they’re not technically perfect. For example, sometimes there will be one take that’s got the right emotional content but has some pitch issues. Remember: Pitch problems can usually be fixed (for example, by using Cubase’s VariAudio feature), but there is no way to add emotion.
Sometimes you’ll have a section that’s strong overall except that the vocalist got carried away and sang too loudly on one word, causing the mic or mic preamp to overload, or the recording to get clipped at that spot. In a situation like that, you might try substituting a word from one of the other takes. Generally, it’s better to keep phrases intact from a take, but you can certainly substitute a word or two to make a fix, if necessary.
Get Fading
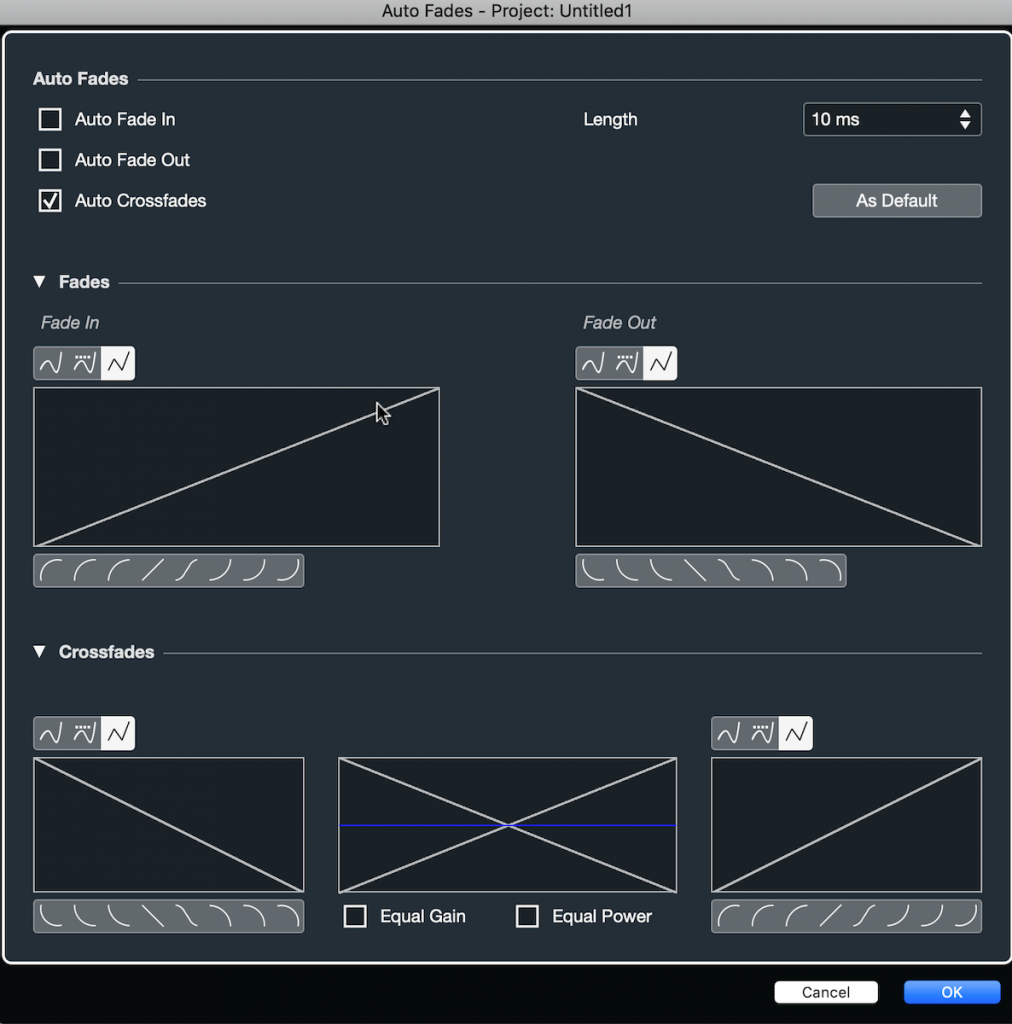
Whenever you make an edit in a track in your DAW, you run the risk of creating a pop or click at the edit point, especially if you’re putting two regions from different tracks together. For that reason, it’s usually best to insert crossfades (that is, have the first region fade out for a brief period of time while the second one fades in over the same period of time) at the boundaries of the various takes in the comp.
In a long song, however, doing this manually can get pretty labor-intensive. Cubase offers a handy feature called Auto-Fade that removes the tedium by creating crossfades automatically at any edit point, thus saving you the trouble:
The vocal is arguably the most important part of any song. With these tips, along with the ones provided in Part 1, you should have all the tools you need to get some great vocal tracks. Time to bring in the singer!
Check out our other Recording Basics postings.
Click here for more information about Steinberg Cubase.


