MIDI Editing
MIDI (short for “Musical Instrument Digital Interface”) is a digital “language” that allows electronic instruments to control each other and communicate with computers. Among other things, it gives you the ability to record performances into your DAW from a connected MIDI keyboard or other “controller” instrument. Because MIDI recordings consist only of data that tells your DAW which note to play and when (along with other performance-related information), you can assign any MIDI track to any virtual instrument in your DAW, or to a connected MIDI synthesizer or drum machine.
In addition to their sonic flexibility, MIDI recordings are freely editable. Every DAW gives you plenty of options for viewing, changing and perfecting your MIDI tracks. In this article, we’ll look at some of the most common ones, and show you how to use them.
Roll It
The most commonly used and versatile MIDI editor is known as the piano roll (in Steinberg Cubase, it’s called the Key Editor). The concept is relatively simple: MIDI notes and data are displayed on a grid, somewhat reminiscent of a old-fashioned player piano roll, hence the name. Elapsed time (usually expressed in bars and beats) is shown on the horizontal axis, while note pitches are shown on the vertical axis, with the duration of notes corresponding to their length.
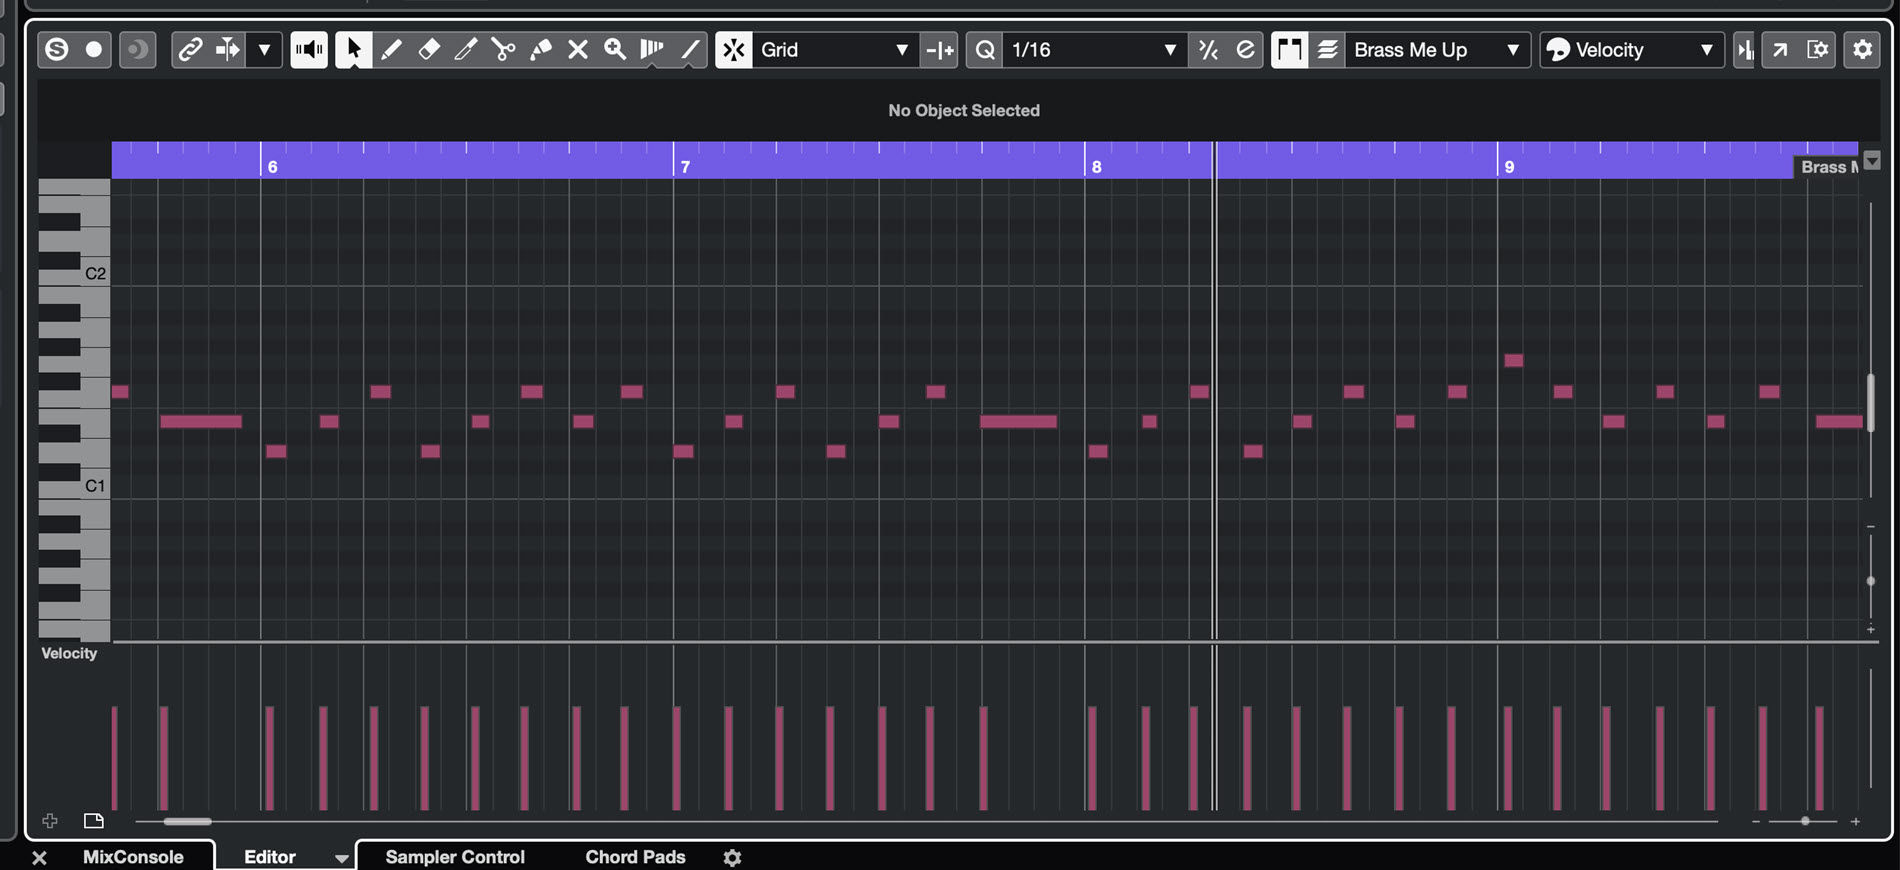
In this editor, you can use standard cut, copy and paste operations to manipulate notes, or you can click on a note (or notes) and drag it to another location or another pitch. Additionally, you can also drag on one end of a note to lengthen or shorten its duration.
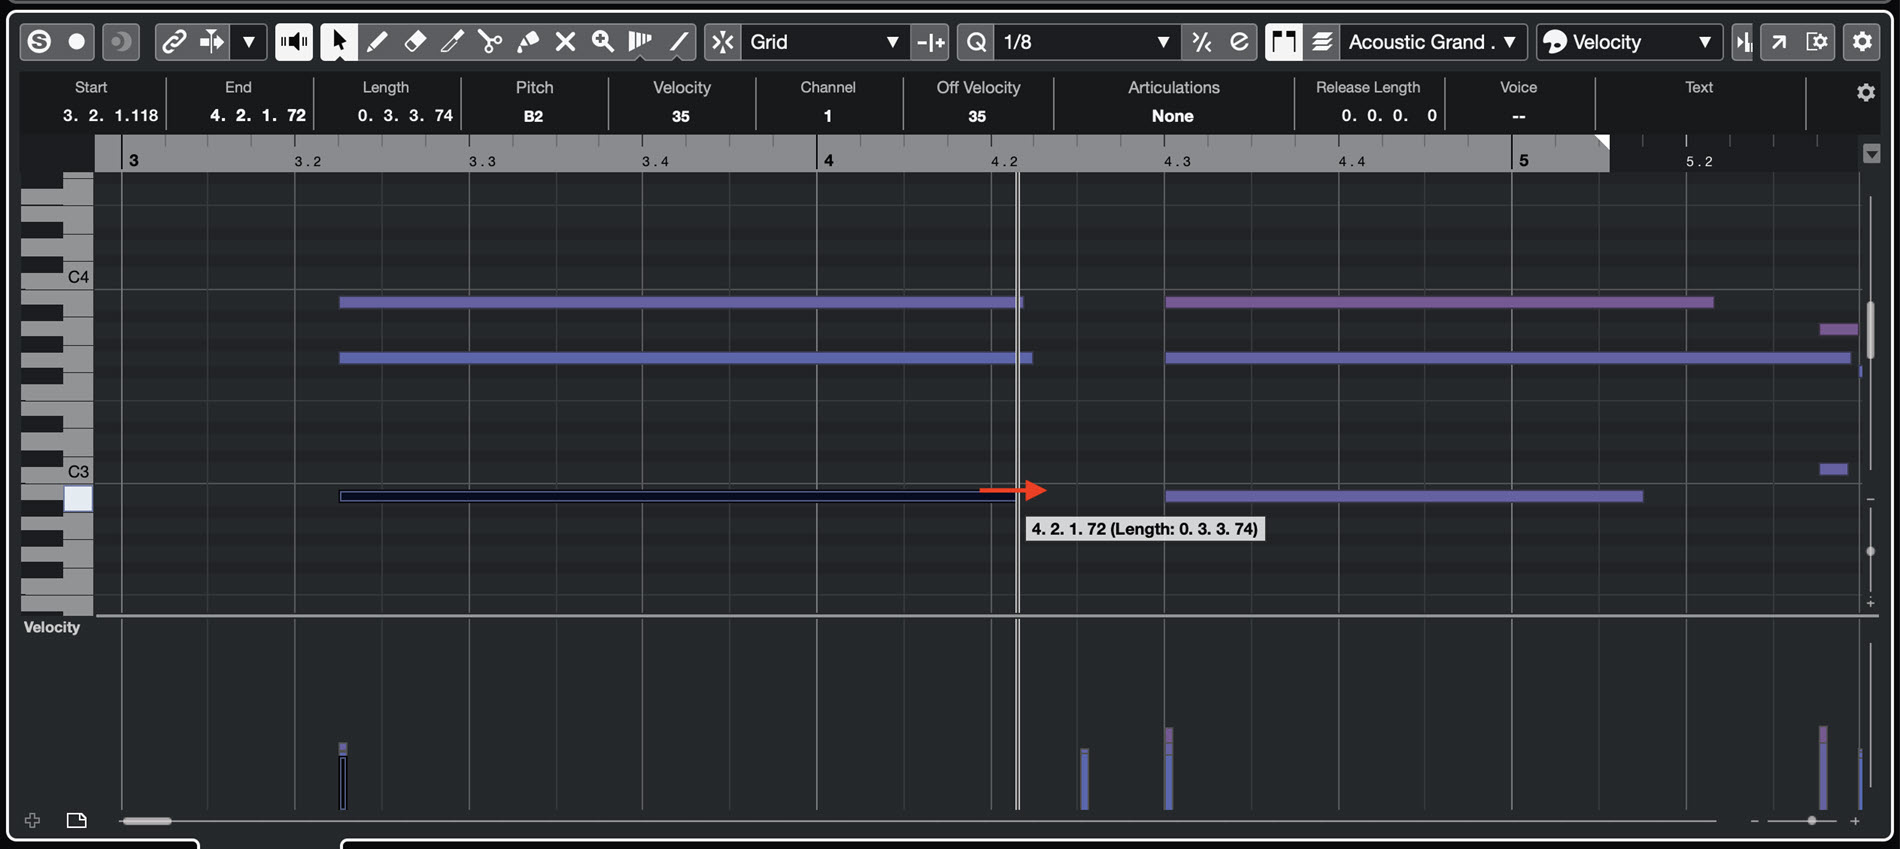
Transposing MIDI notes is simple in a piano roll editor too. Just select the note or notes you want to transpose and drag them up or down until they’re at the desired pitch.
Other Views
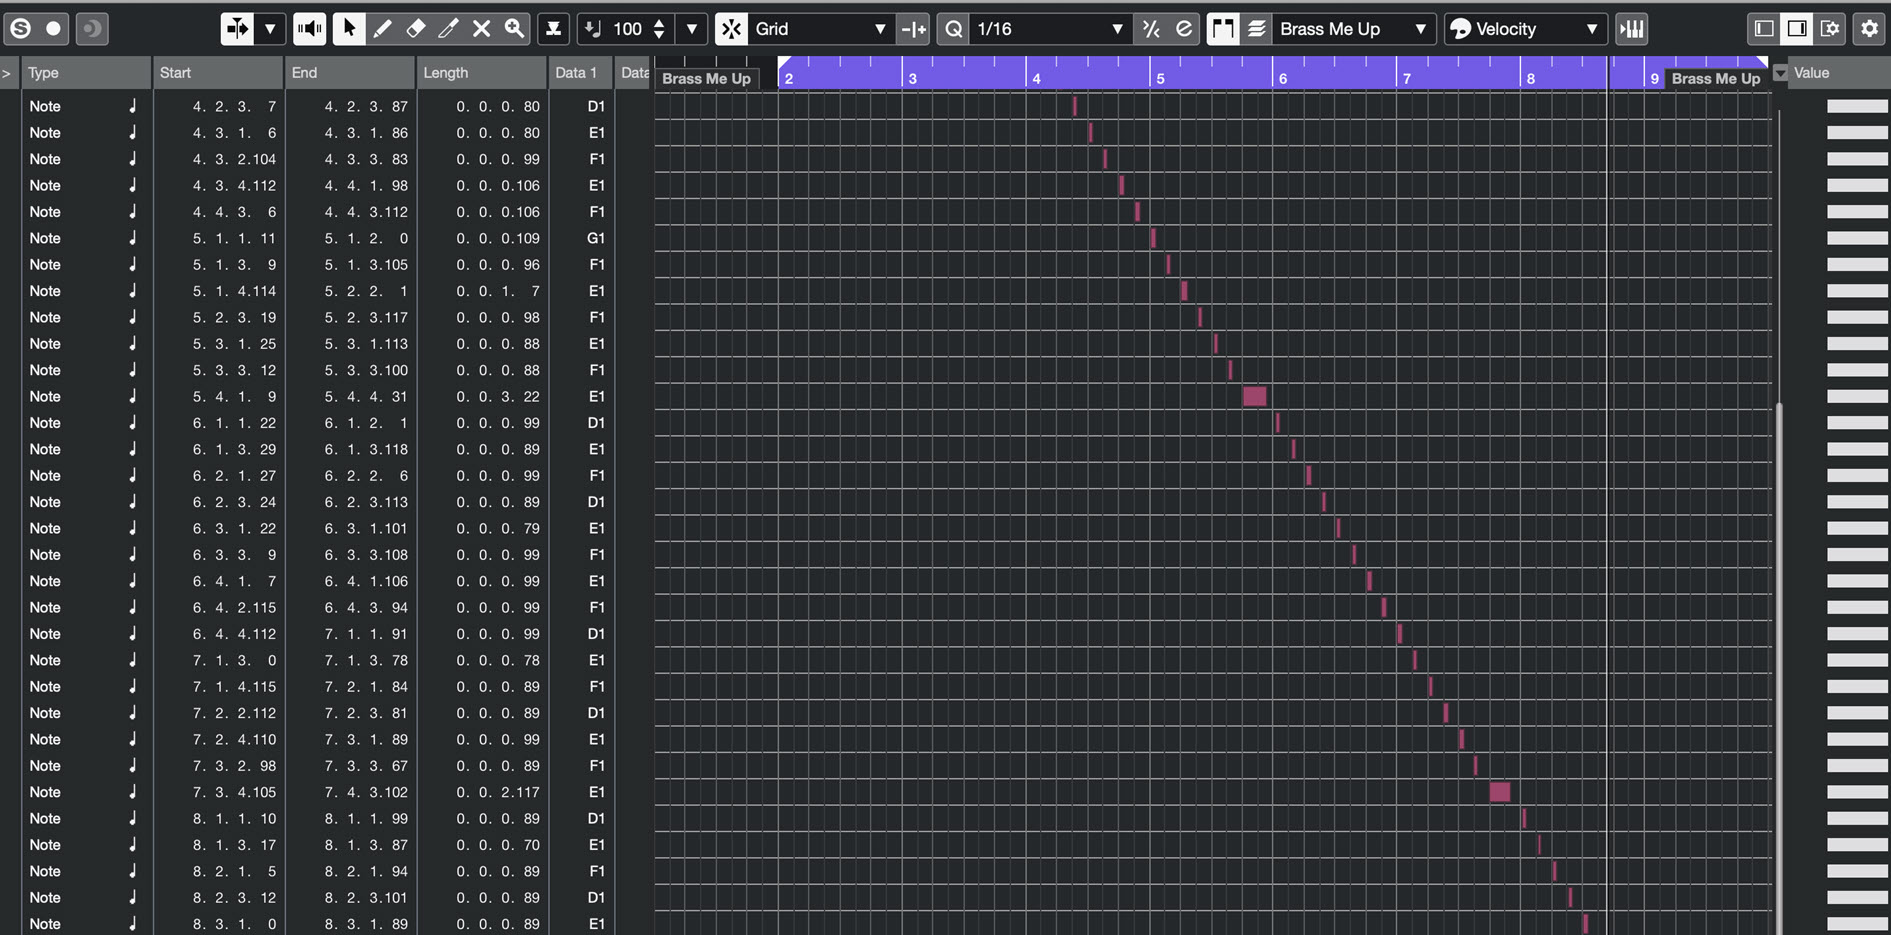
Another type of MIDI editor offered by many DAWs is called an event list. (In Cubase, it’s referred to as the List Editor.) The basic idea is to display a list of every MIDI event, including note-ons and note-offs, as well as Velocity and controller events such as Pitch Bend or Modulation. This lets you edit events precisely, using numeric values.
In many DAWs (including Cubase), if you select an event in any other MIDI editor (such as a piano roll), you’ll also find it highlighted in the event list, where you can input changes numerically to any of the fields. You can also select notes and events directly from the event list.
Cubase’s List Editor is unusual in that it also provides a graphic section. The notes in the list are shown as slashes going from left to right as time elapses, and top to bottom with each successive note:
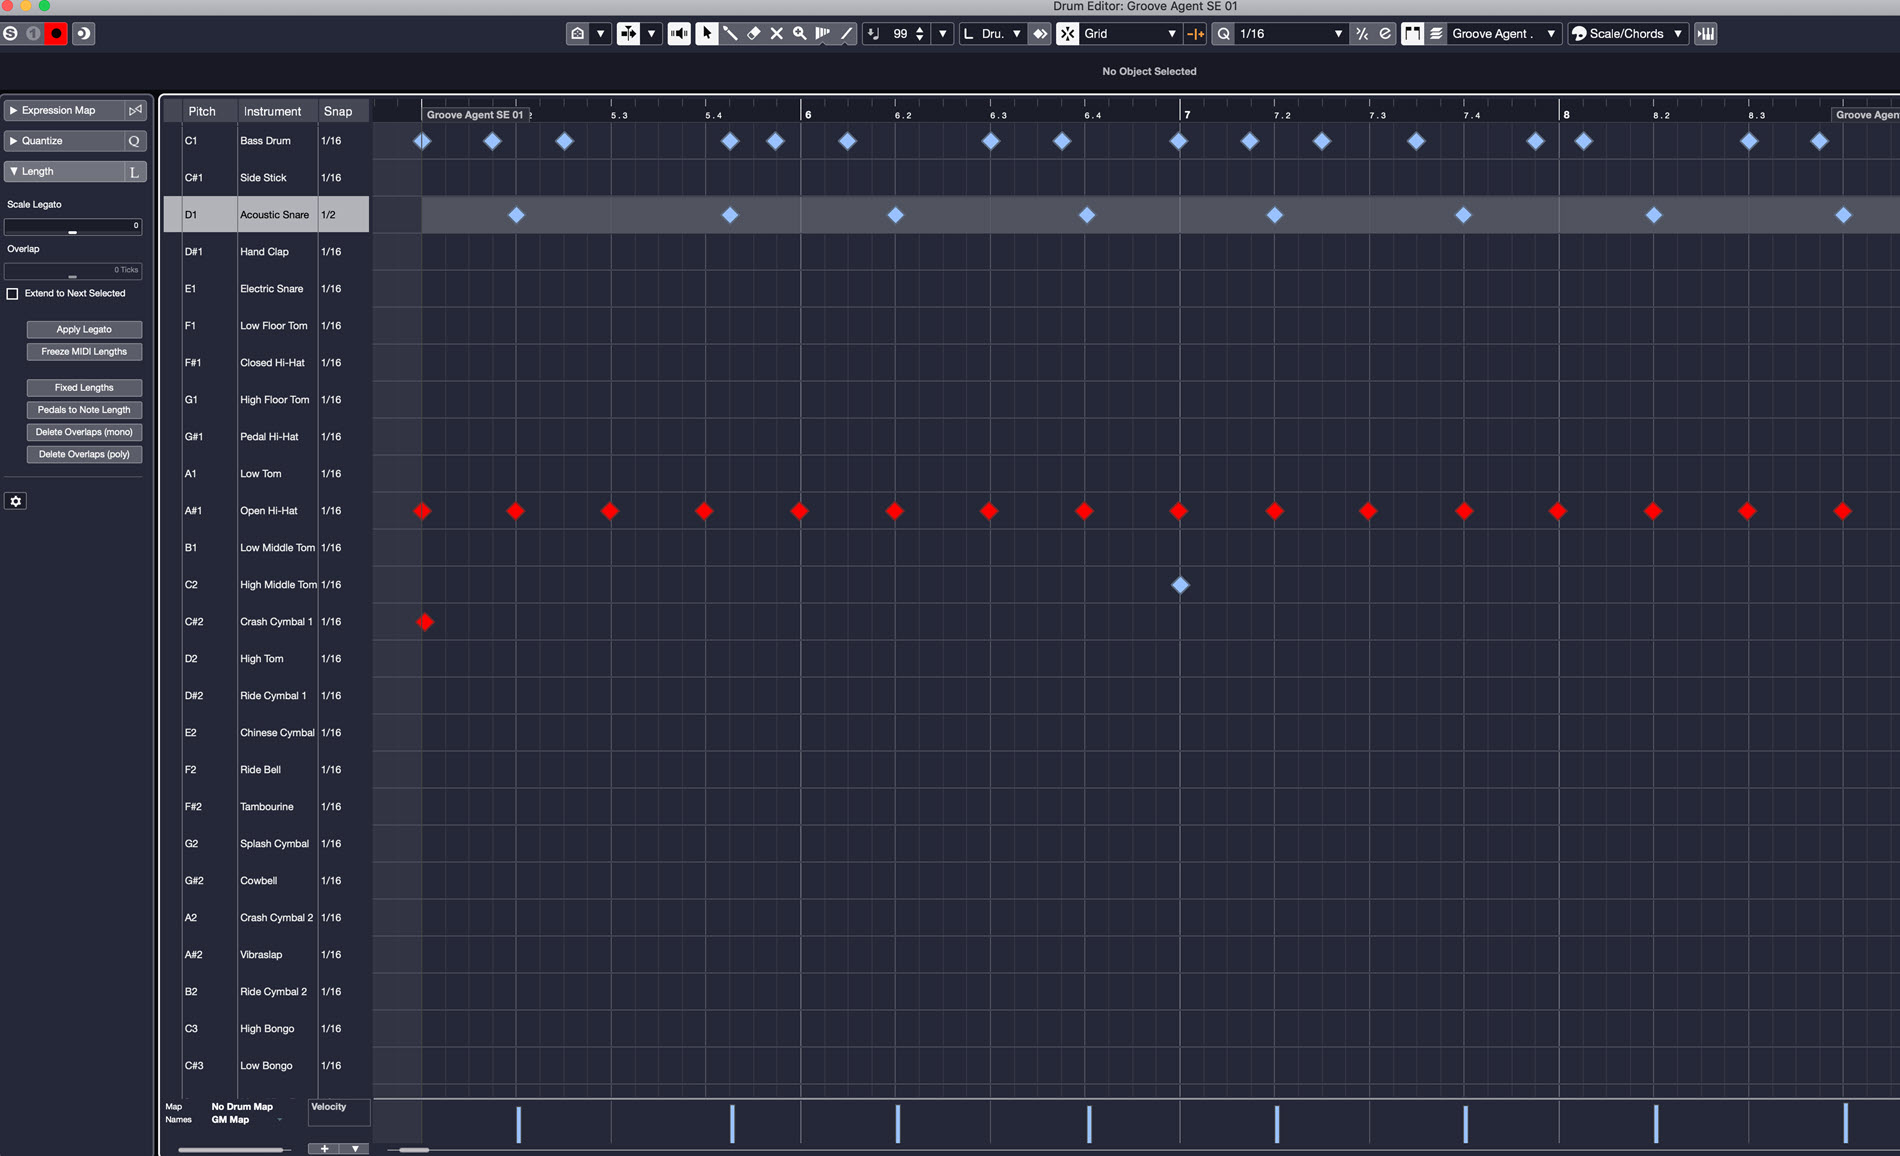
Many DAWs also provide a specialized editor interface for MIDI drum parts. In Cubase, it’s called, not surprisingly, the Drum Editor. It’s not all that different from the Key Editor, except that the notes are depicted as diamond-shapes and, since they represent drum hits, are all one length. When fully quantized (see the “Timing It Right” section below), they also sit on the grid lines instead of between them, like they do in the Key Editor.
With the grid snap on (more on this in the next section), it’s easy to manually enter drum notes or move notes from one drum or cymbal to another, and they’ll all be on the grid. You can even change the grid value for each drum independently. Drum editors are most valuable when working with quantized parts, such as those commonly found in genres like EDM.
In a lot of DAWs, you can also edit MIDI in standard music notation. To do this in Cubase, use the Score Editor:
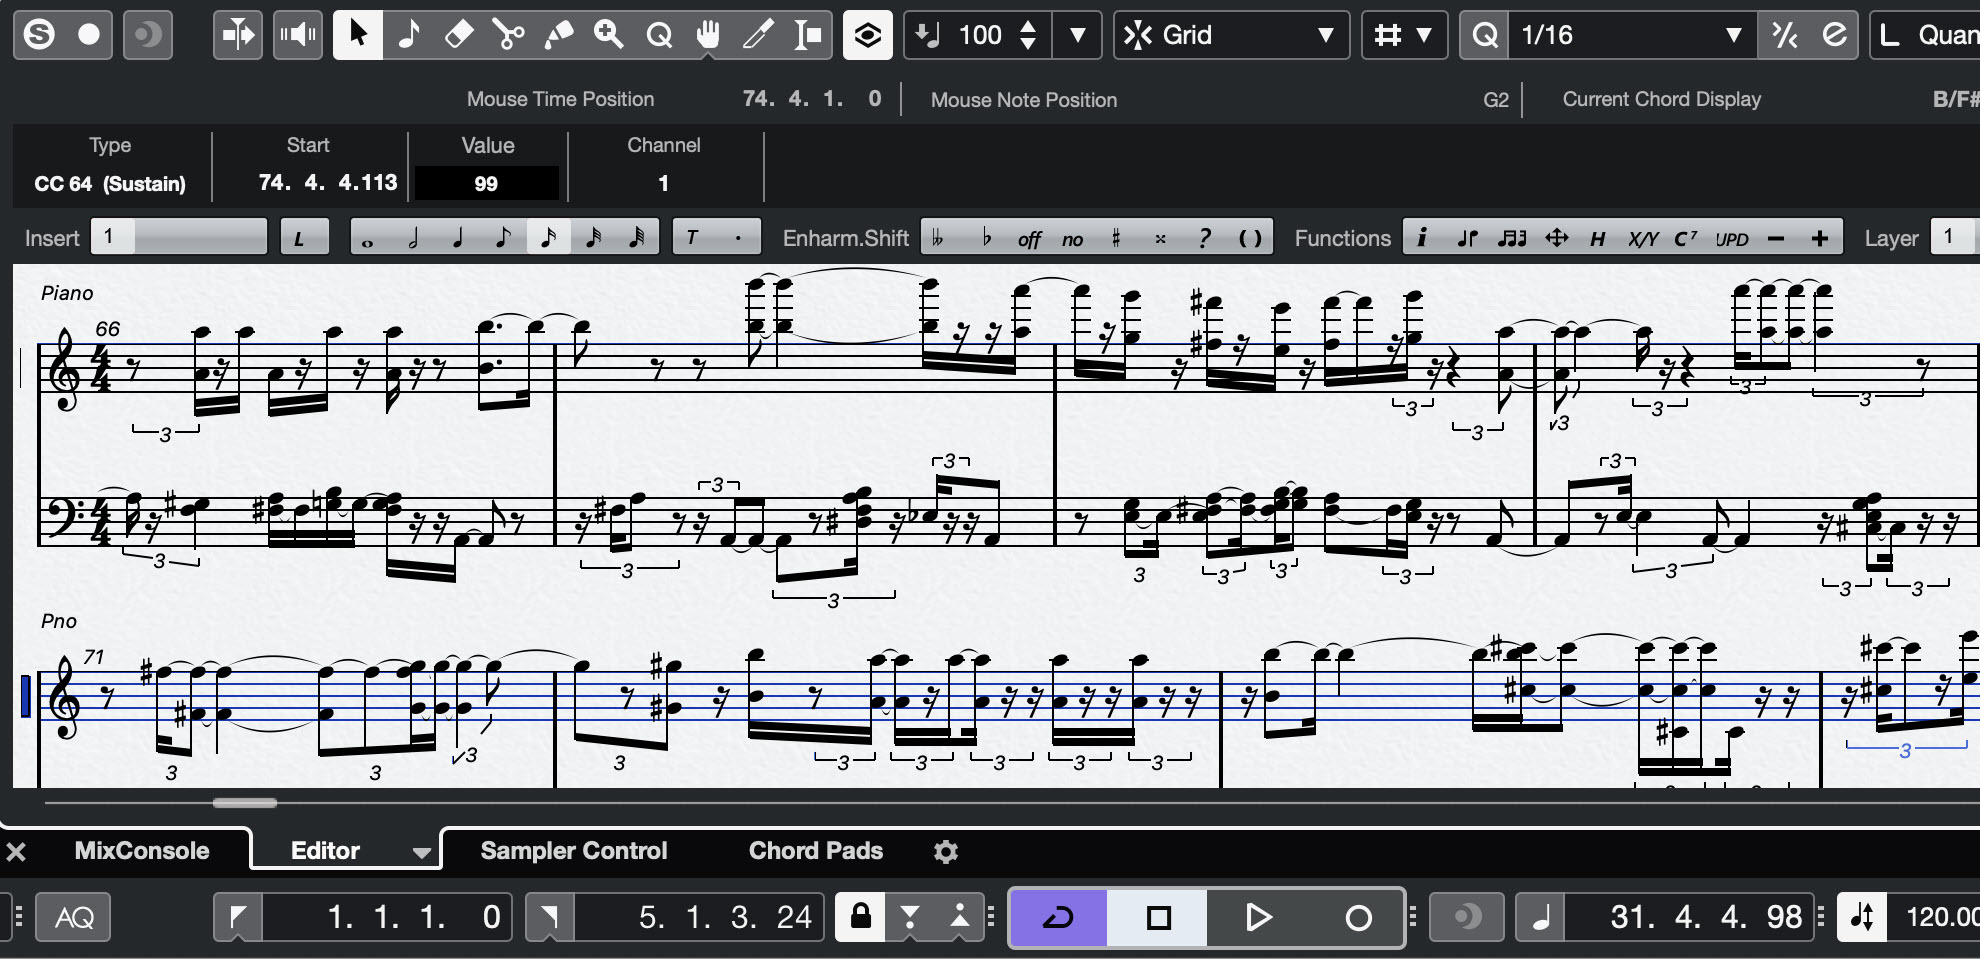
Powerful as they are, score editing windows are not as fully featured as dedicated notation programs such as Steinberg Dorico. Still, they’re handy if you prefer working in notation, and you can easily switch back and forth between a score editor and other MIDI editors.
On the Grid
Understanding the grid is critical for successful MIDI editing — and audio editing, for that matter. The grid provides the rhythmic contours of your song. It’s particularly useful on music that was recorded in time with your DAW’s click track or metronome.
If you set the grid for, say, quarter notes, each measure in the editor will be split into four equal sections. For eighth notes, you’d get eight equal sections, and so forth. Each grid line represents a beat. How you set the grid depends on the rhythmic content of the track.
The grid has two critical functions. First, it’s a visual aid. Depending on how you set it, you’ll see each measure subdivided by that setting. It’s crucial when you’re editing to see where, say, each quarter-note or eighth-note falls in a measure.

The other important aspect is something called grid snap or snap-to-grid (in Cubase, it’s simply called Snap). When activated, it constrains your editing to whatever the grid setting is. For example, to move entire measures within a song, set the grid value to a full bar (1:1 in Cubase). More usually, you’ll end up setting it to match the smallest rhythmic value in the track you’re editing.
Learn your DAW’s keyboard shortcut for turning grid snap on and off, because you’ll want to often toggle between the two when you’re editing. In Cubase, press the J key to activate or deactivate grid snap.
Timing it Right
Quantizing is an important MIDI editing function that’s related to your grid settings as well. When you quantize a note (or a multi-note selection), it gets moved onto (or closer to, depending on your settings) the nearest grid line.
A rule of thumb is to never set the quantize function for a smaller rhythmic value than the smallest one in the section or track you’re quantizing. Otherwise, you’ll likely get at least some notes quantized to the wrong beat.
If you want your MIDI part to sound like it was played rather than programmed, you’ll want to avoid quantizing the whole selection so that every note is precisely on the grid. Your DAW will offer options for tightening up the rhythms through quantization, without putting every note directly on a beat.
The most straightforward of these is usually referred to as quantize strength. It allows you to quantize your selection by less than 100 percent. In Cubase, this function is referred to as Iterative Quantize.
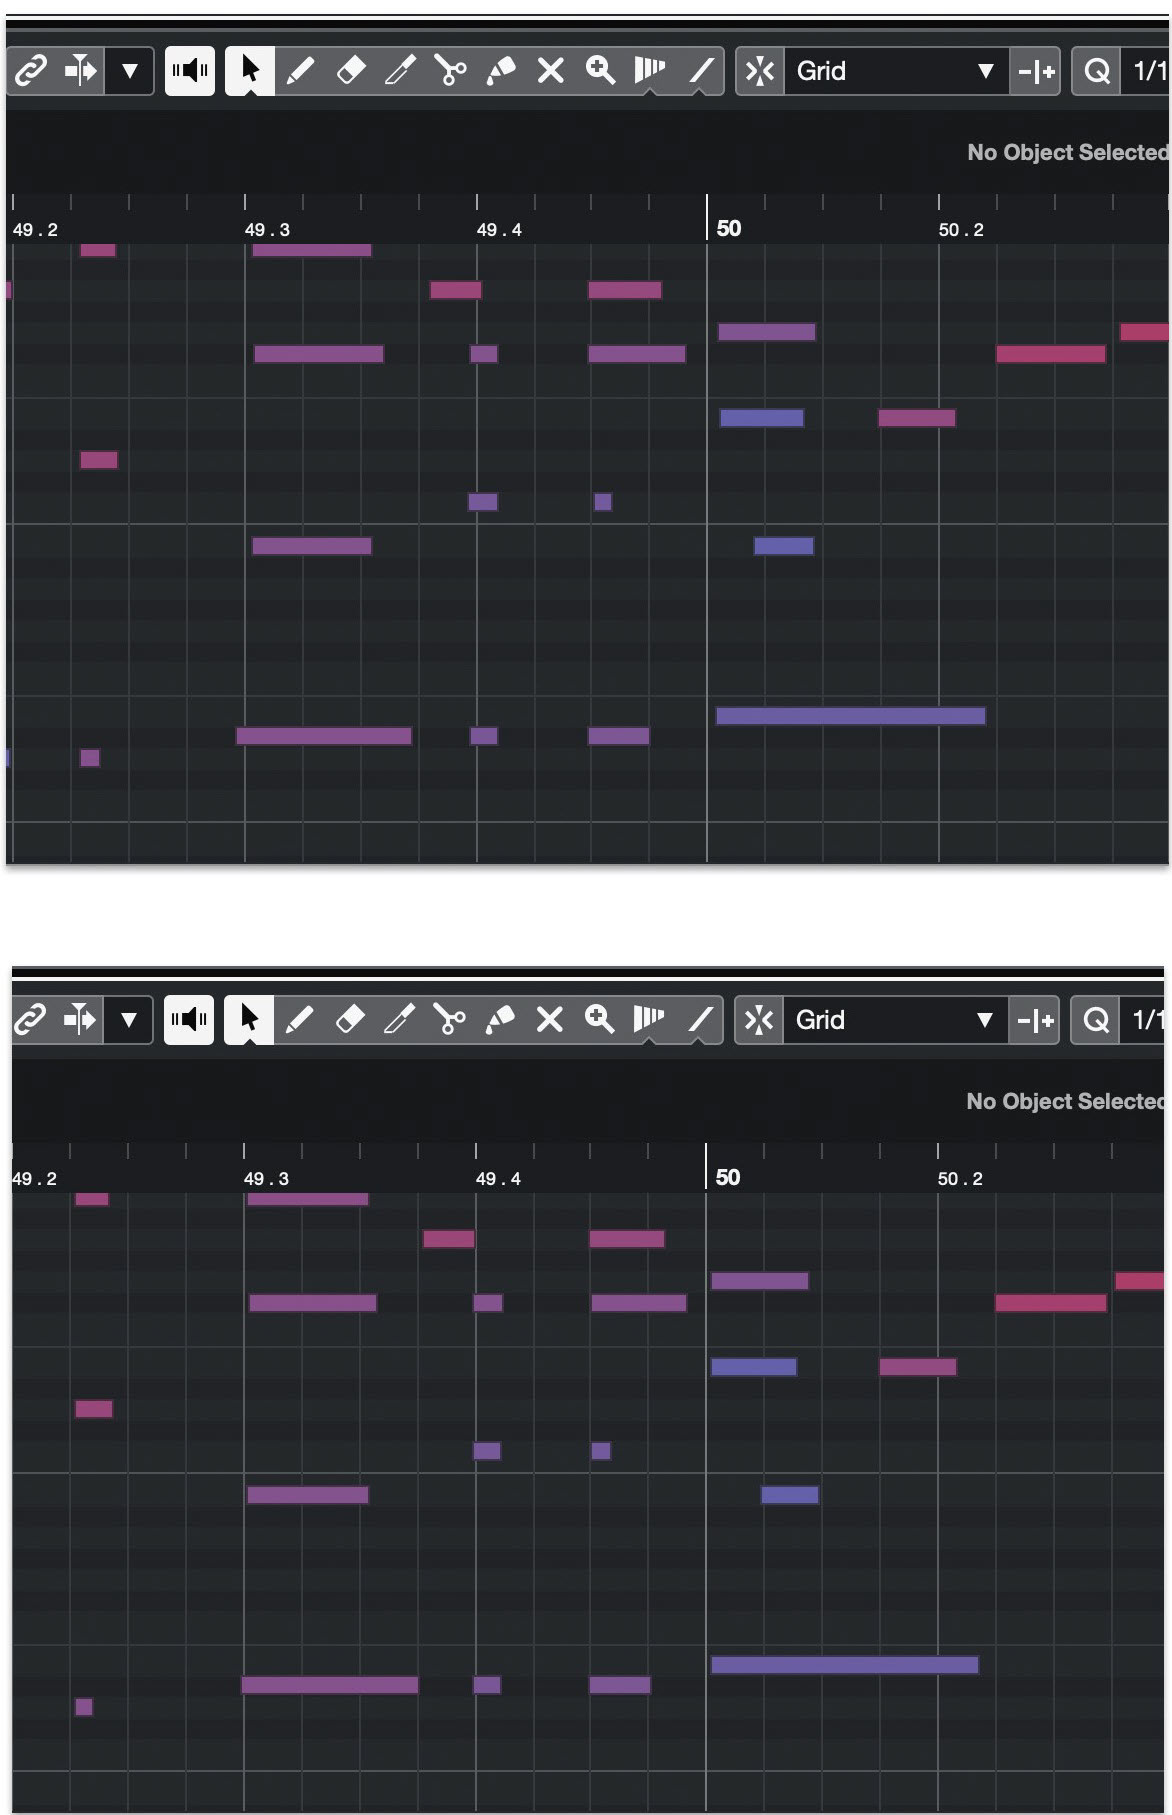
Another Cubase feature that lets you control the degree of quantization is called the Safe Range. It lets you tell Cubase not to quantize any notes that are within X number of ticks of the grid line. Depending on how many ticks you set it for, it will leave notes alone if they are close to but not exactly on the gridline, thus preserving some of the feel of your MIDI part. Most DAWs offer similar options.
Escape Velocity
The Key Editor in Cubase, like most MIDI editors, shows MIDI Velocity. This parameter measures how hard a note on a keyboard is struck (technically it measures the speed, or velocity, with which a key travels down from its resting position), and it is usually used to affect the loudness and softness (dynamics) of each note and/or its brightness.
In the Key Editor, Velocity is displayed on the bottom of the editor screen in the form of vertical lines that you can lengthen or shorten by dragging, as shown in the area circled in red in the illustration below:
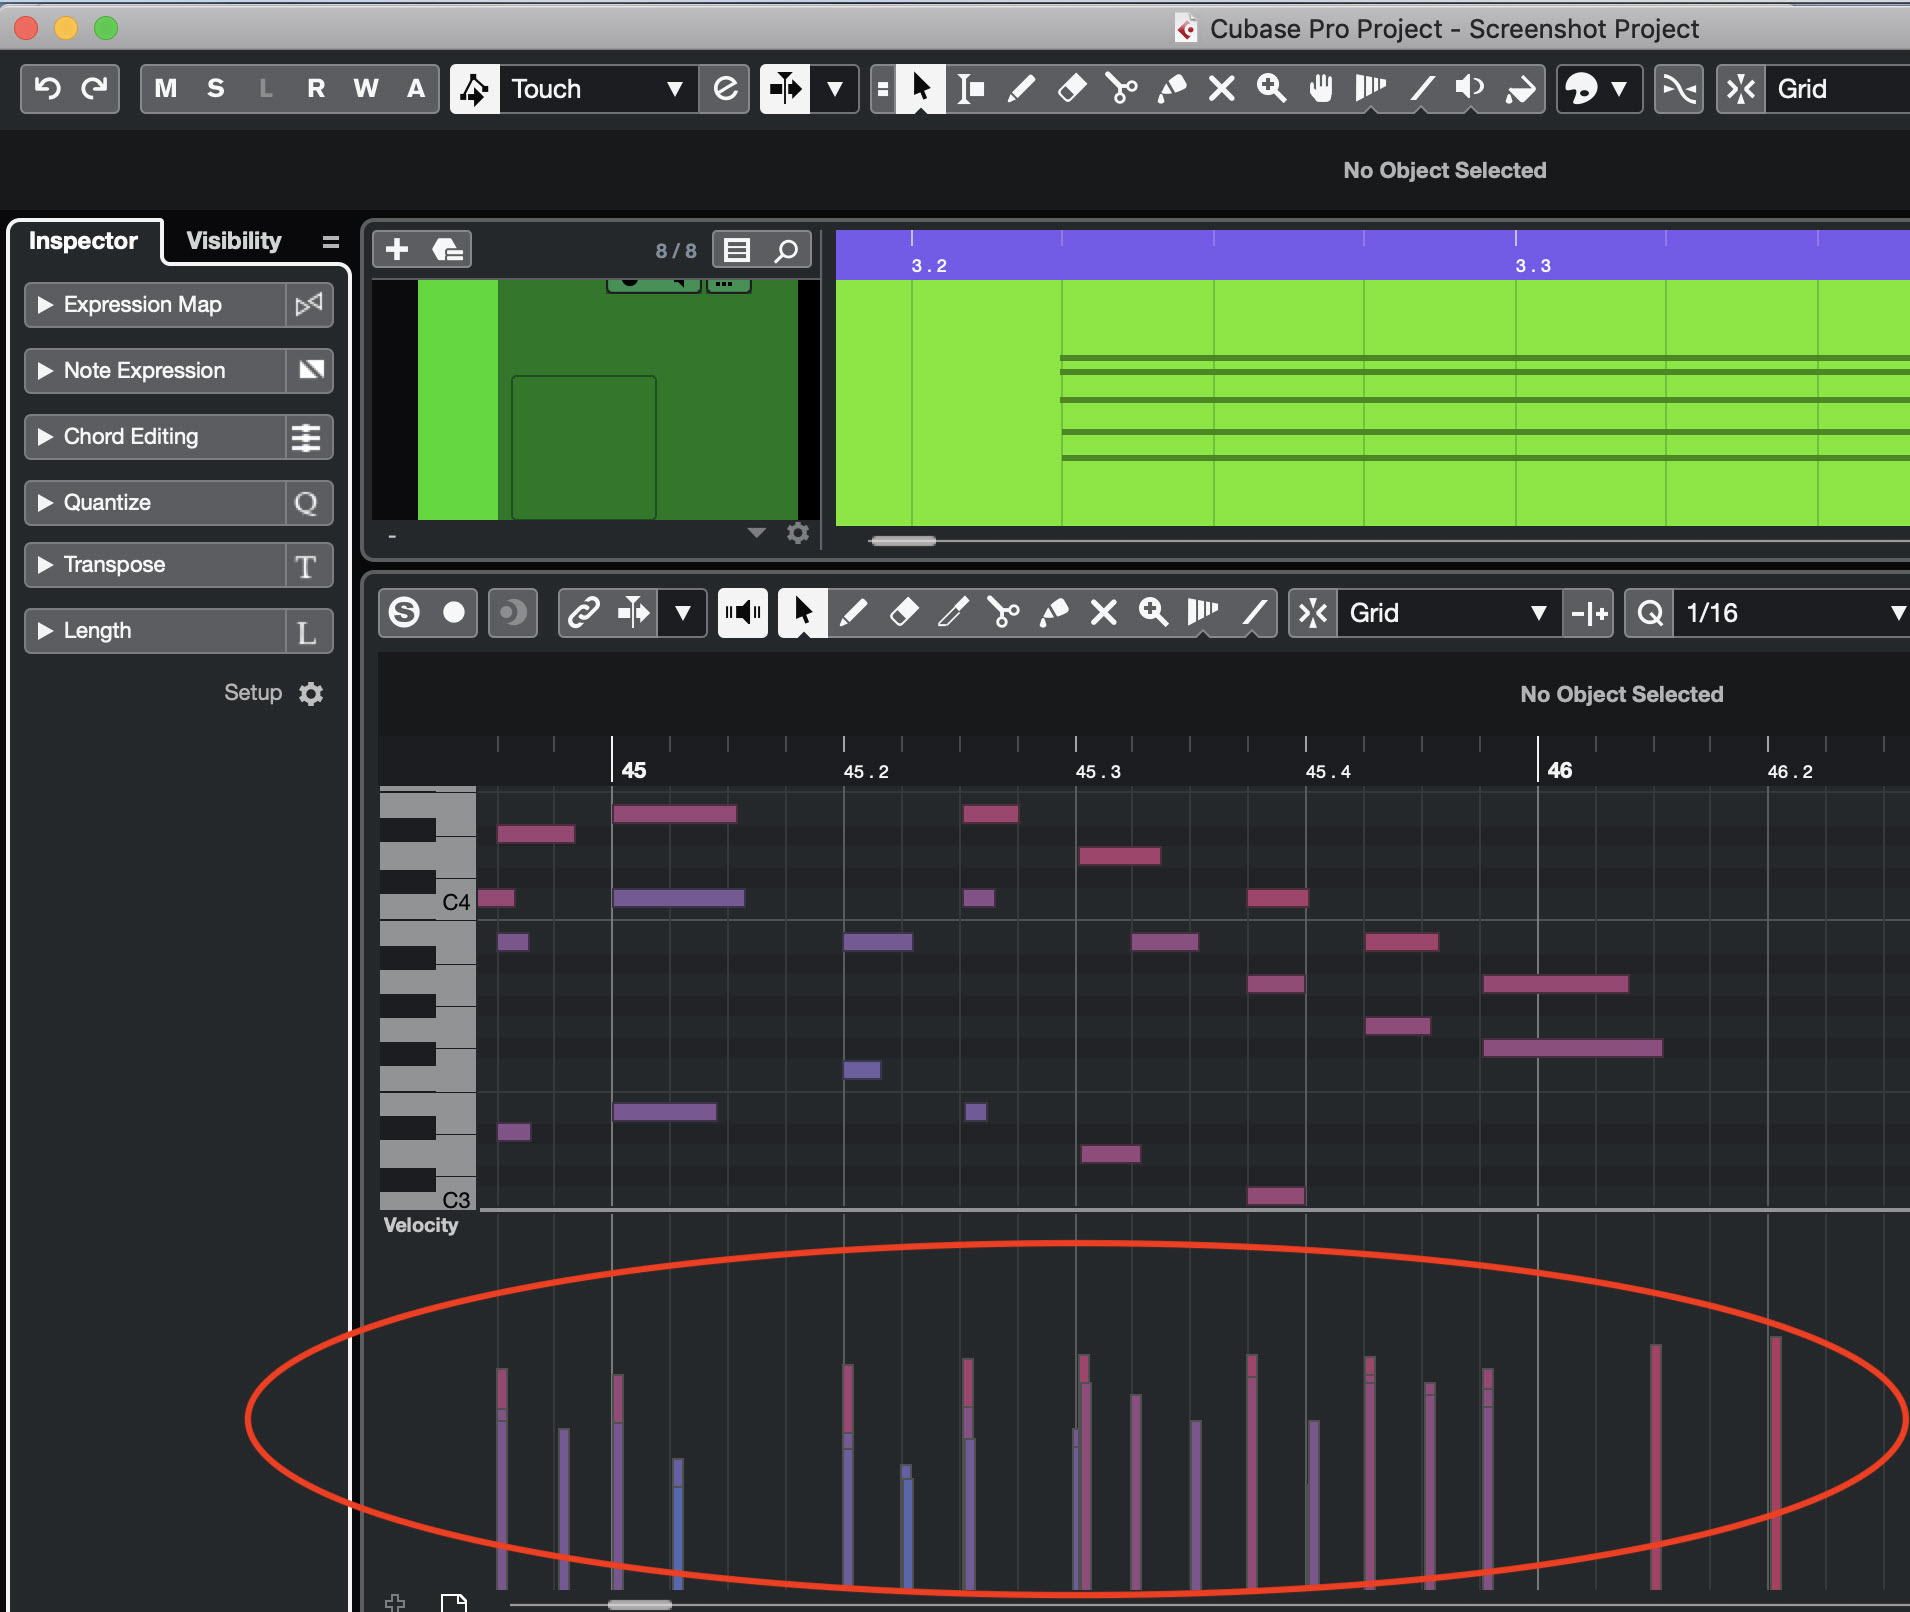
Like many other MIDI parameters, Velocity is expressed in values from 1 to 127. For example, a snare drum hit with a Velocity of 120 will be considerably louder than one that’s at 35. Like any MIDI variable, you can edit Velocity, either note by note or in groups of notes defined by a selection, giving you a lot of control over the dynamics of a MIDI performance.
Velocity is often adjusted by moving individual sliders or by applying a Velocity value to a note, selection of notes or an entire track. In most situations, you won’t want to make all the Velocity values the same, because doing so will remove the dynamics. It’s better to bring Velocities up or down by an equal amount, so that the relationship between notes stays the same.
The Long and Short of It
When you change the duration of MIDI notes, you are altering whether they sound staccato or legato. If notes are short and have space between them, they’ll sound staccato. If their durations go right up to the edge of the following note, they’ll sound legato. You can easily select all the notes in a part or section and drag them to change their length all at the same time.
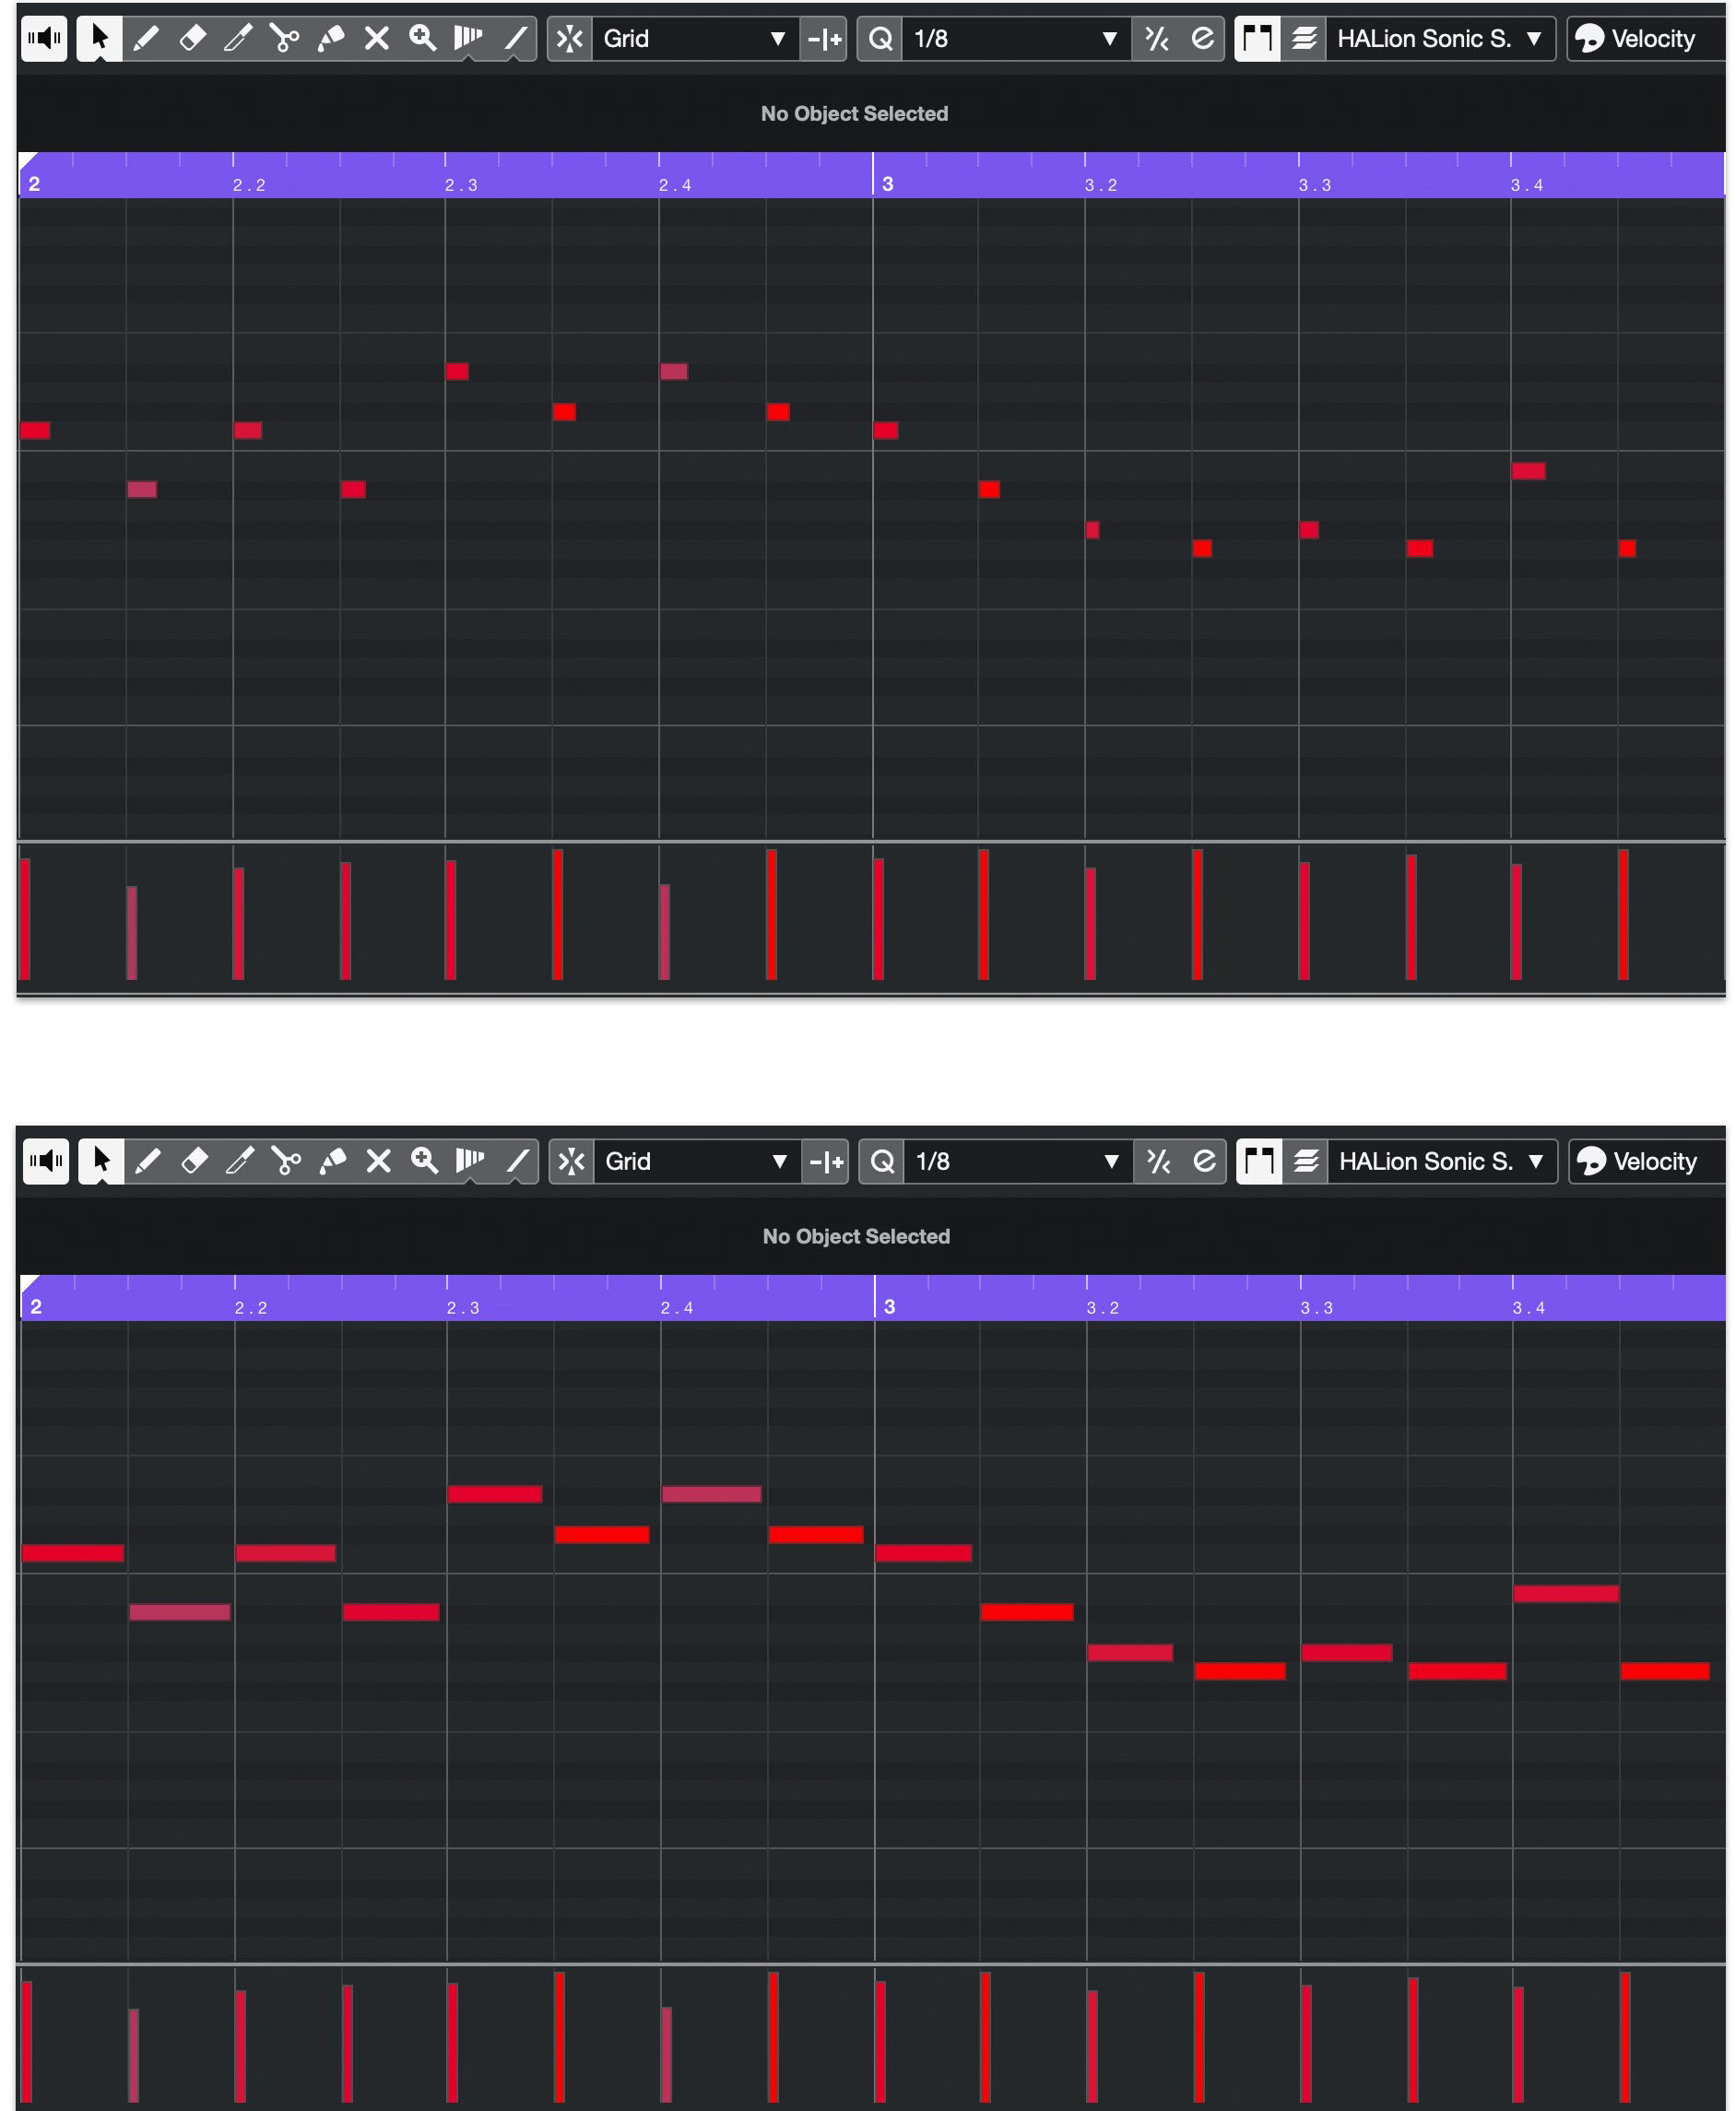
Be sure to watch out for is notes that overlap, where the end of one note hangs over the beginning of the next. In many types of instrument parts, such overlaps would be undesirable for two reasons. One, the two notes might sound discordant when sounding together, and two, the end of the first note might obscure the attack of the second.
Under Your Control
While this article has covered the basics of MIDI editing, we’ve only scratched the surface. The deeper you get into MIDI, the more you’ll use some of the other available control and expression options — for example, Pitch Bend, Modulation and Aftertouch.
MIDI has been around for nearly four decades now, so its longevity and durability is proven; however, it’s fair to say that the best is yet to come. The original MIDI spec (MIDI 1.0) has been updated to MIDI 2.0, which exponentially increases the resolution of MIDI parameters. It’s going to take time for MIDI 2.0-supported devices and software to make it to the market, but when they do, MIDI performances will undoubtedly rise to an even higher level of expressiveness and editing will be correspondingly more precise.
Check out our other Recording Basics postings.
Click here for more information about Steinberg Cubase.


