Tagged Under:
Organize Your Mix
These few simple steps will make you more productive.
Mixing, by its very nature, is a complex activity with a lot of moving parts. You’ve got a multitude of tracks that need to be adjusted individually for level and panned in the stereo spectrum. Some will also need to be processed with equalization and gain reduction such as compression or limiting. You’ll also be automating levels and adding effects like reverb and delay, among many other tasks.
Your project will likely also include auxiliary channels, sub channels and a master bus (in Steinberg Cubase, they’re referred to as FX Tracks, Group Tracks, and the Main Out, respectively) and they’ll need attention too. In short, you’ve got an awful lot to keep track of during a mix, so to help avoid confusion, it’s best to start the process with your session as organized as possible.
Order Out of Chaos
Task number one is to put your tracks in a logical order. The easiest way to do that is to arrange all the instrument and vocal tracks by type. In other words, put all the drums together, all guitars, all keyboards and so on.
Within each category, you’ll also want to arrange the tracks in a way that makes sense to you logically. For example, if you have multitrack drums, you might want to order them something like this: kick, snare, hi-hat, toms, overheads, and room mics:
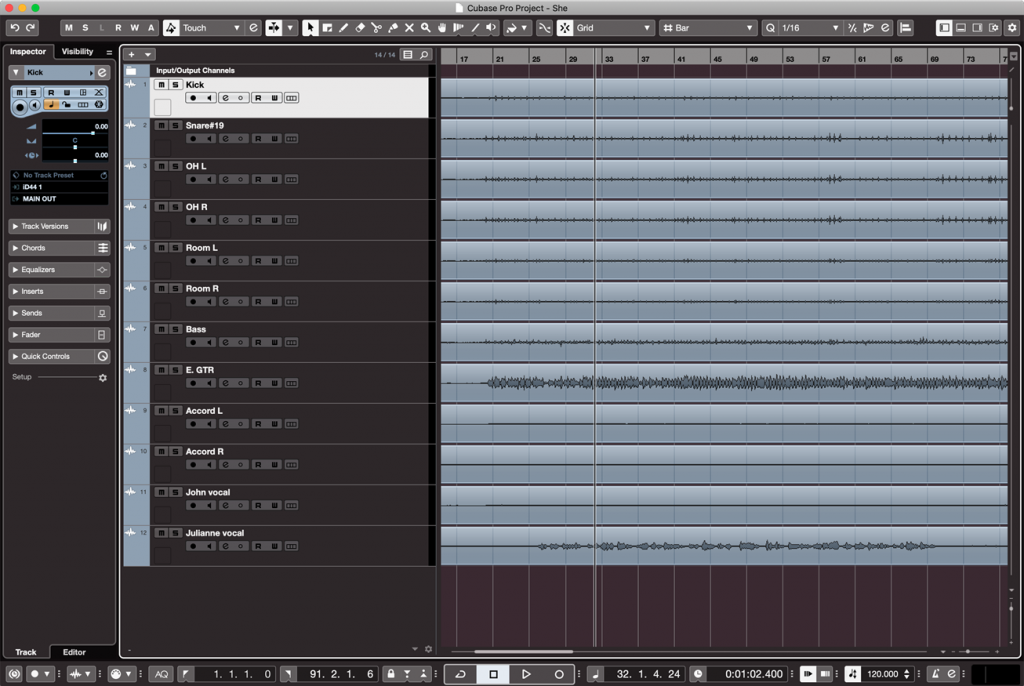
In Cubase, the easiest place for rearranging the order of tracks is the Track List in the Project Window — simply click on a track header and drag it up or down to change its position. The order of tracks in the Mix Console will mirror what’s in the Track List. As you pass each track in the list, you’ll see a green line that shows the location of where the track would move to if you release the mouse button.
Next, check the track names to make sure they make sense and will not confuse you during the mix. If you want to rename a track, simply double-click on its name. It will become highlighted and allow you to type in something new.
The Color of Music
Once you’ve got your tracks in order and correctly named, it’s also helpful to color-code them. Doing so allows you to know at a glance what kind of track you’re looking at in the Mix Console or the Track List.
There’s no right or wrong when it comes to color choice. I like to color drum tracks blue, bass purple, electric guitars red, acoustic guitars orange, keyboards green, and vocals pink, but everyone does it differently. Use whatever scheme you like, but stay consistent from project to project so that you commit your system to memory:
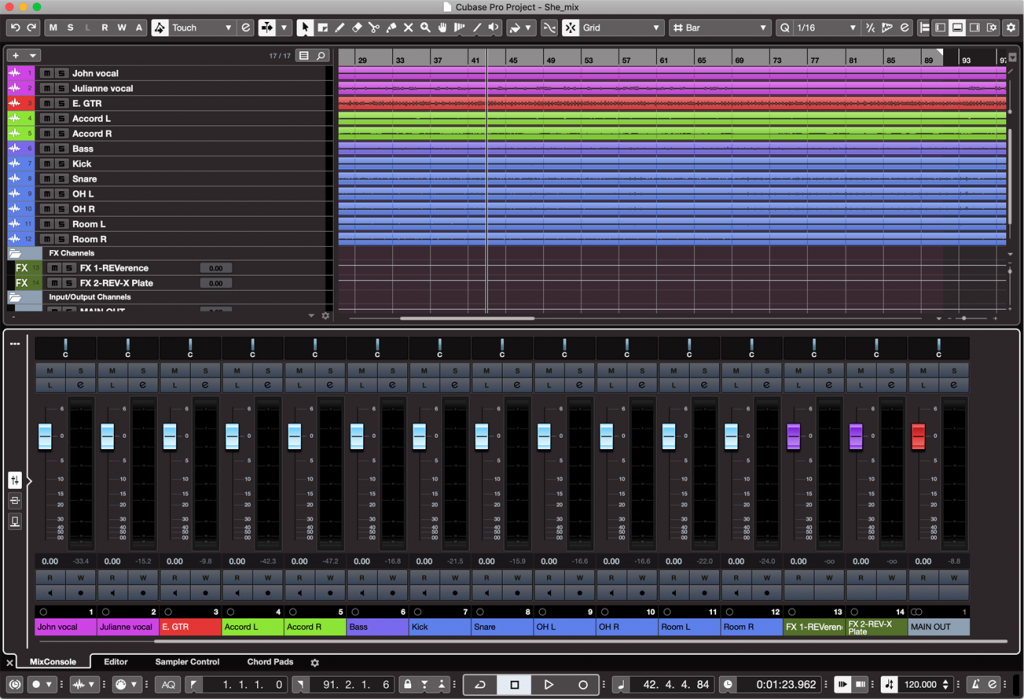
To change the color of a track in Cubase, first select the track header and then go to Project/Colorize Selected Tracks, which opens the Colorize window. If the window says “Colorize Selected Objects,” it means you currently have an Object (audio or MIDI event) selected. Before you change the track color, you need to deselect the Object (clicking in an empty part of a track lane will do it) and then click on the track header. The Colorize window should then switch to saying Colorize Selected Tracks:
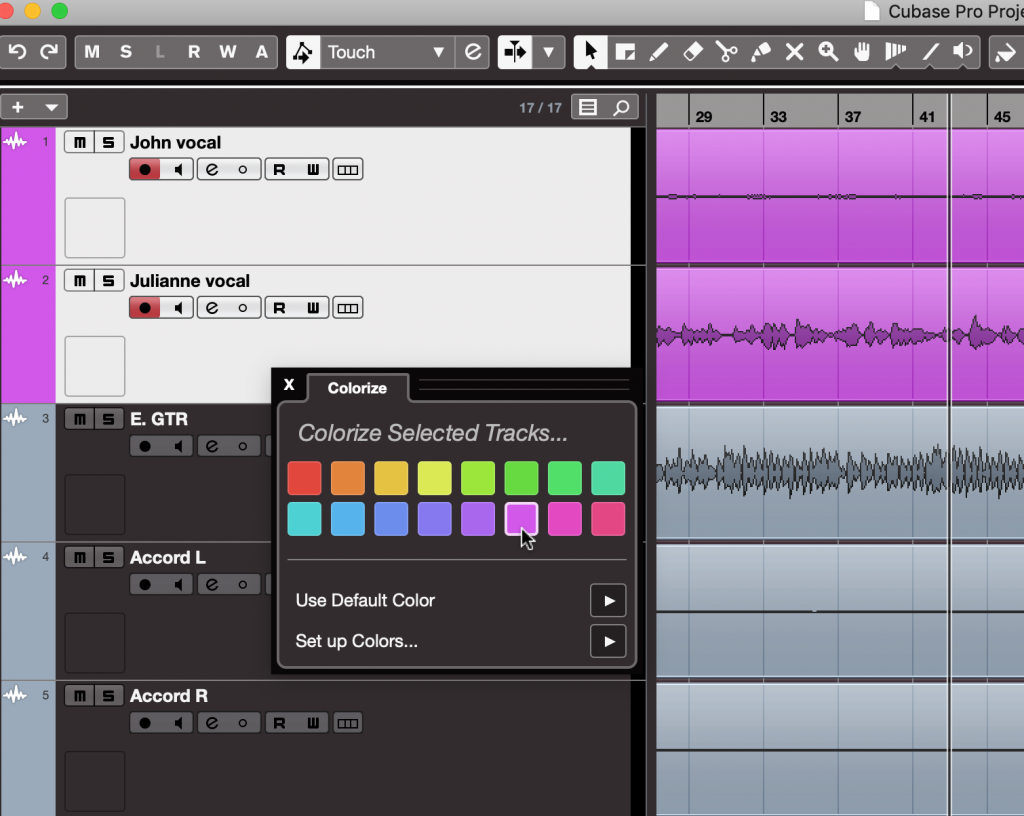
Next, click on a color, and it will change both the track header and all the Objects in selected tracks as well.
Fold it Up
Especially if you have a high track count in your session, you can make your Track List more compact and clean-looking with the Track Folders feature in Cubase, which lets you enclose any group of tracks you select. (Note that Track Folders do not appear in the Mix Console.) If the folder is open, the tracks are visible, but if it’s closed, they’re hidden inside the folder.
Track Objects from Folder Tracks not only have a unique look, but can be edited as a group. You can even nest folders inside folders:
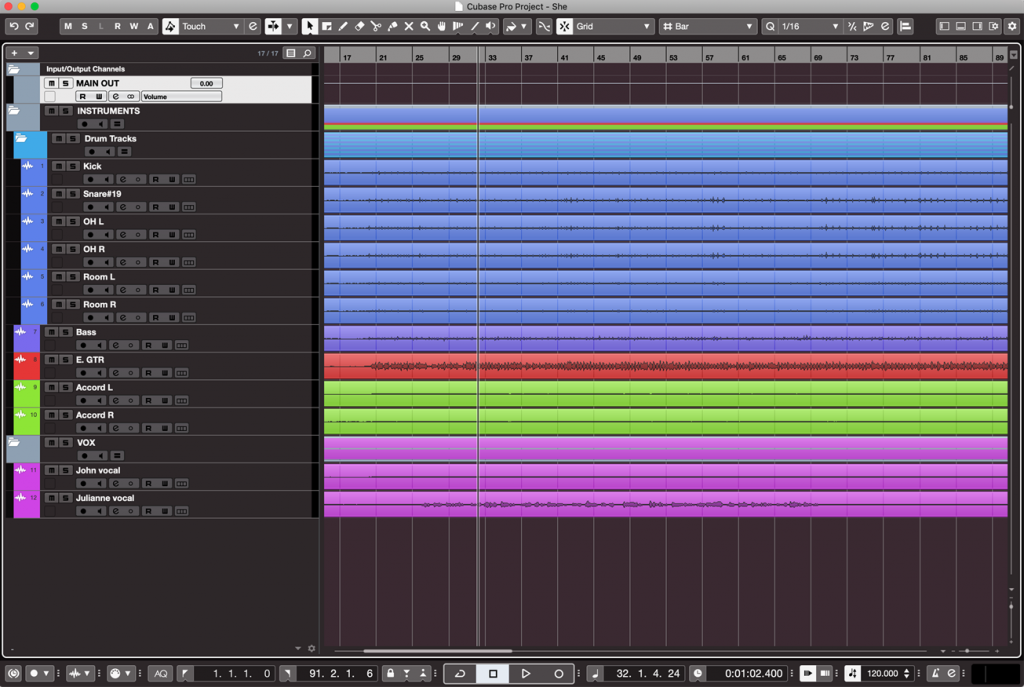
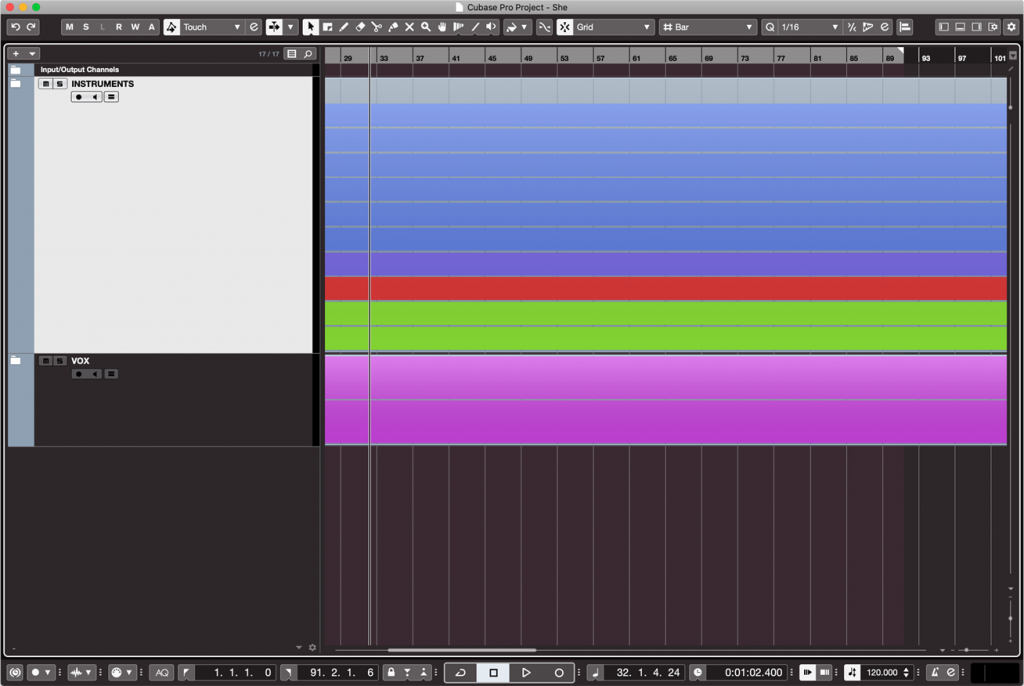
Once you have tracks in folders, you can solo and mute the entire folder with buttons on the folder track. They’re also handy for splitting the main workspace vertically, with the Track List above and the Mix Console in the Lower Zone (you may need to first click Lower Zone button on the upper right to open it up, and then choose “Mix Console” on the bottom left):
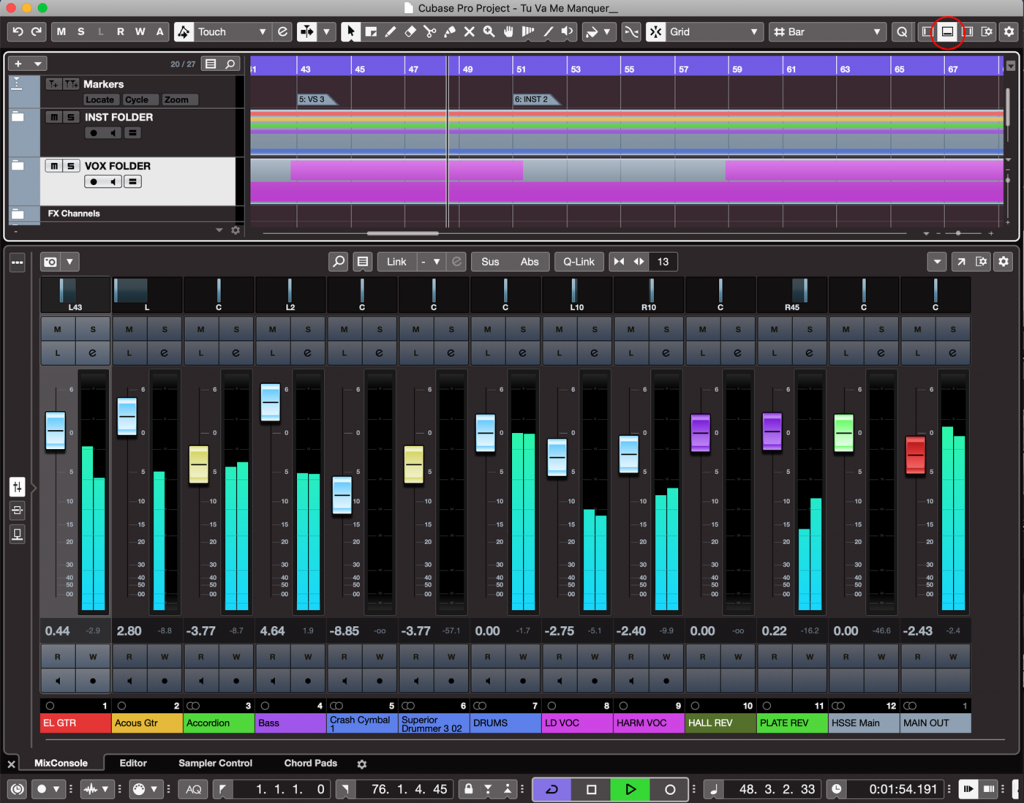
To create a Track Folder, select the Tracks from the Track List that you want to include, then go to Project/Track Folding/Move Selected Tracks to Track Folder.
Mark it Up
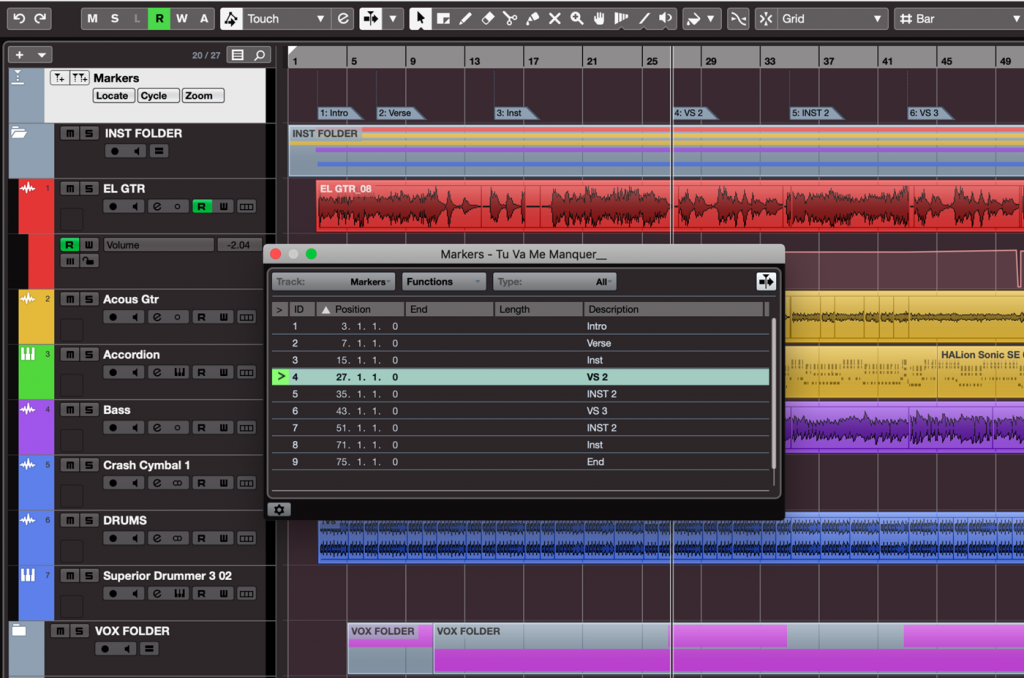
Adding markers to the beginning of each song section — such as intro, verses, choruses, bridge, etc. — not only helps you see where you are in your song at a glance, but it also gives you an easy way to jump to specific parts of the song during the mix.
First, however, you must create a Marker Track, which is one of the track types you see when you use the Add Track function (Project/Add Track or right-click in the Track List). Once you’ve created it, you can use the Add Marker button to put a marker at the current cursor position: (Make sure to turn on the Grid and set it to Bar if you want to create markers precisely at the beginning of measures.)
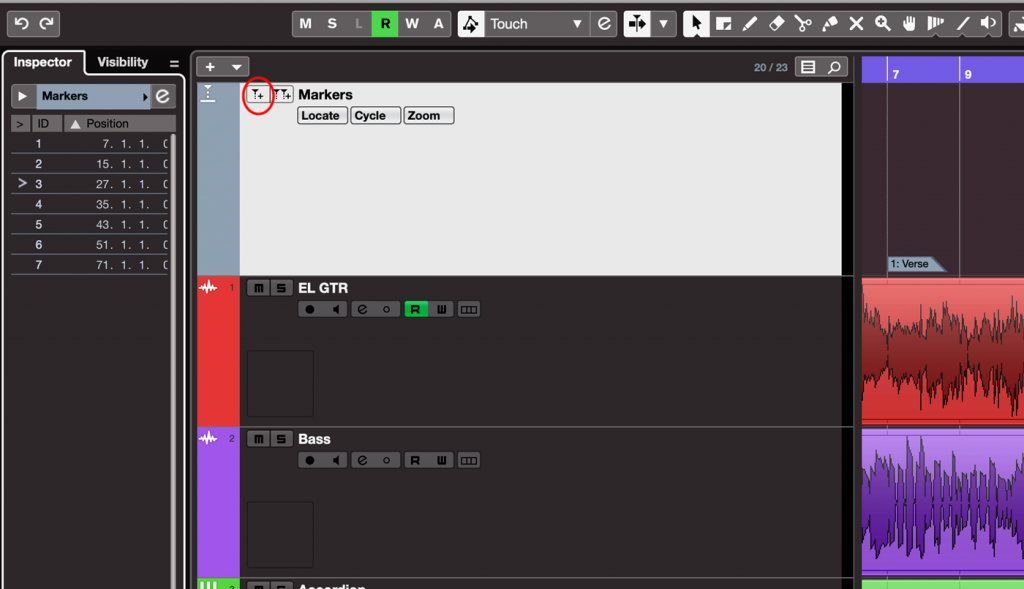
Open the Marker Window (Project/Markers or Command (Control)+M). You’ll see a list of the markers created. Here you can name your markers (which I highly recommend), delete them or change their location.
You can make the transport jump to a specific marker by clicking in the Locate (>) column next to it in the Marker Window, or in the Marker Inspector (you can open the latter by clicking the Inspector tab with the Marker Track selected). Cubase also offers another type of marker called Cycle Markers for saving left-to-right locator positions:
Ready to Rock
If you’ve taken all the steps outlined here, your mixing will be well-organized and streamlined. This will not only make you more productive but also allow you to concentrate more on the most important (and most fun) aspect of mixing — the creative part.
Check out our other Recording Basics postings.
Click here for more information about Steinberg Cubase.


