Tagged Under:
The Importance of Archiving and Backup
Don’t wait until audio disaster strikes.
Okay, you’ve spent days, weeks — even months — carefully crafting, recording and producing a song you think is pretty great. After innumerable overdubs, mixes and remixes you’re almost done.
Then one morning you go to open the project file to give it one last listen … only to discover that the hard drive you stored it on has crashed.
Yikes!
There are two endings to this tale, one happy, one tragic. In the happy ending, you’ve been regularly backing up your data, so you can easily open the file from another drive.
Unfortunately, it’s the tragic ending that happens way more often, and it goes something like this: the crashed drive contained the only copy of your song, and all the painstaking work that went into recording it is probably gone forever. OK, perhaps you can go to a data recovery service to try to salvage what was on the drive, but there’s no guarantee that it will work, and it will likely cost you hundreds of dollars to even make the attempt.
IT professionals know that it’s not a matter of if a hard drive will fail, it’s a matter of when. And compromised hard drives are not the only way to lose data, either. Accidental erasure is another potential problem, as are files that for some reason have gotten corrupted and won’t open.
Most home recordists (in fact, most computer users in general) don’t start backing up regularly until after they’ve gone through the misery of losing some important data. Don’t be one of them. Instead, do yourself a favor by implementing a backup strategy now. The only way to avoid data disaster is to be proactive.
In this article, we’ll provide suggestions for backing up your DAW data, along with best practices for saving while recording and mixing, as well as a how-to for archiving completed projects.
It Pays to Save (As)
Data pros use what’s called the “3-2-1 rule” when developing their backup strategies. That means the goal is to have three copies: the original file and two backups, one of which is stored offsite, either in a physically different location, or on a cloud-based service such as Dropbox™ or Google Drive™.
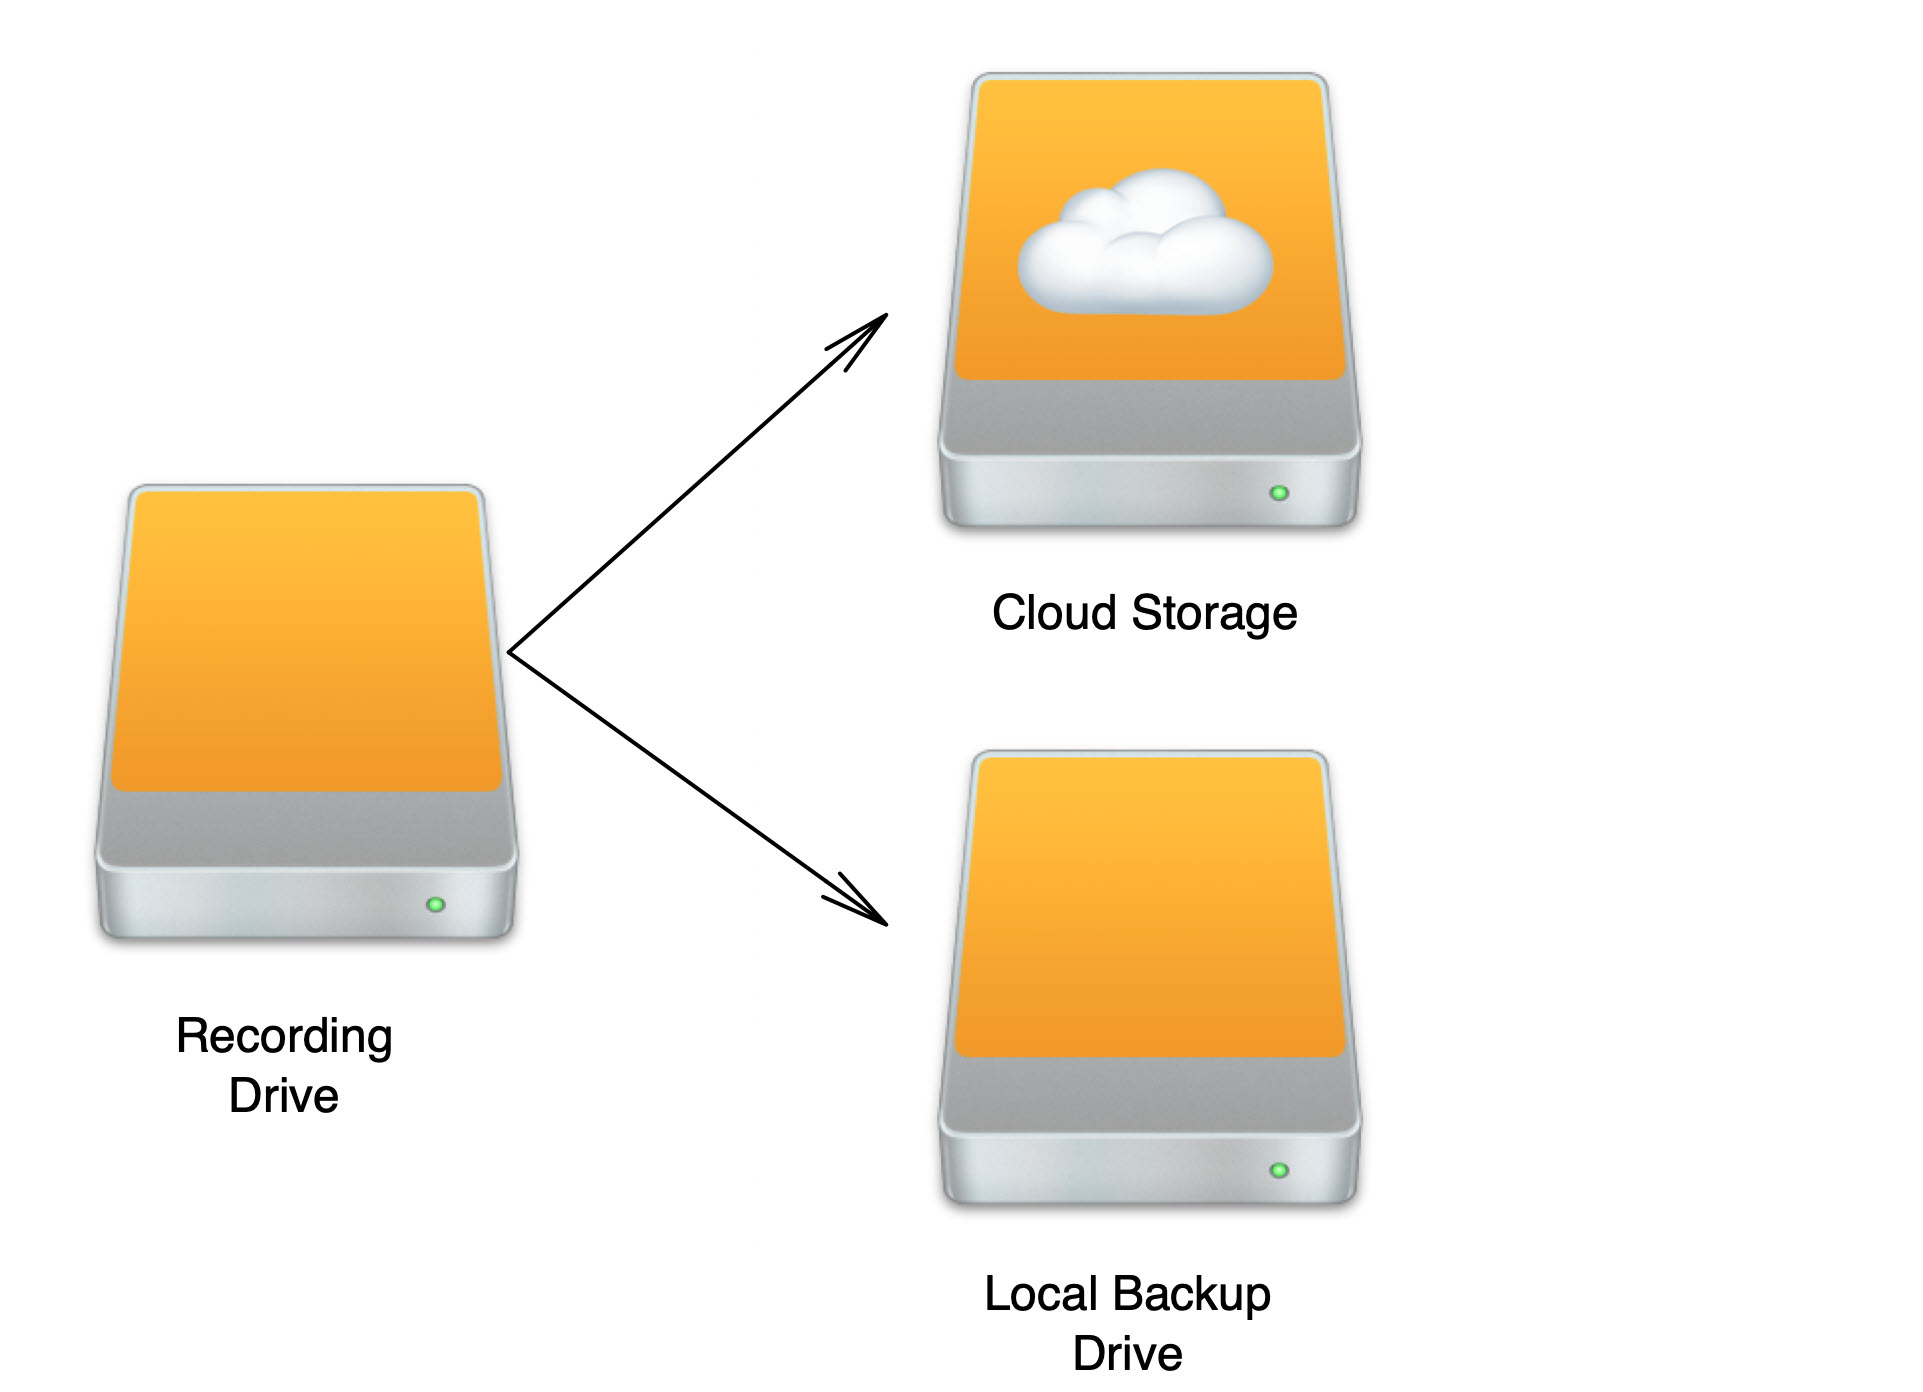
If that sounds like overkill, you can keep your data reasonably secure with a “2-1” strategy instead; that is, two total copies of your project — the original file and one that’s stored offsite or in the cloud.
To make that latter strategy work, it’s best to follow certain procedures for saving your DAW projects. Most importantly, save multiple copies of your project file (within the same folder) as you go, using the “Save As” (not the Save) command. That will create a digital “paper trail” of the progress of your project over time. Not only does this effectively protect your music from drive crashes and data corruption, but also from yourself.
What do we mean by that? Well, if you only ever work on one copy of your song and you make changes or mix decisions that you regret, you have no easy way to revert to the way it was before. But if you save incremental versions using “Save As…” — preferably at least a couple of times every time you’re working on the song — you’ll always be able to retrace your steps and find the version you saved before you introduced the problem.
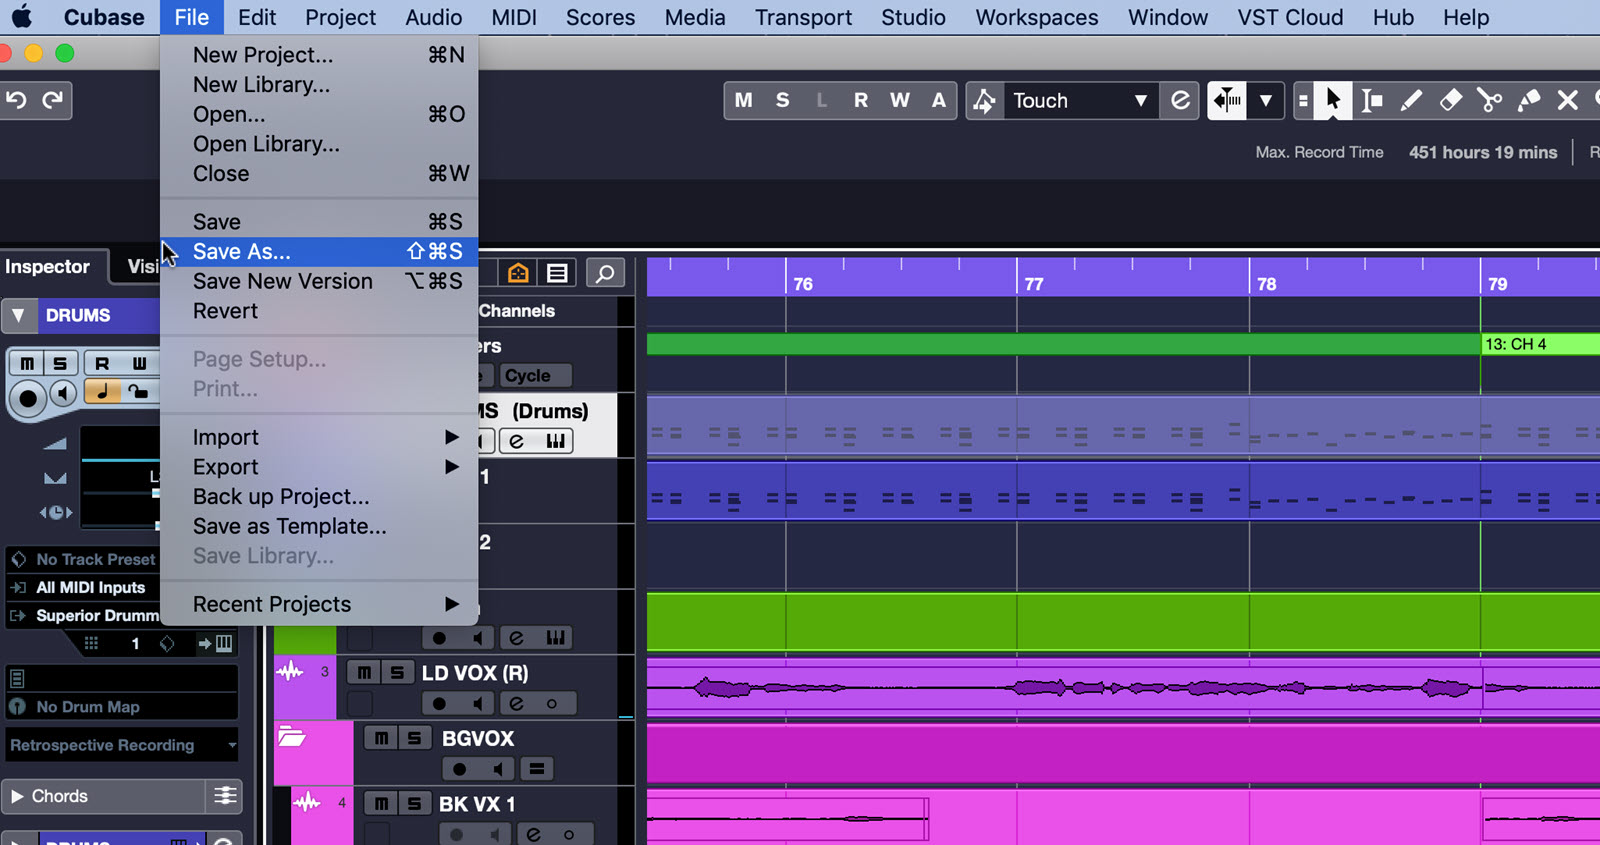
As an alternative to manual saves, many DAWs also offer automatic backup (“Auto Save”) options that create copies of your file as you go. For example, Steinberg Cubase lets you choose how often to make a backup and how many backups to keep. The backed-up files show up in your Project folder with the .bak file extension and an incremented number.
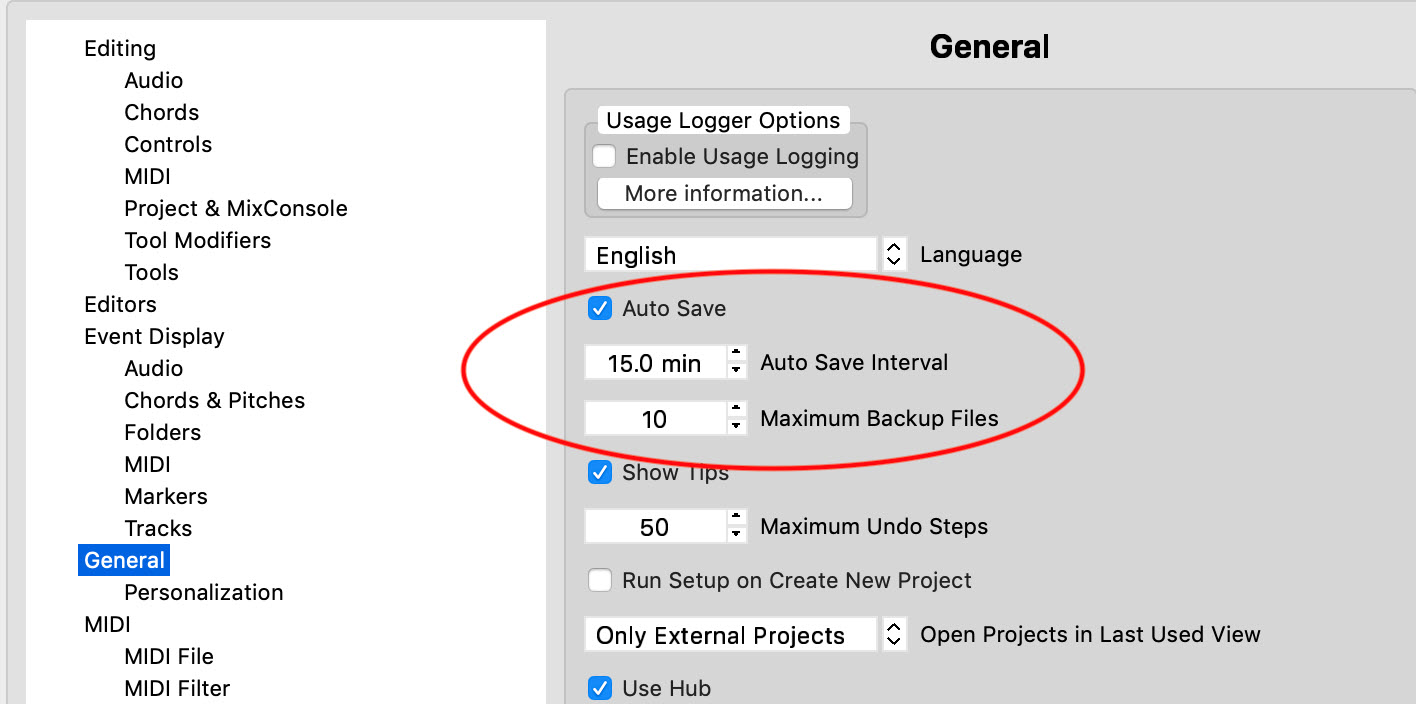
In addition to periodically saving new versions, you should also use your DAW’s plain vanilla Save command often. There are few things more frustrating than doing a great take or coming up with an inspiring new patch on your soft synth, only to have your computer crash before you’ve had a chance to save it.
Got Your Back?
The “2-1” strategy also requires that you copy the entire project folder for your song to a cloud-based storage service (or to a thumb drive or portable hard drive that you take to another location) at the end of every working session.
Cubase makes this process easy with the File menu “Back up Project” command. When selected, it lets you choose a destination and then opens the Back up Project options dialog, shown below. At this stage, simply uncheck all the boxes and give your backup a name that includes an incremental number or date.
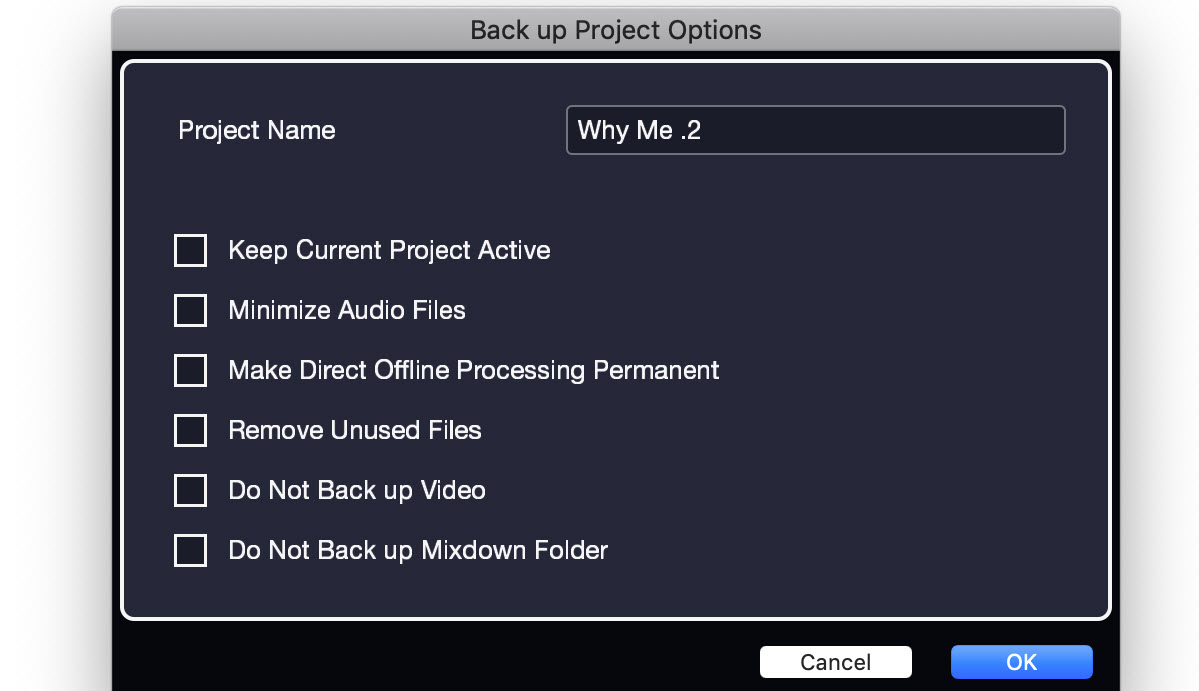
If you’re using a DAW that doesn’t have a similar feature, you can manually copy your entire project folder (which includes both the project file and audio files) to your backup drive. Start by just copying it to the main directory of your backup drive. Don’t put it in the specific song folder until after you’ve renamed it with an incremental number or date after the song name. This way, after your first backup, subsequent backups won’t have the same name inside the same folder.
Depending on how many times you reopen the project before you complete it, you’ll end up with several copies of your project folder, including the project data and the associated audio files. Yes, you’ll use up a lot of disk space, but as we’ll see shortly, you’ll be able to erase most of the folders when you’re ready to archive the project, thus freeing the disk space for future use.
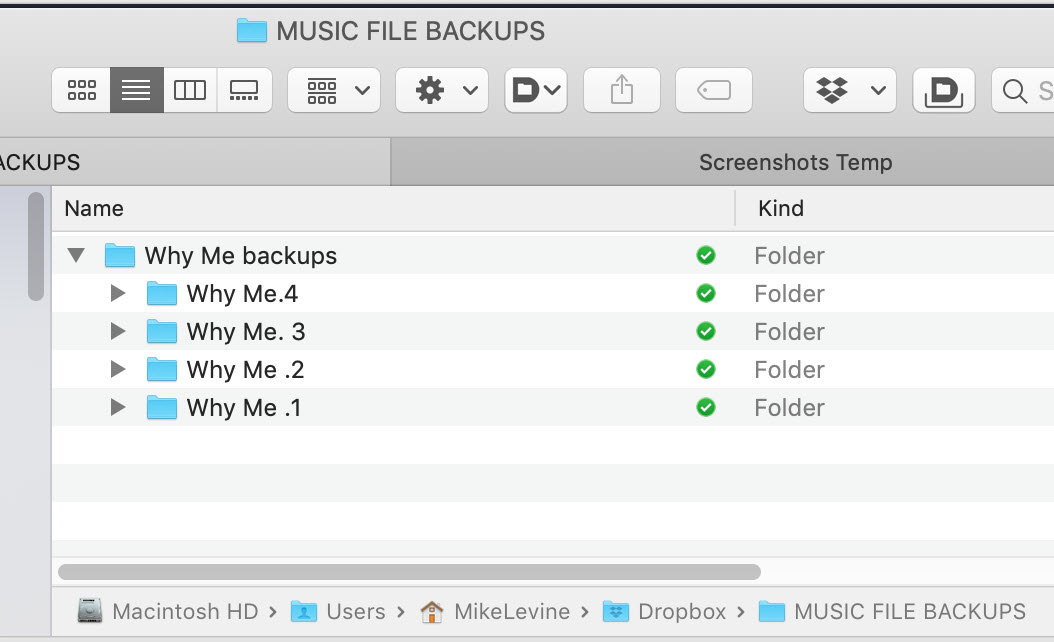
If you want to be “3-2-1 rule”-compliant,” also make a local copy of the project folder to a local drive that’s not the one you record to, using the same folder-naming structure as you used for the backup drive. If you later need to access your backup for whatever reason, simply choose the most recent of the project folders on the drive.
Save It for Later
Once you’re finished with your project (including mixing and mastering), it’s time to archive it. Create a special folder for this purpose on your cloud-based service (as well as on your local backup drive if you’re using one). Your DAW should have a feature that allows you to save a copy and keep only the active audio files from the project. That can save you a lot of space, wherever you’re archiving to.
Cubase users can once again use the “Back up Project” feature. This time, check the Minimize Audio Files, Make Direct Offline Permanent and Remove Unused Files options, as shown below:
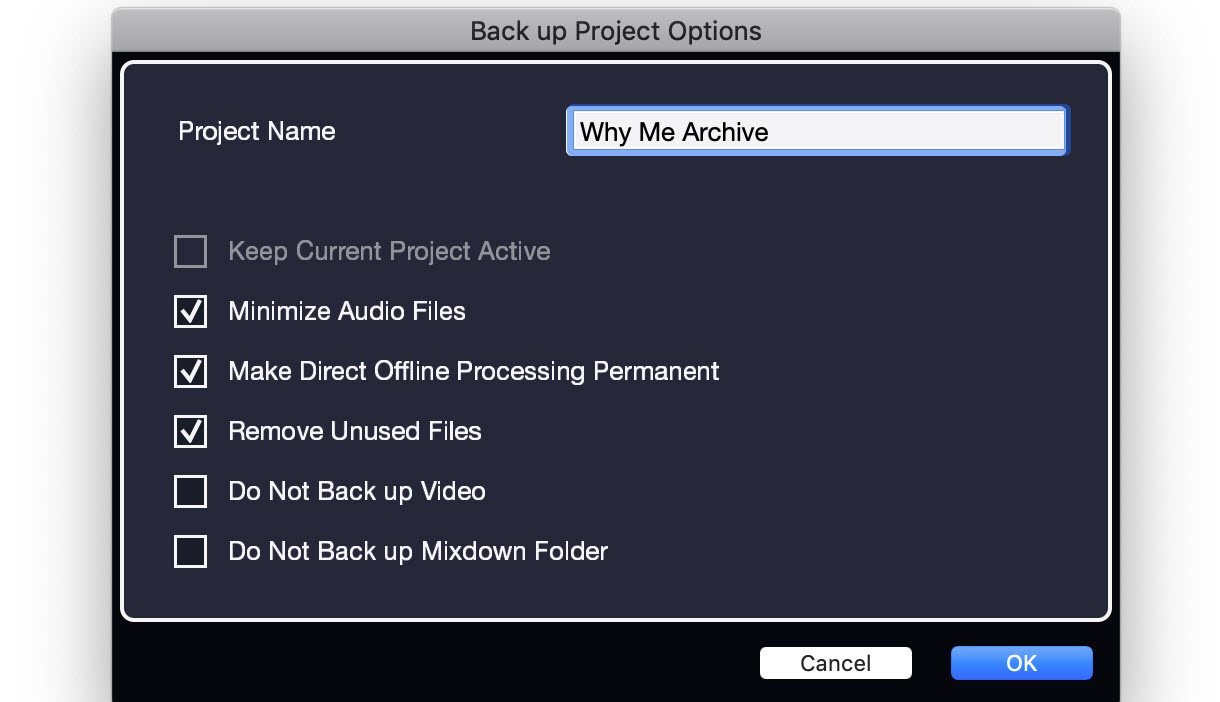
Make sure that your final mix and any mastered files are in the archive. Once they’ve been archived, you can delete all the incrementally saved project folders on your backup drive, which will free up a lot of space.
If you want to really future-proof your archive, you can also do bounces of each individual track, including effects, panning and automation. This is accomplished by soloing each track and then bouncing it to disk — just make sure any send effects are also soloed. The Audio Export function in Cubase can do a batch export of multiple tracks with or without processing, taking a lot of the tedium out of this, but even if you have to do your bounces one track at a time, you’ll receive a major benefit: If for some reason you need to reopen the project down the road and you no longer have access to your DAW or plug-ins, you’ll still be able to recreate the mix.
It’s essential to keep one local copy of your archive, because there’s always the chance that you’ll decide to stop paying for the cloud-based service or possibly that it will go out of business. In either case, you could lose access to your data.
A No-Lose Scenario
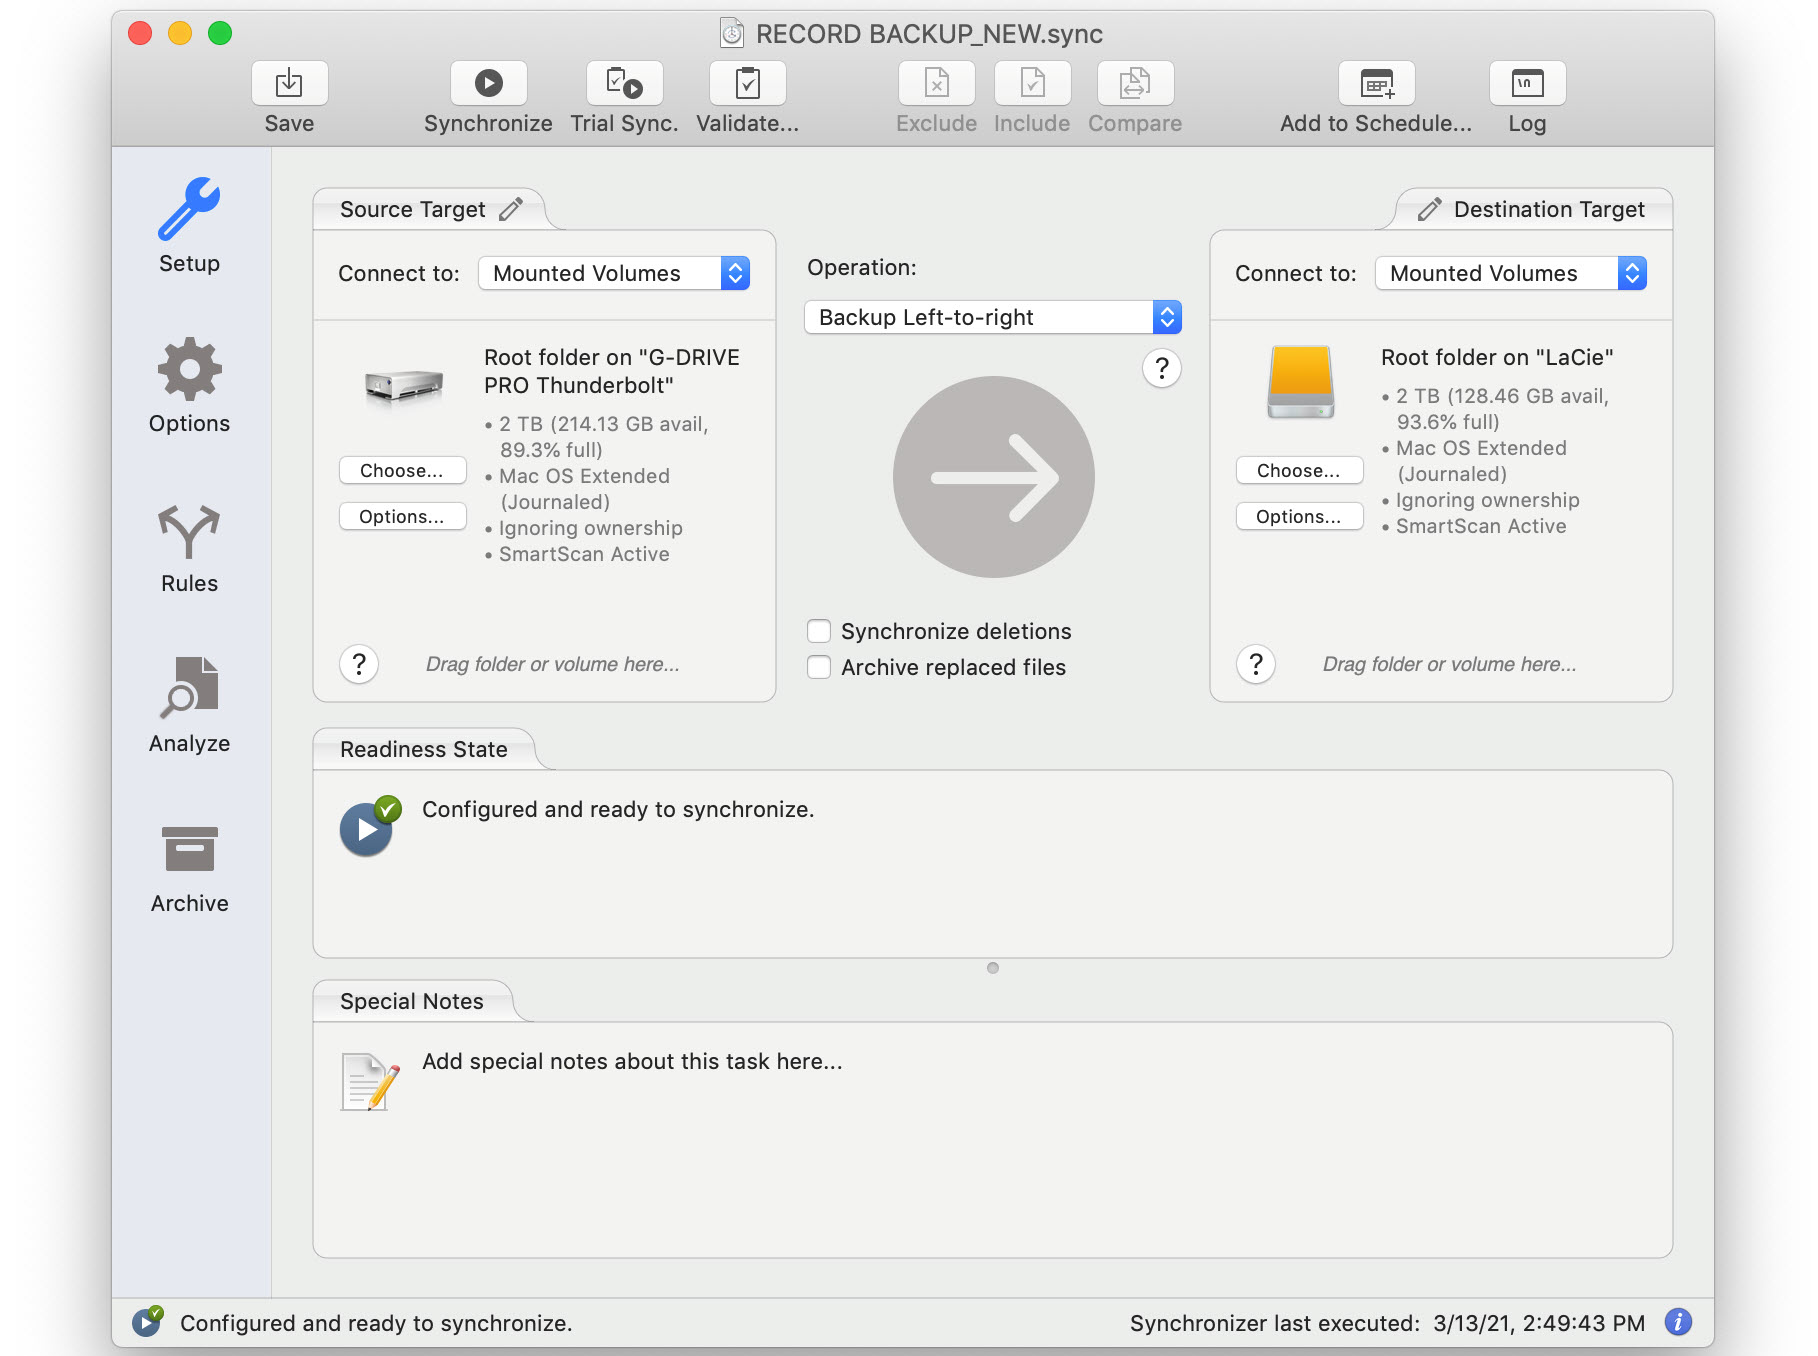
So far, we’ve only discussed backing up individual music projects, but you should also regularly back up your entire recording drive — something that can easily be done with automated backup software like Chronosync. Also consider making a bootable backup of your system drive, where your programs reside.
However you choose to go about it, be sure to set up a backup system that’s relatively easy to execute while providing you with the necessary level of data security. Although it might seem a little onerous at first, you’ll soon get into a routine, and it won’t seem like a burden. And you’ll be able to sleep better at night knowing that your data is protected!
Check out our other Recording Basics postings.
Click here for more information about Steinberg Cubase.


