Tagged Under:
Setting Up a Mix Template, Part 1
Cubase lets you pre-configure your ideal setup for instant recall.
Imagine this: A brilliant song idea suddenly comes to you, and you want to record a rough demo of it while it’s fresh in your mind, so you launch your DAW and create a new empty file. Then you think it through a little more and decide that you should probably generate a few audio tracks in advance to use for recording vocals, guitar and bass, as well as some virtual instrument tracks for the drums and keyboards. Then you realize that you’re also going to need a reverb, and maybe a delay or two; perhaps a chorus or a flanger as well …
In some DAWs, by the time you get everything set up, your muse may have deserted you altogether. Wouldn’t it be great to instead be able to open your DAW with all of those tracks and instruments and effects pre-configured so you can dive right into recording? By giving you the ability to create something called a Project Template, Steinberg Cubase lets you do just that. Better still, you can create as many of them as you want, so you can instantly start making music the next time inspiration strikes. (Templates are handy for users of all levels, by the way; for example, many composers rely on them for immediate access to different instrument and sound configurations they use regularly.)
Here are the steps for building your own Project Templates.
What’s the Hub, Bub?
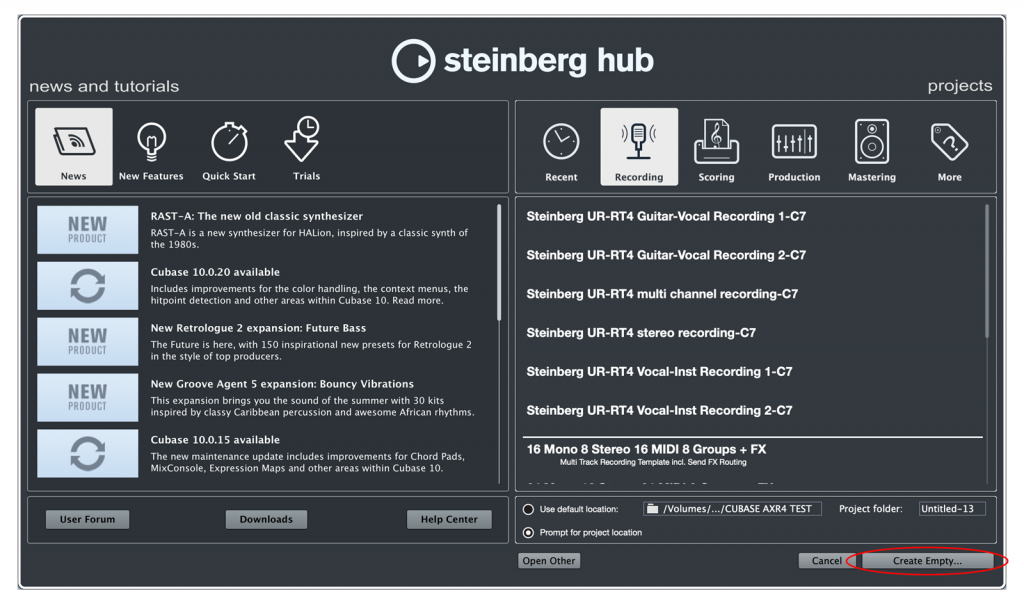
By default, the Steinberg Hub screen appears when you launch Cubase. It shows you the latest news and info from Steinberg on one side and Project information on the other. The latter includes icons for Recording, Scoring, Production and Mastering. Clicking on any of these will open lists of factory Project Templates, any of which you can use as is, or as starting points for creating your own template. (Note that the Project information area offers the same choices as the Project Assistant window, which you can open by pressing Command+N on a Mac® or Control+N on a PC.)
Let’s instead create a new Project Template from scratch. To do so, simply click on the Create Empty button in the bottom right-hand corner of the Project area of the Hub screen, as shown below:
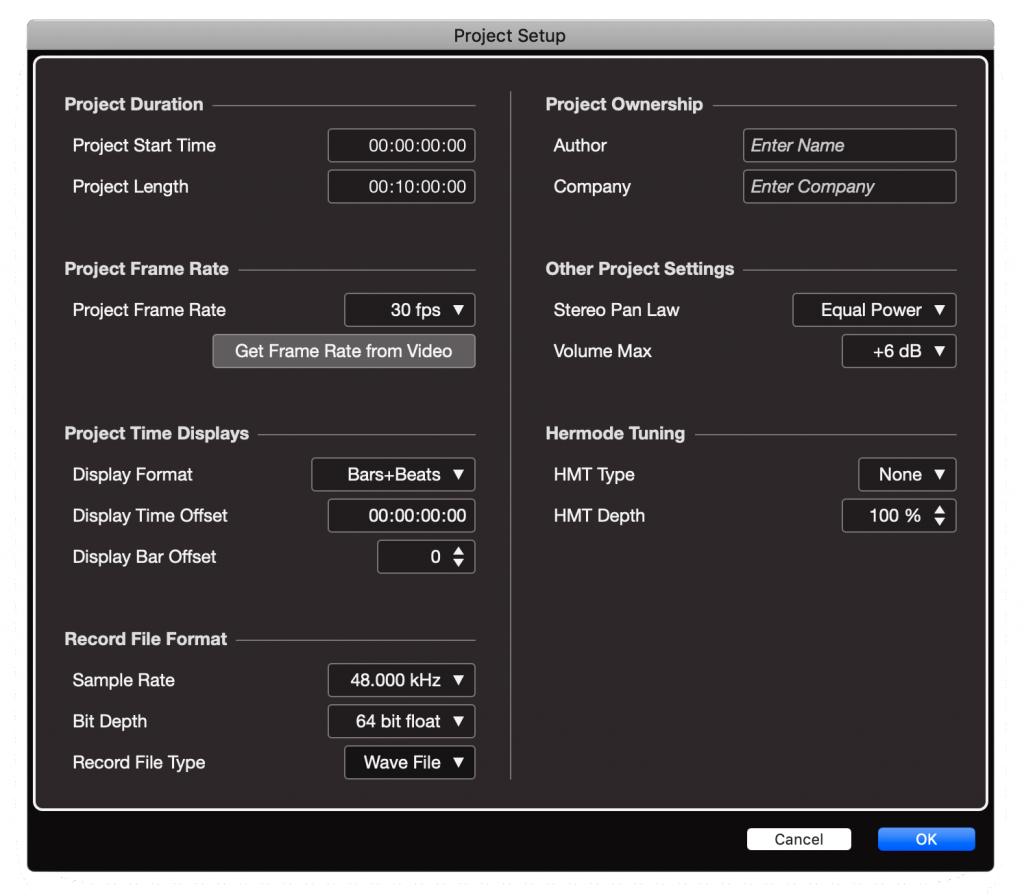
An empty Project will appear, which will serve as your blank canvas. Next, go to the Project Menu, choose Project Setup (Shift+S), and a window will open that lets you configure numerous settings for your Project — or in this case, for your Project Template:
Ready Get Setup
The critical settings in the Project Setup window are all under the Record Format category, so don’t worry about the others for now. Here, you’ll choose the bit depth and sampling rate for audio in your project, as well as the type of audio files that will be generated by Cubase. As a general rule, higher bit depths and sample rates offer better quality, but create larger files and tax your computer’s processors more. In addition, your audio interface might limit the bit depth and sampling rate choices you can make, based on what it supports. In most cases, you’ll probably be satisfied with the quality of 24-bit or 32-bit Float files at 44.1kHz or 48kHz.
For Record File Type, the default is Wave File. You might want to switch it to Broadcast Wave File, which is the same except for extra timing information stored in their headers — something that can be useful when moving files from project to project.
Tracking Your Tracks
The idea of a template is to build as “typical” a setup as possible. Rather than trying to estimate how many mono and stereo audio tracks I’ll need for a typical recording, I find it easier just to create one of each, which I’ll refer to here as “model tracks.” From these, I’ll make as many copies as necessary during my recording by using the Duplicate Tracks command, which is available by right-clicking in a Track in the Track List. (If you’d prefer to set up multiple mono and stereo tracks, wait until after you’ve fully configured your model tracks first, including adding any effects, which I’ll explain in Part 2.)
To create a track, right-click (or Control-click on a Mac if you don’t have a two-button mouse) in an empty part of the Track List, then choose Add Audio Track from the resultant menu. That will bring up a dialog box that lets you specify a stereo or mono track, configure inputs and outputs, and more:
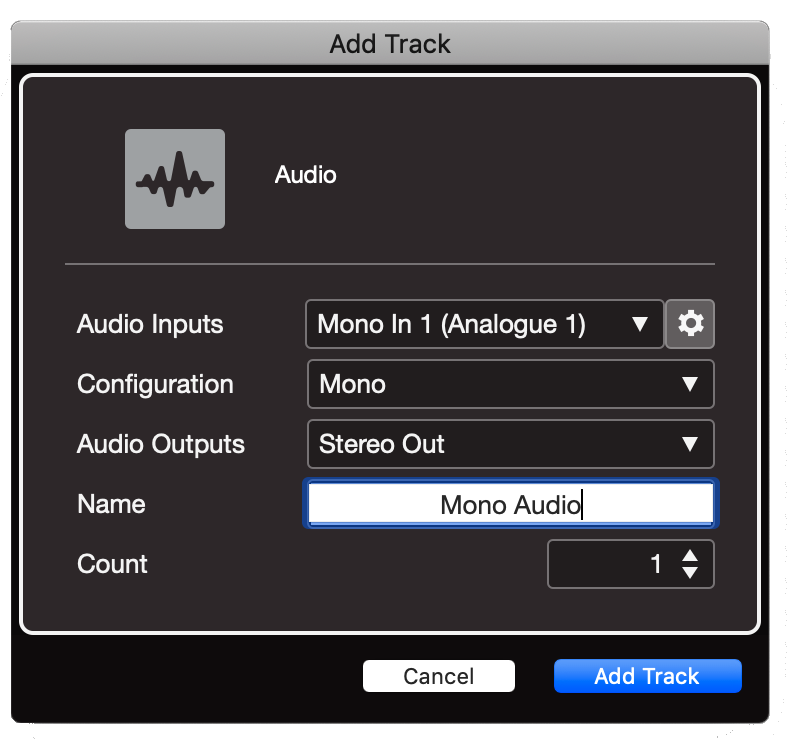
For the first one, choose Mono as the track type and fill in whatever is typical for your setup in the input field. (Most likely it would be input 1 on your interface, but you can change it during recording if need be.) Leave the Audio Outputs box set to Stereo Out, which sends it to your master output. You can also name your track here. For now, call it Mono Audio. Next, repeat the process, but this time, create a stereo track.
Further down the Add Audio Track menu is a choice called Using Track Preset, circled in red in the screenshot below:
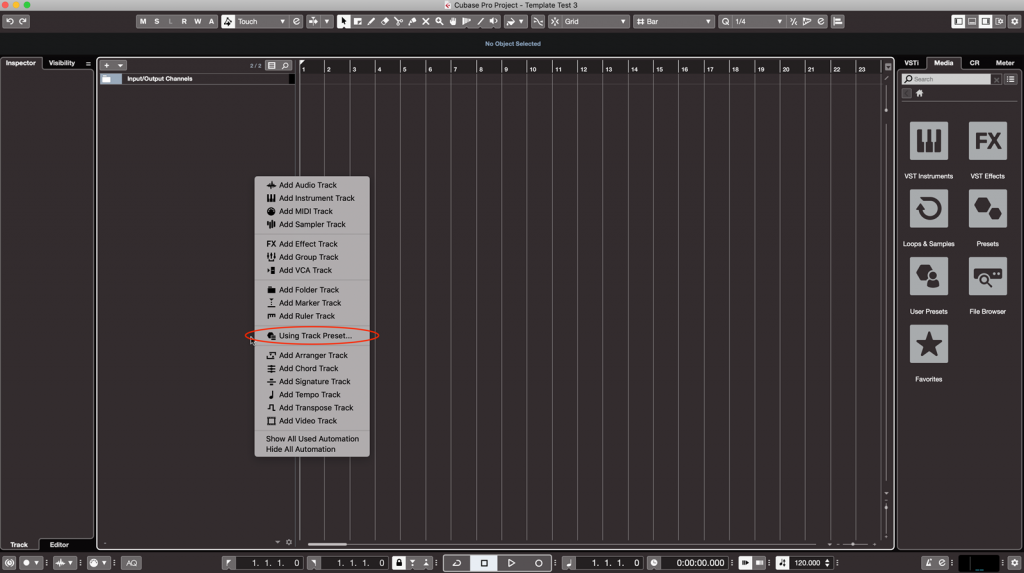
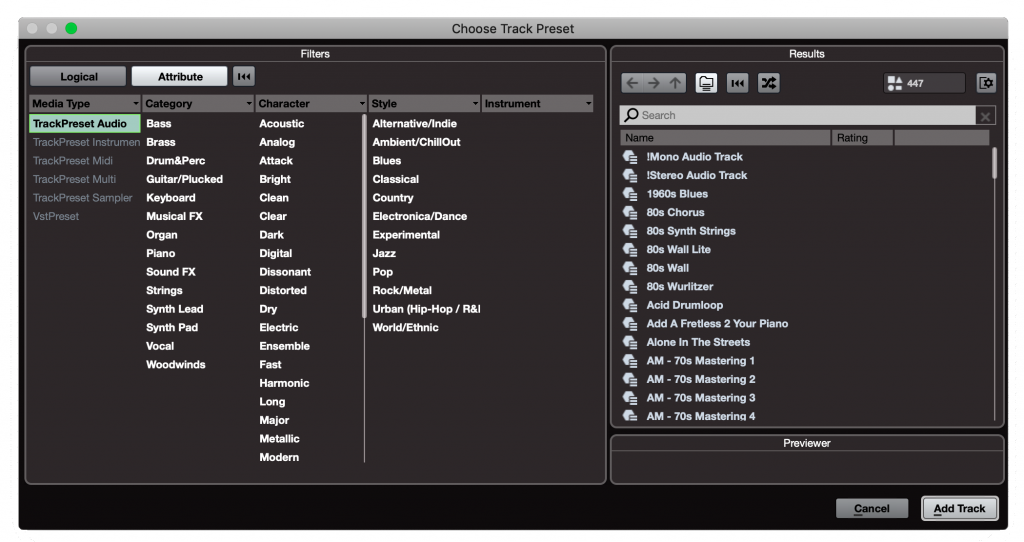
This opens the Choose Track Preset window, where you can find pre-configured tracks of all types, including mono and stereo audio tracks that are set up for various instrument types and genres and even have effects already added. If you like, set your model tracks up using these; you can always customize them later.
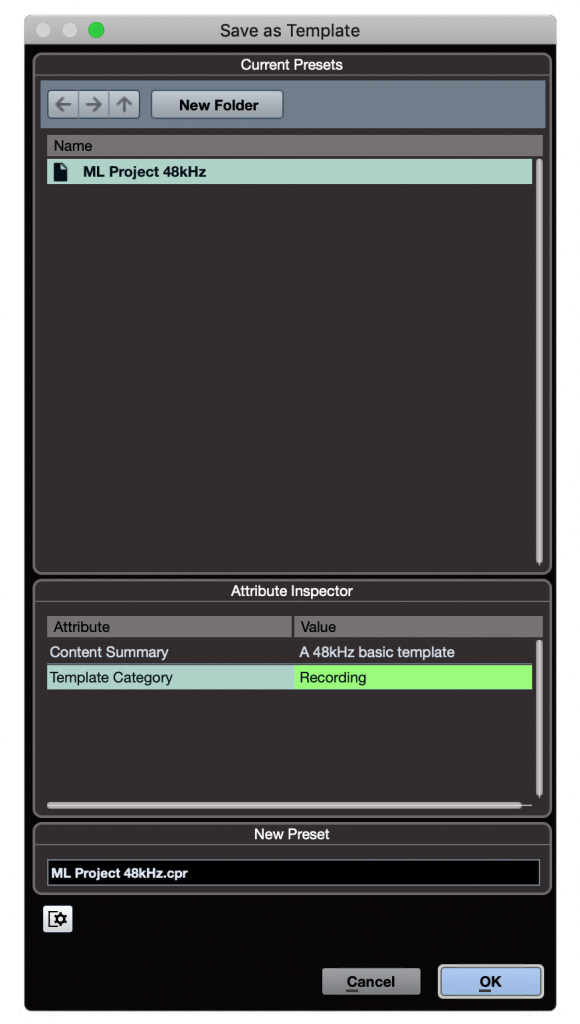
To save the template you’ve created thus far, go to the File menu and select the Save as Template option. This will bring up the Save as Template dialog box, where you can name your template, add a description, and even assign it to a category. You can save as many templates as you want. You can rename them, and delete those you no longer need from either the Save Template dialog or the Project Assistant window (Command+N or Control+N, depending upon whether you are running Cubase on a Mac or a PC).
In Part 2, we’ll add effects, MIDI instrument tracks and more to our template.
Check out our other Recording Basics postings.
Click here for more information about Steinberg Cubase.


