Genos MIDI Recording, Part 2
Learn how to use Multi Recording mode.
In Part 1 of this two-part series on MIDI recording in Genos, we focused on using Quick Recording mode, which is great for capturing ideas since Genos arms or activates every channel. This is especially useful when recording a Style, which can have up to eight tracks of instrumentation playing back at once.
This time we’ll dive deep into Multi Recording, which allows you to start from scratch and build a complete song track by track. For this demonstration, we’re going to be recording single part instrument voices (no layers or splits) and lay down a simple three-track song, one track at a time.
The first step is to select an instrument voice for your first track. Let’s choose one of my favorite voices in Genos: the Yamaha C7 Studio Grand, and assign it to the Right 1 Part. To do this, you can either touch the Right 1 graphic on the screen and select the C7 Studio Grand from page two of the Piano category, or press the Voice button (a white backlit button located to the right of the jog wheel, next to the Style button):

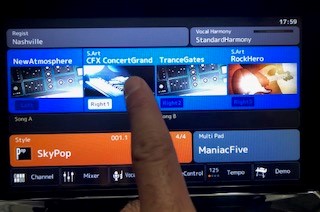
Pressing the Voice button will take you to the Voice Part Setup screen. Tap anywhere within the Right 1 blue name field and you will be taken to the same category and voice selection screen as if you’d used the touch screen. This is cool because there’s more than one way to navigate the instrument voices:
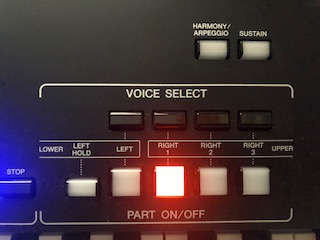
Next, make sure that only the Right 1 Part is ON (unless of course you want to record layered or split voices, but for now let’s just stick with piano):
Then double-check that the ACMP button is off (not lit):
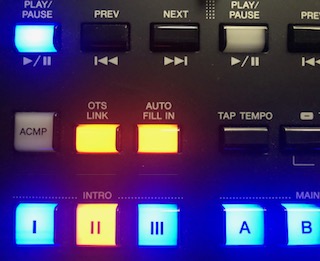
When the ACMP button is lit, generally you won’t hear a single instrument across the full range of the keyboard unless your fingering mode is set to one of the “FULL” keyboard modes. (See my blog article “Mastering AI Fingered mode” for more on this)
Now that you’re set up with your single C7 Studio Grand, let’s do some recording! It’s as simple as pressing the RECORDING button, located just to the right of the SONG B area on the left side of the panel:
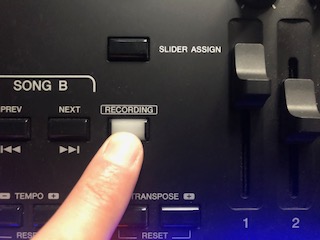
Once pressed, you will see the Song Recording menu pop up on the screen. Go ahead and touch Multi Recording. Next, press the red record icon in the lower left hand corner of the screen. You’ll now see all 16 tracks become “Armed” (in recording vernacular) — in other words, ready to record. It’s important to note that even in MIDI Multi Recording Mode, Genos still defaults to arming all 16 tracks, just to cover its bases. Also, be aware that the song name is always titled “New Song” (which makes sense, since we are going to do just that — record a new song):
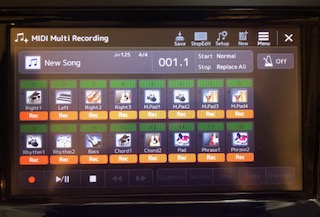
Now let’s un-arm (more properly called “disarm”) the 15 tracks we don’t want to record. Simply deactivate tracks 2 through 16 by touching the red “Rec” icon beneath each track. You’ll notice that as you do this, each disarmed track number will turn green.
At this point you should have track 1 armed (indicated with a red Rec icon), and tracks 2 through 16 disarmed:
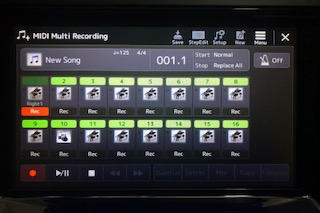
Genos is now in Record Standby mode, meaning that, when you strike a key, recording will begin.
NOTE: I highly recommend using a metronome when doing Multi Recording, as it can help you stay in time when laying down additional tracks. To turn on Genos’ built-in metronome, simply touch the Metronome icon in the upper right-hand portion of the screen. Changing the tempo or even tapping in a tempo in is achieved by the TEMPO + & – buttons as well as the TAP TEMPO button:
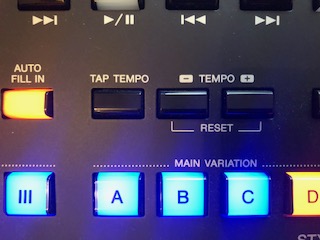
Go ahead and start up the metronome and you’ll hear it begin clicking at the current tempo. (Turning the metronome on will not start the recording.) Once you’re comfortable with your chosen tempo, just start playing and Genos will begin recording. When you’re finished, touch Stop (the square icon at the bottom of the screen).
To play back what you’ve recorded, touch the Play/Pause icon at the bottom of the screen. If you’re not happy with your recording, simply touch the Record icon in the lower left-hand corner of the screen and try again. If you are happy with what you recorded, this is a good time to save your song.
To do so, simply touch the Save icon at the top of the screen:
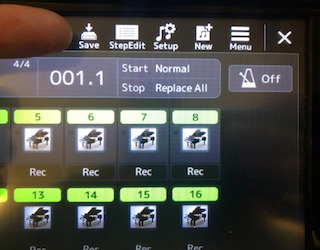
Now you get to choose where you want to save your song — to the internal User memory, or to a USB Thumb Drive. (Note: A compatible USB thumb drive must be inserted into one of Genos’ “To Device” ports in order to save to a thumb drive.) Accordingly, select either the User icon or the USB1 icon and a name selection screen will appear, allowing you to name your song:

Type the name of your new masterpiece into the character field, then press OK. At this point, you can confidently power down the Genos with the knowledge that your song has been saved.
Now it’s time to select another instrument voice for recording on Track 2. Go to the Home screen and touch the C7 Studio Grand icon, which is currently assigned to the Right 1 part. You will now see the Instrument categories. We’re going to be recording drums on Track 2, so touch the Drum Kit icon in the lower left-hand corner of the screen. Five pages of drum kits will appear. Select the first one, named Rock Drum Kit:
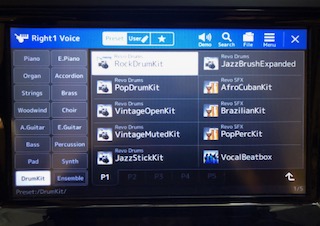
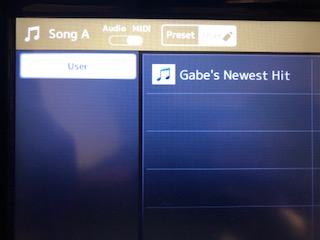
Press the Recording button and once again select Multi Recording mode, then touch the New Song field and select your song (I’ve named mine “Gabe’s Newest Hit”):
Next, touch the EXIT icon to return to the recording screen. Under Track 2 (Channel 2), there should be an icon of a Grand Piano. Touch that icon. The “Song Ch2” pop-up menu will appear:
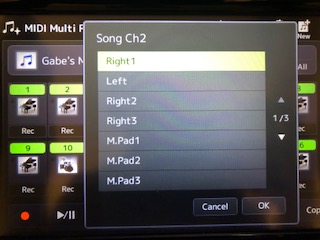
Select “Right 1” from the list (if it’s not already selected), then touch OK. You’ll now see that the Grand Piano icon for Track 2 has changed to a Drum Kit icon and is already in record stand-by mode, just waiting for you to lay down your second track:
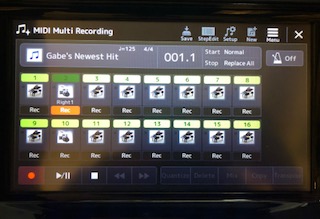
Turn the metronome back on, and when you’re ready to start recording, either start playing, or touch the Play/Pause icon at the bottom of the screen. When you’re finished laying down your drum track, touch the Stop icon at the bottom of the screen. Now touch the Play/Pause icon again and you’ll hear Tracks 1 and 2 playing back simultaneously.
Manually playing drums in time can be challenging, so Genos gives you the ability to quantize note data. Quantizing essentially moves notes you’ve recorded so they line up timing-wise with the beat.
Let’s go ahead and quantize the drums. You’ll notice an icon labeled “Quantize” at the bottom of the screen:
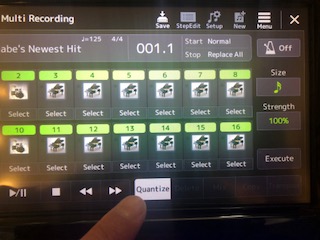
Touch this and various Quantize options will appear to the right of the screen. For now, let’s stick with the default sixteenth note size with the strength at 100%. To apply this, select the Track/Channel you’d like to quantize (in this case, Track 2, Drums) and touch Execute. When you now play back your song, you should notice that the drum beat sounds tighter and more in time.
If you’re happy with what you’ve recorded on Track 2, go ahead and save again: Touch the Save icon at the top of the screen, select the current song you’re working on and touch the “Save Here” icon in the upper right-hand corner of the screen. You’ll be given an opportunity to rename the song or just leave it as is, then touch OK in the lower right hand corner of the screen. Genos will ask you if you’d like to overwrite your current song. Select “Yes” and you’ll be taken back to the recording screen.
Now it’s time to select our next instrument voice to record. If you scroll back up a little, you can simply follow the steps above. The process is exactly the same, although this time you will be recording to Track 3. Let’s select a Bass as the instrument voice for that track:
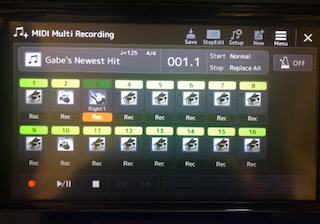
After you’ve recorded your third track and saved it, now you can start mixing. Press the Slider Assign button just to the left of the faders until the OLED Sub Display appears (it’s the skinny window above the six knobs and eight faders), showing Ch1 through Ch10:
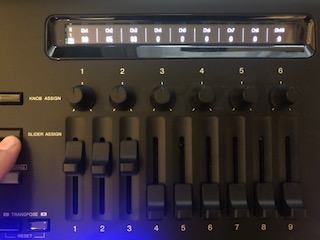
Faders 1, 2 and 3 now control the volume for Tracks 1, 2 and 3. Start your song playing back while moving the faders up and down. You’ll notice the volume levels of your three recorded tracks will get softer or louder. When you get the mix just the way you like it, simply save it again.
By repeating the steps above, you can record 16 individual MIDI tracks and mix them all independently, without ever cracking open a laptop. How cool is that!
All photographs courtesy of the author.
Click here for more information about Yamaha Genos.


