Tagged Under:
Live Sound Interconnections 101
Using the right cables and connectors will keep your audio clean and quiet.
Audio signals always start somewhere and end somewhere else (usually at a speaker). In the course of their journey, they typically travel through a variety of different connectors and cabling. Using the right cable and connector for the job is as important as using the right size socket wrench to tighten a nut. Here’s everything you need to know about the kinds of interconnections you’ll encounter in both live sound and recording.
Three Different Signal Level Types
There are three types (though technically, these are actually ranges) of signal level: mic, line and instrument. Let’s look at each in turn.
Mic Level
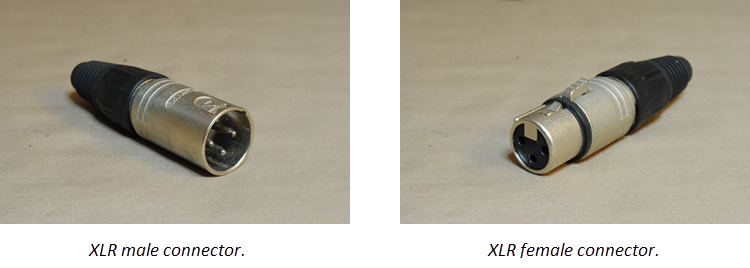
Microphones produce very low signals that must be amplified before they can be sent through a mixer and then on to a power amplifier and speakers. That’s why every mic input on a mixer has a preamp that raises the weak output from a microphone up to a much stronger line level. Mic cables typically have an XLR male connector at one end and an XLR female connector at the other end:
Line Level
Line level signals are much stronger (“hotter”) than mic signals and therefore don’t require as much amplification or gain as mic level signals. They can come from a variety of sources, including the outputs of a mixer or an outboard effects device such as digital delay or reverb. There are other devices that produce line level signal too, such as computer audio interfaces, CD/DVD players, samplers and some keyboard workstations. The output of wireless microphone receivers can often be switched to either line or mic level, so make sure you know what the setting is before you connect it to your mixer. Any line level output can be plugged directly into a power amplifier or powered speaker and will produce plenty of volume.
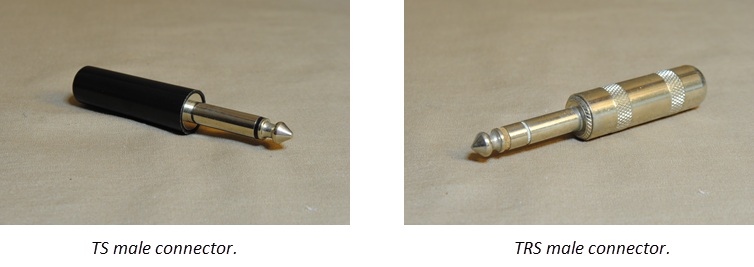
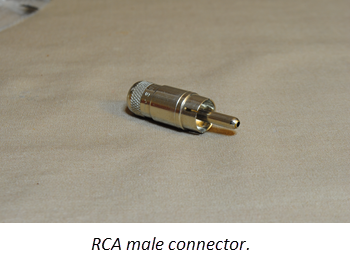
Cabling carrying line level signals can terminate in any combination of XLR, TS (Tip-Sleeve), TRS (Tip-Ring-Sleeve) or even RCA connectors:
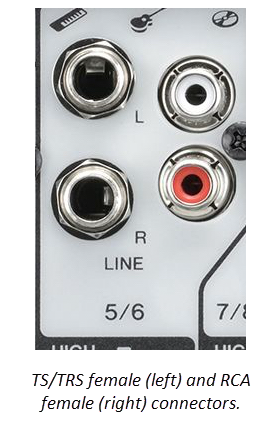
Instrument Level
What about the signal from an electric bass or guitar? These kind of fall into the Island of Misfit Toys. Instrument signals are too strong for a mic input and too weak for a line input. Instrument connections almost always use the TS connectors shown above. Yamaha STAGEPAS 400BT and 600BT mixers have special “combo” jack inputs that can accept XLR, TRS or TS connectors (but only one at a time!). There’s also a switch for Mic, Line or “Hi-Z”; the latter turns the combo jack into an instrument input with just the right amount of gain to bring the signal from an electric bass or guitar up to line level without adding noise or distortion:
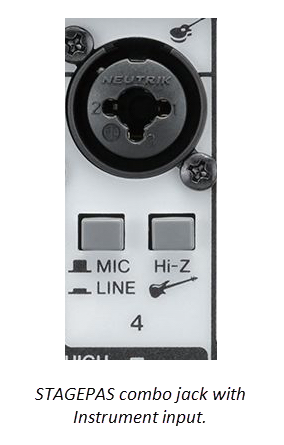
This “Hi-Z” (impedance) switch also ensures that the input has the correct electrical characteristics so that the pickups on your electric guitar or bass sound the way they are supposed to.
Other Types of Audio Signal
On occasion you may find some unconventional audio connections on a mixer. For example, the Yamaha MG16XU has a USB input that you can use to connect a phone or laptop for music recording and playback. The Yamaha STAGEPAS 400 BT and 600BT powered mixers feature Bluetooth capability, allowing you to stream audio from your phone wirelessly for music in-between sets.
Here’s What Not to Do
Live sound newbies sometimes make the mistake of thinking that, as long as you have the correct connectors on a cable, you can plug anything into anything. Not true. For example, you could in theory make a special cable that would allow you to physically connect an electric guitar to a mic input, but the signal from the instrument would almost certainly overload the mic input, causing distortion. A similar thing happens if you try plugging a CD player’s line level output into a microphone input.
Conversely, if you connect a microphone to a line input you’ll find that the signal from the mic is not loud enough to use — even when you turn the gain control up all the way. There will also be lots of background noise and/or hiss in the signal. That’s another reason to make sure you always match output levels to input levels.
Unbalanced vs. Balanced
Unbalanced
Any audio connection requires at least two wires or conductors: a positive (“+”) signal (sometimes called ‘hot’), and a ground. Inside the cable, the ground is typically wrapped or braided around the + wire:
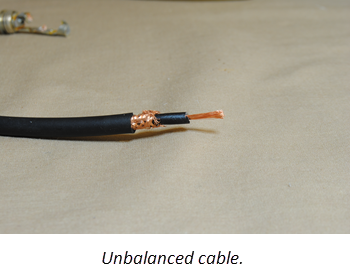
The ground wire is often called the “shield” because it not only carries audio but also helps to protect the + wire from interference produced by cell phones, lighting dimmers, and radio and TV stations (this is known as “RFI” or Radio Frequency Interference).
This basic two-conductor arrangement is called unbalanced, and is generally used by electric guitars and basses, as well as some electronic keyboards. In addition, connections from most DJ mixers and analog turntables are unbalanced, as are most speaker and headphone cables — even some inexpensive patch cables. (A “patch” cable is a short length of cabling used to connect the output of one device to the input of another via a series of jacks arranged closely together in a patch bay.) Unbalanced cables are OK (but not great) at rejecting RFI because the shield itself works as an antenna. For that reason, unbalanced cable runs should be no longer than about 15 or 20 feet.
Unbalanced cables used for electric guitars and basses terminate in TS connectors, while those used for DJ mixers and CD/DVD players usually terminate in RCA connectors. The 1/8-inch mini or 3.5 mm TRS connectors you’ll find on phones and MP3 players are also unbalanced.
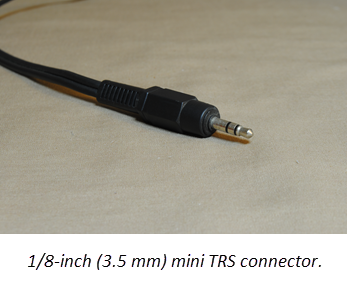
Unbalanced cables are generally not used for microphones because the noise picked up by the cable would be relatively loud, and so, when amplified along with the mic signal, would be very noticeable. The goal is to get rid of the noise while retaining the original signal. And that’s exactly the purpose of a balanced line.
Balanced
A balanced cable uses three conductors instead of two. One carries the original signal (the “+”). A second carries an inverted (phase reverse) duplicate of the original and is called the “–“ (negative or cold). The third shields the + and – from interference. Sometimes there is also a piece of foil wrapped around the + and – to increase the amount of shielding. Balanced lines can easily be run upwards of 150 feet without significant loss of signal or added noise. However, because of the additional circuitry required, balanced gear tends to be more expensive than unbalanced equipment.
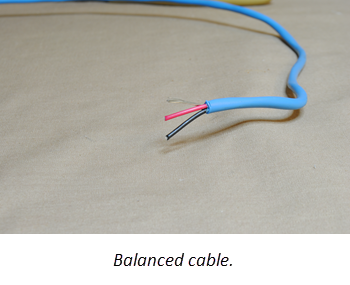
The most common connectors used by balanced cables are XLR and TRS. Note that one, and only one balanced signal can be carried by a single XLR or TRS cable. Don’t be fooled into thinking that a TRS connector is always used as a “stereo” connector. It’s better to view a TRS connector as a tool that can be used for many purposes, like a hammer. For example, it can be used for unbalanced stereo headphones, for a mono balanced connection or for a special connection called an “insert” (a send/return at unity gain). TRS connectors are rarely, if ever, used by professional microphones.
Note that using a TRS cable for an electric guitar or bass will not make the signal balanced, and may actually add more noise than if you use the proper TS cable. Conversely, using a TS connector for a balanced signal instead of a TRS one will work — sort of — but you may hear additional noise and/or lose some signal level, so it’s not a great idea.
This may all seem a lot of information to take in, but the bottom line is that using the right cables and connectors will keep your audio clean and quiet — the ultimate goal in both live sound and recording.
All photographs courtesy of the author.
Check out our other Tools of the Trade postings.
Click here for more information about Yamaha mixers.


