Tagged Under:
Cleanliness Is King
What can you do when audio gremlins sneak into your PA system?
You’re setting up for a gig. You connect all of your equipment, turn on the PA … but instead of hearing clean, crisp sound, you are greeted with a rude hum.
Don’t worry, it’s not something you’ll have to live with. Here are some tips to help you find and eliminate the source of such gremlins.
Start From The Ground Up
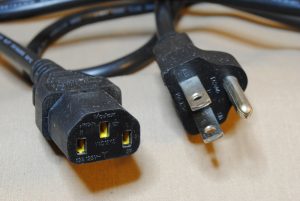
One of the most important things you can do to fight noise in your PA is make sure that your gear is properly grounded. Live sound gear such as mixers, amplifiers and powered speakers usually connect to AC outlets using a detachable, grounded IEC cable. This has a female connector on one end and a three-pin plug on the other with two flat, parallel blades and a round or U-shaped pin.
That round or U-shaped pin is the ground — it literally creates a connection between the mixer and the earth, and that’s important for two reasons: First, it’s a safety precaution ensuring that a circuit breaker will trip if a hazard such as a short is encountered. Second, the ground pin drains unwanted signals to the earth, so that you won’t hear them. Make sure you feel some resistance whenever you plug a cable into an AC outlet, with the outlet firmly gripping the plug — that way, you can be pretty certain that the ground pin is connected and doing its job.
IMPORTANT: If someone has removed the ground pin from an AC power cable, the cable should not be used because it presents a safety hazard. For the same reason, frayed AC cables or cables with cracked insulation should be tossed in the trash. You might even consider cutting the ends off the cable to make sure it isn’t used again.
Continue Troubleshooting
Once you’ve confirmed that your gear is properly grounded, you can continue troubleshooting. This process applies to any PA system, but let’s say for the sake of example that your PA consists of a Yamaha MG20XU mixer and a pair of Yamaha DXR12mkII powered loudspeakers. Start by powering everything down and disconnecting the cables between the MG20XU and the DXR12mkIIs. Then turn on the speakers and listen. You may hear a very faint hiss coming from the speakers, which is normal — but you should not hear any buzz or hum.
Turn off the speakers and connect the mixer outputs to the speaker inputs. Bring the faders down all the way, turn on the mixer and then turn on the speakers or power amp. If you hear hum, you may have what is known as a ground loop. A ground loop is what happens when equipment is plugged into AC outlets in different locations, and is then connected together with audio cables that have their shield connected to ground — which applies to most audio cables.
For example, suppose that the mixer is plugged into an electrical outlet at front-of-house, while the speakers are plugged into an electrical outlet near the stage. The mixer and speakers will be connected using TRS or XLR cables, both of which have grounded shields. If the electrical outlets are on separate circuits, you’ll probably experience a ground loop because their grounds are slightly different. That’s what produces the hum.
There are a few different ways to solve a ground loop. One is to use a power strip to feed AC to all of the gear from the same electrical outlet, which virtually guarantees that you won’t have a ground loop. That’s not always possible, so another solution is to use an isolation transformer between the mixer outputs and the inputs to the powered speakers or amplifier. An isolation transformer disconnects the audio ground between the devices, breaking the ground loop. Lastly, some equipment may have a “ground lift” switch that can solve the problem by disconnecting the audio signal ground from the earth. (Next month we’ll talk about how a Direct Injection box, known as a “DI,” can help solve ground issues with instruments like electric bass and keyboards).
Other Sources of Interference
A variety of external signals can interfere with audio. Radio Frequency Interference (“RFI”) is produced by TV and radio stations, cell phones, Wi-Fi and Bluetooth devices, microwave ovens, two-way radios, wireless microphones, and even certain types of lighting systems. These signals can leak into the audio path, creating noise. Fortunately, the metal chassis of a mixer, amplifier or powered speaker serves as a shield from RFI and absorbs these signals, so as long as the chassis is correctly grounded (see above), RFI will be directed into the earth where it is harmless.
Interference can also be created when AC cables are run alongside audio cables. You can avoid noise by crossing the cables at 90 degrees to minimize the area where the power cable is near the audio cable. This is less of an issue with speaker cables because the signal from a power amp is very strong compared to that of a microphone or line-level signal.
Lighting dimmers and fluorescent work light fixtures can also be a source of noise. Turn off any such lighting that’s in the vicinity of your PA to see if that solves your noise issue.
Now that you’ve completed this troubleshooting, power the system on and bring up the faders one at a time, starting with the master fader. You should not hear any hum or buzz … but if you do, it’s time to check your audio cables.
Cables Get No Respect
Cables take a lot of abuse. They get yanked, stepped on, run over by flight cases and doused with beer, so it’s a good idea to inspect all your cables for damage before and after every gig. Examine the outer sheath of the cable, which is typically made of flexible plastic. Any cable that has breaks or openings in the outer jacket should be replaced. Connectors should be shiny, clean and straight. Oxidation on the contacts can cause intermittent audio or buzzing. Use contact cleaner on a soft, clean cloth to wipe off TS and TRS connectors, removing any dirt that may build up over time. Don’t use anything abrasive on connectors.
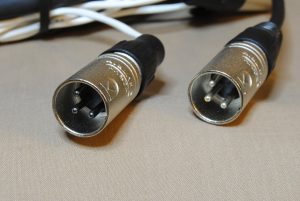
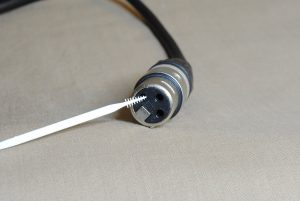
XLR connectors are a bit of a challenge to clean because the contacts are more difficult to access. A cotton swab with contact cleaner on it is helpful when cleaning the pins on a male XLR. Cleaning the sockets on a female XLR connector is tricky, but one effective method is to spray some contact cleaner into the sockets and use a plastic toothpick (the kind with the little brush on one end) to gently remove foreign matter, as shown in the illustration below. Don’t push anything larger into the sockets because that will spread the contacts and create an intermittent connection.
As we saw in our Tools of the Trade blog post about interconnections, audio cables can be balanced or unbalanced, and both types have a ground or shield wire. It’s very important that this wire not be damaged, loose or frayed. There’s not a lot of real estate inside a TS or XLR connector, so if something gets loose, there’s a good chance that the wires will short, making the cable noisy or intermittent. If you suspect that’s the case, open the connector and look for broken or shorted wires. If you have any doubts, send the cable to that Great Gig in the Sky. You won’t regret it.
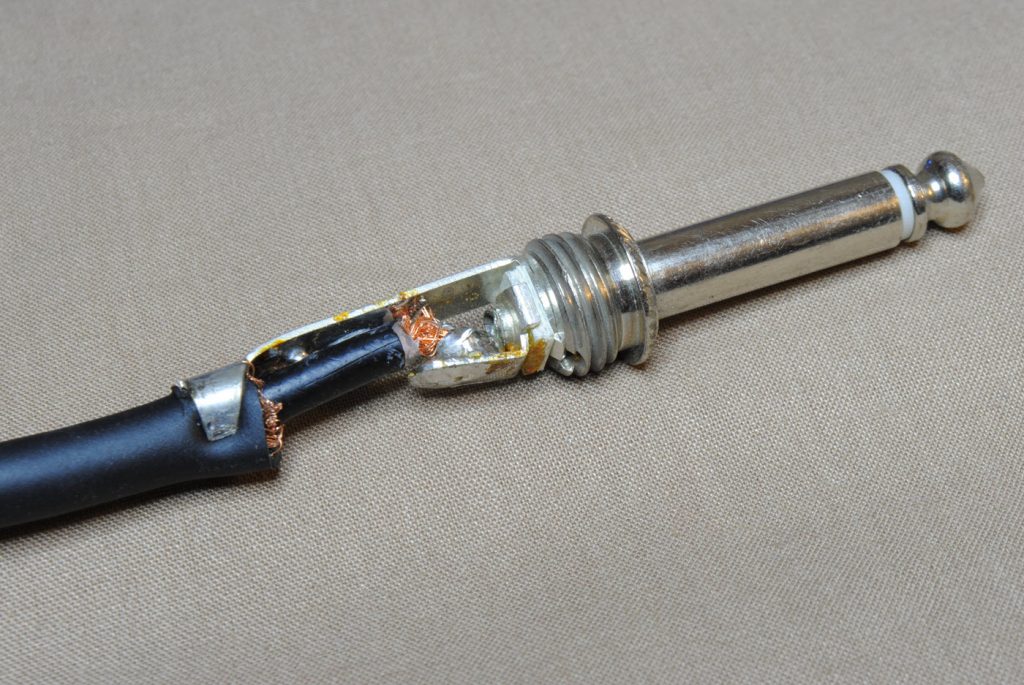
Sniffing out these audio gremlins is not the most glamorous (or fun) part of doing live sound, but once you know what to look for, you’ll have an easier time making your PA run quiet and clean.
All photographs courtesy of the author.


