Equalization
One of the most important tools in live sound is called equalization. It may sound a bit tech-y but equalization (“EQ” for short) is actually just a fancy word for “tone control.” EQ allows you to change the tonal quality of a sound, making it, for example, “brighter” or “more bassy.” We’ve all had the experience of adjusting the tone controls on a car stereo. That’s a simple form of EQ. Mixing consoles typically offer more advanced versions.
In this article, we’ll take a closer look at the various kinds of EQ controls you’re likely to encounter when doing live sound — as well as the best ways to use them.
Basic EQ
Let’s start by taking a look at the basic channel equalization offered by the entry-level Yamaha MG06X analog mixer:

This is called a “two-band” EQ because it gives you control over two frequency areas, labeled High and Low. Note the triangle at the 12 o’clock, notched position. That’s the “0” point, where the control has no effect. To the left and right you can see “-15” and “+15.” This indicates how many decibels (dB) you are boosting or cutting the selected frequency. (A decibel is a unit used to measure sound level.) If you turn the knob clockwise you’ll be “boosting” (raising) a frequency; if you turn it counterclockwise you’ll be “cutting” (reducing) a frequency.
At this point you may be asking yourself the question: What frequency? (Or perhaps even “What is a frequency?”) Well, you may have noticed that the Low EQ is also labeled “100 Hz.” (Hz — short for “Hertz”— is a measure of the number of wavecycles per second, which defines the frequency, or tonal area.) The lower the number of Hz, the lower the frequency, and 100 Hz happens to be pretty low, which is why you can think of this control as a broad “bass” control, same as the one in your car stereo. When you turn the Low knob on this EQ you will raise or lower the sound level at 100 Hz (and some of the neighboring frequencies too), while leaving other portions of the signal untouched.
Similarly, turning the High knob raises or lowers the sound level at 10 kHz. The “k” means times a thousand, so 10 kHz is the same as 10,000 Hz, which is pretty high, making this control roughly the same as a treble control on a car stereo.
When you see simple equalization controls like these labeled High or Low (sometimes called “HF” and “LF” for High Frequency and Low Frequency, respectively), they are almost always a type called a shelf EQ. The name comes from the shape of the EQ curve. The illustration below shows what happens to a sound when you raise the level of a 10 kHz shelf EQ:

Notice how the curve rises up and then levels off, gently boosting all the frequencies above a certain point (in this case, starting at around 2 kHz, or 2,000 Hz below the specified 10 kHz frequency). Affecting a broad range of frequencies above or below the specified frequency is what makes a shelf EQ easy on the ears.
In contrast, this is what happens when you use a 10 kHz shelf EQ to cut instead of boost:

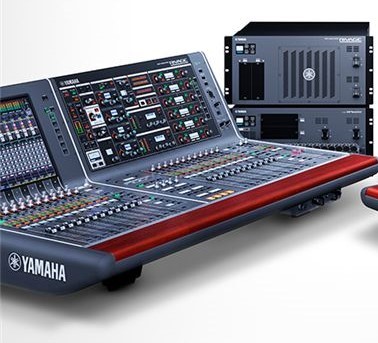
Shelf EQ is useful when you want a broad stroke of EQ — for example, if you want to make a sound brighter. Basic shelf EQs allow you to boost or cut, but you can’t change the frequency. More advanced mixers like the digital Yamaha TF Series allow you to set the frequency area you want to affect, allowing precise control over the sound.
Some mixers offer three-band equalization that adds a Mid (midrange) frequency area. Here are the EQ controls provided by the intermediate-level Yamaha MG16 and MG16XU:

Notice that there are two controls for the Mid: one for the amount of boost or cut, and another that lets you choose the frequency area to be affected (known as the “peak” or “center” frequency). This type of EQ is called a peak/dip or peaking EQ. Peak EQ concentrates on a smaller, more specific frequency area than shelf EQ. The ability to “sweep” the frequency control is why it is also sometimes called a sweep EQ.
Here’s the effect of boosting a peak/dip EQ with a center frequency of 500 Hz:

As you can see, this affects a range of frequencies from approximately 220 Hz up to about 1.1 kHz. The curve drops to 0 on both sides, so it has no effect on the very low or very high frequencies.
Peak/dip EQs are useful for making a slight correction to a sound, or to prevent one sound from stepping on another. For example, you might find that a piano is fighting for space in your mix with a guitar. A dip of a few dB on the piano EQ in the region around 300 Hz can help reduce this problem. Or if you find that a vocal is not cutting through a mix, adding a few dB around 2 or 3 kHz can help … but be careful because adding too much EQ in this region can make the vocal sound harsh.
It’s important to understand that when you boost with equalization, you are not adding frequencies to a sound. Yes, you’re amplifying the signal, but you’re amplifying only a certain range of that signal. For example, boosting at 100 Hz does not add 100 Hz to the signal. It amplifies 100 Hz and some of the neighboring frequencies, while leaving other portions of the signal untouched.
Advanced EQ
Most digital mixing consoles (and some advanced analog ones) offer a more precise form of equalization called parametric EQ. This is similar to peak/dip equalization but adds another control called bandwidth (sometimes known as “Q”) that determines how wide or narrow a range of frequencies are going to be affected.
The next illustration shows a peak boost similar to the one above, but here the bandwidth has been narrowed, allowing you to zero in on a smaller range of frequencies. In live sound, parametric EQ is especially useful for reducing feedback without changing the overall sound — just cut a small area where the monitor or PA system is feeding back.

Many consoles also provide filters. A filter is a simple type of equalizer that removes a particular range of frequencies. High-pass filters (HPF for short) remove all frequencies below a certain point, while low-pass filters (LPF for short) do the opposite, removing all frequencies above a certain point. (LPFs are much less common in live sound consoles than HPFs.) Sometimes a high-pass filter will be fixed, meaning that you can turn it on or off but you can’t change the frequency. More advanced mixers give you the ability to set the frequency where the filter starts working.
And here’s the effect of a high-pass filter set to 100 Hz:

As you can see, frequencies below 100 Hz are being gently rolled off (notice that this actually begins a little bit higher than 100 Hz). You’ll find high-pass filters on most Yamaha mixers because they are very useful for removing unwanted low frequencies from vocal microphones, and that helps increase intelligibility. They also help control excessive low frequencies on guitar amps, and can eliminate the kind of low-frequency rumble that travels through mic stands.
Suggested EQ Settings
Finally, here are some starting points for EQ’ing common instruments:
- Lead vocal: HPF on; Low: 0 dB; Mid +2 to +4 dB at 200 Hz to add warmth and body; High: 0 to +2 dB to add presence, or cut -2 to -4 dB to reduce feedback
- Piano: HPF on; Low: 0; Mid: -4 to -6 dB around 200 Hz to reduce boxiness. High +2 to +4 dB to add presence and sparkle in the mix
- Acoustic guitar: HPF on; Low: +3 to + 4 dB to add thickness or -3 to -4 dB to reduce boom; Mid: -2 to -4 dB at 1.8 kHz to reduce ‘nasal’ quality, or +2 to +5 dB at 5.5 kHz to emphasize pick on strings; High: +3 dB to add presence
- Electric guitar: HPF on; Low: 0 dB; Mid: -2 to -4 dB between 1 to 2 kHz to reduce harshness; High: 0 dB
- Bass: HPF off; Low +2 to +4 dB; Mid: +3 dB at 2.5 kHz for more attack, or -3 to -5 dB at 300 Hz to reduce interference with kick drum, High: 0 dB
- Bass drum (“kick” drum): HPF off; Low: +3 to +5 dB; Mid: -4 to -6 dB at 250 Hz; High: 0 to +2 dB
- Snare drum: HPF on; Low: 0 dB: Mid: -3 to -6 dB at 280 Hz if it sounds wooley or +2 to +4 at 200 if it sounds thin; High: +3 to +5 dB at 4 to 5 kHz if it gets lost in the mix
- Toms: HPF off: Low: +2 to +6 dB; Mid: -4 to -8 at 250 to 350 Hz (reduces ‘cardboard’ sound); High: +2 to +4 dB to add attack
- Overheads: HPF on; Low: -6 to -10 dB; Mid: 0 dB; High: +2 to +4 for a bit of sparkle
- High hat: HPF on; Low: -6 to -10 dB; Mid: +2 to +4 dB at 4 to 5 kHz to add sizzle; High: 0 dB
Check out our other Tools of the Trade postings.
Click here for more information about Yamaha mixing consoles.
Keep reading