Tagged Under:
Think Like a Drummer, Part 2
Assembling an authentic-sounding drum track.
In Part 1 of this two-part series, I discussed the pros and cons of using MIDI and audio loops to create realistic-sounding drum parts. In this installment, I’ll show you techniques for putting your drum track together.
It’s About Time
Whether it’s MIDI or audio loops you’re using, the more you can think like a drummer when putting the parts together, the more realistic the results will be. For audio loops, find a song grouping in a loop collection that fits the feel of your song and is close or identical in tempo. If you’re using MIDI loops, you’ll need to time-stretch it to make it fit. (See Part 1 for more info.)
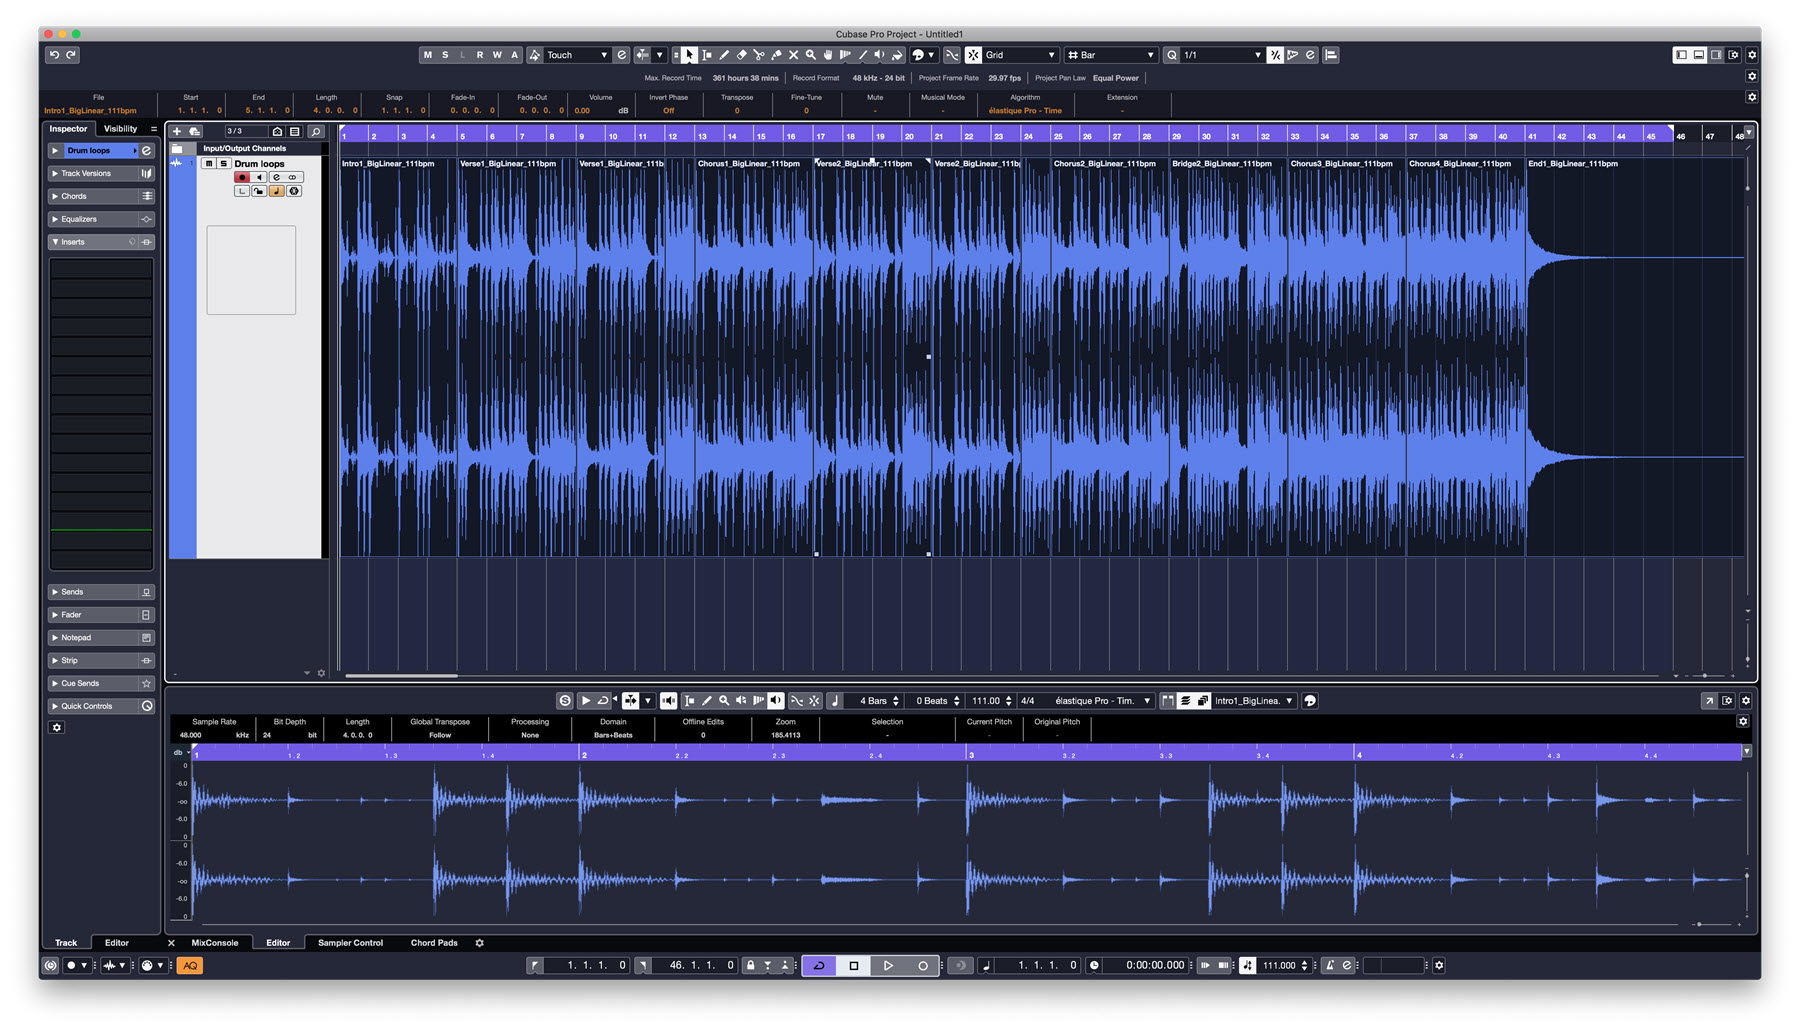
When you’re assembling audio loops, it’s critical to have your grid snap on and set to bars. That way, you can drag and drop loops, end to end, and they’ll stay in time with the song.
The Sum of the Parts
A real drummer generally plays different variations of a particular feel or style for each song section. If you want authenticity, you need to replicate that concept in your loop part. For example, verses are typically simpler or lower in energy than choruses. And if a song has a bridge, it will usually have a feel that’s different from the rest of the song, which means the drum part will change as well.
By the way, there’s nothing wrong with choosing a “basic beat” loop for each song section, then using the same ones each time those sections repeat — as long as you create variety with fills. That said, if you have a slight variation in, say, the second verse, it might make sense to use it again for a verse later in the song.
Fill ‘Er Up
Whether you’re using audio loops or a MIDI drum instrument, it’s essential to have a good selection of fills on hand before you put your part together. Drummers almost always play a fill in the last measure of a section to help propel the song into the next part, and the fills are often only in the second half of that last measure.
If you’re using a MIDI virtual drummer such as Groove Agent SE5 in Steinberg Cubase, you can easily grab a fill from another song. Because it’s MIDI, the instrument will play it with the same kit sounds, so it should fit nicely if it’s stylistically similar … assuming the mapping (i.e., the placement of samples on specific MIDI notes) is the same. If it’s different, you may have to move certain notes in the loop so the correct samples get triggered.
With audio loops, using fills (or any loops, for that matter) from outside the song grouping is next to impossible. That’s because kits from different collections are recorded in different studios with different drummers and won’t sound at all alike.
Often, it can be difficult to find enough fills, because the creators of the collections didn’t provide enough of them for a full-length song. In those cases, you’ll have to repeat some of them. When that happens, try to space the repeats apart as much as possible. Listeners are less likely to notice a fill that’s used in the first and fourth verses than one that’s used in the first and second verses.
Another problem with fills from loop collections (both audio and MIDI) is that they’re often a full measure long and too busy. They might sound cool on their own, but in many songs they’ll seem like overkill.
Sometimes you can successfully use the last two beats from a measure-length fill. If it sounds good, replace the first half of the measure with a repeat of the basic beat you’re using for that section.
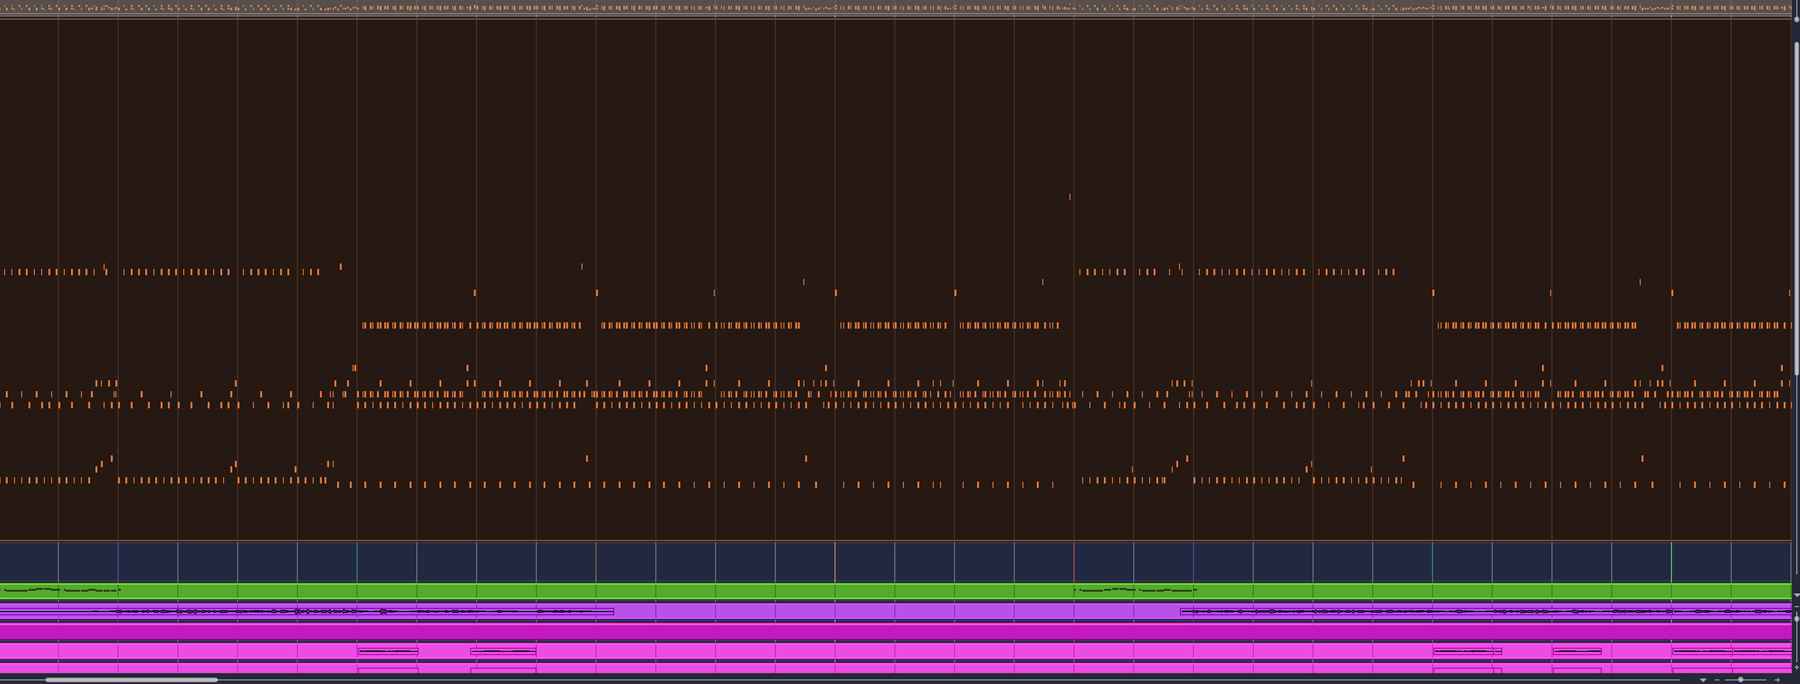
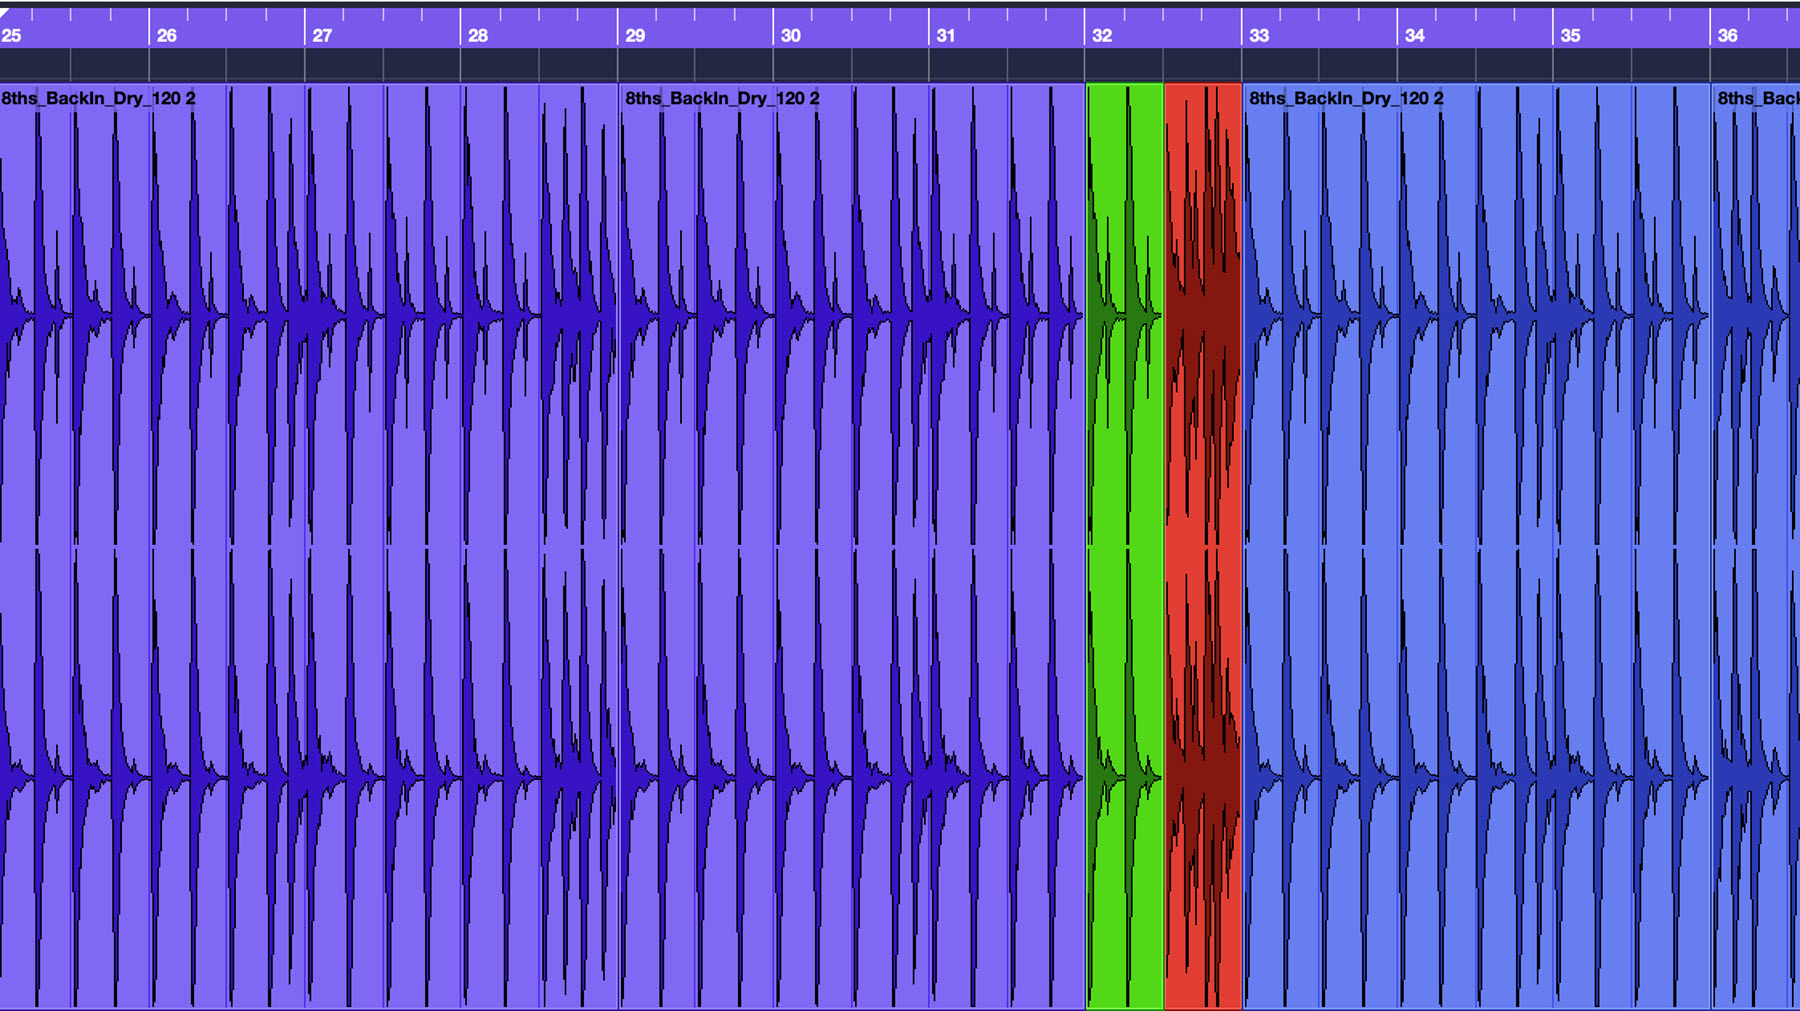
In the following graphic, you’ll see part of an audio loop drum track. The purple is the basic beat for the verse; it lasts four measures and has a little flourish at the end. After that, the same section was copied and pasted, but the last measure was replaced by a fill consisting of two beats of the basic beat (shown in green) and the last two beats of a fill (shown in red):
Whenever you’re assembling audio loops, if you hear any glitches at the edit point, a short crossfade will often smooth it out. Just be careful not to make it so long that it lessens the impact of the hit.
Adaptation
Often, you’ll find you have a loop that works with your song’s basic groove, but needs to be adapted in places. With MIDI loops, it’s easy to make changes. But with audio loops, it’s not always possible to edit and move drums or cymbals within a loop. When it is doable, you often must finesse the edits to make them sound realistic.
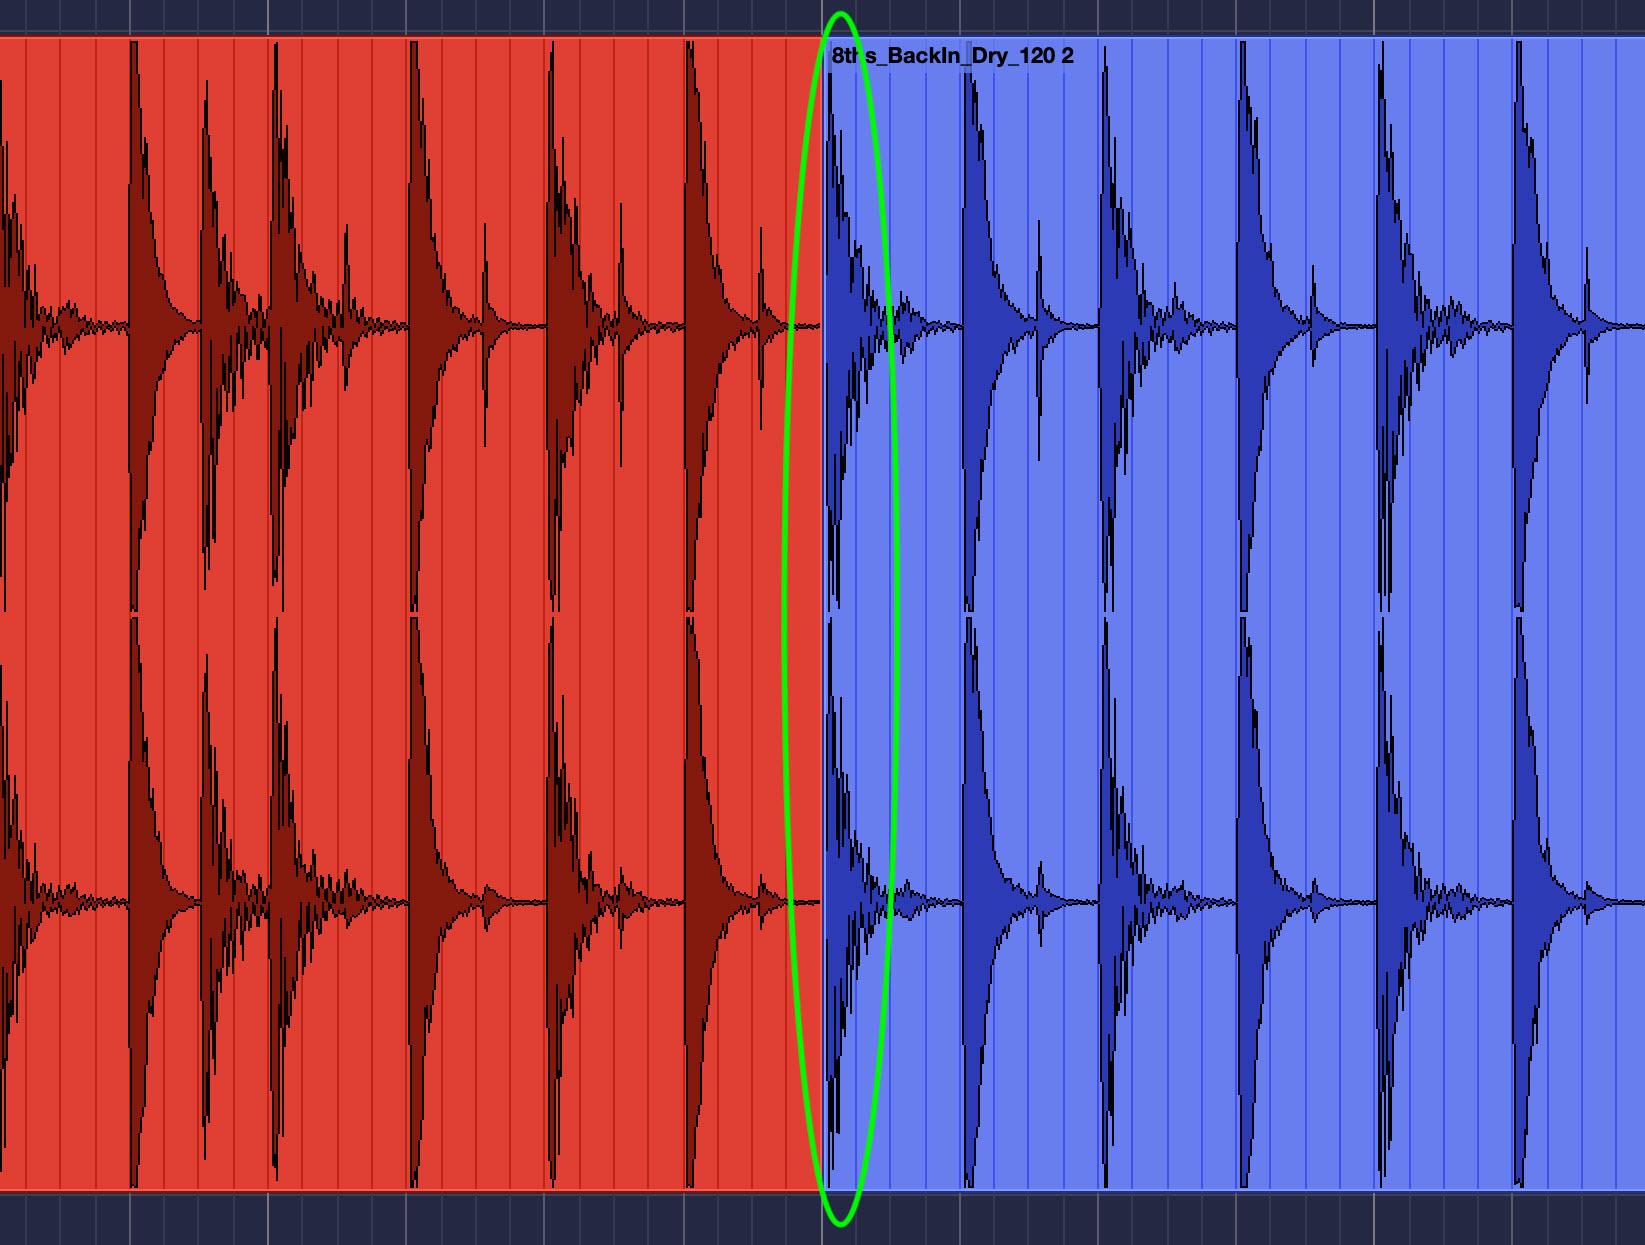
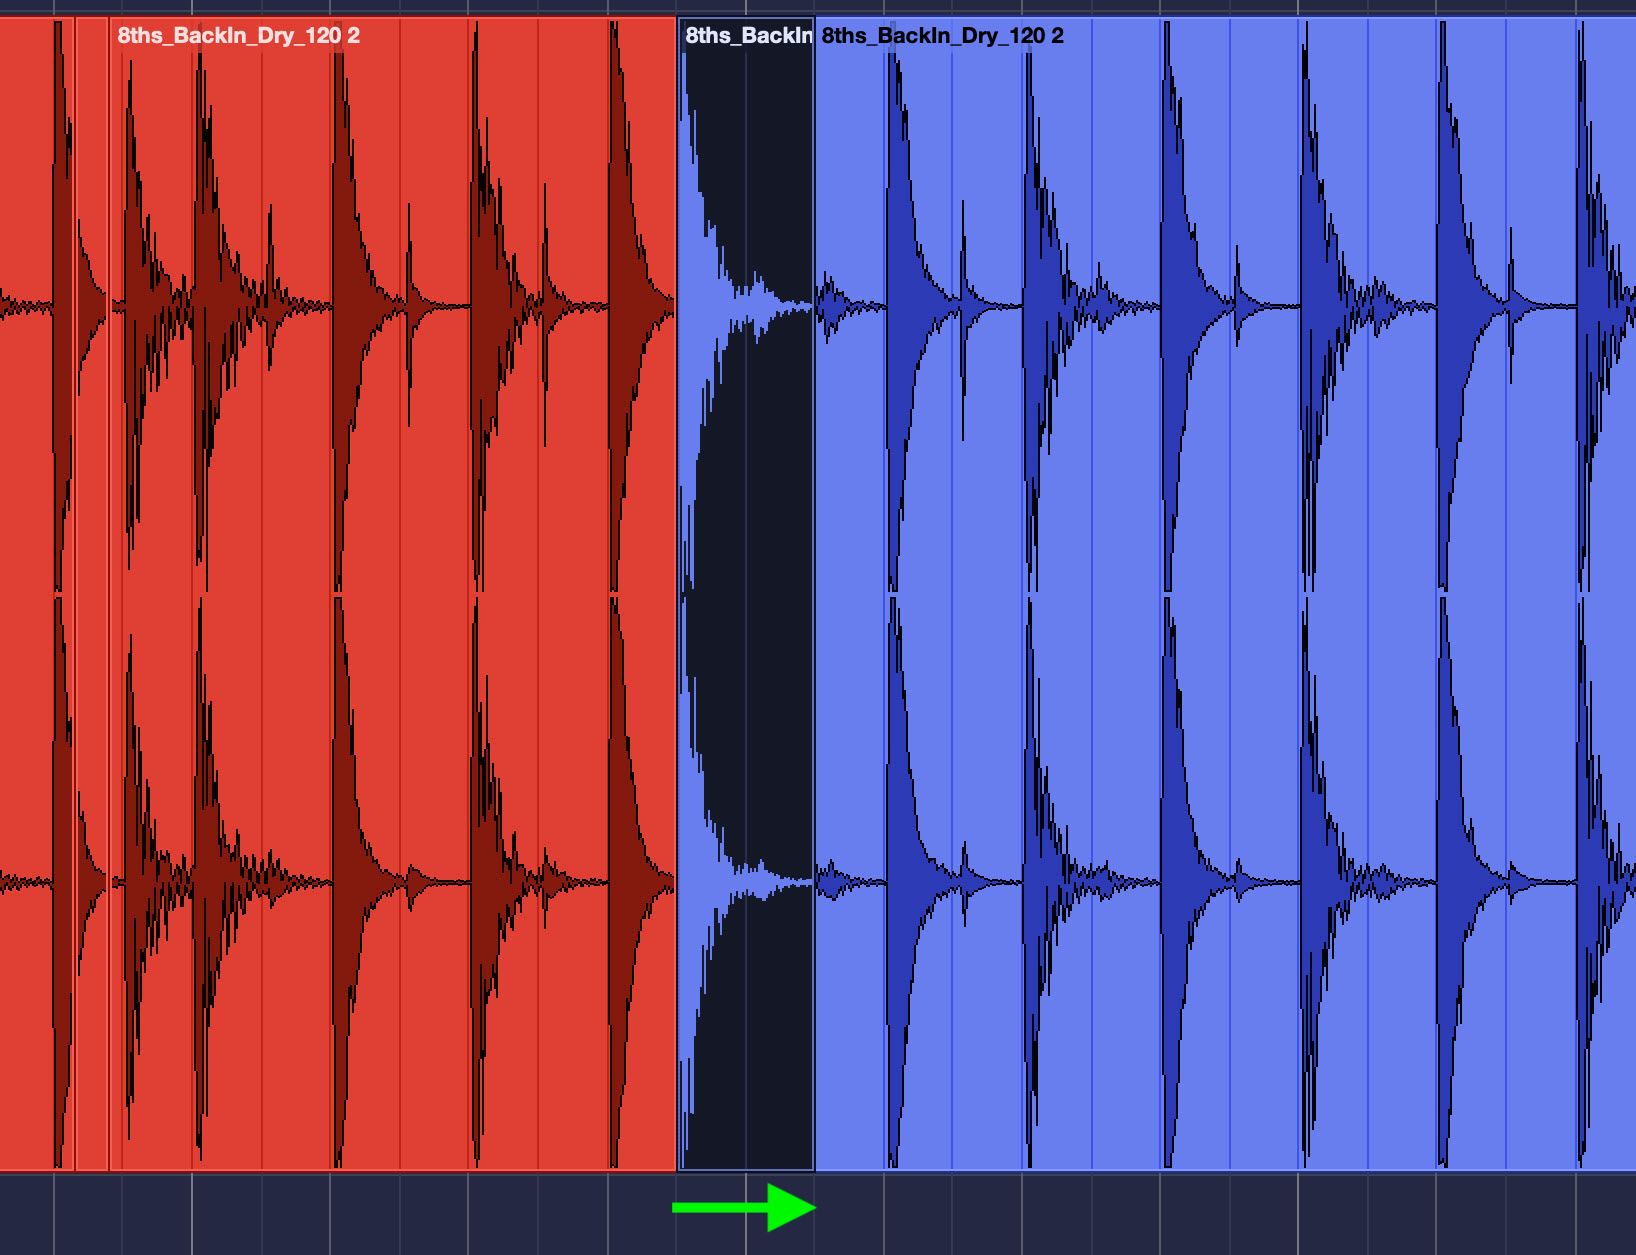
For example, let’s say your song has an eighth-note anticipation to start the measure, and you want to move the bass drum back from beat one of the loop so it’s hitting in the right place. In this graphic representation, the beat you want to move is at the left edge of the blue event, circled in red:
Here’s how to accomplish it:
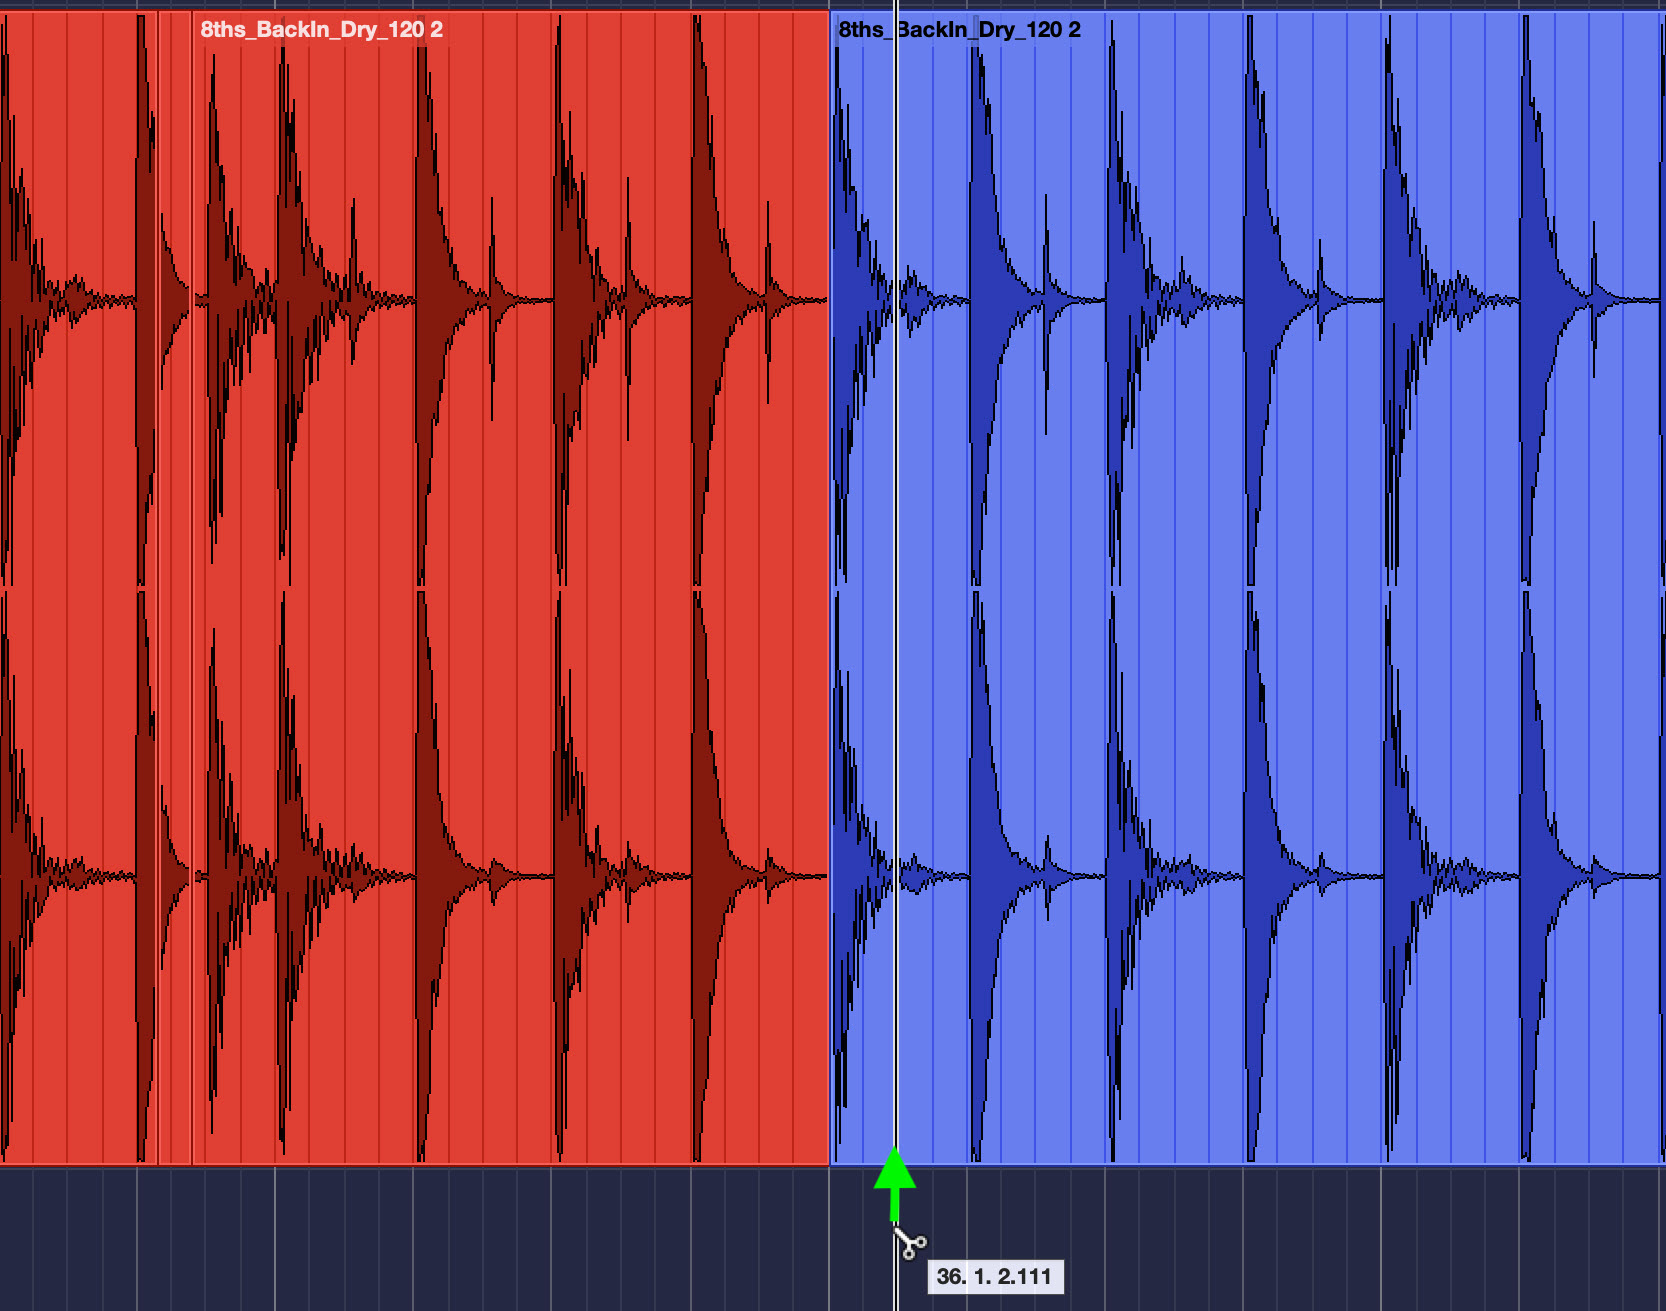
1. Turn the grid snap off, select just the bass drum, and split it to make it a separate event:
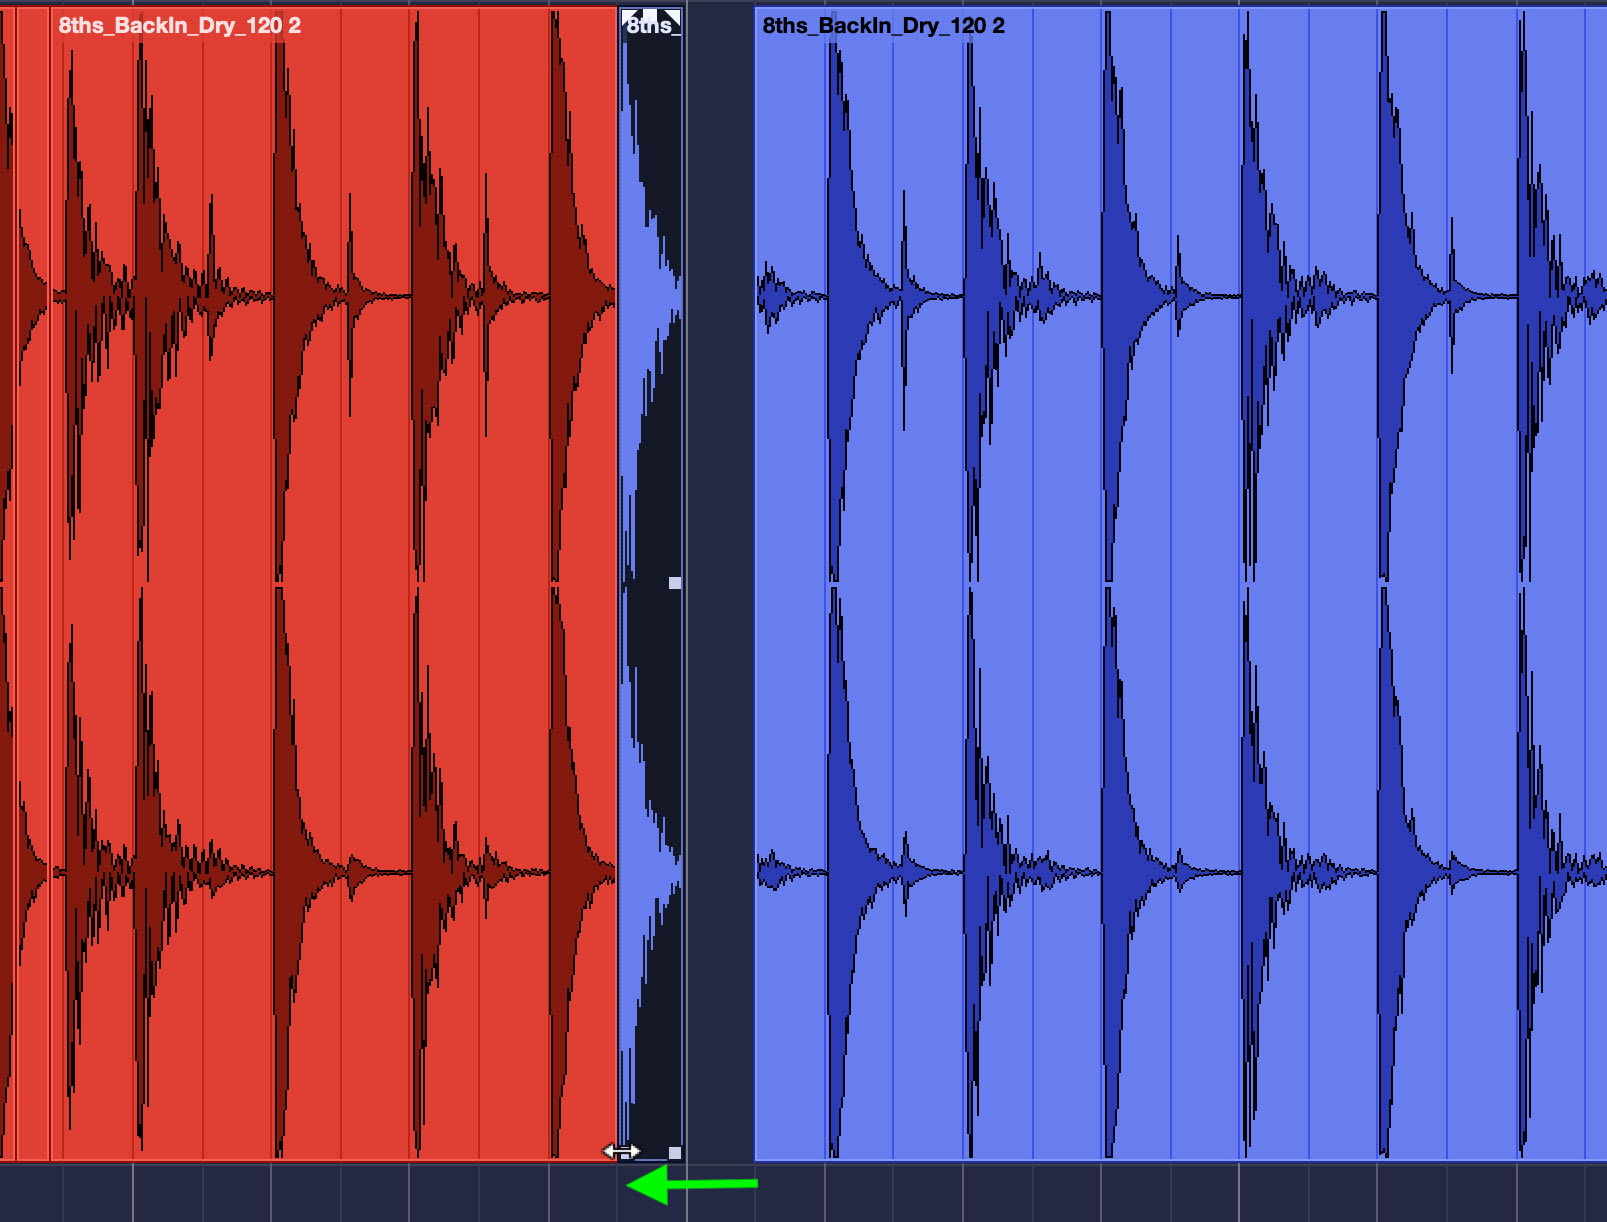
2. With the grid snap set to sixteenth notes, drag the bass drum hit earlier by an eighth note:
3. You now have a space between where the bass drum is, and where it was. Listen to how it sounds in the context of the song. If there’s a noticeable dropout, you can try lengthening the right edge of the event, revealing more of the audio after the edit point:
A Crash in Time
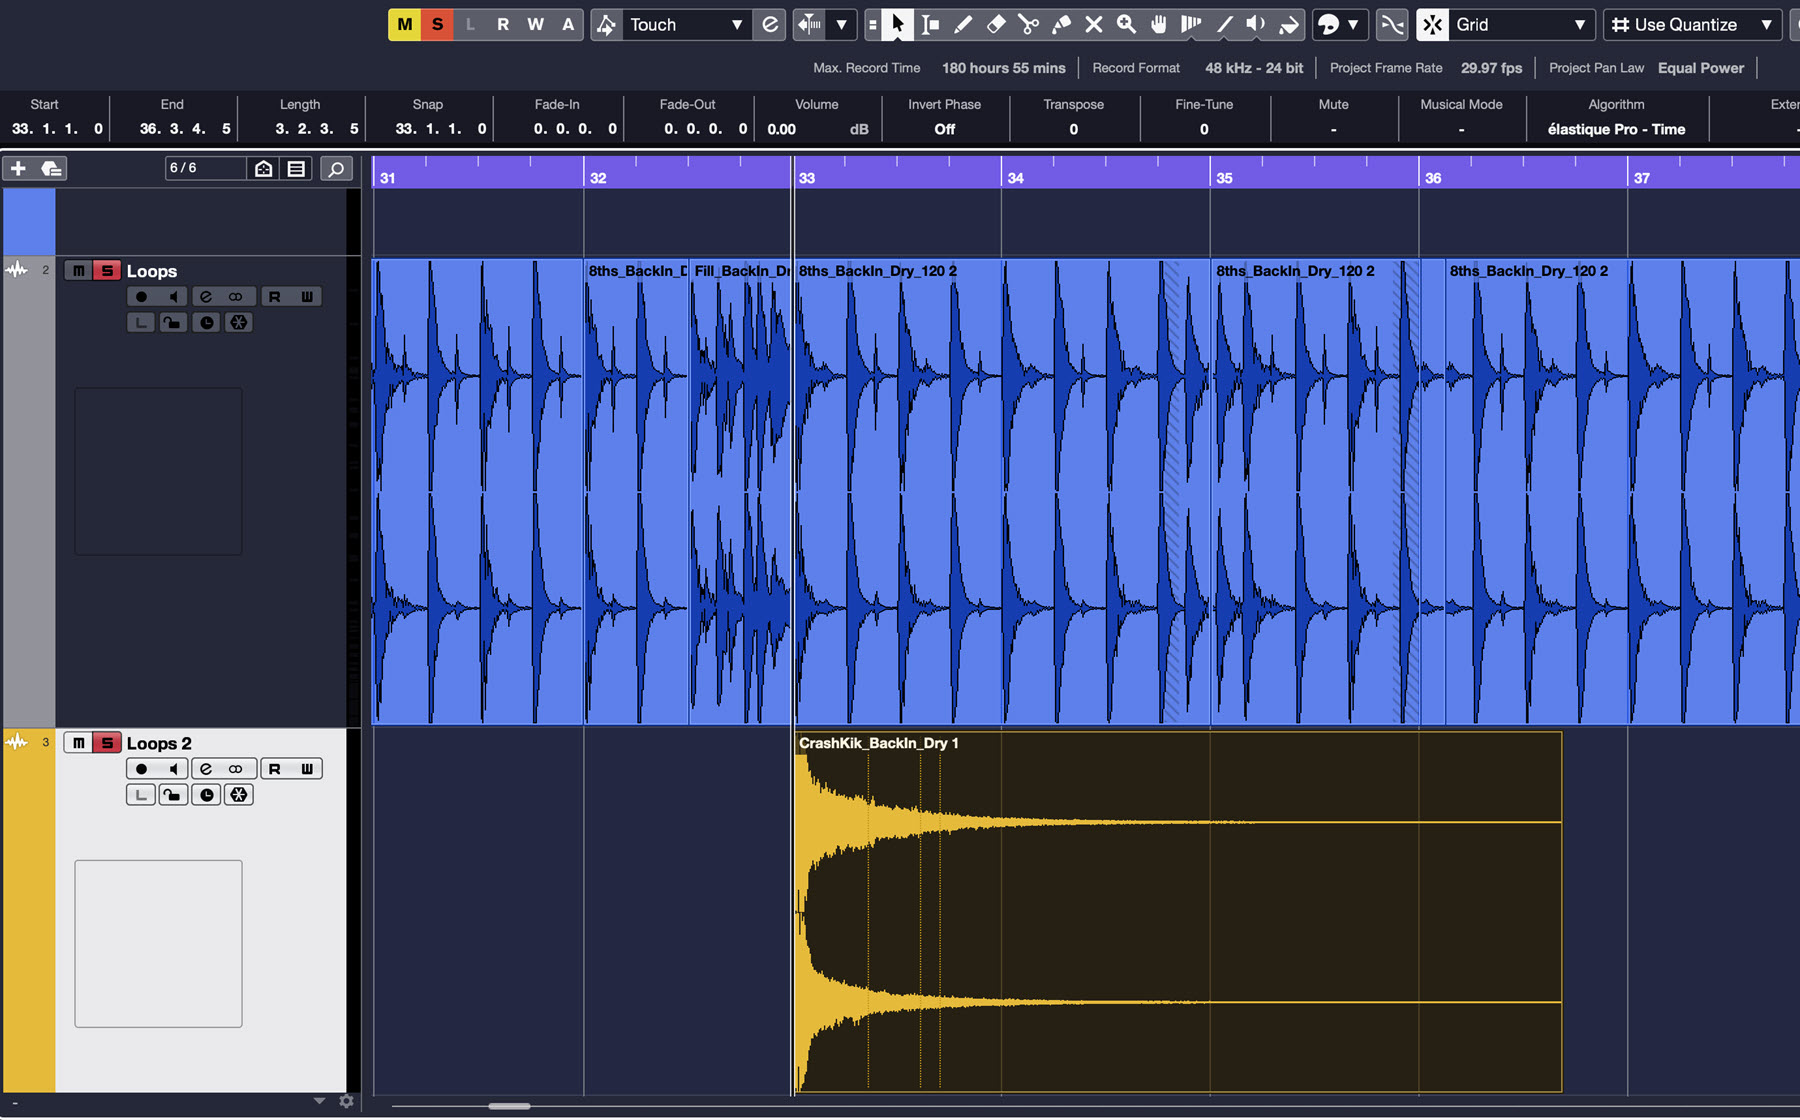
Many audio loops have crashes on the downbeat (beat 1). But, inevitably, you’ll run into places where you don’t have a version of the loop you want to use that has a crash.
An easy solution is to create a separate stereo audio track for your crashes (and any other drum samples that need to overlay the main loop track). Typically, a loop collection will give you individual samples for all the kit elements. Find crash samples you like (even if they’re from a different collection) and place them in that second track, so they’ll play along with the loops:
Mixing with Audio Loops
With MIDI virtual drummers like Groove Agent SE, adjusting the mix of the kit is usually easy because most have powerful internal mixers. But with stereo audio loops, you have no way to address kit elements individually. And, although they’re usually well mixed (at least when heard on their own), there will be times when the loop simply doesn’t work so well in context with the rest of your mix.
If you need to make a simple mixing change, such as raising the bass drum or reducing the snare, you can try using EQ. The idea is to boost or cut a frequency range corresponding to the kit element you’re trying to affect, as shown in the illustration below:
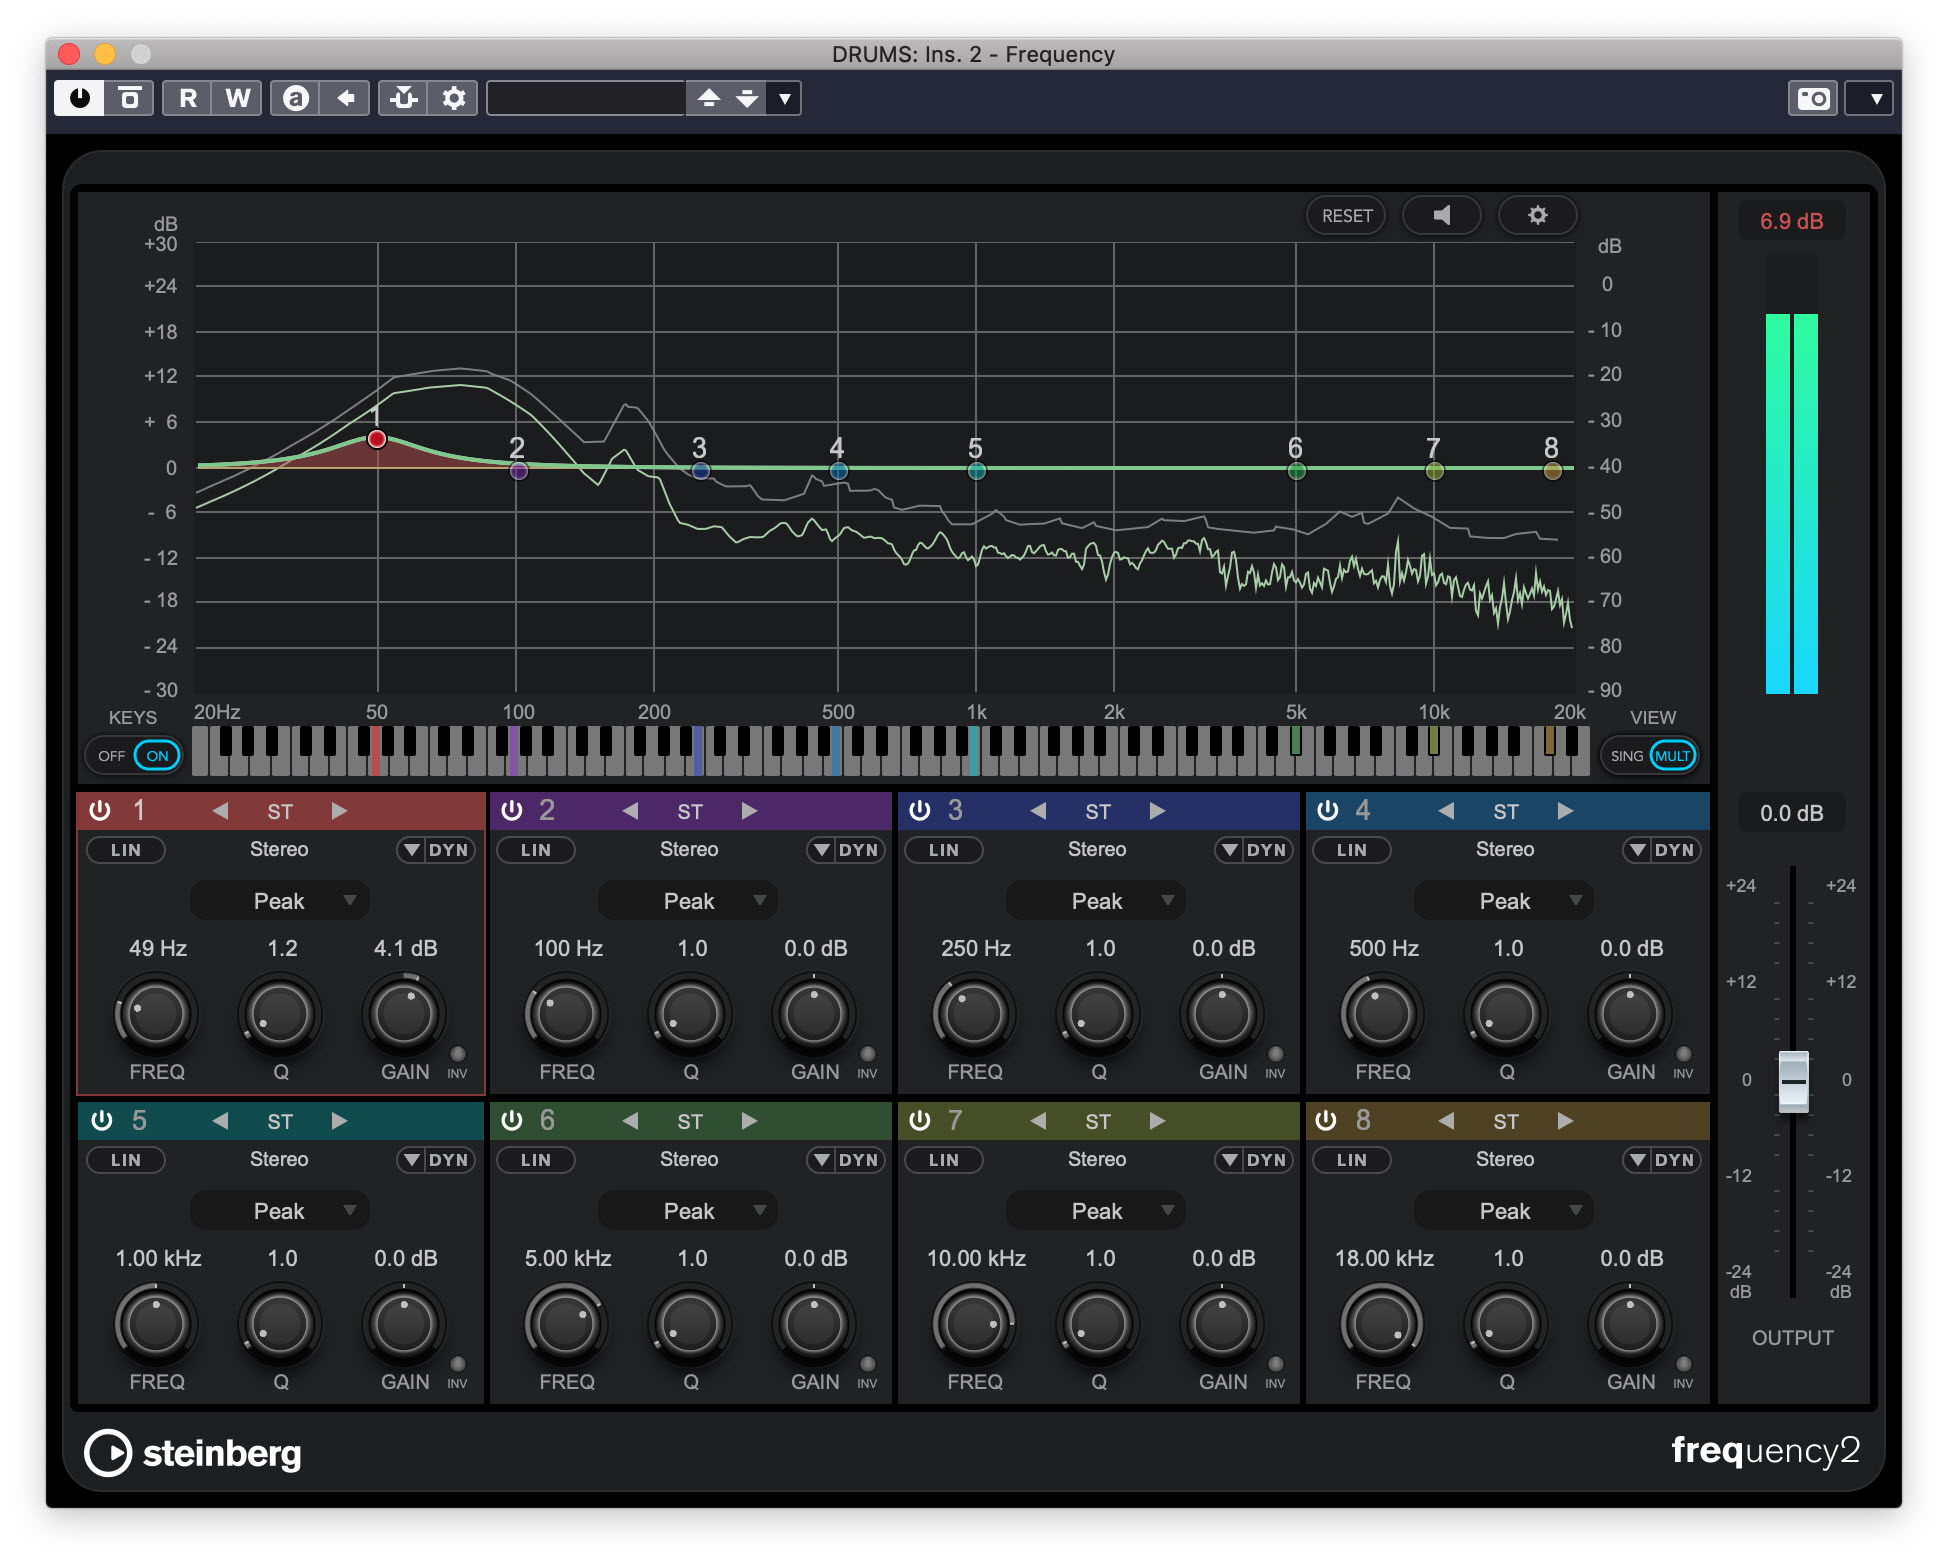
This type of adjustment is almost always a compromise, but can sometimes work. If you want complete mixing control of drum loops, you must find multitrack ones. There are multitrack collections available, but there are fewer to choose from than the large number of stereo loops available.
A Strong Foundation
It’s best to record the other instruments (except for reference tracks) in your song after you have the drum loops in place as a groove reference. Drums are foundational to most musical styles, so you want to overdub to them whenever possible. If you record everything to a click and then add the drum loops later, you may discover that other rhythmic elements (i.e., rhythm guitars, keyboards and bass) aren’t locked in with the loops.
The reason is that every drummer interprets time in a slightly different way, and those variations are what create a drummer’s “feel.” Some play a tiny bit ahead of the beat, others a little behind it (see Watts, Charlie). So, if you record your instrument parts to the metronomic rhythm of the click, the musicians will be using a different rhythmic reference and won’t be able to make their parts groove with the drum loops.
You don’t need to have your entire drum track in place before you start overdubbing instruments (although that’s ideal), but you should at least have a basic beat chosen from a song in a loop collection. Create a temporary drum track that repeats that beat throughout the song so you can record your other parts to it.
The Last Hit
In situations where recording a live drummer isn’t practical, drum loops — whether MIDI or audio — are the next best thing. You’ll have more flexibility with MIDI loops but more authentic sound and feel with audio.
Whichever you choose, keep in mind the techniques described in this article. They’ll make it easier to put together authentic-sounding drum parts.
Check out our other Recording Basics postings.
Click here for more information about Steinberg Cubase.


