Tagged Under:
MIDI Arranging Tips
How to get an orchestra of virtual instruments sounding good.
Among the many benefits of MIDI is that it allows you to put the sound of almost any instrument into your music. But having access to such sonic diversity is not enough.
Knowing how to arrange MIDI instruments effectively, either in conjunction with real ones or in MIDI-only productions, is an important part of DAW-based recording. Here are some tips to help you get started.
At the Source
Choosing sounds is a crucial part of MIDI arranging. Most contemporary DAWs come with loops and collections of sampled instruments and synths, and there are countless third-party collections available as well.
It’s essential to familiarize yourself with the MIDI instruments and sounds you have. That way, you’ll know which ones you like, and which will work best for specific kinds of parts. It will also tell you if you need to purchase more instruments or sounds for the type of music you’re doing.
Stack ’em Up
When you record a MIDI track in your DAW, it contains no audio, just data. It tells your DAW what notes to play and when, as well as how hard you played them, along with other information. Those instructions are instrument-agnostic. That is, they can trigger any MIDI instrument sound. Until you bounce your final mix, you can switch sounds at will.
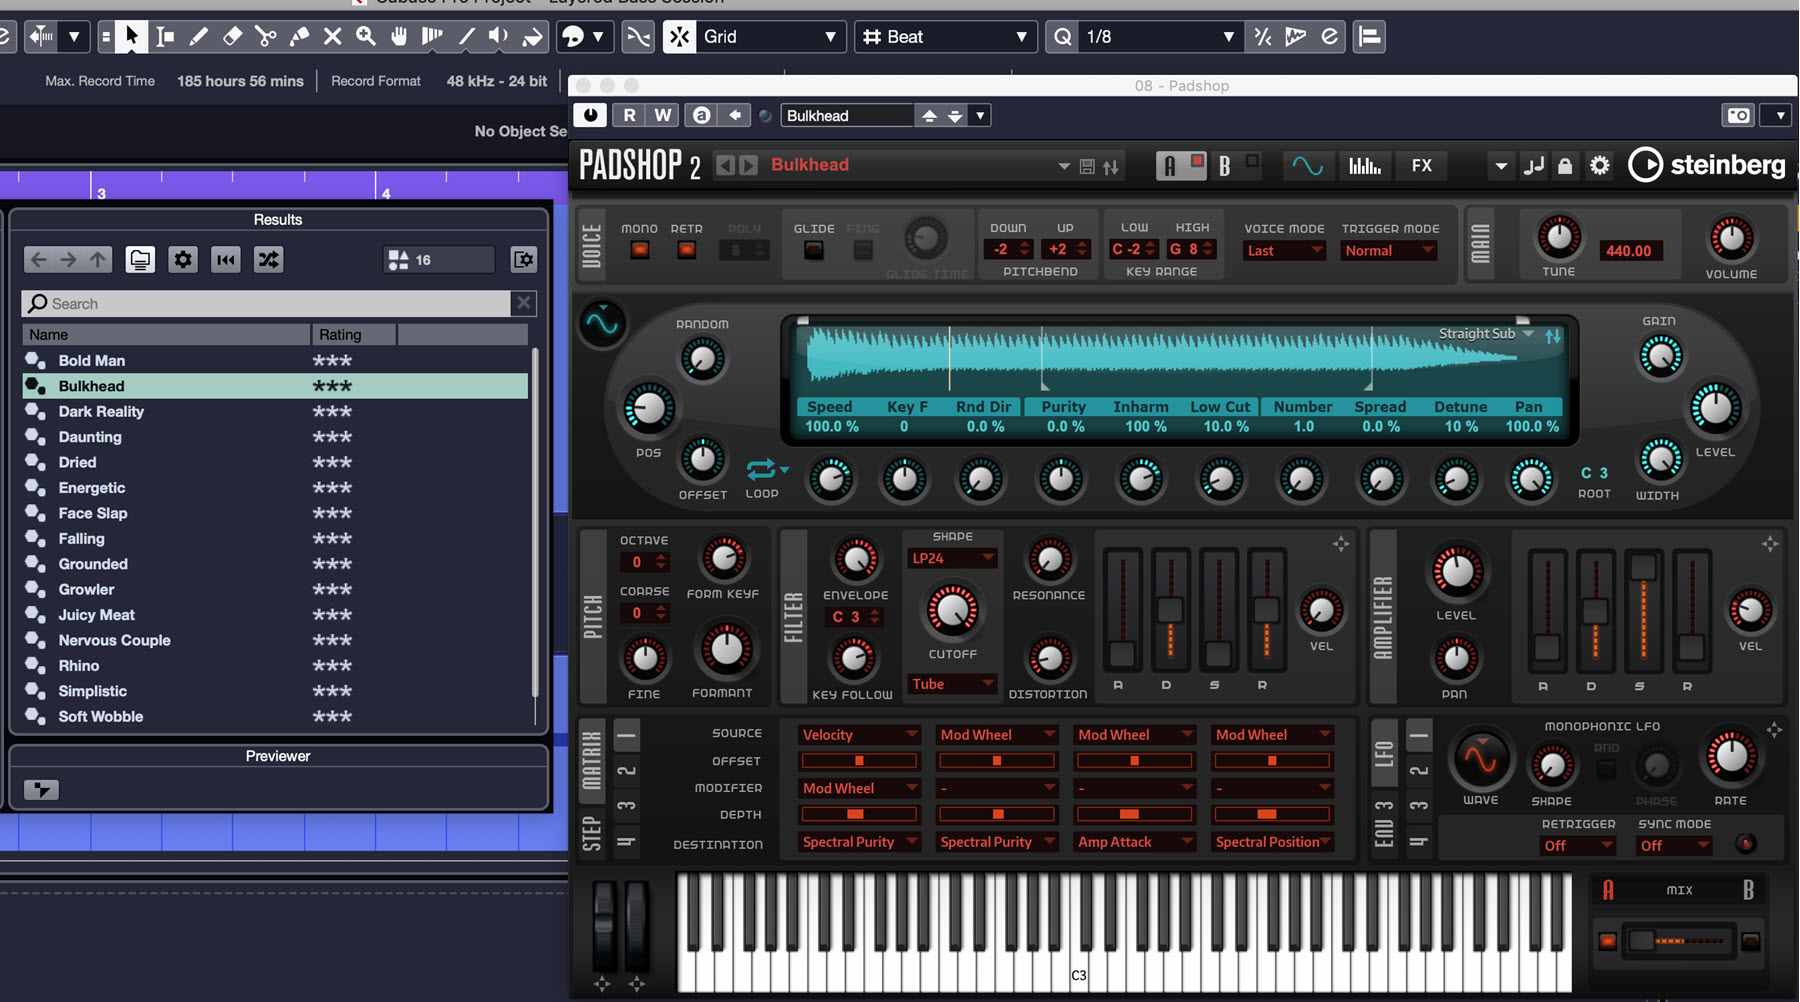
You can also trigger more than one instrument sound at a time from the same MIDI data. That’s called layering, and it’s an important tool when it comes to doing MIDI arrangements. Layered sounds allow you to make your own creative instrument blends, even if you’re just using your instrument’s factory presets. Custom combinations can add a lot of originality to your music, and they’re often much richer than individual sounds too.
Another cool thing about layering is that it doesn’t necessarily sound like two instruments playing. Because you’re using the identical MIDI part to trigger both layers, it often seems like a bigger and fuller version of a single instrument.
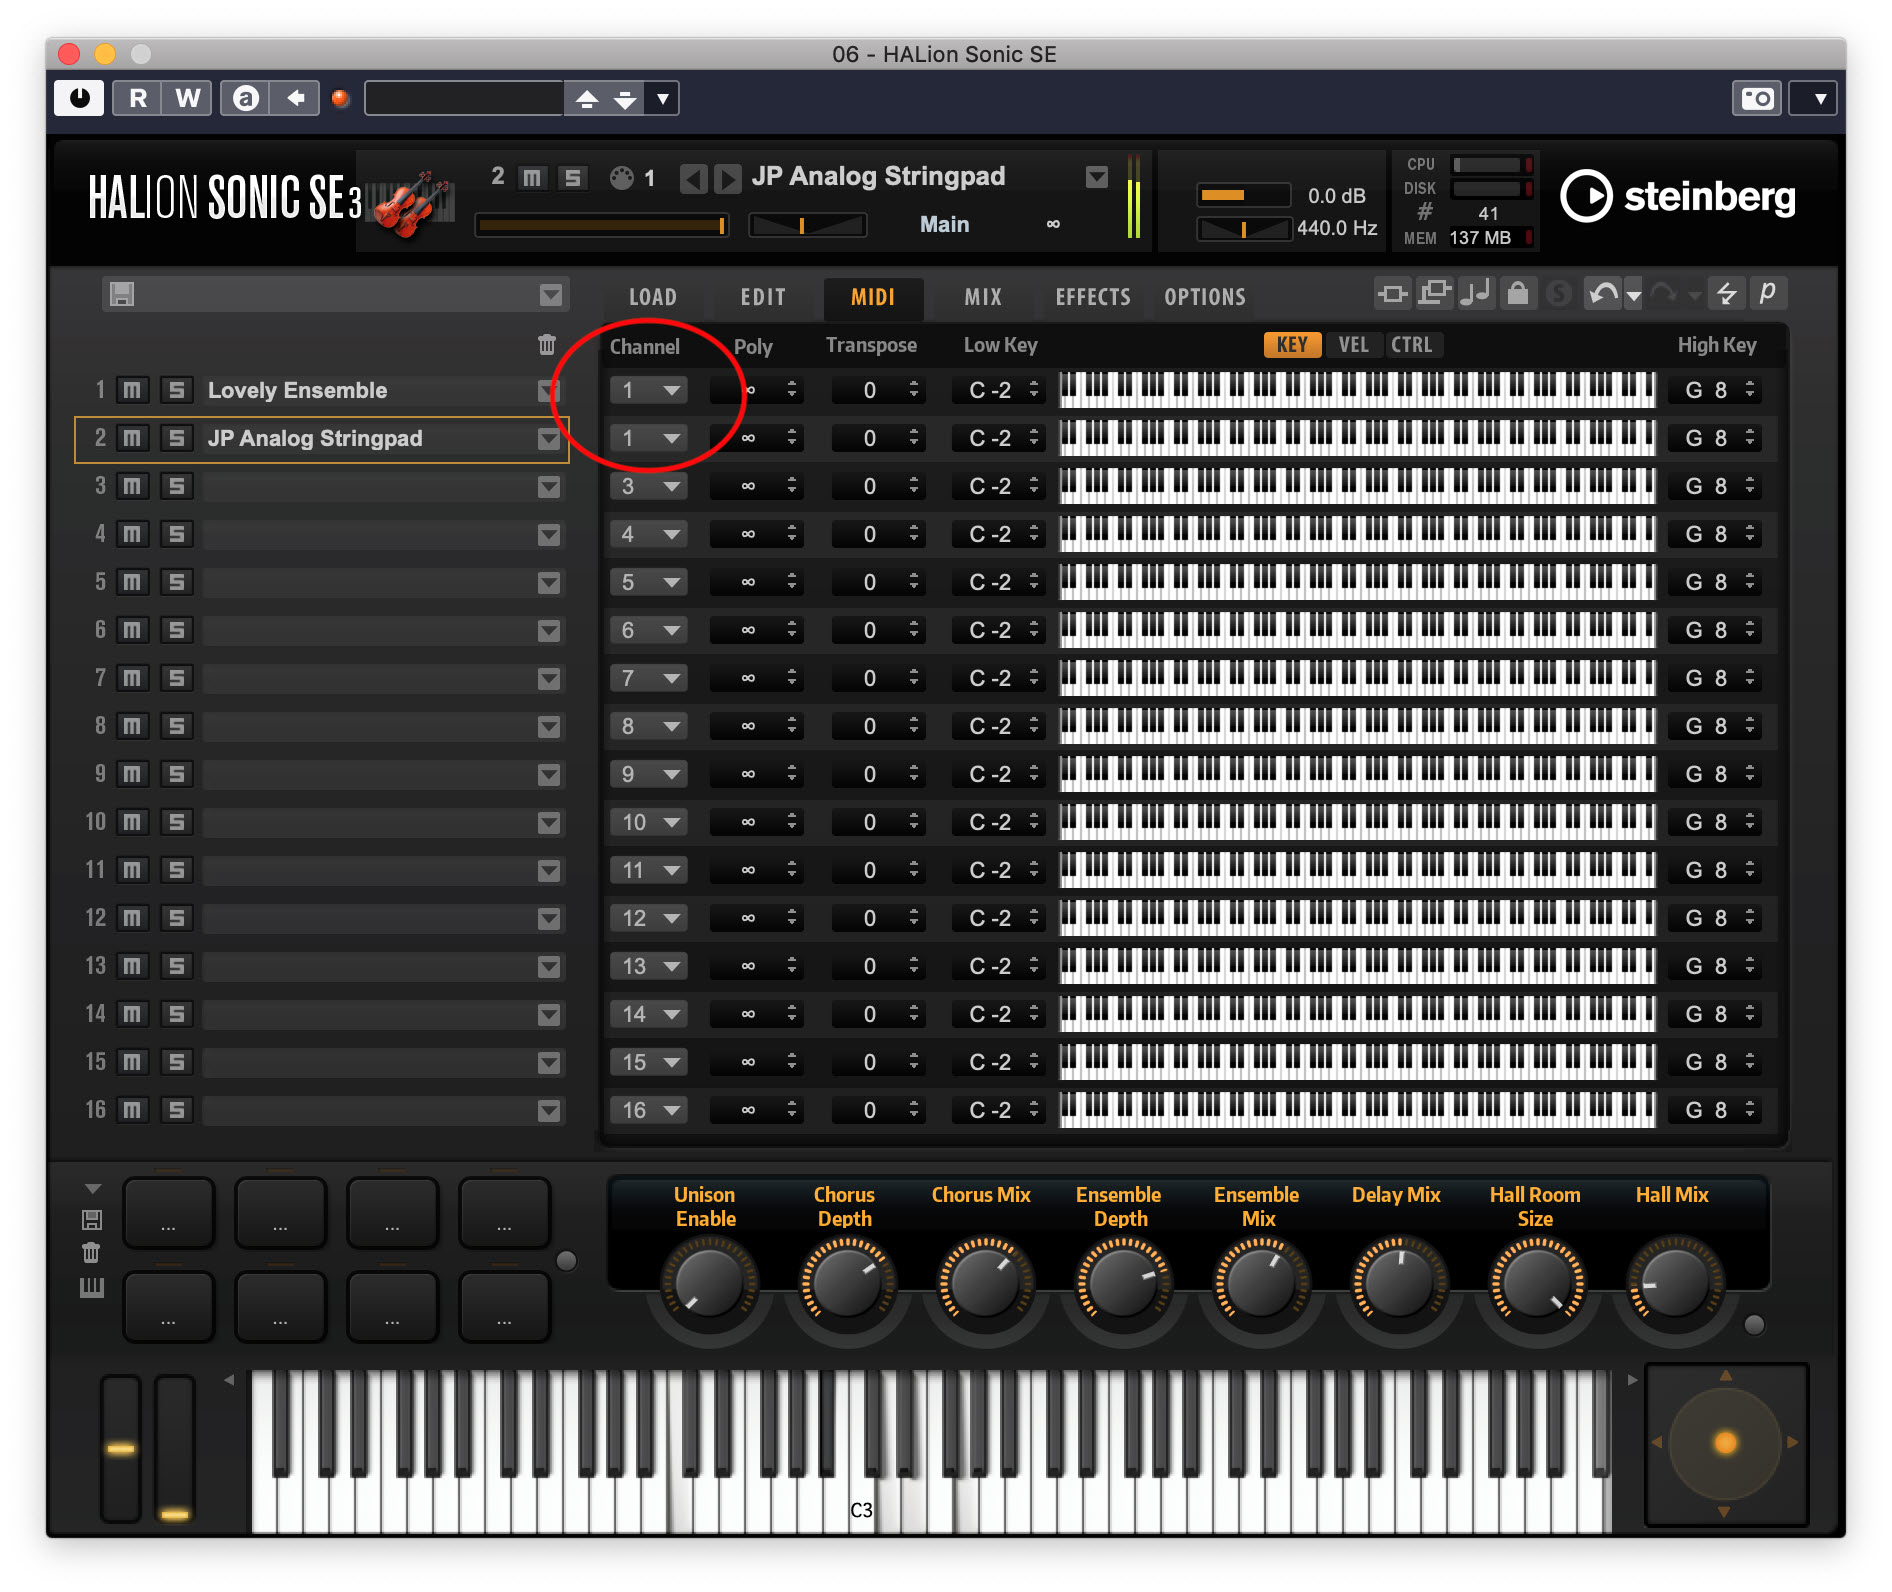
Some virtual instruments let you trigger multiple sounds from a single MIDI track. HALion Sonic SE (included in Steinberg Cubase and available as a free downloadable VST, AU and AAX instrument for any DAW) allows you to assign up to sixteen different sounds to one track.
But even for an instrument that can only trigger a single sound at a time, layering is easy: simply copy the track and assign it to either the same sound or to a different one.
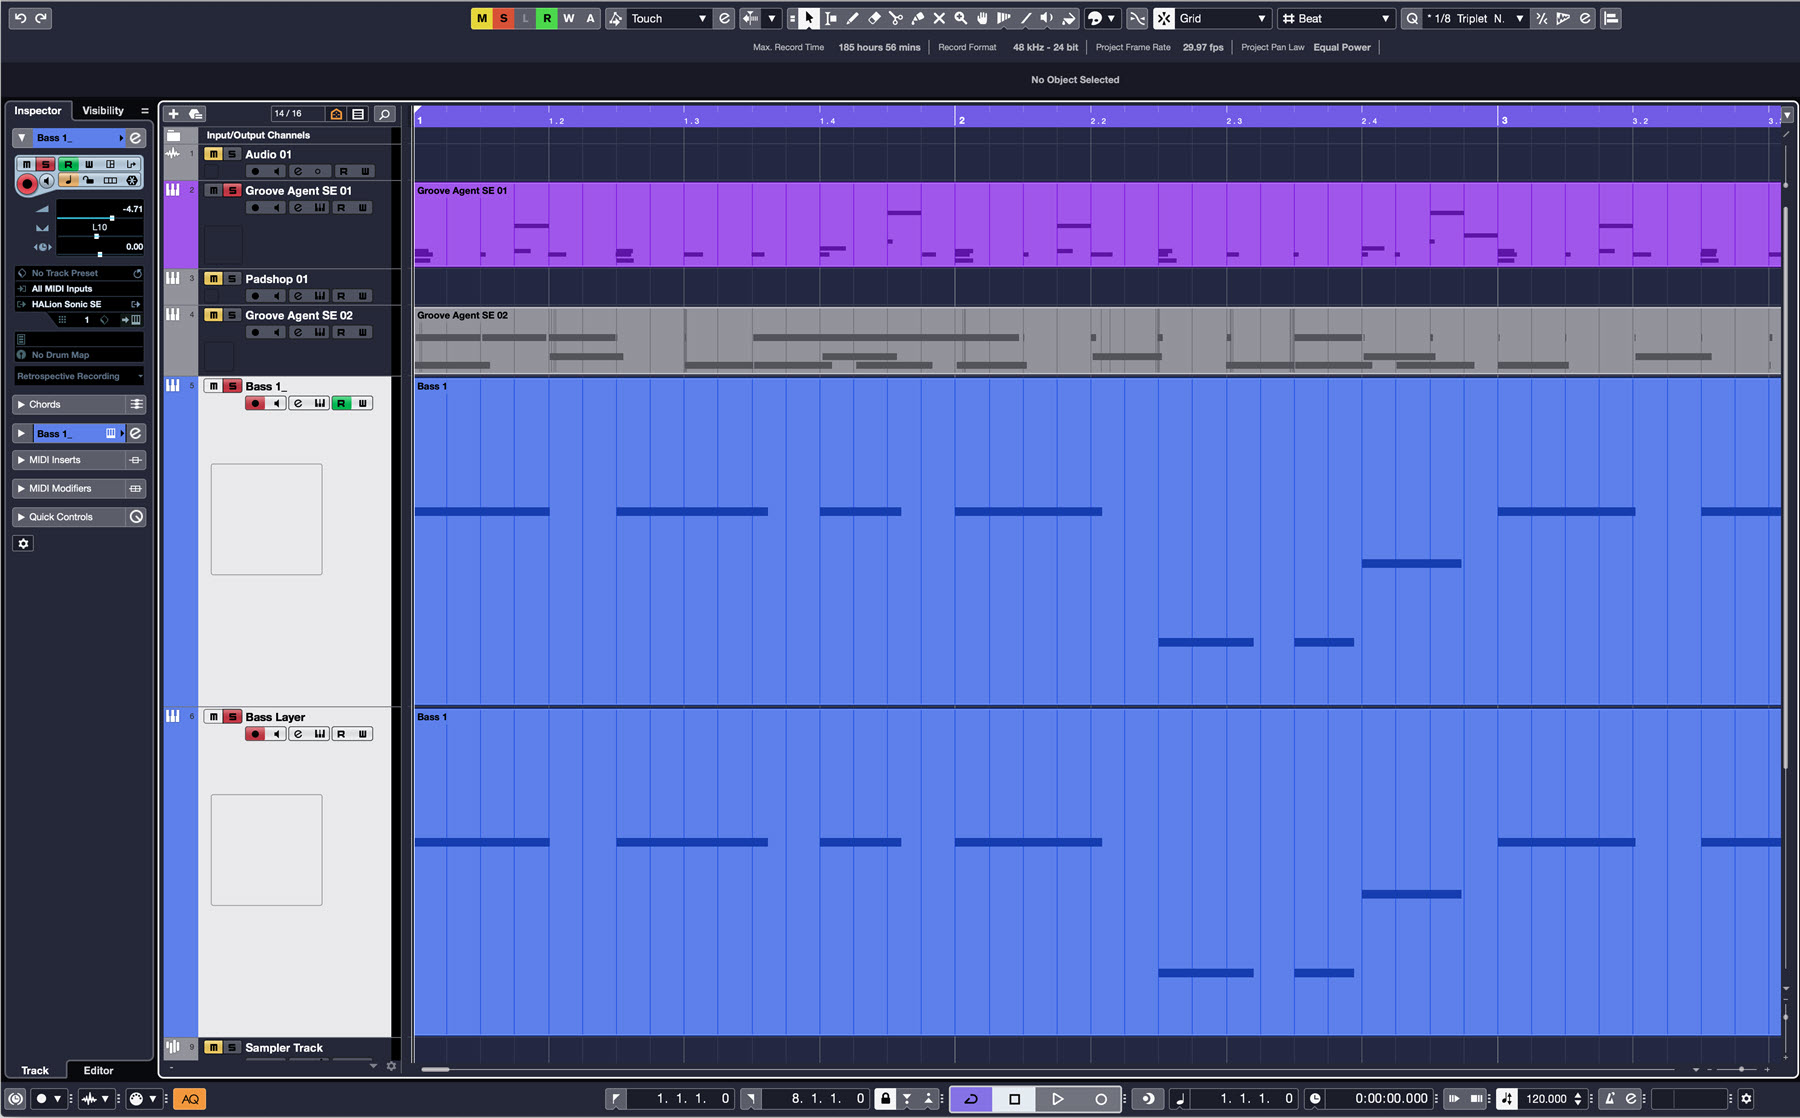
Here’s an example of layering for a synth bass sound. First, here’s a single bass sound (with the drum track as well for context) from Steinberg’s HALion Sonic SE:
And here it is, layered with another, relatively similar sound from HALion Sonic SE. I panned both parts slightly away from the center to enhance the feeling of width:
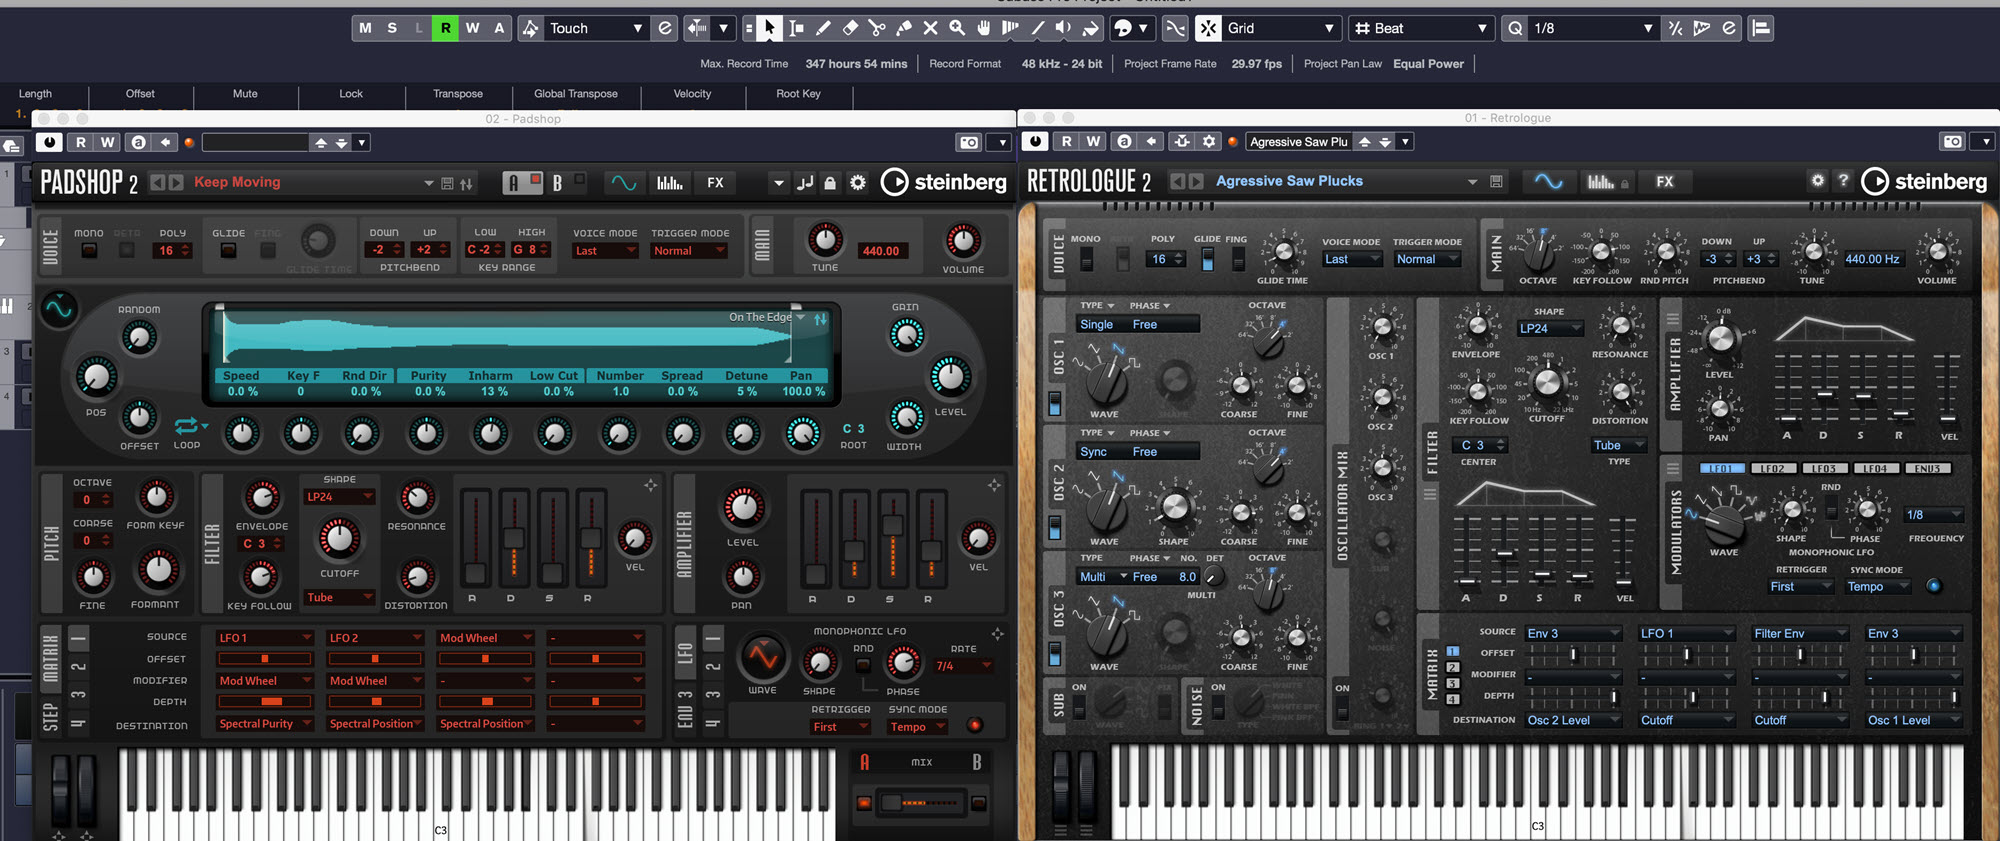
In this next example, you’ll hear how you can substantially change character sonically by using a different-sounding layer instead. First, here’s a sequenced lead sound from Steinberg’s Padshop 2 synth (provided with Cubase Pro and Cubase Artist), using a preset called Keep Moving:
And here’s the result when the track is duplicated and layered with Steinberg’s Retrologue synth (again, provided with Cubase Pro and Artist) playing a preset called Aggressive Saw Plucks:
Get Real
If you’re producing electronic music, you have the advantage of a virtually unlimited sonic palette. You’re not trying to imitate acoustic instruments, so you can go for any sound that works in the context of your music.
But if you’re trying for MIDI parts that sound like actual instruments, you want to play them as authentically as you can. For starters, it’s helpful to stay in the instrument’s actual range. For guidance, you can find plenty of instrument range charts online (try Googling “musical instrument ranges”).
Certain instruments are easier than others to emulate realistically. For example, MIDI drums can be extremely convincing, particularly if you use MIDI drum loops recorded by real drummers. (For more on drum programming, check out this Recording Basics posting.) Electric bass is another instrument that’s relatively easy to imitate with samples, especially if you keep the part as simple as is practical.
Here’s an example. You’ll hear two versions. One features a real electric bass that was recorded as an audio track. The other has a MIDI electric bass part, using a sampled bass instrument. Can you tell which is the real bass?
If you guessed the first one, you’re right. But the sounds are both authentic. The real bass is playing a simple part, so it wasn’t hard to duplicate it on a MIDI keyboard.
Articulate It
Except for keyboard parts (piano, organ etc.), many controller keyboards lack the ability to duplicate articulations that are integral to the sound of specific instruments. For example, string players use legato, staccato, tremolo and pizzicato, among other techniques. Guitarists strum chords and bend notes. Trombonists move their slides to glide between notes, and so forth. You can’t get those subtle sonic variations from just pressing a key.
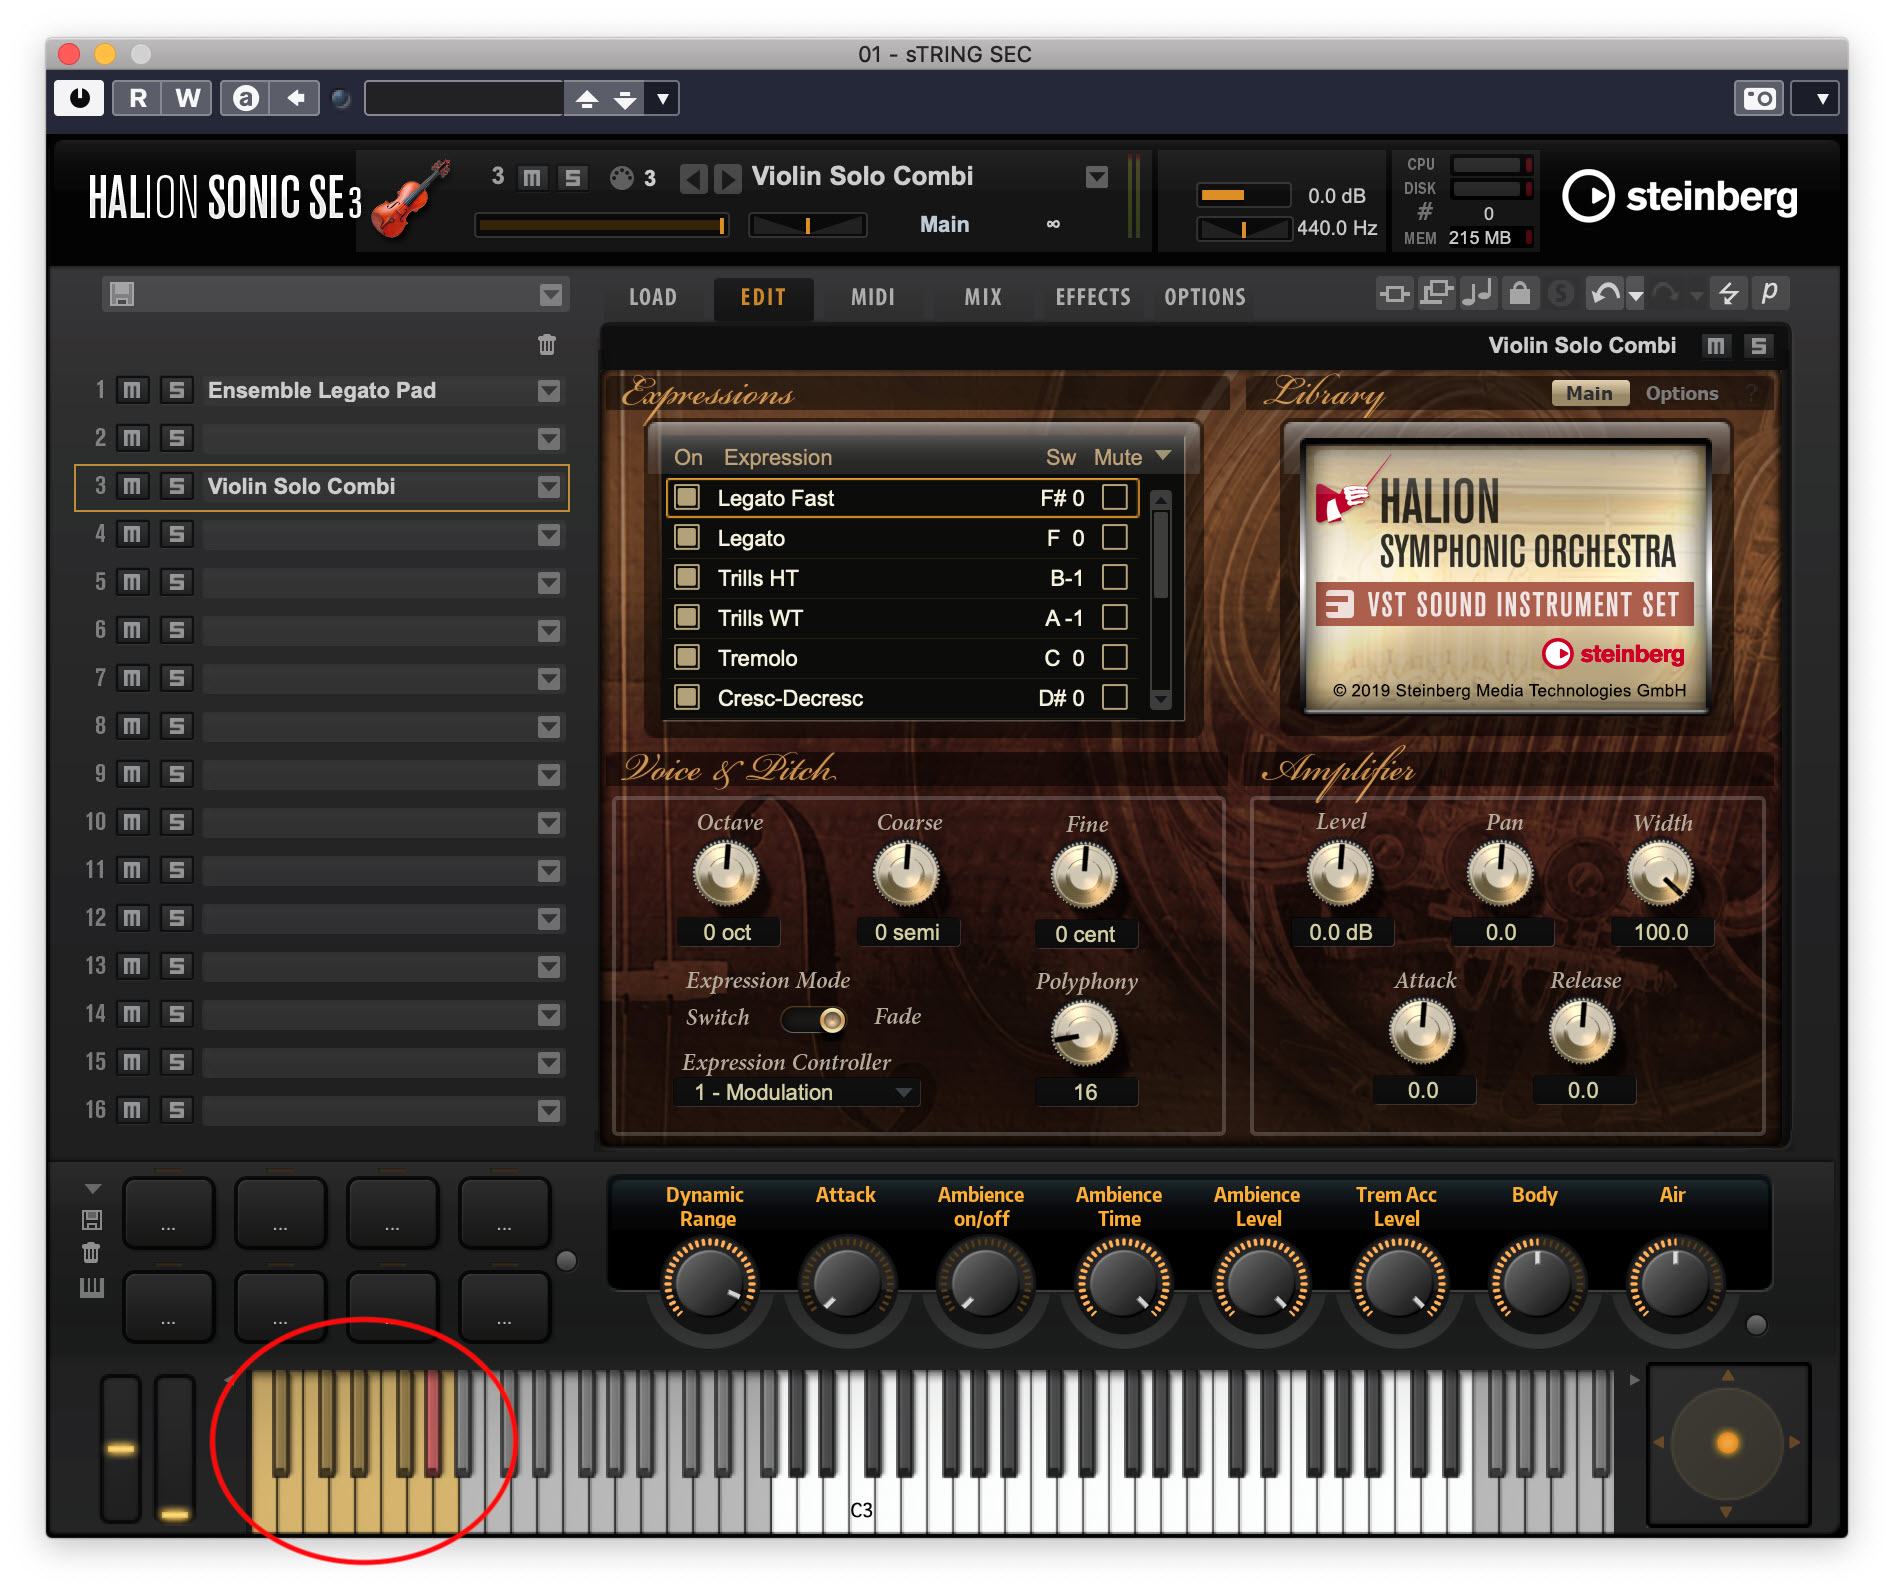
However, there is a feature called key switching that’s programmed into many sampled instruments. Here, several notes at the bottom of the keyboard (below the instrument’s range) are used as switches that allow you to select and change articulations when you press them. If you have an instrument that offers this feature, it’s worth your while to learn how to use it. And because it’s MIDI, you can trigger key switches after you’ve recorded the notes, if that makes it easier for you.
Some of the presets in HALion Sonic SE (for example, the Symphonic Orchestra shown below, part of the Absolute collection or sold separately) offer key switching, and Cubase’s Expression Maps feature gives you even more control over articulations.
Less is More
When you want to use a specific instrument in an arrangement but the MIDI version sounds inauthentic, perhaps there’s a way to adapt the part so that it’s less upfront. The more it’s featured, the more its sampled nature becomes apparent.
Be honest with yourself. If a part screams “sampled,” and you can’t scale it back to a more subtle role, take it out of the arrangement.
Another thing you can do to make MIDI instruments sound realistic is to avoid over-quantizing them. (For more information on quantization, see this blog posting.) Yes, you don’t want notes to be out of time, but if you quantize your performances 100 percent to the grid, they’ll tend to sound less like they were played by humans and more like they were programmed. In electronic music, that’s fine, but not in “organic” genres like rock, pop, country, blues, etc.
When going for realism, a helpful technique is to set the quantize controls to only move the notes that are significantly early or late and leave the closer ones alone. Many DAWs let you set a quantize percentage, which dictates how close to the grid it will move the notes. Think of this as an “intensity” setting. If it’s 100 percent, all notes will move to the grid. If it’s 50 percent, the notes will only be moved half as close.
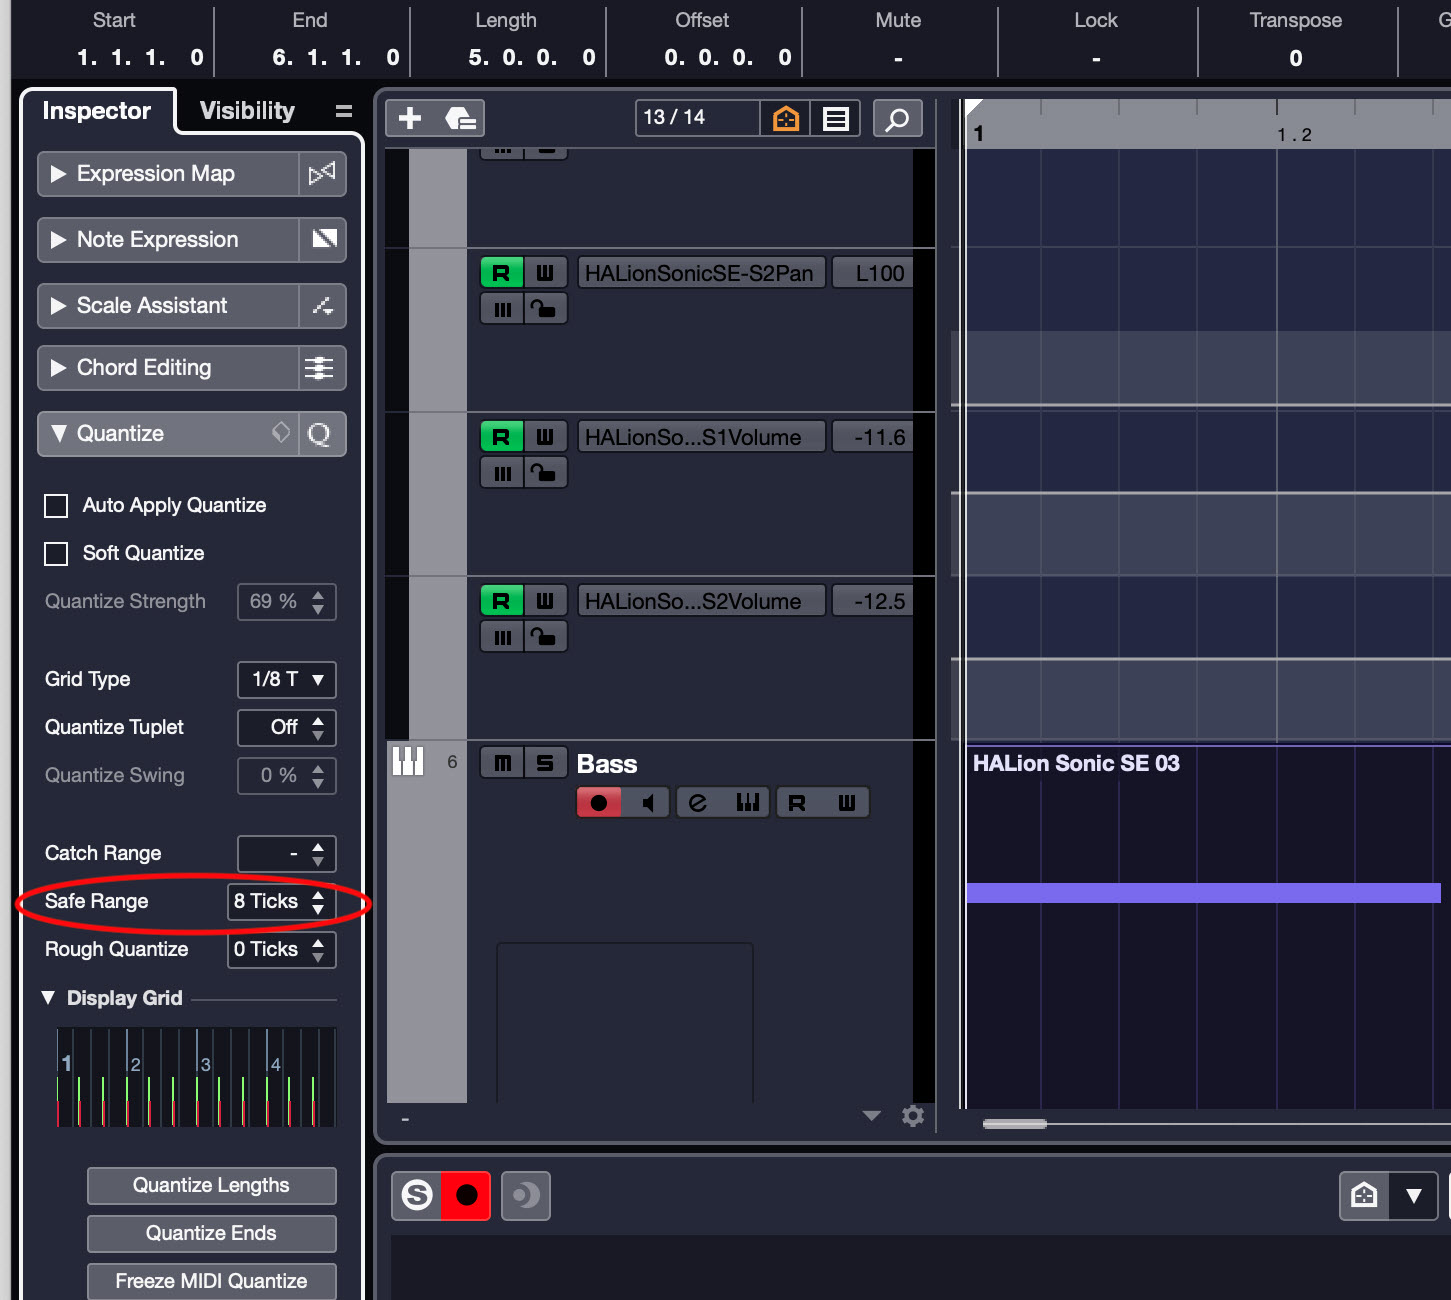
In Cubase, a feature called Safe Range lets you specify a zone defined by distance (measured in ticks) before and after a note where notes won’t be quantized. The idea here is that notes within that range are close enough to the grid to be left alone. Only notes that are outside the zone, and thus farther from the beat, will get moved.
Similarly, you don’t want to flatten out the performance dynamics by changing all the velocities to be too similar (velocity measures how hard the notes are struck, which usually translates to volume). It’s OK to bring up or down the velocities of individual notes if they’re too loud or too quiet, but avoid setting all velocities to the same level, as it will take a lot of the feeling out of the part.
Coda
Just as you can use synthesizers without knowing how to program them, you don’t need to be musically literate to arrange for MIDI instruments; however, it helps to understand basic music theory, so consider making yourself as knowledgeable in that area as possible — there are plenty of online courses and resources.
That said, there’s no substitute for experience when it comes to using MIDI instruments (or any instruments, for that matter). The more you work with them, the more facile you’ll become. If nothing else, it’s a lot of fun to press keys and hear cool sounds!
And don’t worry if your initial arranging attempts don’t live up to your expectations. Not even the most successful producers put together killer tracks when they first started out. As with anything in music, keep working on it, and you’ll see steady progress.
Check out our other Recording Basics postings.
Click here for more information about Steinberg products.


