Tagged Under:
Practical EQ Techniques
How to use equalization during recording and mixing.
Equalization (“EQ” for short) is the process of altering the tonal balance of an audio signal to improve its sound or make it fit better with other signals. There are two main ways in which EQ is used. One is to reduce or remove unwanted information by cutting selected frequencies or frequency ranges. The other is by boosting to emphasize them more.
In this article, we’ll offer some practical advice for using EQ during recording and mixing. But first, let’s talk about the various different types of equalizers and filters you’re likely to encounter.
Equalizer Types
There are three basic types of equalizers:
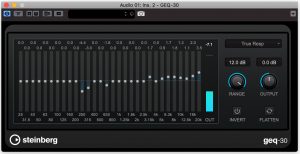
A graphic equalizer provides a number of preset frequencies, each of which can be boosted or cut with a slider, making it easy to see the tonal change you’ve made (hence the term “graphic”).
They’re easy to use but offer less control than a parametric equalizer, which lets you choose your frequencies, along with the width of the frequency range (called “Q”) and the amount of boost or attenuation. Having an adjustable Q is particularly helpful because it lets you control how wide the equalization will be on either side of the selected “center” frequency. If you need to be “surgical” with your application of EQ — in other words, if you want to affect only a narrow frequency area — set a high Q, which gives you a tighter bandwidth. If you want to process a broader range of frequencies, set a lower Q.
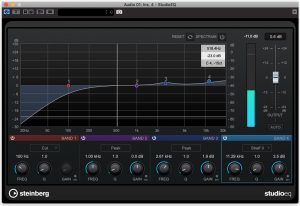
There are also semi-parametric equalizers that offer a choice of frequency and boost/cut amount, but no Q control — in other words, their bandwidths aren’t adjustable, making them less useful than fully parametric equalizers.
Filter Types
Filters are the components in equalizers that alter the frequency content of audio signals. Let’s look at some of the most common filter types.
Peak Filter. Also known as a bell filter, this has its center frequency in the middle, and falls off to either side.
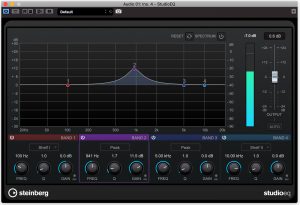
Notch Filter. These are designed for cutting or boosting extremely narrow frequency ranges, or even a single frequency. They’re rarely used in recording, although live sound engineers often use them to remove specific frequencies that are causing feedback. (For more information, see our “Tools of the Trade” blog articles on How to Fight Feedback.)
Shelving Filter. Sometimes known as a “shelf” filter, this is designed to boost or cut everything either above or below the center frequency. There are two types: high-shelf filters, which affect everything above the frequency you set; and low-shelf filters, which affect everything below it.
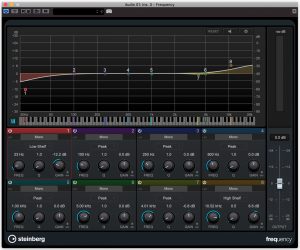
One application for a high-shelf filter would be to gently boost the high-frequency range to create a brighter, more sparkly sound — often referred to as “adding air.” Low-shelf filters are commonly used to reduce (or, in musical genres such as EDM, sometimes increase) the bass frequencies of a source such as kick drum or a low synth tone.
High-Pass and Low-Pass Filters: These filters attenuate only — they don’t boost. They are used to roll off frequencies below or above a user-selected cutoff frequency. The slope setting (also known as “Q” or “Q factor”) makes the roll-off steeper or more gradual.
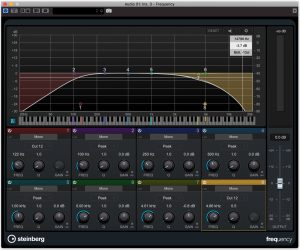
Somewhat counterintuitively, a high-pass filter is typically used to remove rumble (from mic stands or the floor) since it “passes” (lets through) audio above its frequency setting, while rolling off those frequencies below. Conversely, a low-pass filter is typically used to reduce high-frequency noise like tape hiss since it rolls off audio above the cutoff frequency setting and passes what’s below.
Another name for high-pass and low-pass filters are high-cut and low-cut filters. As if the nomenclature wasn’t confusing enough, low-cut is the equivalent of a high-pass filter, and high-cut is the same as a low-pass filter.
Keep It Gentle
It’s usually better to cut than to boost when applying EQ. That said, you will end up doing both during a typical mix. (You’d be tying your hands if you never boosted!) Just be aware that boosting adds level — you’re increasing the signal in a particular frequency area, so the overall signal will get louder. Too much of a boost can cause a track to clip and distort, so it’s best to keep it as gentle as possible. When it comes to cutting frequencies, there’s less of a downside, other than the possibility of making a track too dull (by attenuating too much top end), thin (by attenuating too much low end) or hollow (by attenuating too many mid frequencies).
Hearing is Believing
Many of today’s EQ plug-ins offer excellent visual feedback that shows you graphically what the frequency content of your track is. For example, Steinberg frequency (included with Steinberg Cubase) offers a real-time analyzer that shows you the levels of the various frequencies as the song plays. Such displays can be super helpful in deciding where to apply a boost or cut.
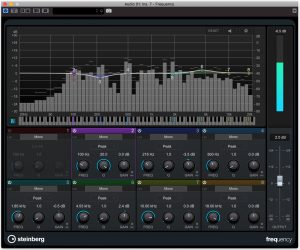
That said, don’t merely go by visual indicators — make sure to listen as well! After all, EQ is an audio process, and so you should evaluate its effects audibly. For a final check, consider closing your eyes while listening, so you’re not distracted by the visuals.
Sweeping it Up
If you’re having trouble figuring out a problem frequency on a track (as would occur if you’re trying to reduce resonance or sibilance, for example), a useful way to find it is with a method referred to as “sweeping.” Use a bell filter with a high Q (narrow bandwidth) and temporarily push the gain up high.
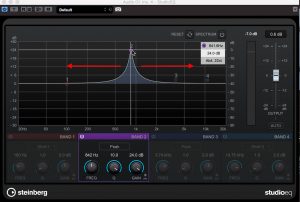
Next, slowly move the frequency knob across the spectrum until you hear the problem become exaggerated. At that point, you’ve found the troublesome frequency and can change the boost to a cut to see if it fixes the problem.
Making it Clear
Many recording and mix engineers use high-pass (or “low-cut”) filters to remove unneeded frequency information from below the effective or desired range of both instrument and vocal tracks. If you don’t high-pass at least some of your tracks, you may get a build-up of low frequencies that will detract from the clarity of your mix.
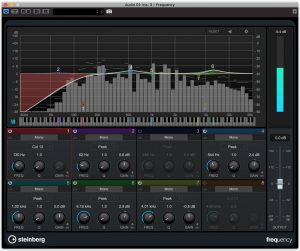
Here’s an easy way to figure out what frequency setting to use when doing this. Slowly raise the high-pass filter’s frequency knob as you’re listening to the track in solo. When you hear the audio start to thin out, back it off to just before that point. Then take the track out of solo and double-check your setting with the full mix. You can experiment with various Slope or Q settings to see which sounds best; the gentler the slope, the more gradual the roll-off.
No Magic Bullet
EQ can solve a wide range of problems, but it’s no magic bullet. If one of your tracks was poorly recorded, and EQ is not helping, the best — and, believe it or not, often the fastest — remedy is to re-record it, if possible. When you do, try to eliminate whatever the problematic factor was, whether it was mic placement, an inferior instrument or a bad performance.
Check out our other Recording Basics postings.
Click here for more information about Steinberg Cubase.


