How to Fight Feedback, Part 1
One of the biggest challenges in live sound is dealing with that pesky, always unwanted gremlin called feedback. In this two-part series we’ll talk about what causes feedback and describe ways to eliminate it. Let’s start by talking about the importance of speaker placement, microphone pickup patterns, and mic technique.
Feedback happens when sound from a speaker reaches a microphone (or guitar pickup), where it is re-amplified and sent to the speaker again, resulting in an uncontrollable “loop.” (There is also electronic feedback, but that’s another discussion.) It usually takes the form of either a low-frequency howl or a high-frequency screech, neither of which is much fun to listen to! You’ve probably heard a form of feedback when a guitar player deliberately (or sometimes accidentally) faces their guitar toward their amp, causing a squeal to occur. Sometimes feedback occurs sporadically — for example, when a vocalist roams around the stage casually holding their microphone and it briefly picks up sound from the speakers — but most of the time it’s a constant annoyance, making it imperative that the live sound engineer deal with it immediately lest the performer (and/or the crowd) grow hostile.
Speaker Placement
The most important way to avoid (or at least minimize) feedback is to make sure that speakers are placed in front of the microphones. If they are behind the mics, then you’re actually inviting feedback because the speakers will aim sound right at the microphones, which will send the signal through the system again. Main PA speakers (“house” speakers) such as the Yamaha S112V are designed specifically to direct sound toward the audience, so as long as they are aimed at the audience and away from the microphones, the possibility of feedback is greatly reduced.
In addition, the more distance you can put between the microphones and the PA speakers, the louder the PA can operate without feedback. That’s why PA speakers should ideally be placed at the front edge of the stage, at least four or five feet in front of the performers and as close to the audience as is practical:

If you’re not sure whether your PA speakers are placed far enough in front of the microphones, try this: Have a friend speak into a microphone while you slowly raise its volume in the PA. If you can make the microphone sufficiently loud to be heard throughout the room without feeding back, you’re in pretty good shape. If you start to hear feedback, then you probably need to reposition either the microphone or the speakers. If you still can’t get the microphone volume loud enough following repositioning, then you may also need to use EQ. We’ll talk more about that in Part 2.
If you’re using stage monitors, feedback can be even more problematic because the monitors are relatively close to the performers and are often pointing directly at the microphones. Like PA speakers, stage monitors should never face directly toward a reflective surface such as glass or mirrors.
Microphone Pickup Patterns
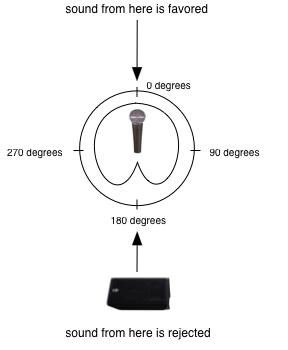
Most vocal microphones used in live sound are directional, meaning that they pick up sound coming from a certain direction and reject sound coming from other directions. For example, a type of mic called a cardioid favors sound from the front. As a sound source moves around the side of a cardioid microphone, sound is gradually rejected until the mic rejects most of the sound directly behind it, as shown in the illustration below. This is known as the mic’s pickup pattern.

When you graph out a microphone’s pickup pattern, you can see its polar response. In the case of a cardioid microphone, the polar response resembles an upside-down heart (thus the name “cardioid”):

Keep in mind that every mic responds in three dimensions, although they rarely are able to capture much sound coming from above or below. A cardioid microphone will capture sound strongest from directly in front, at “0 degrees.” It will reject sound most effectively from behind, at “180 degrees.” Most microphone manufacturers provide this documentation on their websites.
The illustration below shows the best location for an onstage monitor such as the Yamaha SM10V when a performer is using a cardioid microphone:
Cardioid is not the only popular pickup pattern used for vocal microphones. A pattern called supercardioid provides better rejection of sound from the sides, but has a small “lobe” of pickup directly behind it. The points of maximum rejection are at approximately 120 and 240 degrees, as shown below:

This is important because if you face a monitor toward the rear of a supercardioid microphone, it is likely to feed back due to that little lobe. It would be better to place a monitor at 120 and/or 240 degrees, where a supercardioid microphone rejects sound more effectively:

The hypercardioid pattern is similar to supercardioid but with a few differences. Hypercardioid rejects a little better on the sides but has a larger pickup area in the rear. Also, the points of maximum rejection for a hypercardioid mic are around 105 and 255 degrees.
Mic Technique
Equally important to placement of speakers and the microphone pickup pattern is proper mic technique — something that many performers unfortunately take for granted. First and foremost, when using vocal microphones, the singer’s mouth should be very close to, and directly in front of, the microphone grille — a position known as “on-axis.” Being on-axis helps make a performer’s voice louder than any surrounding noise, which is especially important when they are singing or speaking softly because that’s when you’ll need to turn up the microphone level. We want to make the voice louder, not the background noise. Encourage the singer to keep the mic centered in front of their mouth during the entire performance in order to ensure consistent levels, and stress to all the performers beforehand that they should never point the front of a microphone directly at any speaker.
Here’s a photo that shows the proper way to hold a vocal microphone:

Notice that the hand is not covering any part of the grille. This is really important because if you cover portions of the grille on a directional microphone, then the mic will actually become omnidirectional, meaning it will pick up sound equally from all directions — and that usually results in feedback occurring at much lower levels.
In contrast, here’s how not to hold a microphone:

Cupping your hand over the front of the mic will also produce feedback because a hand is actually a pretty good reflector for sound.
Click here for Part 2, where we look at the concept of “ringing out” a sound system and describe how to use EQ to eliminate feedback.
Photographs courtesy of the author.
Check out our other Tools of the Trade postings.
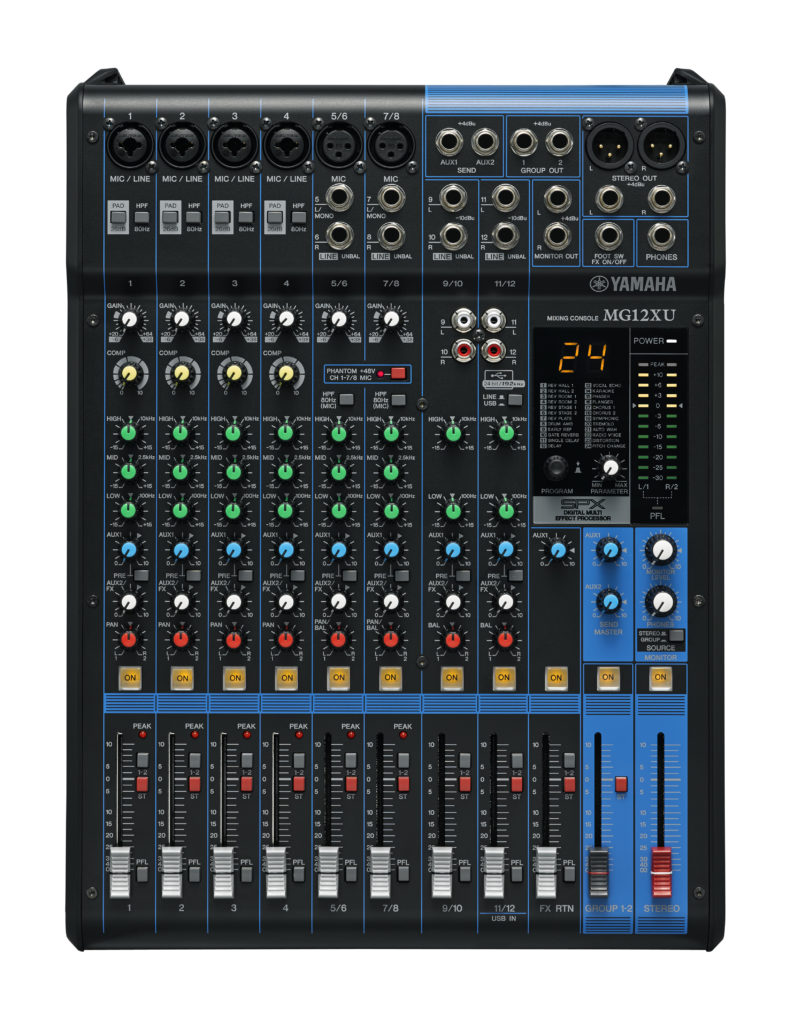
Click here for more information about Yamaha PA speakers and stage monitors.
Keep reading