Understanding and Using Reverb
Producers and recording engineers commonly add some degree of reverb to pretty much every song they work on. That’s because reverb provides a sense of space, giving instruments and voices more dimension and life. It can make anything sound as if it was recorded in a big concert hall, the live room of a famous studio, a club or almost any other type of space … even if it was actually captured two inches in front of a microphone in a tiny bedroom.
In this article, we’ll talk about the various kinds of reverb plug-ins available, and the ways you can use them during recording and mixing. (For information on how to use reverb in live sound, check out this blog post.)
Which is Which?
Reverb plug-ins are based on either algorithmic or convolution technology (or sometimes a combination of both). Algorithmic reverbs such as Steinberg REVelation or roomworksSE (both included with Cubase) use mathematical formulas to emulate various real acoustic spaces, such as rooms, halls, plates, and so forth. Even though they’re digital models of reality, they can be quite accurate.
Convolution reverbs use samples of actual spaces — called “Impulse Responses” (or IRs for short) — as the basis for their sounds. For example, REVerence, one of the reverb plug-ins included with Cubase Pro, offers sampled acoustics from recording studios, concert halls, cathedrals, tunnels and gymnasiums, among other places.
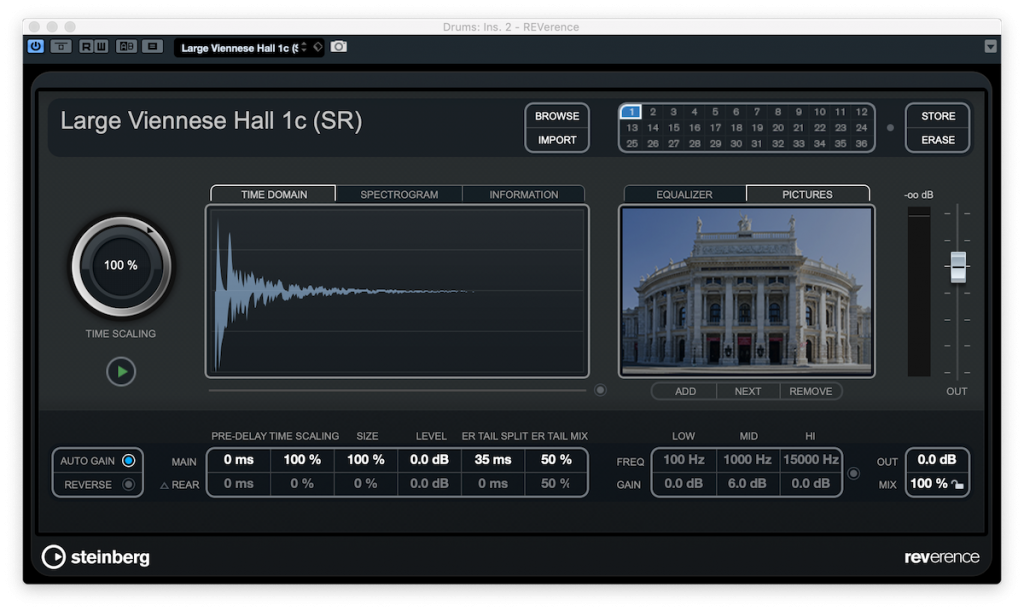
Although convolution reverbs sample real spaces, that doesn’t necessarily make them better overall. Algorithmic reverbs typically have more adjustable parameters, providing superior control and customization. They’re also more CPU-efficient, as compared to convolution plug-ins.
Configurations
Whichever type of reverb you use, the best way to apply it is as a “send effect,” using an auxiliary (“aux”) send-and-return configuration. Such a setup is usually preferable to using it as an “insert effect” — that is, inserting it directly on the source track. (For more information about aux sends and returns, check out this blog post.) There are two reasons why. First, you can send the signal to one reverb plug-in from multiple channels in your mix simultaneously, which allows you to use fewer plug-ins overall and save on CPU overhead. The second is that you can further customize the sound with other processing plug-ins inserted after the reverb. (More about this shortly.)
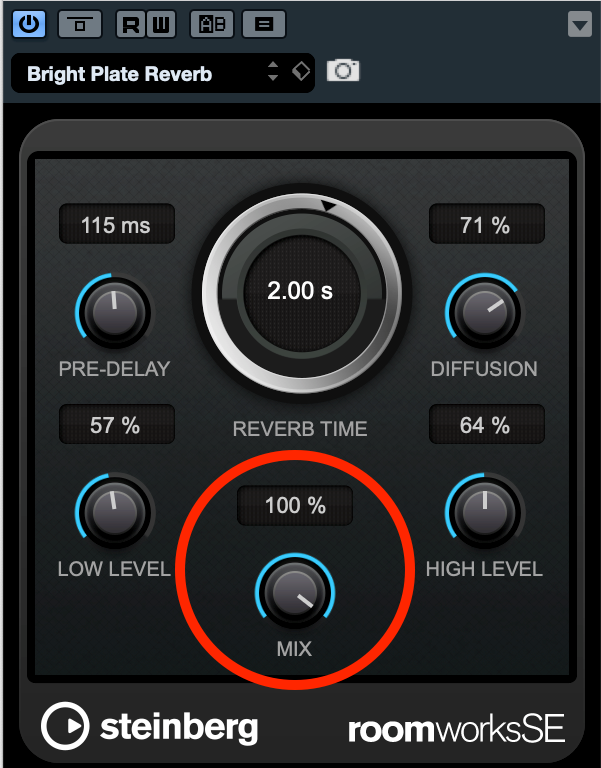
One note of caution: Whenever using an aux send to feed signal to a reverb plug-in, be sure to set the plug-in’s mix control (sometimes called “wet/dry”) to 100%. Otherwise, when you turn up the send, the reverb will output some dry (unprocessed) signal along with the wet (processed) signal, which can potentially cause phase issues since dry signal is already coming from the source track.
Spaces
When mixing, you’ll generally want to add some reverb to several tracks, unless they were recorded with enough natural ambience that it’s not necessary. How much you apply and the type of space(s) you select is an artistic choice.
For example, if you wanted to make a vocal sound like it was recorded at a live concert, you would probably want to choose a reverb based on a hall or some other large space. If you were trying to add some additional ambience to an instrument, you might want to instead go for a smaller virtual space such as a room, chamber or short plate.
Plate reverbs, in case you’re wondering, were analog devices typically found in recording studios that featured large metal plates that vibrated as audio passed through them, creating a reverberant sound that was then captured by an internally mounted microphone, with its signal then routed to the console.
Chamber reverbs simulate reverbs created in echo chambers, which were highly reverberant rooms (usually with tiled walls and/or floors, like bathrooms). The sound of an instrument or voice was pumped into the room through speakers and then picked up with a series of mics, with the resultant signal routed back to the console to be mixed in with the original sound source.
Plug-in recreations of plates and chambers often sound quite good. Plates are particularly versatile.
Falling into Decay
A reverb signal has two main sections: the early reflections and the tail. The former is the first part of the reverb signal. It reproduces the initial part of the sound being processed and is louder than the tail, which is the sustaining and fading part of the signal.
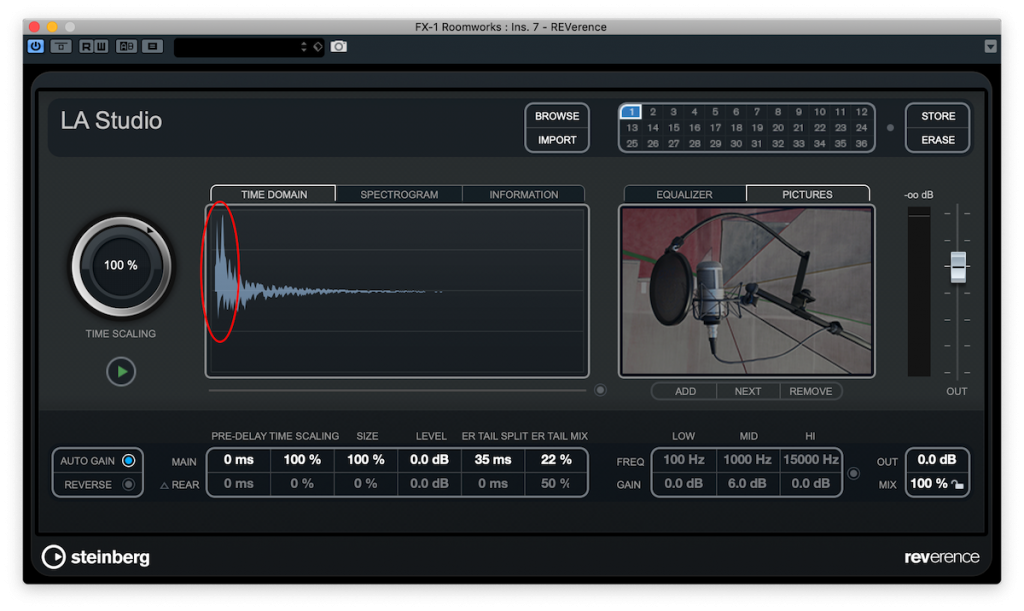
The length of the entire reverb signal is a critical variable, and is often expressed as decay time, though it is also sometimes called reverb time or RT60. Some plug-ins offer an adjustable size (or “room size”) control that determines the length of the decay.
Be careful when using a reverb with a long decay time on an up-tempo song. The faster the tempo, the more quickly the next line or phrase comes around, and you generally don’t want the reverb tail hanging over it, since that can make your mix sound muddy and indistinct. On songs with slow tempos, you have more leeway to use longer decay times.
An easy way to check if the reverb is hanging over is to solo the vocal (or another track you’ve put the reverb on) and listen to whether it ends before the next line comes in. If not, try shortening the decay time.
In Advance
Another important reverb parameter is pre-delay, which is usually expressed in milliseconds. As the name implies, this adds a delay before the reverb starts.
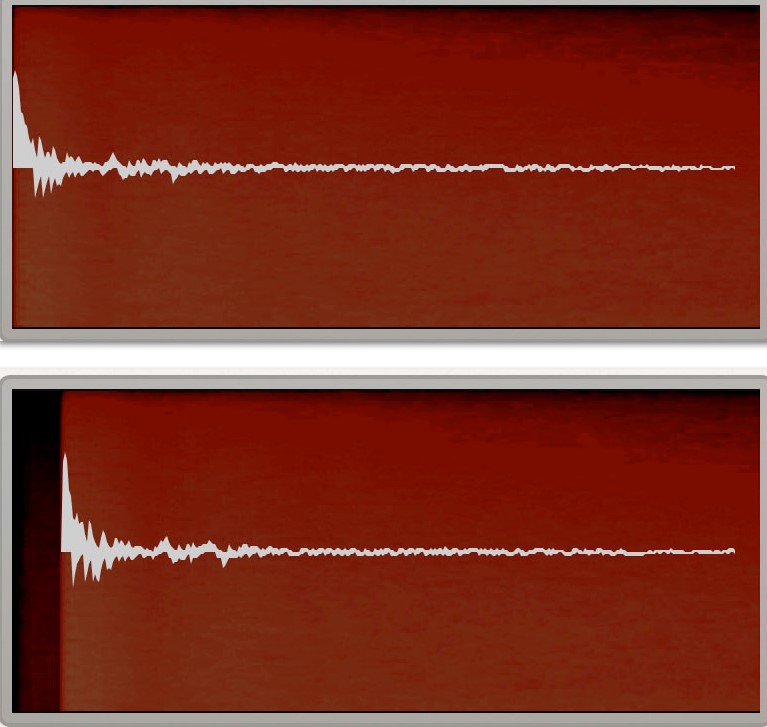
You’ll find that a short pre-delay (less than 30ms or so, depending on the song) often helps a reverb sit better in the mix. Without it, the reverb will start the instant the audio hits it, which can sound unnatural. If you set the pre-delay too high, however, you’ll hear a distinct space before the reverb begins. Unless you’re going for a rhythmic effect (where the reverb is timed to come in on a beat), that probably won’t sound very good.
Extra Goodies
Most reverbs have EQ controls of some type. It’s often helpful to attenuate (cut) some frequencies of the reverberated signal, particularly in the low end. Doing so can help avoid cluttering the mix with the low frequencies in the reverb tails, which generally can be reduced without damaging the overall tone. If you want more equalization options than your reverb plug-in provides, you can always insert an EQ plug-in after the reverb.
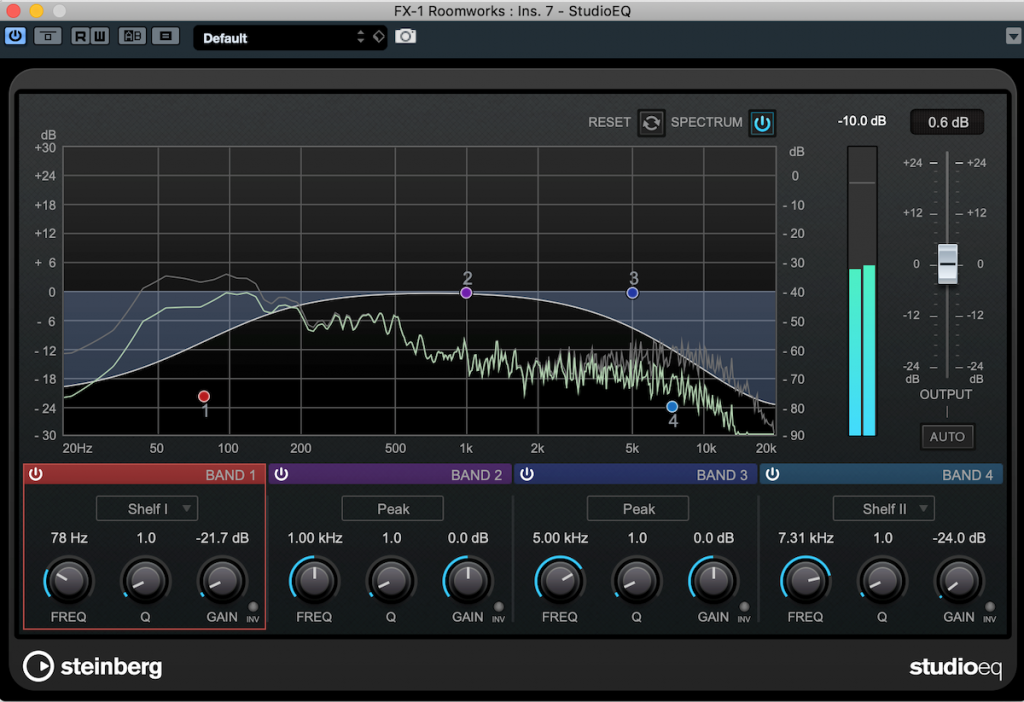
When it comes to processing reverb, you’re not limited to EQ, either. If you place a compressor after a reverb, for example, it will squash down the reverberated signal and change its sound — sometimes quite significantly. Similarly, saturation after reverb can add a cool graininess. If you’re going for a rhythmic effect, a dedicated delay plug-in can substitute for the pre-delay and give you more control, including locking it to the song’s tempo.
Bear in mind that, as mentioned in our blog posting The Virtual Soundstage, ambient effects like reverb make a sound recede towards the back of the mix, so factor that in when you’re deciding how much of it to put on a vocal or lead instrument. In general, it’s usually best to be understated with reverb. If all your tracks are dripping in it, it can take away the punch and clarity of your mix. That said, almost every song can benefit from some judicious application of reverb. Experimentation, as always, is key!
Check out our other Recording Basics postings.
Click here for more information about Steinberg Cubase.


