Tagged Under:
Simple Stereo Miking Techniques
Here’s how to get phase-coherent recordings with two microphones.
In multitrack recording projects, instruments are usually miked in mono — that is, with a single microphone. However, in certain situations, you’ll get better-sounding results if you use two mics to capture the sound in stereo. These scenarios include:
- Recording acoustic piano
- Recording an acoustic guitar that’s the main instrument in an arrangement
- A live recording of an entire ensemble or an instrument section like strings or horns
- Drum kit overheads
- Room mics
But recording a source in stereo takes more than just setting up two mics and hitting record. Here’s what you need to know, including some simple stereo miking techniques that are easy to set up yet yield excellent results.
First, Choose the Right Microphones
The main gear requirement here is a a pair of microphones, or a dedicated stereo mic, which will make setup easier. The downside to the latter is that many stereo microphones only feature a single miking configuration, whereas using two separate mics gives you more options.
If you go with a pair of mics, make sure they’re the same make and model. Otherwise, you won’t get a frequency-balanced signal on the left and right. That said, there’s no rule that you can’t use different mics; it’s possible you might like the results.
You’ll get the best results for many instruments with a pair of small-diaphragm condenser microphones (sometimes called ( “pencil” mics) set in a cardioid polar pattern, though omni also works in some situations. Use a factory-matched pair if you want the same exact response from each mic. Don’t get too hung up on that, however, as you can also get good results with an unmatched pair of the same microphone.
Another useful, though not strictly essential piece of gear is a stereo bar. It’s a small holder that screws onto a microphone stand. One type, shown in the photo below, contains two posts, each on a swiveling arm. This allows you to connect a pair of mics and adjust their distance from each other and their angle to the source, making positioning easy. Another type contains a single, non-swiveling bar with adjustable posts to configure the side-to-side position of the microphones.
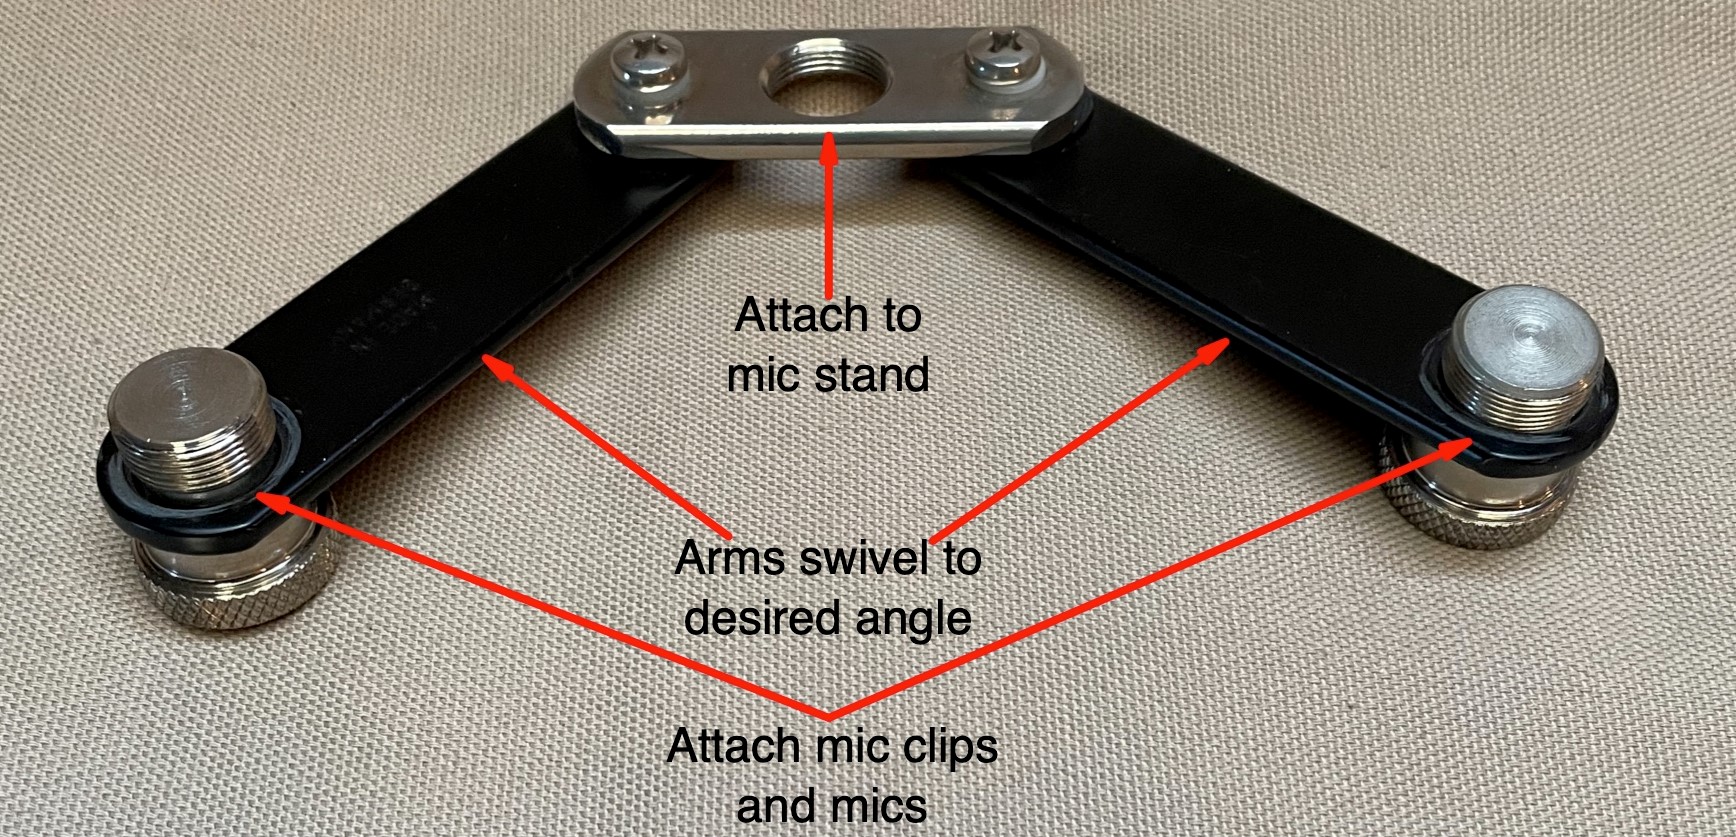
If you don’t have a stereo bar, you can simply use two mic stands, one for each mic.
Next, Consider the Source
When deciding whether or not to record an instrument in stereo, think about the source. Does its sound emanate mainly from a single point, such as a voice or a trumpet? If so, you’ll probably be fine miking it in mono. But if it’s spread out, like a piano, vibraphone, or even an acoustic guitar, it can sound much better in stereo.
The context is also crucial. If it’s a solo or heavily featured instrument such as an acoustic guitar on a singer/songwriter ballad or a piano on a piano/vocal demo, you’d be more likely to record it in stereo so that it can fill up the stereo spectrum in the mix. But if it’s, say, an acoustic rhythm guitar in a dense arrangement — a situation where you don’t want it to be overly wide — mono miking is a better choice.
Phase becomes a consideration whenever two or more mics record the same source. That’s because the sound waves from the source will arrive at each mic at a slightly different time. If your mix gets summed to mono, those differences in arrival times cause a phenomenon called comb filtering, which can cause some of the frequencies to cancel each other out, resulting in thin or dull-sounding audio.
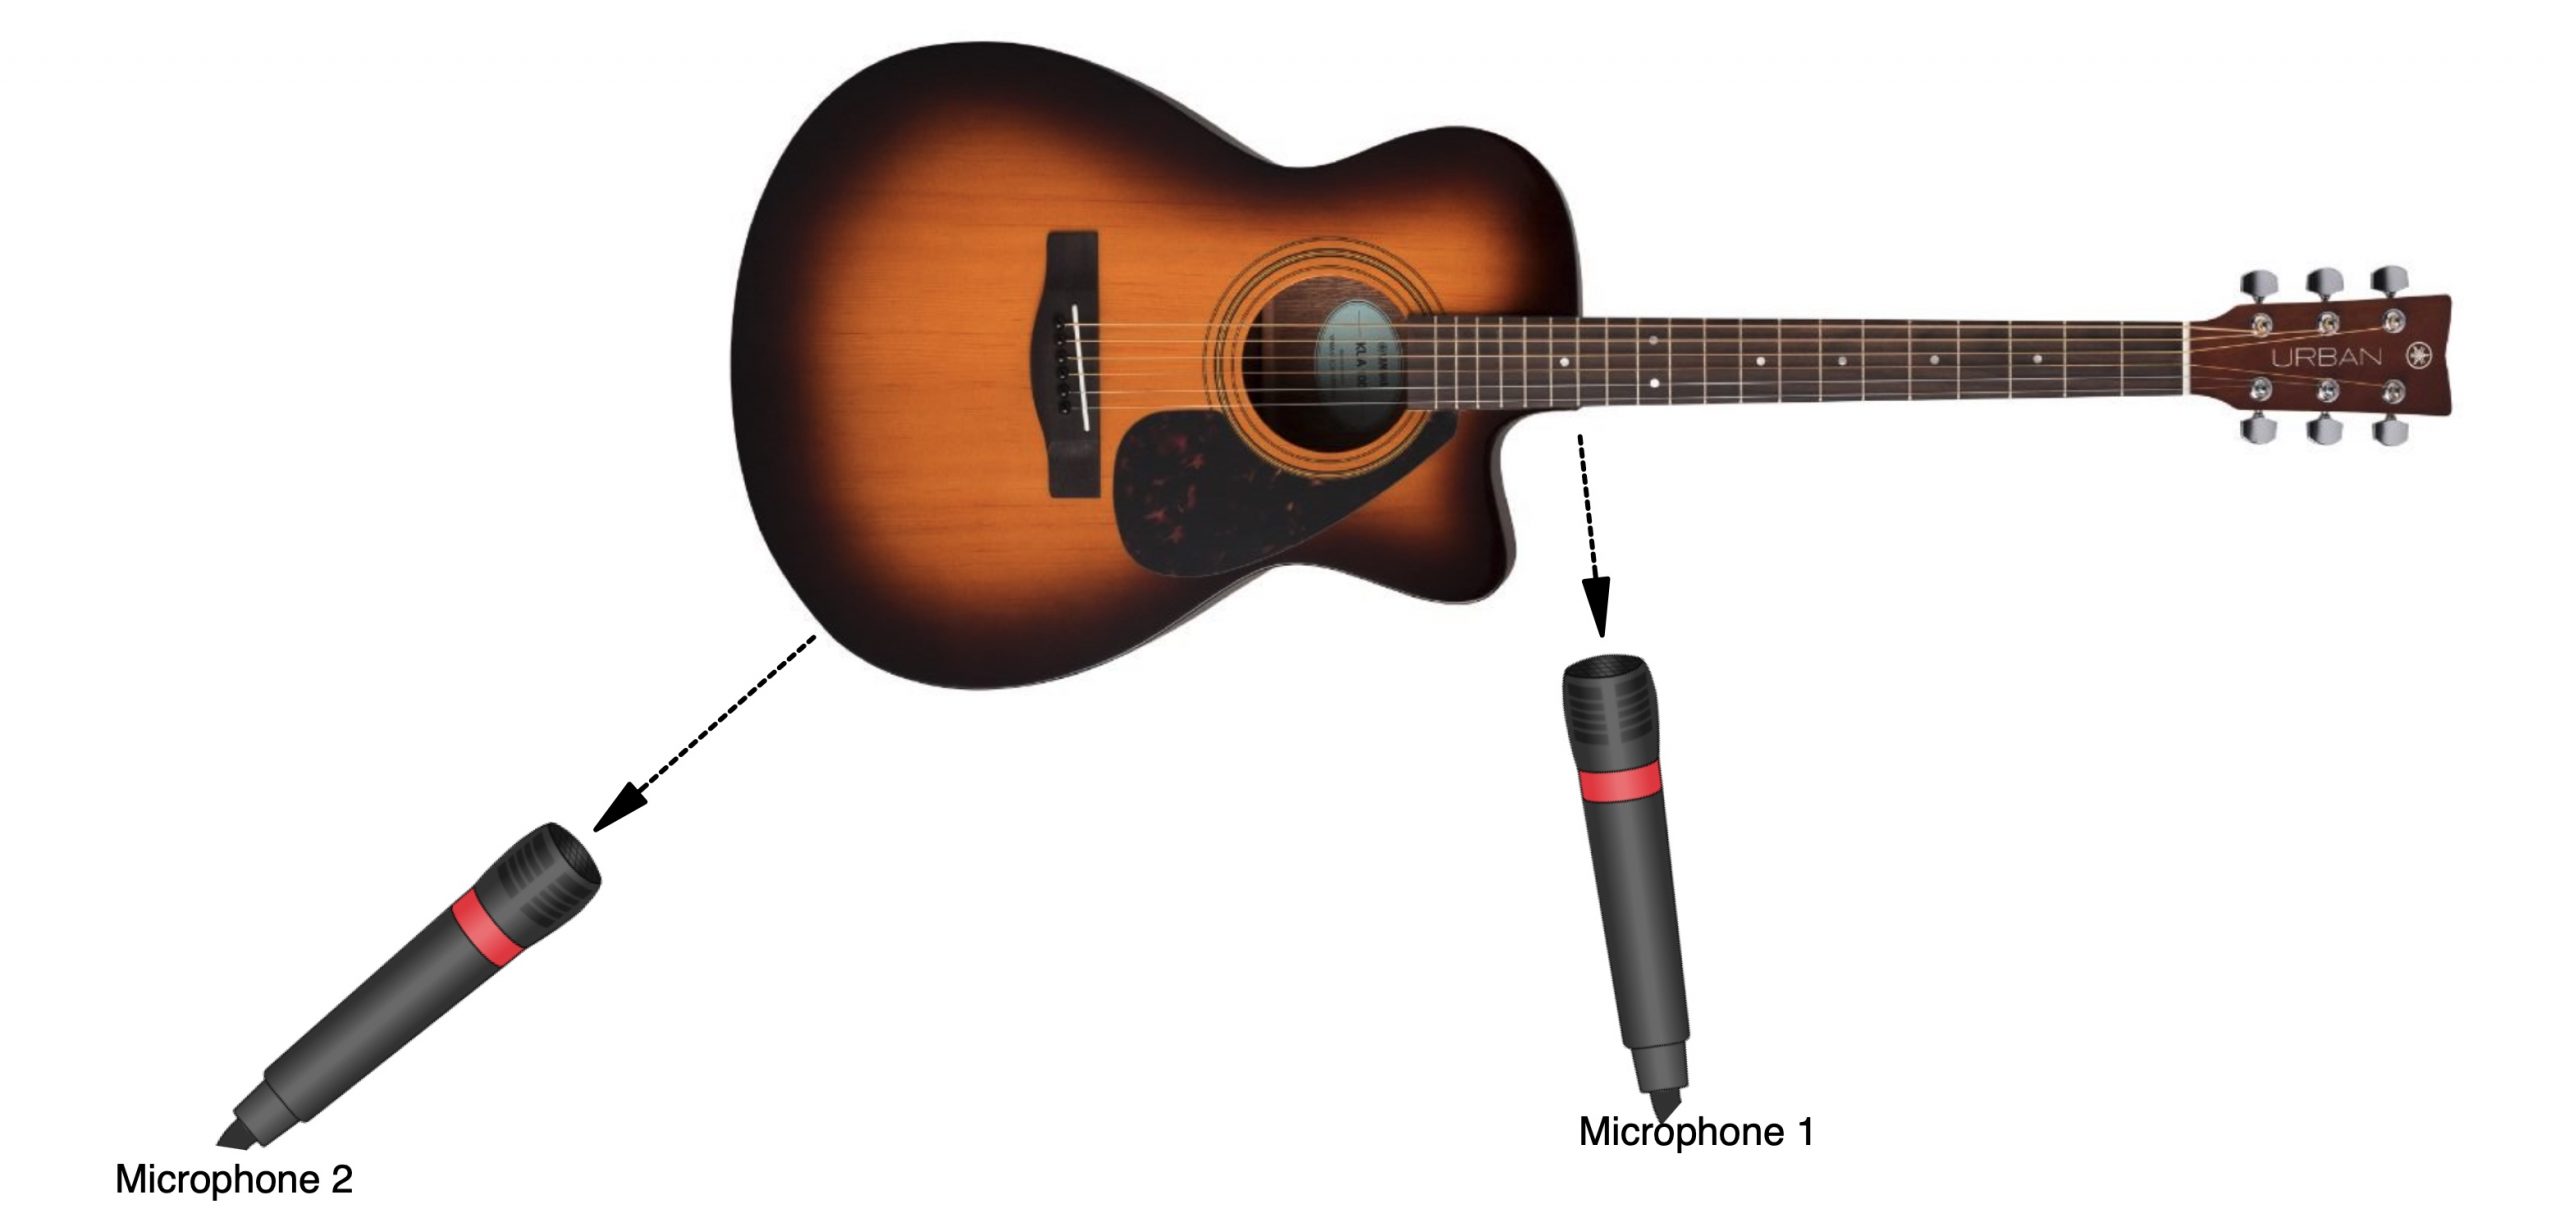
XY
Stereo recording has been around for a long time (it was first invented in the 1930s), so audio engineers have had many years to perfect miking methods that allow you to record in stereo without creating phase problems. Each method has its strengths and weaknesses, so it’s good to know several techniques — that way, you can choose the one that’s right for your project.
The simplest stereo-miking technique is called XY. It requires two cardioid mics with their capsules at a 90-degree angle to each other, stacked one over the other, like this:
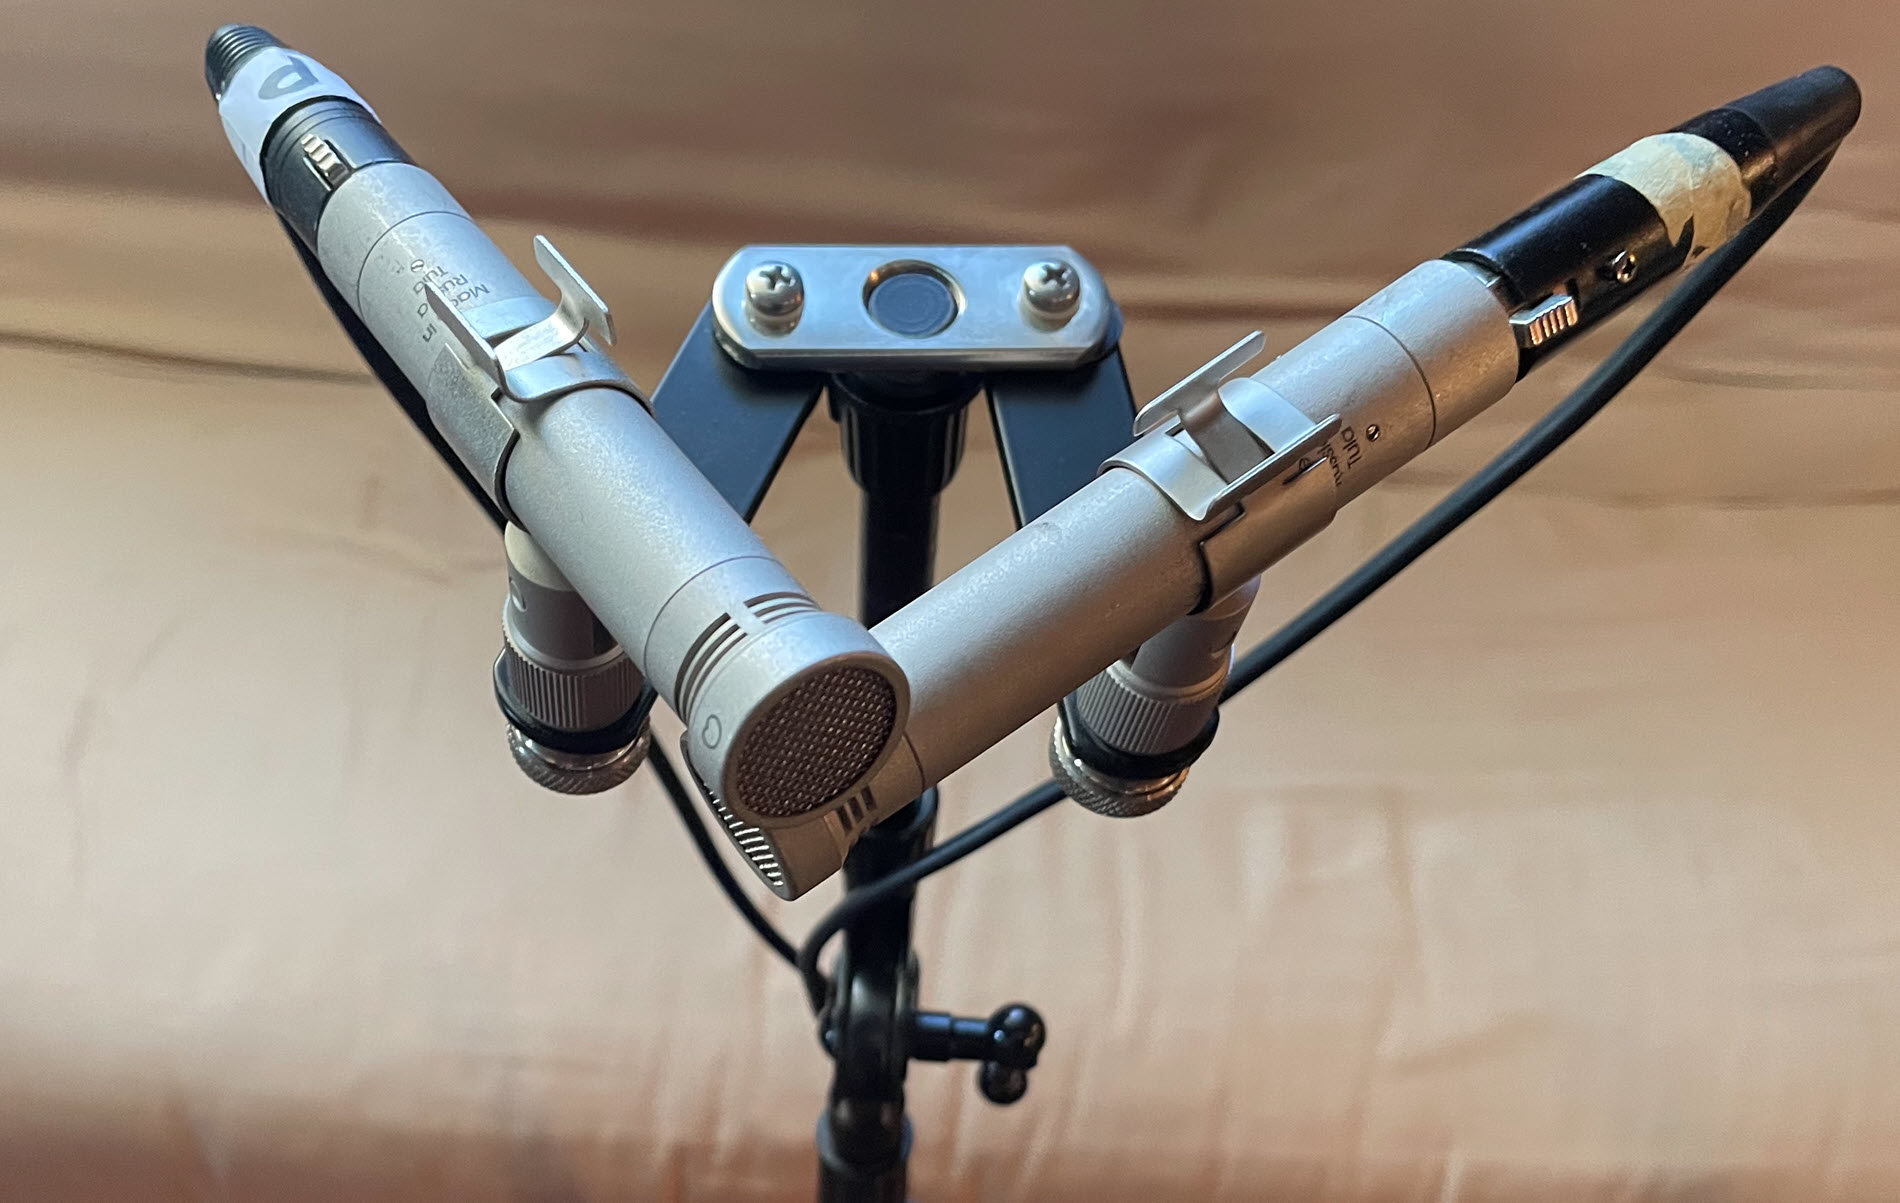
Point the closed part of the “v” at the source. How far back you position the mics depends on the instrument, the room and what you’re trying to accomplish. The further the mics are from the source, the more it will start evening out tonally, but you’ll also get a lot of room sound (reflected sound coming from the walls, floor and ceiling, as opposed to direct sound coming from the source).
XY provides a tight stereo image free of phase issues when summed to mono. You can gain a more expansive sound by moving the mics outward beyond 90 degrees (but still with the capsules stacked on top of one another), though you might sacrifice a little tonality when their signals are summed to mono.
Here are two audio clips of an acoustic guitar recorded with an XY pair. First, here it is in stereo.
… and here’s the same recording summed to mono. As you can hear, the frequency response holds up pretty well.
ORTF
Another relatively easy-to-use stereo configuration is ORTF (which stands for Office de Radiodiffusion Télévision Française) — a technique that was developed by French broadcast engineers. Instead of the capsules being together like with XY, they’re spaced apart by 17 cm (approximately 6.7 inches), with the microphones at a 110-degree angle to each other:
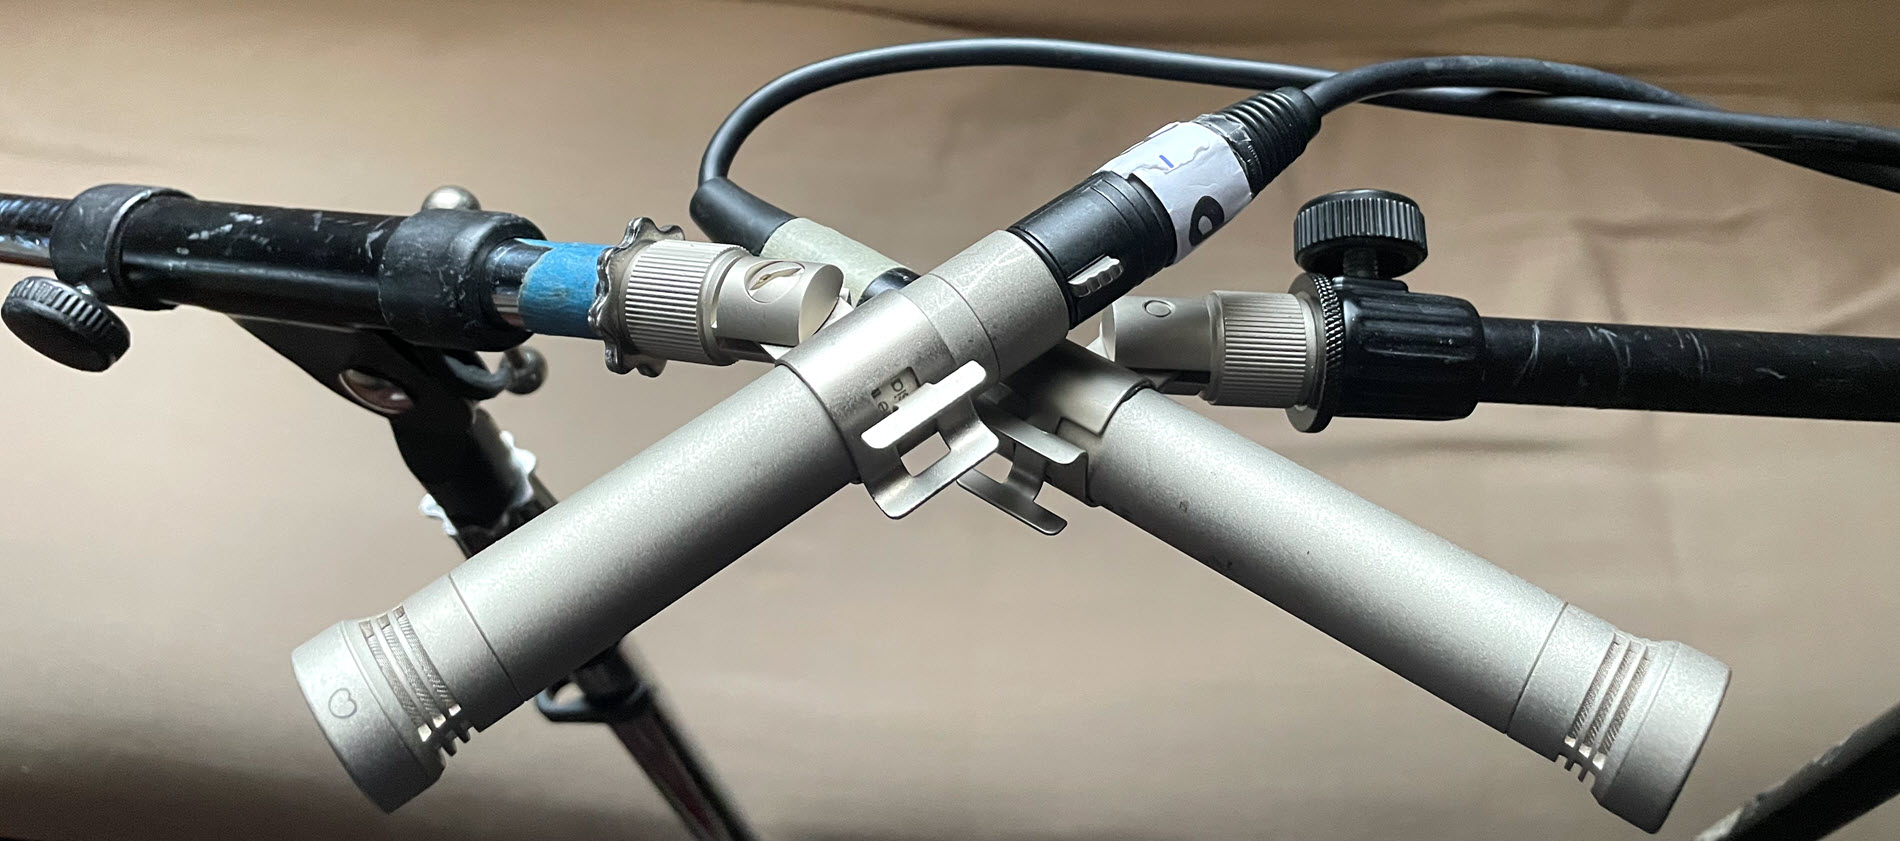
ORTF works particularly well when you’re miking an ensemble or vocal group. It gives you a wider image than XY, with more emphasis on the sides and less on the center.
Here’s an audio clip of an acoustic guitar recorded with ORTF. Because this technique requires that the mics point in the opposite direction, the body side of the guitar recorded a little louder than the neck side, so when mixing I panned its channel slightly left in order to balance out the energy in the stereo image.
Spaced Pair
Another basic stereo miking technique is called spaced pair (sometimes known as “AB”). It yields a pretty extensive stereo image, although it’s a little harder to avoid phase issues when summed to mono.
The photograph below shows the mic positioning for a spaced pair recording: simply place two mics roughly three to 12 feet apart to capture the source, which should be in the center:
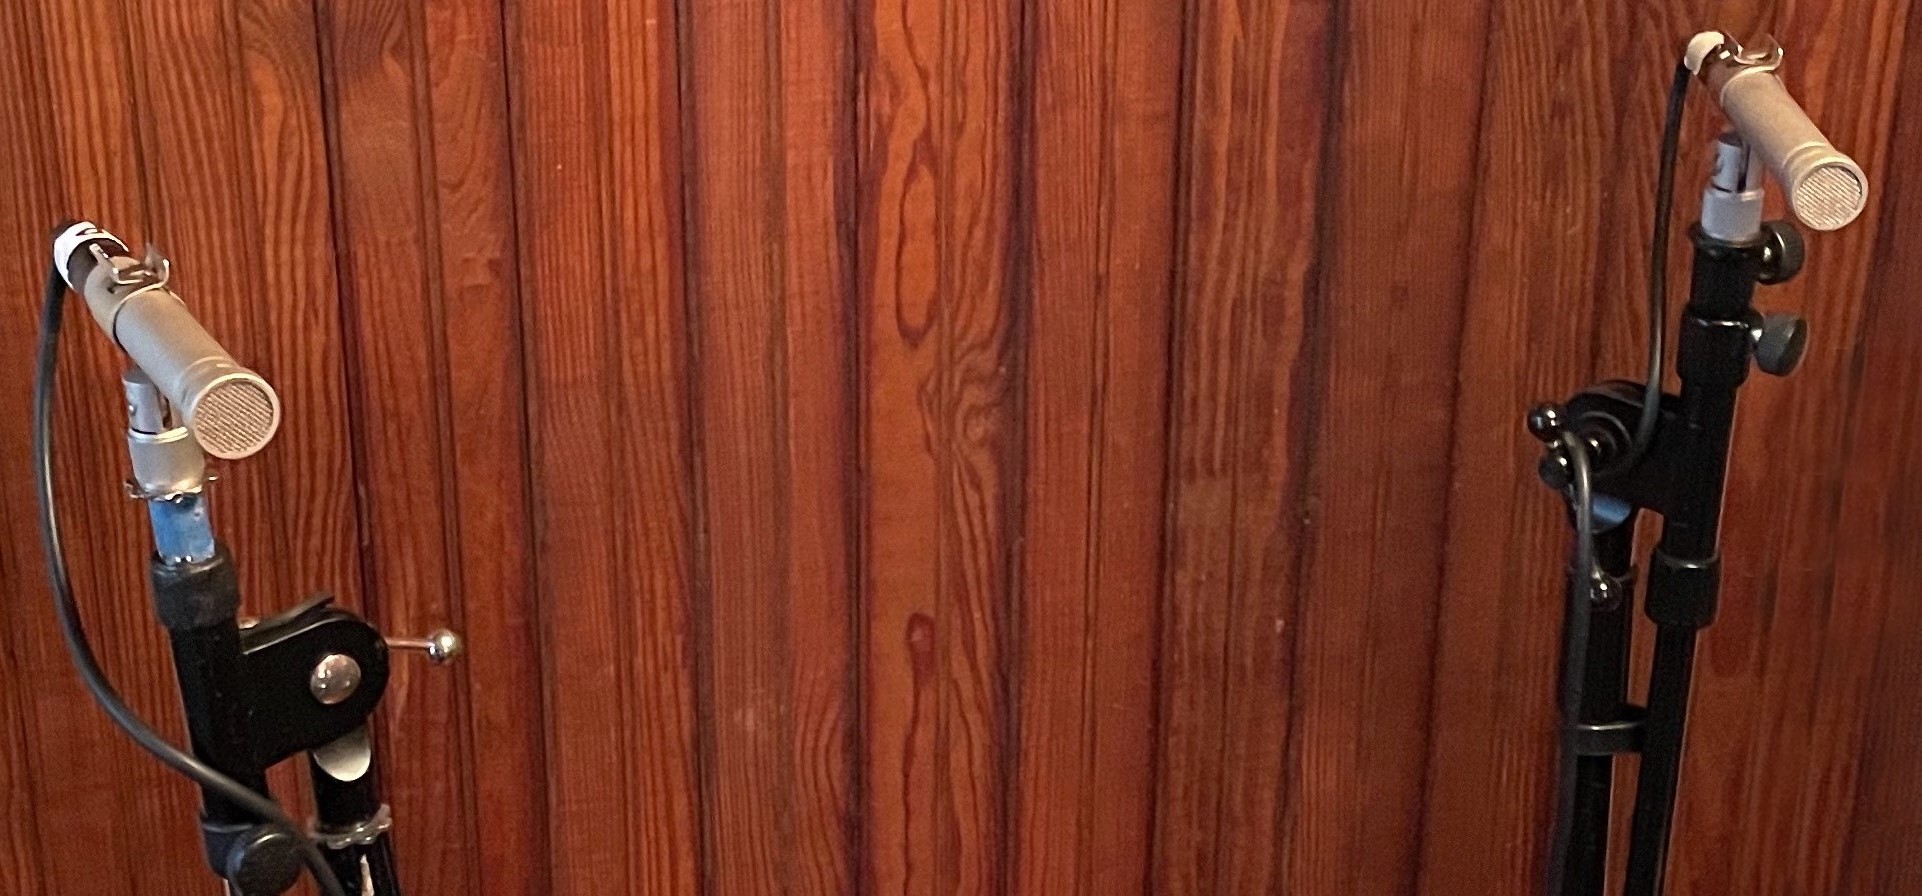
When deciding where to place the mics, use what’s called the 3:1 rule to minimize phase issues. It states that the distance between the two microphones must be at least three times greater than the distance of the mics to the source. Unless you’re miking an ensemble, you probably don’t want the mics to be too far from the source, anyway. That’s because, in addition to any phase issues, you’ll get a lot of room sound and fewer transients (the loud initial part of sounds, like the crack of a snare drum or the attack of a guitar pick), resulting in mushier overall sonics.
Here’s another acoustic guitar audio clip, this time recorded with a spaced pair. As with the ORTF example, there was some imbalance between levels on the left and right, so I did a little judicious panning during mixing to compensate.
Comparing Stereo Miking Techniques
Here are three examples of conga recordings captured with XY, ORTF and spaced pair so you can compare and contrast the results of each technique. All three were recorded with the mics about 2 to 2.5 feet from the congas.
XY:
ORTF:
Spaced pair:
Don’t be shy about using a tape measure to accurately judge the distance between mics and from the mics to the source when employing any stereo miking technique. Whichever technique you choose, be sure to listen to how it sounds as the player plays (use headphones for best results) and adjust positioning until you get the sound you want. It’s easier to experiment with the distance between the source and mics when using XY or ORTF because you don’t have to worry about the 3:1 rule.
Make sure to check your recording in mono too. It won’t sound as wide, but hopefully, you won’t lose too much tone from comb filtering. If it sounds significantly worse in mono, reconsider your mic positioning or miking strategy.
All images courtesy of the author.


