Tagged Under:
Delay, Part 2
Five setups to get you going.
In Part 1 of this two-part series, we covered basic delay parameters and talked about different delay types. Here, we’ll present step-by-step setups for some common delay applications. Each includes a screenshot from Steinberg Cubase and/or various Cubase plug-ins showing a setting that you can use as a starting point. (Similar settings can be applied to delay plug-ins in other DAWs.)
Thickening
If you have a vocal or instrument track that sounds thin, you can use a delay to thicken it.
1. Insert a delay plug-in directly on the track.
2. If the plug-in offers EQ or filter controls, make sure they are turned off. The idea is to make the delayed signal sound as similar to the source as possible.
3. Set the delay time somewhere between 30ms and 50ms.
4. Leave the feedback at its lowest setting.
5. Set the mix control between 20% and 30% wet, and experiment from there. The interplay between the delay time and mix settings is the key to creating this effect.
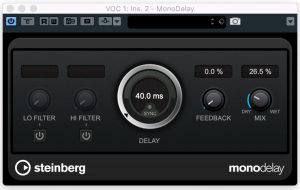
Panned Doubling
This configuration allows you to create a short delay that’s panned to the opposite side from the original signal. You’ll find this especially useful on backing vocals or rhythm guitar, particularly when you can’t record an actual double-track — something that’s usually preferable due to the slight variations in timing and/or tuning.
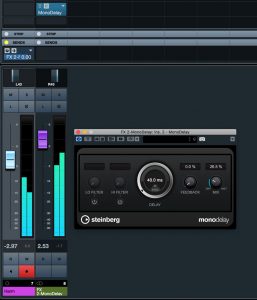
1. Create an aux track (an FX Track in Cubase) and insert a mono delay plug-in on it.
2. Pan the plug-in’s output opposite that of the source track. If you’re applying this to a track that’s panned to the center, move it a bit towards one side and pan the delay opposite.
3. Set the delay time somewhere between about 40 and 50ms.
4. Leave the feedback at its lowest setting.
5. If you’re not hearing the double as a distinct sound, try inserting a pitch shift or chorus plug-in after the delay in the aux track to add a subtle change to the delayed track’s pitch. This helps differentiate it from the original and adds to the illusion of it being a separate part. You can also experiment with EQ settings to further change the sound of the double.
Slapback Delay
As we mentioned in Part 1, slapback (sometimes called “slap”) delays were a big part of the vocals on rockabilly recordings made back in the ’50s. (They were also a big favorite of Beatle John Lennon.) These delays are long enough that you can hear a discrete, albeit very short echo. Depending on where you set the wet/dry control, they can help give body to a sound without being overly noticeable.
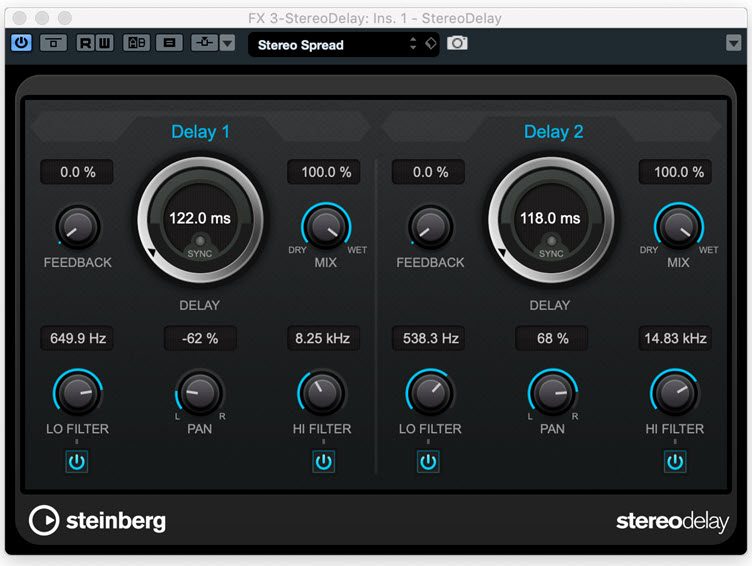
1. Insert a delay directly on your track. If it’s a mono track, use a mono delay. If it’s a stereo, use a stereo delay.
2. Set the delay time in the 50ms to 140ms neighborhood.
3. Use little or no feedback.
4. If you’re using a stereo delay, use its filters or EQ controls to differentiate the sonics of the two sides, and set the delay time for the left side slightly different from the right to enhance the stereo effect. Make one side about 4 or 5 milliseconds slower or faster than the other. If you’re using the slap on a lead vocal and the delay has pan controls, try setting the left side to around 3 o’clock and the right side at 9 o’clock to keep the vocal sounding relatively centered.
Long Delay
Here’s another setup that lets you add space to a vocal or lead instrument. This technique works especially well on songs recorded to a click because you can turn on the sync option for the delay time and set it to a rhythmic value. If you didn’t record to a click, you can still apply this effect, but you’ll have to use your ears when setting the delay time. Google “Delay Time Calculator” to find online calculators that let you figure out approximate delay times for different rhythmic values, based on your starting tempo.
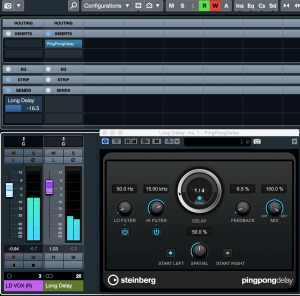
1. Put a delay (either mono or stereo) on an aux track with the wet/dry set at 100%.
2. Set the feedback so you get a few repeats, and experiment with long delay times, such as a quarter-note or even a half-note. If you want to make the effect more syncopated, try using dotted or triplet settings.
3. Use the plug-in’s filters to roll off both high end and low end so that the delay is less “hi-fi” than the original signal.
4. Keep the send reasonably low, so you’re getting subtle repeats that are mostly audible at the ends of vocal or instrumental lines.
Opposite-Panned “Ghost” Delay
If you have a soloing instrument such as lead guitar that’s panned to one side (either fully or partially), it can be cool to add a “ghost” delay that’s panned opposite and only faintly audible. It gives the track a subtle spaciousness that makes it sound fuller without seeming as if there’s an actual delay.
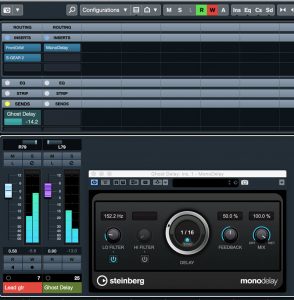
1. Set up a mono delay on an aux track.
2. Pan the aux track’s output to be opposite that of the source track. For example, if the source is at 3 o’clock, pan the delay to 9 o’clock.
3. Set the delay time relatively short, such as a sixteenth note.
4. Start with the aux channel’s volume off, and slowly bring it up during playback until you hear the delay only slightly.
5. If you want an obvious delay effect, turn the aux channel (or the send from the source channel) up higher.
Check out our other Recording Basics postings.
Click here for more information about Steinberg Cubase.


