Using Reverb and Delay In Live Sound, Part 2
In Part 1 of this article, we talked about the basics of reverb and delay — two important effects that add spaciousness to a sound. Now let’s describe how exactly they can be added to your mix and give you some tips on how best to use them in live sound.
Return to Sender
Adding reverb or delay to a sound (or group of sounds) is almost always accomplished with something called a send, which takes some of the audio from a channel (or channels) and routes it either to a built-in effect or to an output on the mixer, where it can be patched to an external effect. These sends are usually called aux sends (short for “auxiliary”), although they are also sometimes called Effect [or FX] sends). The original unprocessed sound is called the “dry” signal, while the added reverb or delay effect is called the “wet” signal.
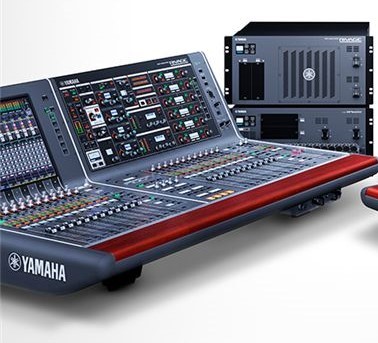
For example, the effect send on a Yamaha MG06X mixer consists of a simple on/off pushbutton that sends the signal to the effect. The aux sends on more advanced Yamaha models like the MG16XU use rotary knobs, as shown below; in that particular mixer, you turn up the AUX4/FX knob in order to send the signal to the effect. The use of rotary knobs allows you to apply the effect (in differing amounts) to more than one channel. (To learn more about aux sends, check out this blog posting.)

Once the signal is sent to the effect processor, digital technology does its thing, creating a reverb or delay effect. But now we have to bring that effect back into our mix, almost like it’s a new signal — and in fact it really is a new signal. That’s where an effect return comes in. An effect return is like a mini input dedicated to an effect.
Effects returns normally have level controls and various routing options, such as panpots. The effect return on the Yamaha MG06X has both a level control and a switch. Bring up the level control to return the effect to your mix. Use the switch to choose between the different effects.
What Program Should I Use?
Generally speaking, you should use short reverbs and delays on fast songs, and longer reverbs and delays on slower songs. That’s because, when a band is playing at a fast tempo, a long reverb or delay will make the mix “muddy” and reduce the clarity of an instrument by stepping on the original sound.
Here are some suggestions for using reverb and delay on specific instruments:
Drums: Reverb almost always works better than delay for drums. Start by adding a small hall to the snare drum and see if you like the way it puts the drum into an imaginary space — but don’t add too much or the snare will lose impact. You can do the same for toms. Avoid using reverb on cymbals or high-hat because it will make them too “splashy.” Reverb on a kick drum is generally a bad idea because it makes the bottom end of your mix muddy and you’ll lose clarity on both the kick drum and the bass guitar.
Percussion instruments like conga and bongos can benefit from a bit of short room reverb to dramatizes the “slap.” Long reverb on a tambourine works for ballads where the tambourine is playing on the two and four, but avoid it if the tambourine is playing eighth or sixteenth notes, or is being played on an up-tempo song.
Vocals: You can use reverb or delay on a lead vocal — or both! For ballads, a hall program on the lead vocalist generally works well and adds the sense of depth you get from being in a large room. If you want something more intimate, try a small room program. A plate reverb on vocal can emphasize the highs of the vocal sound but be careful about adding too much plate — especially on sibilant vocalists — because it can emphasize “s” and “t” sounds.
If can view the actual delay time, start at around 250 ms, with enough feedback to get two or three repeats. At faster song tempos, try shorter delay times; at slower tempos, try longer delay times. This prevents the delay from interfering with the original vocal and making the song’s lyrics difficult to understand. You can also briefly switch on a long, rolling delay to emphasize a word at the end of a lyric — but be sure to turn it off so that the delay doesn’t cover up the vocal.
Background vocals can be fattened up with a doubling effect (i.e., a very short delay, around 30 ms) but keep it subtle so that it doesn’t make the vocals sound sloppy. Ditto for doubling on a lead vocal.
Guitar: Delays work great for giving guitar solos a sense of continuity but ask if the guitar player is already adding their own effects because you don’t want to overdo it. On rhythm guitar, really long delays with a lot of repeats will result in a sound similar to The Edge from U2.
A bit of reverb on a rhythm guitar will help it “sit” in your mix and blend well with other instruments. Try a room type reverb with a short decay or an ambient program. This is especially useful when you are mixing outdoors because there are very few natural reflections in an open space and so guitars can sound very “dry.”
Keyboards: A small hall or medium-size room reverb works great on piano to add depth and size. A bit of short room reverb on an organ sound works nicely to add a sense of width and space. Delay works well for synth solos … especially if you’re in a prog-rock band!
Horns: A small room or an ambient program makes horn stabs more dramatic. Longer rooms or halls work well for sax and trumpet solos. Delays can be useful for horn solos but tend to work better when the tempo is slow and instrumentation is sparse. If you’re working with a ska band, you can get away with a short delay on the horns
Bass: For the most part, stay away from using reverb or delay on bass. It reduces definition and adds clutter to the low end. An exception might be if you had a fretless bass taking a solo in a ballad — in which case adding a little hall reverb can elongate the note endings in a very flattering way.
Check out our other Tools of the Trade postings.
Click here for more information about Yamaha mixing consoles.
Keep reading