Using Pads In Live Sound
An important part of creating a good live sound mix is avoiding distortion, and that usually starts with the input to your mixer. As we saw in a previous Tools of the Trade blog post about gain staging, using the correct inputs and setting proper levels is a big help, but what happens when you’ve done all that and still hear distortion?
That’s where a pad can come to the rescue.
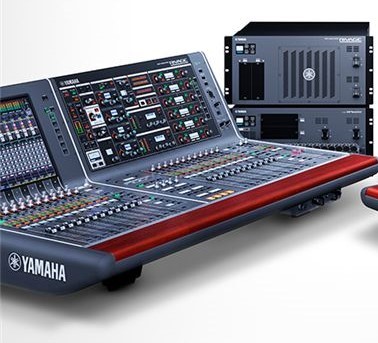
A pad is a switch found on the input channels of many mixers, including all Yamaha MG and MGP Series models. Typically located near the microphone input, it attenuates (reduces) the signal from a microphone before it reaches the mic preamp circuitry inside the mixer:

The reason you’d want to attenuate a signal coming from a microphone is simple: Some sources from the stage — for example, kick drum — are very loud! Making matters worse, kick drum mics are usually placed right in front of, or even inside, the drum. That combination can create a signal so strong that it overloads the mic preamp in the mixer.
You may be thinking “Well, that’s why there’s a gain control; I can simply turn down the gain.” However, even with the gain all the way down you may still see the peak light flashing and hear distortion. That’s where a pad comes in: It prevents the signal from overloading the mic preamp. It’s not unusual to use pads on kick, snare and tom microphones, as well as on mics placed right up against the grille of large guitar stacks.
Proper Pad Usage
That said, it’s important that you always first try to set proper level with the pad switched off. That’s because, if you’re dealing with a weak signal and the pad is on, you’ll need to bring the gain way up, and that can add noise. Use the technique for setting input level described in the previously mentioned Tools of the Trade post, and see if you can get the meter to read a good level. More importantly, listen to the signal to make sure that you don’t hear any distortion. If you’ve turned the gain down all the way and the meter is still in the red (or you’re hearing distortion), it’s time to employ the pad. When you turn on the pad, you should expect to see the level drop quite a bit. Simply use the gain control to restore a good level.
Caution: Avoid turning the pad on and off while the fader is up. If you have a kick drum playing through the PA when you turn off the pad, for example, the level of the channel will suddenly increase, and that will not only throw a scare into anyone nearby, it can damage your speakers as well as, possibly, your ears!
How Hot is Too Hot?
The pad switch on Yamaha MG and MGP mixers provides 26 dB of attenuation, which is sufficient to eliminate preamp overload in most cases. There are, however, a few rare situations where even that may not be enough attenuation, particularly when using microphones that have a very high output level (such as condenser mics) and are placed on extremely loud sources. Those kinds of mics sometimes have a very “hot” (high) output level — one that can overload a microphone input — and that’s why many condensers have their own built-in pad:

Microphone pads may simply be labeled “Pad” or they may be labeled with just a number, such as “-10 dB,” indicating the amount of attenuation. In some cases, the pad switch may have multiple settings such as -10 dB or -20 dB. To make sure that you don’t add noise by cranking the gain of the mic preamp too high, always use the lowest pad setting that eliminates the distortion.
If you’re using such a mic and are running into distortion problems, start with the microphone pad off, listen to the signal and watch the meter or peak light. If it indicates an overload (or you hear distortion), then switch the microphone pad on to reduce the signal before it even reaches the mixer. Sometimes you may hear distortion from a condenser mic even if the signal level looks weak on the meter. That could mean that the source is actually overloading the electronics inside the microphone. In such cases, turning on the mic’s pad will usually solve the problem.
Get in Line
In cases where the mixer and microphone both lack a pad, you can use a device called an inline pad. This is typically a small metal tube or box with an XLR male connector at one end and an XLR female connector at the other end. Inside is a simple electronic circuit that reduces the signal:

Many inline pads can be plugged right into the XLR jack on the mixer, and then you can plug a microphone cable into the pad. In some instances, XLR cables are used to make the connection. Inline pads do not require any sort of power source.
The amount of attenuation offered by an inline pad is usually shown on the outside. The attenuation amounts are usually fixed at a specific value, but some are variable. Typical values are -10, -20, and -30 dB.
If you’re shopping for an inline pad, don’t skimp on a cheap one that may color the sound of the microphone or prevent phantom power from passing. These devices are not particularly expensive, with prices starting at around $20 for a good one, so I recommend carrying a few of them in your gig bag — you never know when you may need one!
A pad is something you may not need on every gig, but when you’re dealing with loud sounds captured by mics placed close to the source, it will help keep your signal distortion-free. Happy attenuating!
Photographs courtesy of the author.
Keep reading