Using Solo During Live Mixing
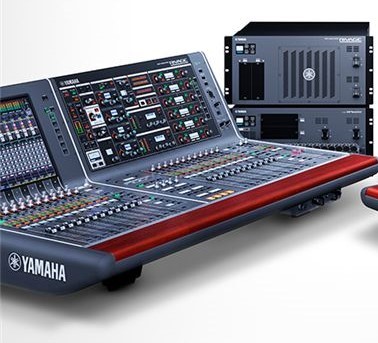
You may have noticed that your mixing console has buttons labeled PFL, AFL, SOLO or CUE. All have the basic function of allowing you to hear a single channel (or bus) in isolation (something called soloing), but they also differ in important ways and have multiple usages. In this article, we’ll describe each, and tell you how to use them in live sound.
PFL
PFL is an abbreviation for “Pre Fader Listen” (or “Pre Fader Level”), and it’s a feature found on most mixing consoles designed for live sound. You’ll usually find a PFL button located near the fader of every input channel. When you press it, the sound from that one channel is routed to the headphone jack (often summed to mono, even if it’s a stereo channel), and all other signals are muted in the headphones. (If the mixer has a “monitor” or “cue” output jack, the PFL signal can usually be routed there, either instead of, or in addition to, the headphone jack.)
There’s also normally an LED associated with each PFL button so you can see at a glance which channels are being soloed; some consoles even have a warning light that blinks whenever one or more PFL buttons are pressed, so that you’ll know what you’re hearing in your headphones is different from what’s being heard in the main FOH (Front of House) mix. Turning off PFL is easy: All you have to do is press the button(s) a second time.
The key thing to remember is this: PFL does not isolate the channel in the main left/right mix; it only does so in the headphones (and/or a “monitor” or “cue” output). In other words, the sound coming from the PA during a show won’t be affected if you hit one of these buttons.

PFL can be helpful in a variety of situations. For one thing, it allows you to instantly identify whether or not a particular microphone or instrument is connected to your mixer. Simply put on your headphones and press the associated channel’s PFL button. If you don’t hear anything and the musician is playing or singing, there’s nothing connected there. PFL is also a great way to check wireless microphones before a show to make sure they are working!
Or suppose you’re mixing a show and you suddenly hear a hum through the PA system. As the old saying goes, “the show must go on,” so you can’t just stop the musicians and listen to each channel separately in an effort to find the problem. However, if you PFL each channel one at a time, you’ll be able to quickly find the source of the noise — and without interrupting or interfering with the show in any way.
Most mixers, including Yamaha MG and MGP Series models, allow you to PFL more than one channel at a time, which can be useful if you need to hear how two channels are interacting with each other. But remember that the signal you’ll hear in your headphones is pre-fader — so there’s no point in trying to create a mix by pressing PFL on a bunch of channels.
PFL also helps with setting input gains correctly — an important part of live sound called gain staging. Here’s how it works: The input channels on many mixers (including Yamaha MG Series models) provide a two-color LED to show input signal, where you’ll see green for “signal present” and red for “overload.” That’s useful, but there may be times when you want a more detailed view of the input level, like when you’re setting the gain on the microphone for a dynamic lead vocalist. Pressing the PFL button on a channel temporarily “borrows” the main left/right meter and reassigns it to that input channel, giving you a more accurate way to set the input gain. When you turn off PFL, the main left/right meter reverts to showing signal for the main left/right mix.

By the way, since PFL is pre-fader, you can actually have a channel fader all the way down while you set the input level, then raise it when you are confident that the input level is set properly.
AFL
AFL, which stands for “After Fader Listen” (or “After Fader Level”), is a function related to PFL, though it’s less commonly used and is usually applied to output buses (that is, collections of outputs) such as subgroups, aux send masters and stereo or mono master outputs, as opposed to individual channels. AFL, which is found on Yamaha MG and MGP Series mixers, is a great way to hear which channels are contributing to an output bus. For example, if you press AFL on the Aux 1 output of a Yamaha MGP32X, you’ll hear all of the channels that are being sent to Aux 1, which is really handy when you want to preview a monitor mix. Similarly, pressing AFL on a subgroup will allow you to hear all of the signals that have been assigned to that subgroup.

SOLO
Some mixing consoles simply offer buttons labeled “SOLO” instead of “PFL” or “AFL.” In those cases, you need to carefully check the documentation to determine if these are PFL or AFL. A word of caution: If channel solo buttons are AFL, they operate post-fader, meaning that the channel fader must be raised in order to hear the isolated signal in the headphones — which also means that the associated signal might be heard in the house mix.
In addition, if channel soloing on a particular console is AFL, pressing the SOLO button temporarily shows that channel’s input level on the main left/right meter, but the meter will be accurate only if the channel fader is set to “0” — that is,“unity” gain. (See our Tools of the Trade blog on gain staging for more information.)
CUE
Yamaha TF Series mixers provide CUE buttons for all input and output channels instead of PFL, AFL or SOLO. Pressing CUE on an input channel works the same as PFL, but you can choose pre- or post-fader listen (i.e., PFL or AFL) for the output channels. This gives you the option of listening to an output bus either before or after the output fader, enabling you to preview a monitor mix in your headphones before you send the signal to an onstage monitor. There’s also a choice of Mix Cue (where multiple channels can be cued at the same time) or Last Cue (where only one channel may be cued at a time).

SIP
Last but not least, be aware that some mixers (mostly those designed for recording and not live sound) have a feature called “solo-in-place” (SIP), which, unlike PFL, does affect the main left/right mix. If you’re doing a live show and you see buttons labeled that way, approach with extreme caution!
Keep reading